& Construction

Integrated BIM tools, including Revit, AutoCAD, and Civil 3D
& Manufacturing

Professional CAD/CAM tools built on Inventor and AutoCAD

Integrated BIM tools, including Revit, AutoCAD, and Civil 3D

Professional CAD/CAM tools built on Inventor and AutoCAD
Transcript
00:04
When working in info works.
00:06
WS pro there may be times when you want to make changes to
00:09
a specific object with the goal of achieving a desired simulation result.
00:16
For example,
00:16
you may want to resize a single pipe to increase the flow rate within a network
00:24
with the pipe replacement scenario open in the toolbar, click the properties tool.
00:29
Then in the GEO plan, click the dark blue bypass pipe
00:34
in the pipe's properties window increase its diameter by
00:37
entering a new value in the type box.
00:39
In
00:40
this case, the diameter is doubled from 100 to 200
00:46
commit your changes by right clicking bridge net. In the model group window,
00:50
click commit changes to database then OK,
00:57
double click the pipe replacement run to open the schedule, hydraulic run
01:03
at the top of the network group box.
01:05
The down arrow icon is bordered in red,
01:08
meaning there is a more up to date version of the network,
01:11
click it and observe the version number change from 5 to 6 in the group box,
01:16
click save, then rerun
01:18
and confirm that you want to run the two simulations again.
01:24
Once the simulations finish,
01:26
you can see if the change in diameter you
01:28
made to the pipe gave you the desired results.
01:31
This method is ideal when you have only one object you
01:34
want to change or a very small number of objects.
Video transcript
00:04
When working in info works.
00:06
WS pro there may be times when you want to make changes to
00:09
a specific object with the goal of achieving a desired simulation result.
00:16
For example,
00:16
you may want to resize a single pipe to increase the flow rate within a network
00:24
with the pipe replacement scenario open in the toolbar, click the properties tool.
00:29
Then in the GEO plan, click the dark blue bypass pipe
00:34
in the pipe's properties window increase its diameter by
00:37
entering a new value in the type box.
00:39
In
00:40
this case, the diameter is doubled from 100 to 200
00:46
commit your changes by right clicking bridge net. In the model group window,
00:50
click commit changes to database then OK,
00:57
double click the pipe replacement run to open the schedule, hydraulic run
01:03
at the top of the network group box.
01:05
The down arrow icon is bordered in red,
01:08
meaning there is a more up to date version of the network,
01:11
click it and observe the version number change from 5 to 6 in the group box,
01:16
click save, then rerun
01:18
and confirm that you want to run the two simulations again.
01:24
Once the simulations finish,
01:26
you can see if the change in diameter you
01:28
made to the pipe gave you the desired results.
01:31
This method is ideal when you have only one object you
01:34
want to change or a very small number of objects.
InfoWorks WS Pro allows you to make changes to a specific object with the goal of achieving a desired simulation result. For example, resizing a single pipe can increase the flow rate within a network.
To change the size of a pipe:
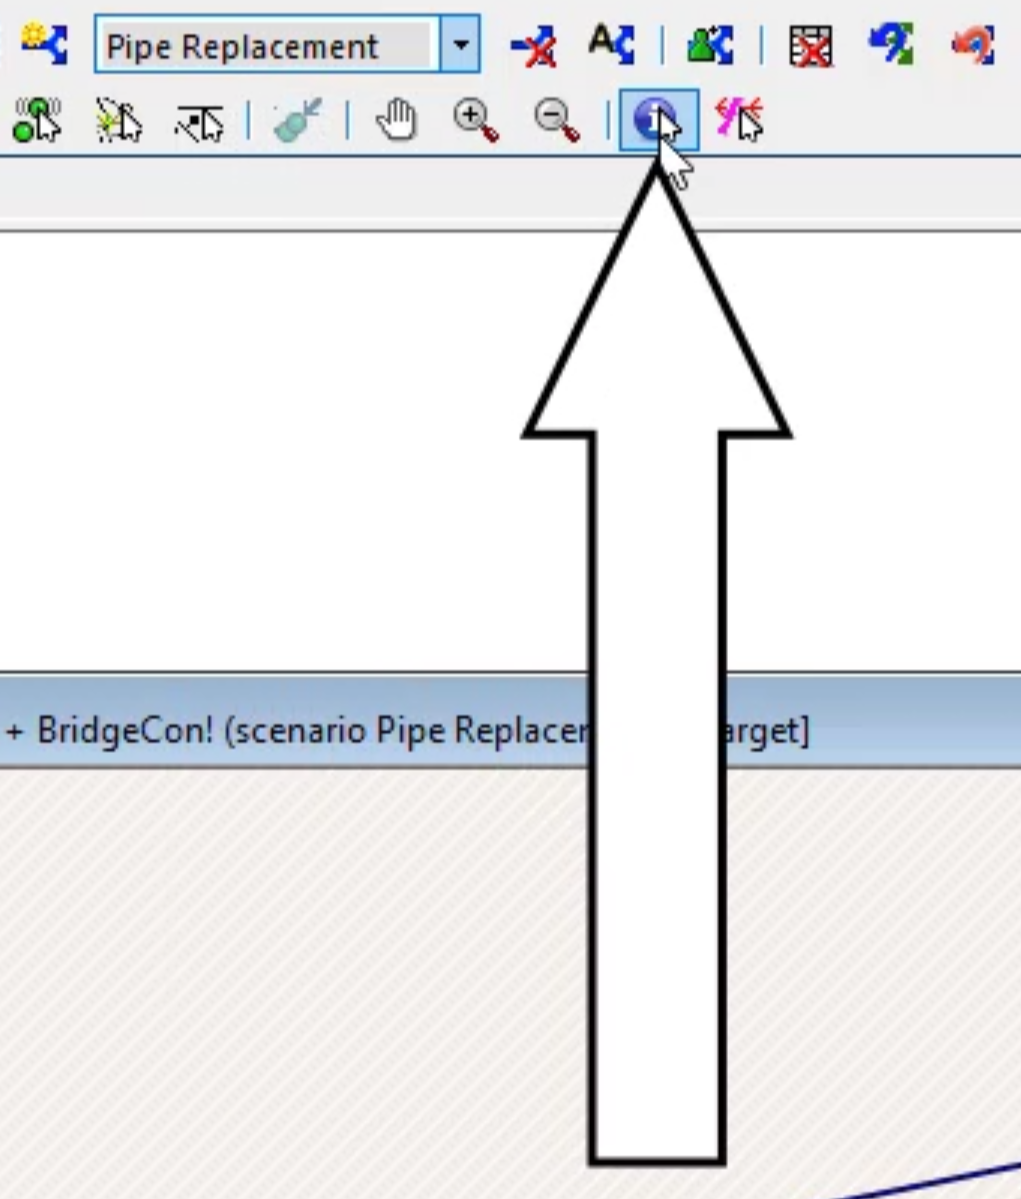
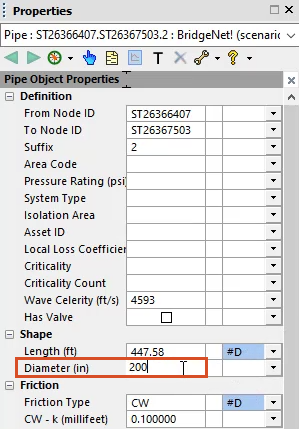
To commit the changes:
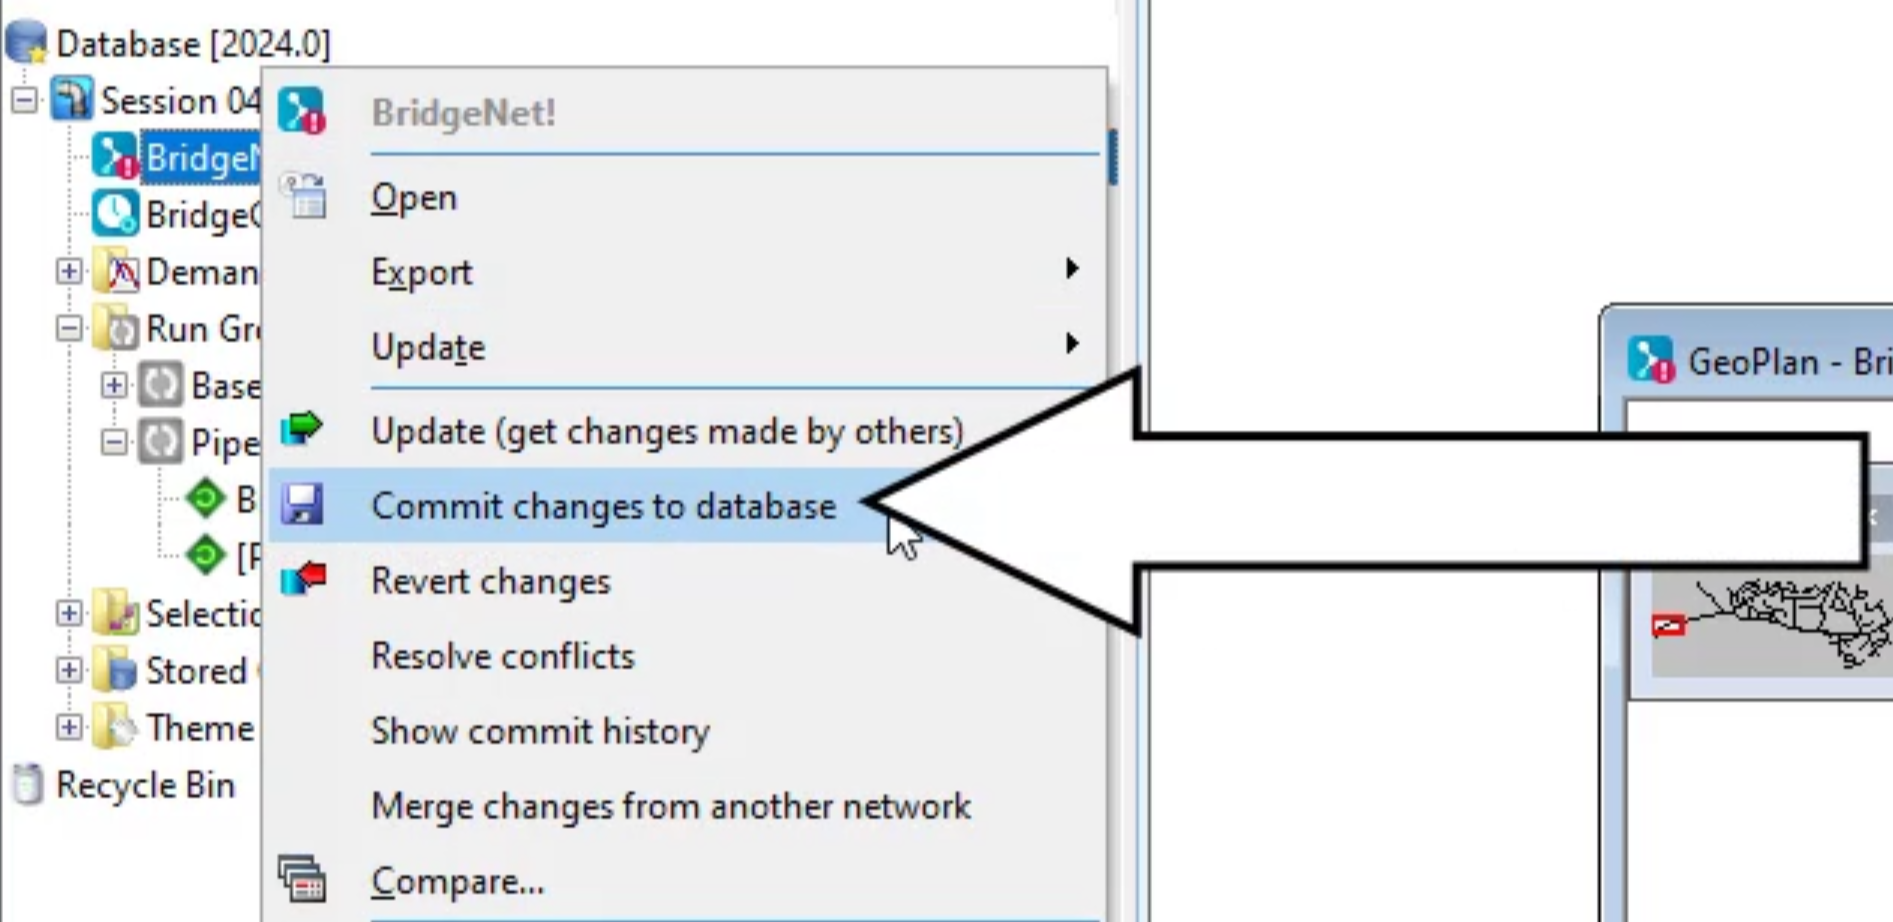
To run the simulation:
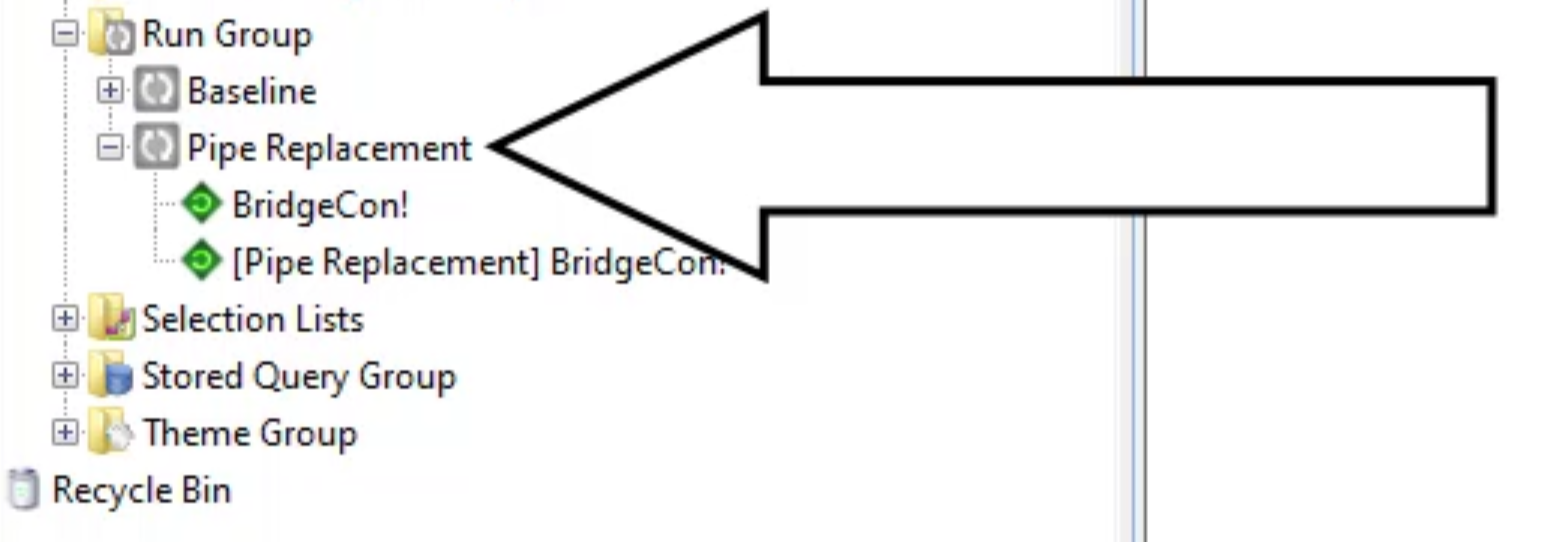
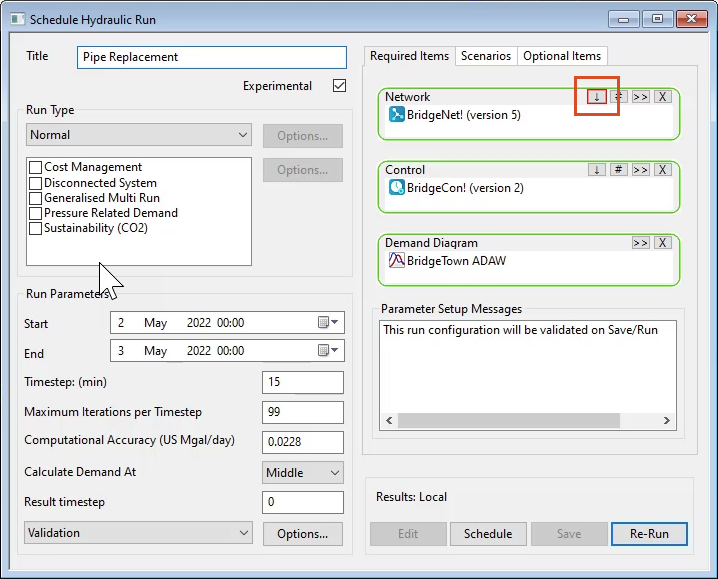
Notice in the Network group box, the version number changes from “5” to “6”.
Once the simulations finish, observe whether the change in pipe diameter gives the desired results.
Note: This method is ideal when you want to change only one object, or a very small number of objects.
How to buy
Privacy | Do not sell or share my personal information | Cookie preferences | Report noncompliance | Terms of use | Legal | © 2025 Autodesk Inc. All rights reserved
Sign in to start learning
Sign in for unlimited free access to all learning content.Save your progress
Take assessments
Receive personalized recommendations
May we collect and use your data?
Learn more about the Third Party Services we use and our Privacy Statement.May we collect and use your data to tailor your experience?
Explore the benefits of a customized experience by managing your privacy settings for this site or visit our Privacy Statement to learn more about your options.