00:03
This example is going to work through the configuration and simulation of a GMR.
00:08
For a pipe brake assessment.
00:10
You will configure the GMR to break each pipe
00:13
one by one and run a simulation for each bra
00:17
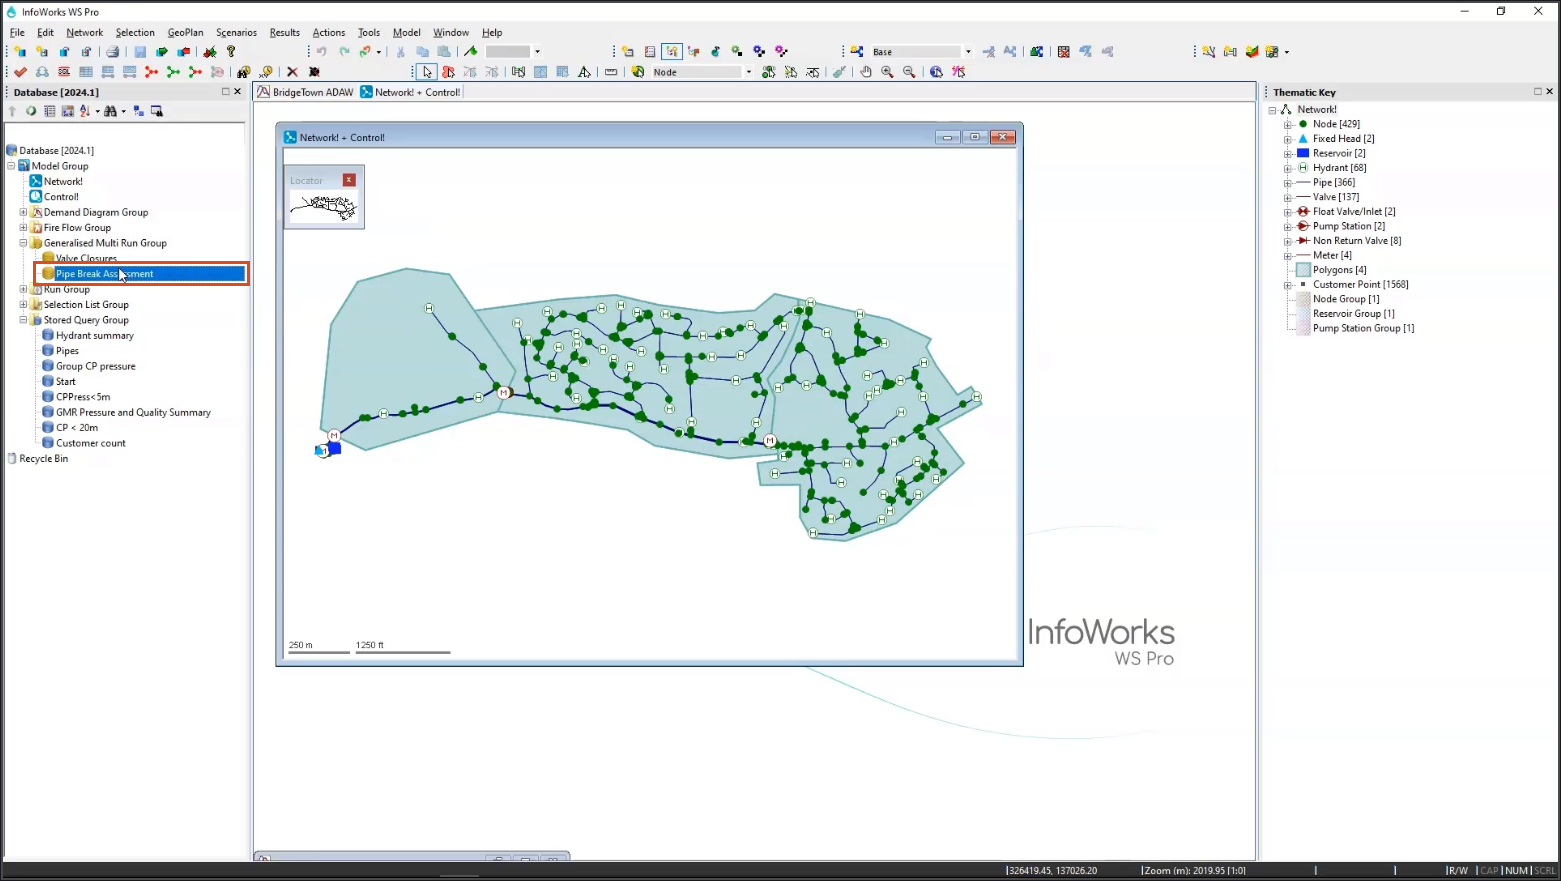
to begin open a network and control in the background.
00:22
Then in the model group window, right,
00:24
click generalized multi run group and select new generalized multi run config
00:31
a new name dialogue displays
00:33
for this example, set the name to pipe break assessment and then click OK.
00:40
A new generalized multi run appears in the model group window,
00:43
right? Click pipe brake assessment and select open
00:47
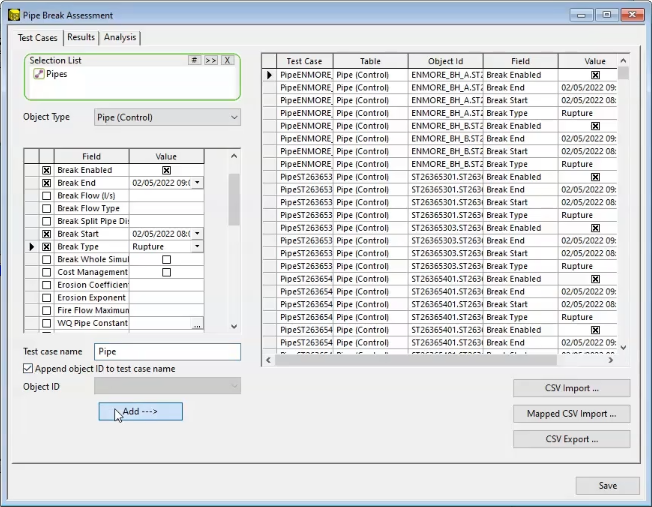
within the generalized multi run configuration dialogue.
00:50
Navigate to the test cases tab
00:53
from the model group dragon drop the pipes selection list into the selection list,
00:58
expand the object type dropdown and choose pipe control.
01:04
Then in the grid scroll down to brake enabled and turn this on.
01:10
Then set the break start time to eight o'clock
01:14
and the break end time to nine o'clock.
01:17
Lastly set the brake type to rupture
01:22
in the test case name field. Enter a name to be used for all test cases,
01:27
insert pipe in the test case name and then enable the append
01:31
object ID to test case name. Option.
01:34
Click add to populate the table with test cases.
01:38
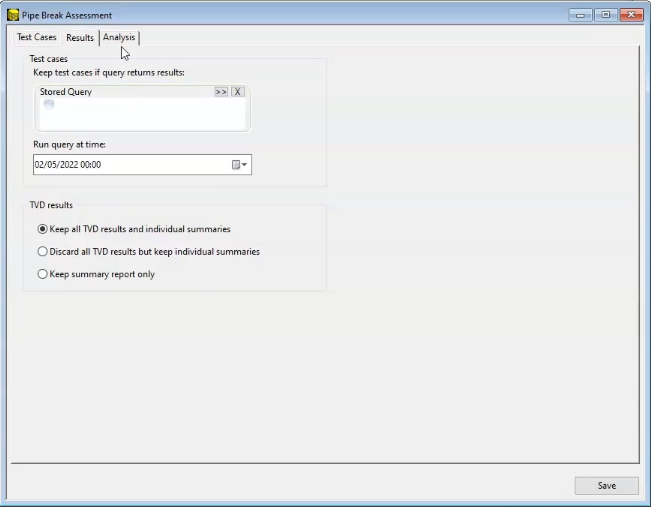
Next, click the results tab,
01:41
select keep all TVD results and individual summaries,
01:45
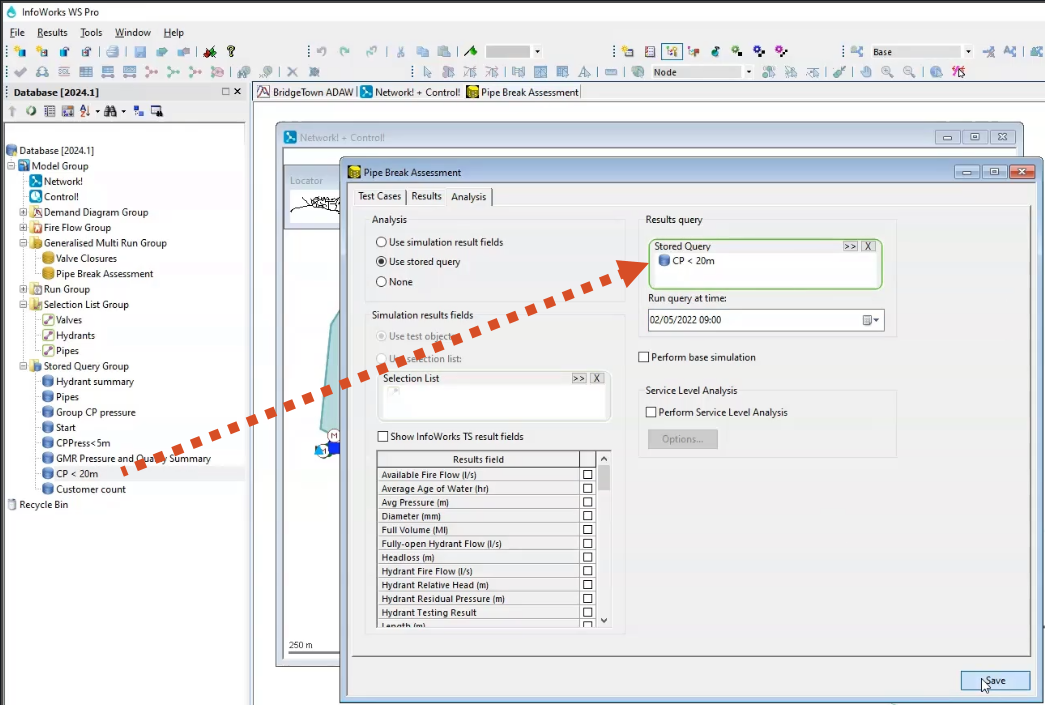
click the analysis tab and select use stored query
01:51
from the model group.
01:52
Expand the stored query group and drag the CP
01:55
less than 20 m SQL into the stored query pane
01:59
set the query time to be 25 2022 at nine o'clock
02:05
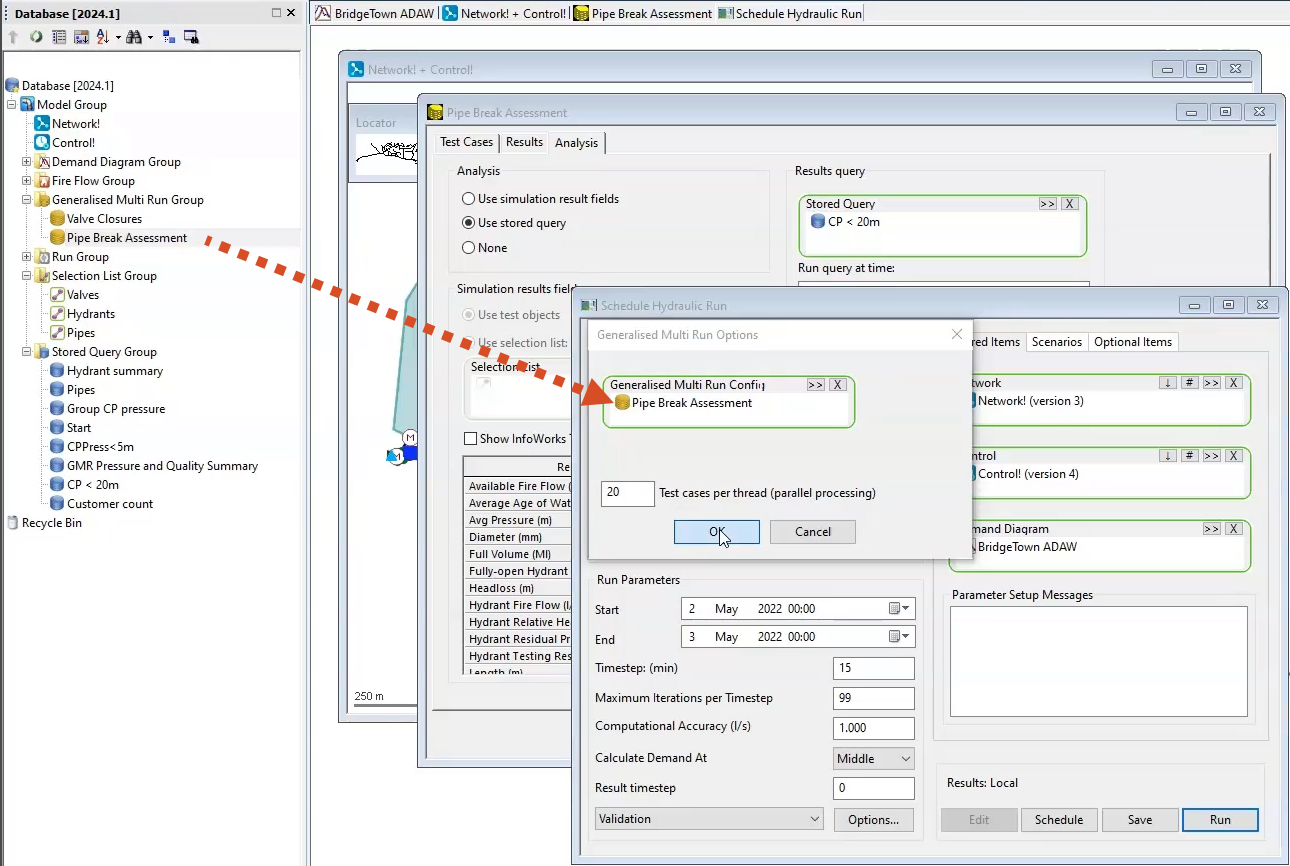
from the model group, right, click run group and select new
02:11
name this run pipe brake assessment in the schedule,
02:14
hydraulic run dialogue and then set the run to experimental
02:19
in the schedule. Hydraulic run dialogue.
02:21
Ensure a network control and demand diagram are assigned,
02:26
expand the run type dropdown and select normal.
02:31
Then from the run type group, select generalized multi run
02:37
from the generalized multi run options.
02:39
Dialogue specify the previously created pipe
02:42
break assessment configuration by dragging it
02:44
from the model group and dropping it into the configuration pane.
02:48
Or you could select browse navigate to the configuration you want
02:57
back in the schedule. Hydraulic run dialogue, click run
03:02
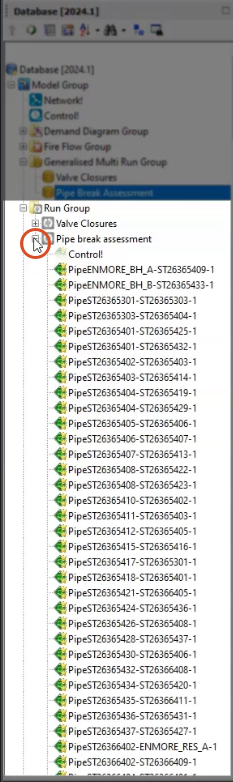
after a few minutes. The run displays in the model group window,
03:07
you will notice a number of simulations are present as well as the summary report.
03:14
The simulations are those that have met the criteria specified in the stored query.
03:19
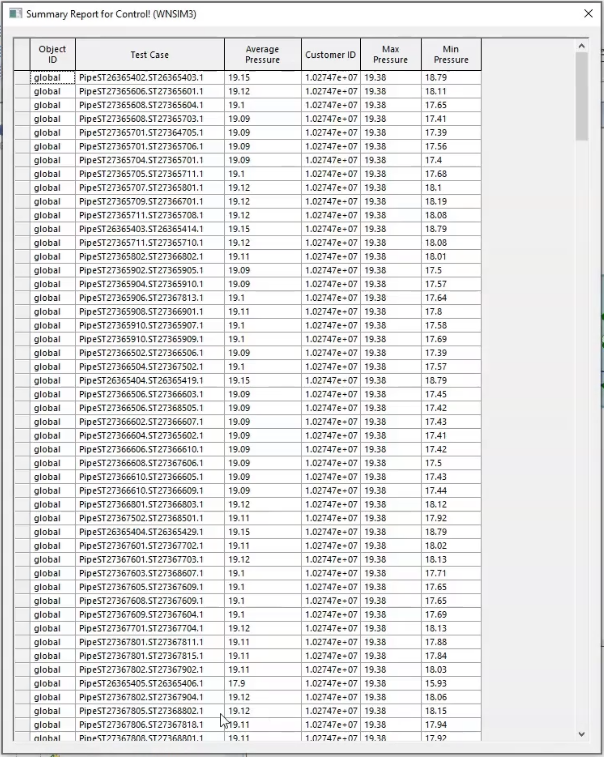
Right? Click the control simulation
03:26
a summary report appears that includes a summary of each
03:29
test case where the maximum pressure is below 20 m.
03:33
It also includes columns for the minimum average and maximum
03:37
pressures as well as the id of the customer point.
03:41
this data represents the constraints you applied through
03:44
the CP less than 20 m stored query.
03:48
Right click one of the test case simulations
03:51
from here, you can open this as a summary that is specific to that simulation
03:56
or you can open it as simulation results on the
03:59
GEO plan and apply any themes or labeling necessary.