00:03
Multi Solute Water Quality (MSQ) allows you to model several interacting chemicals in the water system.
00:11
In this tutorial, the goal is to model Contaminant A and Contaminant B,
00:16
which then react to produce Contaminant C within the distribution network.
00:20
When using this module for your own work, you will need to have the set of equations to implement already available.
00:28
You will also need to have done your own research as to how to model complex interactions between solutes.
00:35
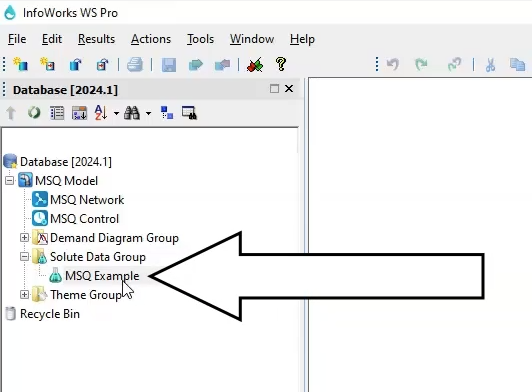
First, create a new Solute Data Group object.
00:39
From the Model Group, right-click the MSQ Model Group and select New > Solute Group.
00:46
Then, right-click the new Solute Data Group you just created and select New > Solute Data.
00:52
In the popup, name the new solute data object “MSQ Example”.
00:57
In the Model Group, double-click the MSQ Example solute object to open it.
01:04
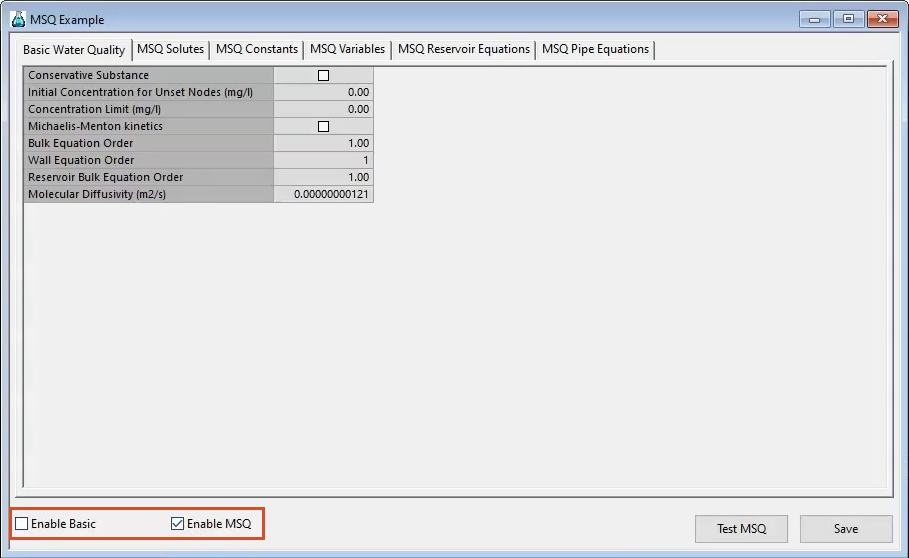
In the bottom left of the Solute Data dialog box, deselect the Enable Basic water quality option to turn it off,
01:11
and then select Enable MSQ to allow the MSQ tabs in this dialog to become active.
01:17
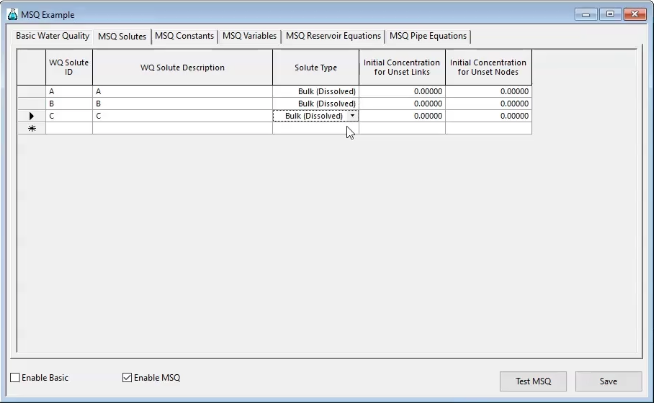
In the MSQ Solutes tab, any number of solutes are defined.
01:22
You will populate the first row for Contaminant A, the second row for Contaminant B, and the third row for Contaminant C.
01:30
In the first row, specify the WQ Solute ID as A.
01:34
The solute IDs are used in property sheets and in the results.
01:39
All IDs must be unique within this grid.
01:43
Also set the WQ Solute Description as A.
01:47
In the second row, specify the WQ Solute ID as B and the WQ Solute Description as B.
01:56
Specify the third WQ Solute ID as C and the WQ Solute Description as C.
02:03
For all the rows, from the Solute Type drop-down list, select Bulk (dissolved) to specify that the solute is present in the bulk liquid,
02:12
rather than on the pipe walls.
02:14
Leave the Initial Concentration for Unset Links and Nodes set to zero for A, B, and C.
02:21
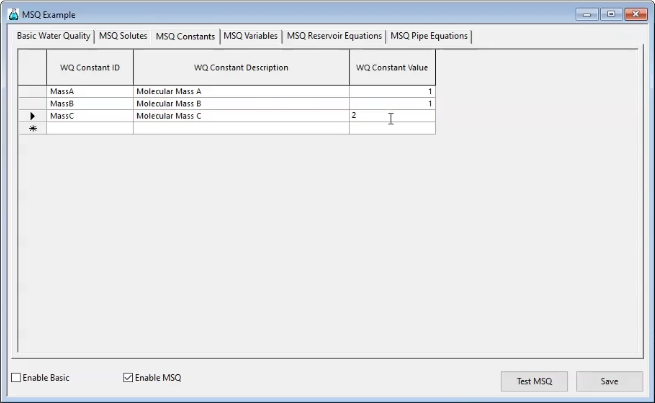
In the MSQ Constants tab, constants are used to make equations easier to read but are optional.
02:28
Any number of constant IDs can be defined with associated numerical values.
02:34
The constant IDs are replaced by the numerical values when the engine acts upon the equations.
02:40
Again, you will populate the first row for Contaminant A, the second row for Contaminant B,
02:46
and the third row for Contaminant C.
02:49
In the first row, specify the WQ Constant ID as Mass A, the WQ Constant Description as Molecular Mass A
02:58
and the WQ Constant Value as 1.
03:01
In the second row, specify the WQ Constant ID as Mass B, the WQ Constant Description as Molecular Mass B
03:09
and the WQ Constant Value as 1.
03:13
In the third row, specify the WQ Constant ID as Mass C, the WQ Constant Description as Molecular Mass C
03:22
and the WQ Constant Value as 2.
03:26
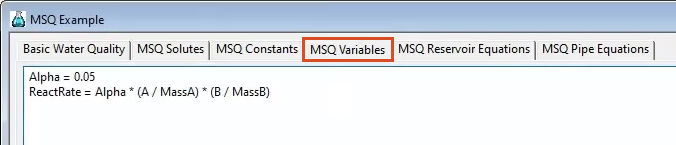
The MSQ Variables tab defines the Variable IDs, one per line in the text editor.
03:32
Variables define an expression by combining constants, numerical values, algebraic operators, and reserved keywords.
03:41
The MSQ Reservoir Equations tab defines the way that solutes change over time within reservoirs.
03:47
One solute is defined per line in this text box.
03:52
Only dissolved (bulk) solutes are considered in this section.
03:56
The equation for each solute is composed of numbers, arithmetic operators, constants, variables, and solute IDs.
04:05
Similarly, in the MSQ Pipe Equations tab, the way that solutes change over time in pipes is defined.
04:13
This deals with changes to adsorbed solutes, as well as those dissolved in the bulk of the water.
04:19
The construction of equations for Pipes follows the same rules as for reservoirs.
04:24
The exception is that pipe equations can also include adsorbed solutes.
04:30
In the MSQ Variables, MSQ Reservoir Equations,
04:35
and MSQ Pipe Equations tabs, copy and paste the scripts provided in the MSQ_Variable.txt, MSQ_Reservoir_Equations.txt
04:44
and MSQ_Pipe_Equations.txt files, respectively.
04:49
When you are finished, click Test MSQ to ensure that there are no errors.