& Construction
Integrated BIM tools, including Revit, AutoCAD, and Civil 3D
& Manufacturing
Professional CAD/CAM tools built on Inventor and AutoCAD
Integrated BIM tools, including Revit, AutoCAD, and Civil 3D
Professional CAD/CAM tools built on Inventor and AutoCAD
Transcript
00:03
Info works.
00:04
WS Pro's interface is flexible and gives you several options
00:08
to work in the way that suits you best.
00:10
The user interface includes a menu
00:13
toolbars,
00:14
a main window
00:15
and a status bar.
00:17
From the menu,
00:18
you can easily access several options based
00:20
on functionality by expanding each menu name,
00:24
expand file to open or create a database
00:27
access. Recent databases
00:30
close model groups
00:31
configure database settings. Save changes to data
00:35
print active windows or exit info works. WS pro
00:40
next expand edit
00:44
here.
00:44
You can undo basic operations, cut,
00:47
copy or paste contents of cells from the grid view or selected objects,
00:51
rename items in a database, delete selected objects in the grid view,
00:55
export contents of the grid view to CSV, find and replace values in the grid view
01:01
and view properties for the current item
01:05
click network.
01:06
This menu contains options pertaining to both the network and the control
01:11
here. Access options for version control,
01:15
validate the network,
01:16
navigate through errors,
01:18
run updates,
01:20
compare other networks,
01:22
review simulation results,
01:25
import and export network objects,
01:28
set network options
01:30
and more
01:32
expand selection.
01:33
This menu provides functions that can be performed on a network selection
01:38
from here. You can run an SQL
01:40
query to make a selection on the current network,
01:43
select all objects in the current network,
01:46
invert selected objects,
01:48
create labels for objects
01:50
and simplify the geometry of selected objects.
01:55
Expand geo
01:56
plan
01:57
this menu houses geospatial tools
02:00
here. You can set the coordinate system, find objects,
02:04
navigate to different tools and work with polygons.
02:09
Click scenarios to create and manage scenarios
02:13
under results.
02:14
You can configure how results are displayed through
02:16
graph and grid reports or export simulation results.
02:21
Click actions to access any custom created actions,
02:25
expand tools for an extensive list of commands
02:28
from using edit flags to joining models,
02:32
expand model to access static demand options,
02:36
set various pipe properties
02:38
and more
02:41
click window to open new windows, configure window displays
02:45
and arrange icons.
02:48
Lastly expand. Help to access the info works. WS pro help documentation
02:53
check for updates
02:55
or even suggest a feature.
02:58
Be aware that a few of the tools you can access from the
03:01
menu are the same as those you can access from the toolbars.
03:05
The toolbars are anchored at the top of the window
03:08
by default and offer easy access to common commands.
03:12
Also, they are highly customizable.
03:15
You can change a toolbar's visibility
03:17
order of contents
03:19
and position.
03:20
You may also add and modify your own user to find toolbars.
03:25
The main window of info works.
03:27
WS pro is where you create and inspect details of a database,
03:31
display various views or windows of your networks
03:35
and produce graphs and reports.
03:38
The status bar is at the bottom of the interface
03:40
and provides additional information about what you are currently doing,
03:43
such as details about a current command,
03:46
the current zoom level on the GEO plan window
03:49
and the current cursor location.
03:52
The info
03:52
works WS pro interface is a robust environment that is highly customizable.
03:57
So you can work efficiently.
Video transcript
00:03
Info works.
00:04
WS Pro's interface is flexible and gives you several options
00:08
to work in the way that suits you best.
00:10
The user interface includes a menu
00:13
toolbars,
00:14
a main window
00:15
and a status bar.
00:17
From the menu,
00:18
you can easily access several options based
00:20
on functionality by expanding each menu name,
00:24
expand file to open or create a database
00:27
access. Recent databases
00:30
close model groups
00:31
configure database settings. Save changes to data
00:35
print active windows or exit info works. WS pro
00:40
next expand edit
00:44
here.
00:44
You can undo basic operations, cut,
00:47
copy or paste contents of cells from the grid view or selected objects,
00:51
rename items in a database, delete selected objects in the grid view,
00:55
export contents of the grid view to CSV, find and replace values in the grid view
01:01
and view properties for the current item
01:05
click network.
01:06
This menu contains options pertaining to both the network and the control
01:11
here. Access options for version control,
01:15
validate the network,
01:16
navigate through errors,
01:18
run updates,
01:20
compare other networks,
01:22
review simulation results,
01:25
import and export network objects,
01:28
set network options
01:30
and more
01:32
expand selection.
01:33
This menu provides functions that can be performed on a network selection
01:38
from here. You can run an SQL
01:40
query to make a selection on the current network,
01:43
select all objects in the current network,
01:46
invert selected objects,
01:48
create labels for objects
01:50
and simplify the geometry of selected objects.
01:55
Expand geo
01:56
plan
01:57
this menu houses geospatial tools
02:00
here. You can set the coordinate system, find objects,
02:04
navigate to different tools and work with polygons.
02:09
Click scenarios to create and manage scenarios
02:13
under results.
02:14
You can configure how results are displayed through
02:16
graph and grid reports or export simulation results.
02:21
Click actions to access any custom created actions,
02:25
expand tools for an extensive list of commands
02:28
from using edit flags to joining models,
02:32
expand model to access static demand options,
02:36
set various pipe properties
02:38
and more
02:41
click window to open new windows, configure window displays
02:45
and arrange icons.
02:48
Lastly expand. Help to access the info works. WS pro help documentation
02:53
check for updates
02:55
or even suggest a feature.
02:58
Be aware that a few of the tools you can access from the
03:01
menu are the same as those you can access from the toolbars.
03:05
The toolbars are anchored at the top of the window
03:08
by default and offer easy access to common commands.
03:12
Also, they are highly customizable.
03:15
You can change a toolbar's visibility
03:17
order of contents
03:19
and position.
03:20
You may also add and modify your own user to find toolbars.
03:25
The main window of info works.
03:27
WS pro is where you create and inspect details of a database,
03:31
display various views or windows of your networks
03:35
and produce graphs and reports.
03:38
The status bar is at the bottom of the interface
03:40
and provides additional information about what you are currently doing,
03:43
such as details about a current command,
03:46
the current zoom level on the GEO plan window
03:49
and the current cursor location.
03:52
The info
03:52
works WS pro interface is a robust environment that is highly customizable.
03:57
So you can work efficiently.
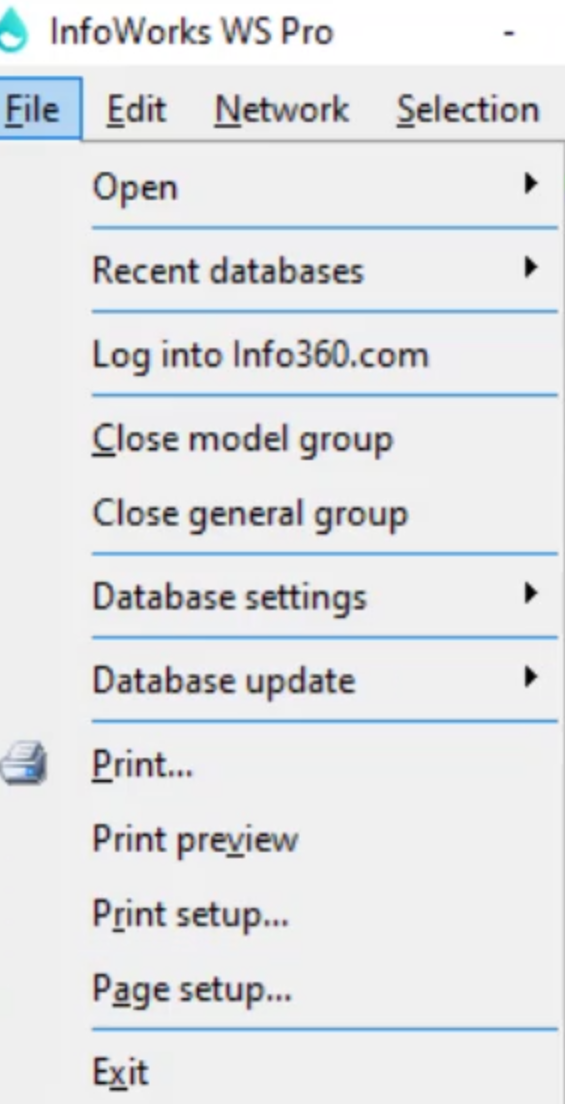
InfoWorks WS Pro's interface is flexible and gives you several options to work in the way that suits you best. The user interface includes a menu, toolbars, a main window, and a status bar.
A few of the menu tools are also accessible from toolbars. The toolbars are docked at the top of the window by default, offer easy access to common commands, and are highly customizable. InfoWorks WS Pro allows you to change a toolbar’s visibility, order of contents, and position, or add and modify user-defined toolbars.
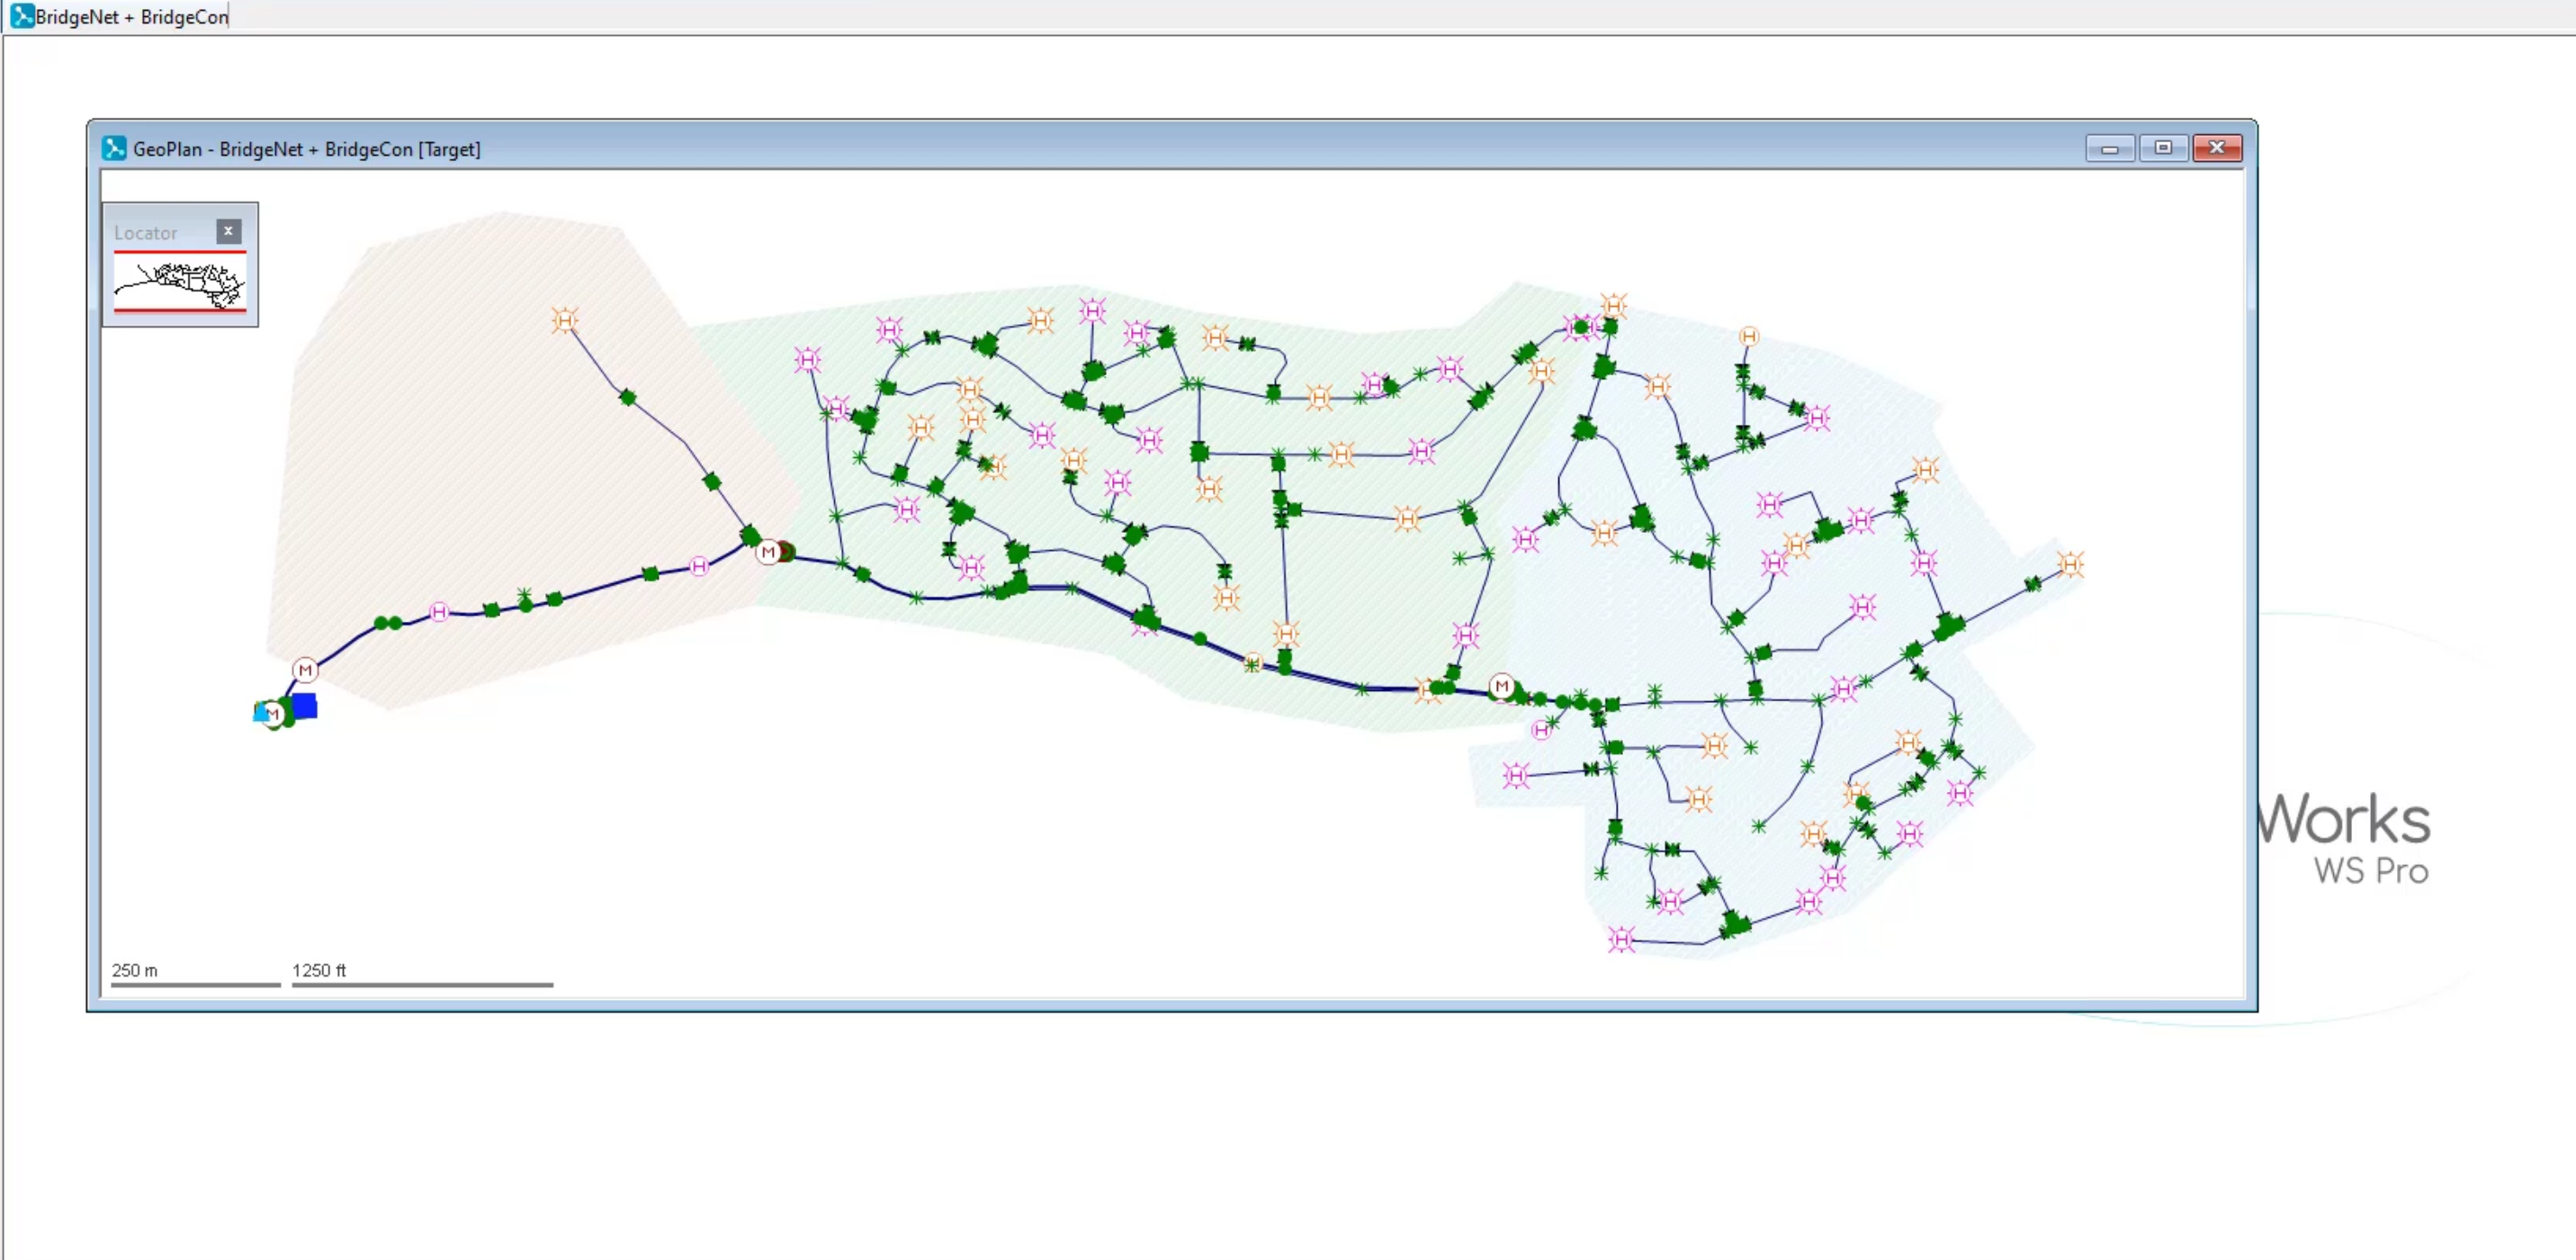
How to buy
Privacy | Do not sell or share my personal information | Cookie preferences | Report noncompliance | Terms of use | Legal | © 2025 Autodesk Inc. All rights reserved
Sign in to start learning
Sign in for unlimited free access to all learning content.Save your progress
Take assessments
Receive personalized recommendations
May we collect and use your data?
Learn more about the Third Party Services we use and our Privacy Statement.May we collect and use your data to tailor your experience?
Explore the benefits of a customized experience by managing your privacy settings for this site or visit our Privacy Statement to learn more about your options.