& Construction

Integrated BIM tools, including Revit, AutoCAD, and Civil 3D
& Manufacturing

Professional CAD/CAM tools built on Inventor and AutoCAD

Integrated BIM tools, including Revit, AutoCAD, and Civil 3D

Professional CAD/CAM tools built on Inventor and AutoCAD
Transcript
00:03
To run the automatic calibration module,
00:06
you need to have an appropriate live data configuration for the model.
00:10
To set up the live data configuration, in the Model Group,
00:14
expand the Calibration Model model group.
00:17
Create a new Live Data Configuration object by right-clicking on the Calibration model group
00:23
and selecting New > Live Data Configuration.
00:28
Double-click the Live Data Configuration object to open it and navigate to the Live Data Points tab.
00:37
Next, open your local file browser to access the dataset for this tutorial.
00:43
Navigate to the Calibration Live Data folder.
00:47
Select all the text files, and then drag and drop them into the first cell in the Live data point tab.
00:55
The live data files will automatically load into the table.
00:59
Commit the changes to the Live data configuration to the database.
01:05
Before the live data can be used with the model,
01:08
it needs to be associated with the network.
01:11
This association is done using the control file in InfoWorks WS Pro.
01:18
Each logger data file is referenced in the Live Data Configuration using a Live Data Point ID.
01:25
This field provides the link between the logger data and the model.
01:30
Ensure that the Live Data Configuration is open behind the BridgeTown Network and BridgeTown Control.
01:38
In the Network tab, click Control and from the flyout select Link live data points…
01:46
to open the Link Live Data Points dialog.
01:50
Click both the Match with Asset ID and Match with Node/Link ID buttons.
01:56
In this example, nothing is listed in the Unmatched: group box,
02:00
which means that everything is correctly matched.
02:04
Click Done.
02:06
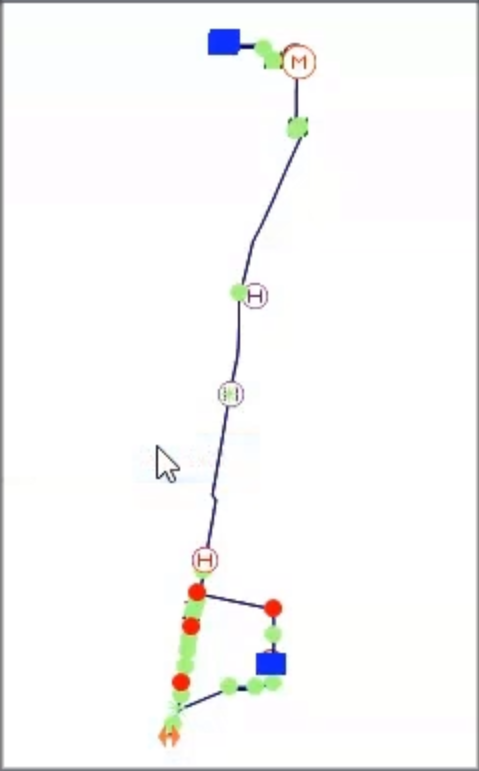
You can also right-click the GeoPlan and click Selection > Select live data point objects from the submenu.
02:14
This will select and highlight all the objects with live data attached, so they are easier to see.
02:20
In the toolbar, click the Clear selection button.
02:25
Then, commit any outstanding changes to the network and control to the database.
Video transcript
00:03
To run the automatic calibration module,
00:06
you need to have an appropriate live data configuration for the model.
00:10
To set up the live data configuration, in the Model Group,
00:14
expand the Calibration Model model group.
00:17
Create a new Live Data Configuration object by right-clicking on the Calibration model group
00:23
and selecting New > Live Data Configuration.
00:28
Double-click the Live Data Configuration object to open it and navigate to the Live Data Points tab.
00:37
Next, open your local file browser to access the dataset for this tutorial.
00:43
Navigate to the Calibration Live Data folder.
00:47
Select all the text files, and then drag and drop them into the first cell in the Live data point tab.
00:55
The live data files will automatically load into the table.
00:59
Commit the changes to the Live data configuration to the database.
01:05
Before the live data can be used with the model,
01:08
it needs to be associated with the network.
01:11
This association is done using the control file in InfoWorks WS Pro.
01:18
Each logger data file is referenced in the Live Data Configuration using a Live Data Point ID.
01:25
This field provides the link between the logger data and the model.
01:30
Ensure that the Live Data Configuration is open behind the BridgeTown Network and BridgeTown Control.
01:38
In the Network tab, click Control and from the flyout select Link live data points…
01:46
to open the Link Live Data Points dialog.
01:50
Click both the Match with Asset ID and Match with Node/Link ID buttons.
01:56
In this example, nothing is listed in the Unmatched: group box,
02:00
which means that everything is correctly matched.
02:04
Click Done.
02:06
You can also right-click the GeoPlan and click Selection > Select live data point objects from the submenu.
02:14
This will select and highlight all the objects with live data attached, so they are easier to see.
02:20
In the toolbar, click the Clear selection button.
02:25
Then, commit any outstanding changes to the network and control to the database.
To run the automatic calibration module, an appropriate live data configuration must be set up for the model.
To create a new Live Data Configuration object:

The live data files automatically load into the table:
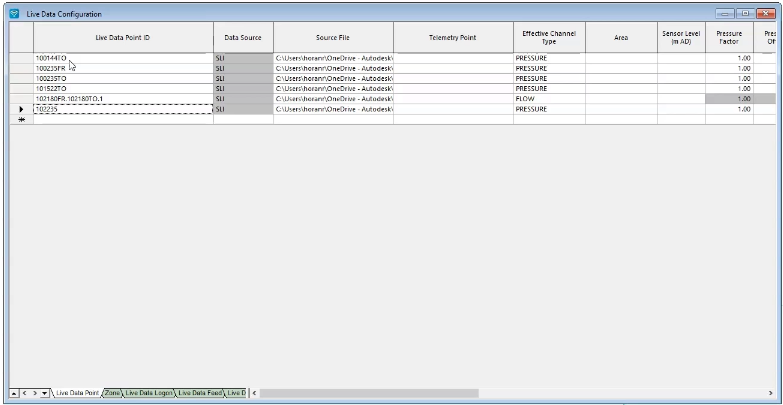
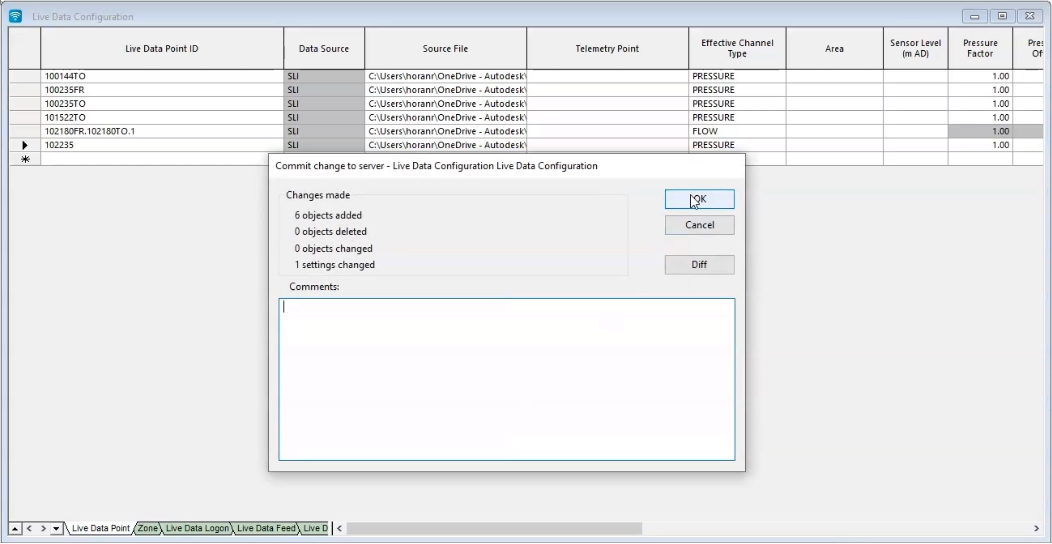
To commit the changes to the Live data configuration to the database:
Before the live data can be used with the model, it needs to be associated with the network. This association is done using the control file in InfoWorks WS Pro.
Each logger data file is referenced in the Live Data Configuration using a Live Data Point ID. This field provides the link between the logger data and the model.
To associate the live data with the network:
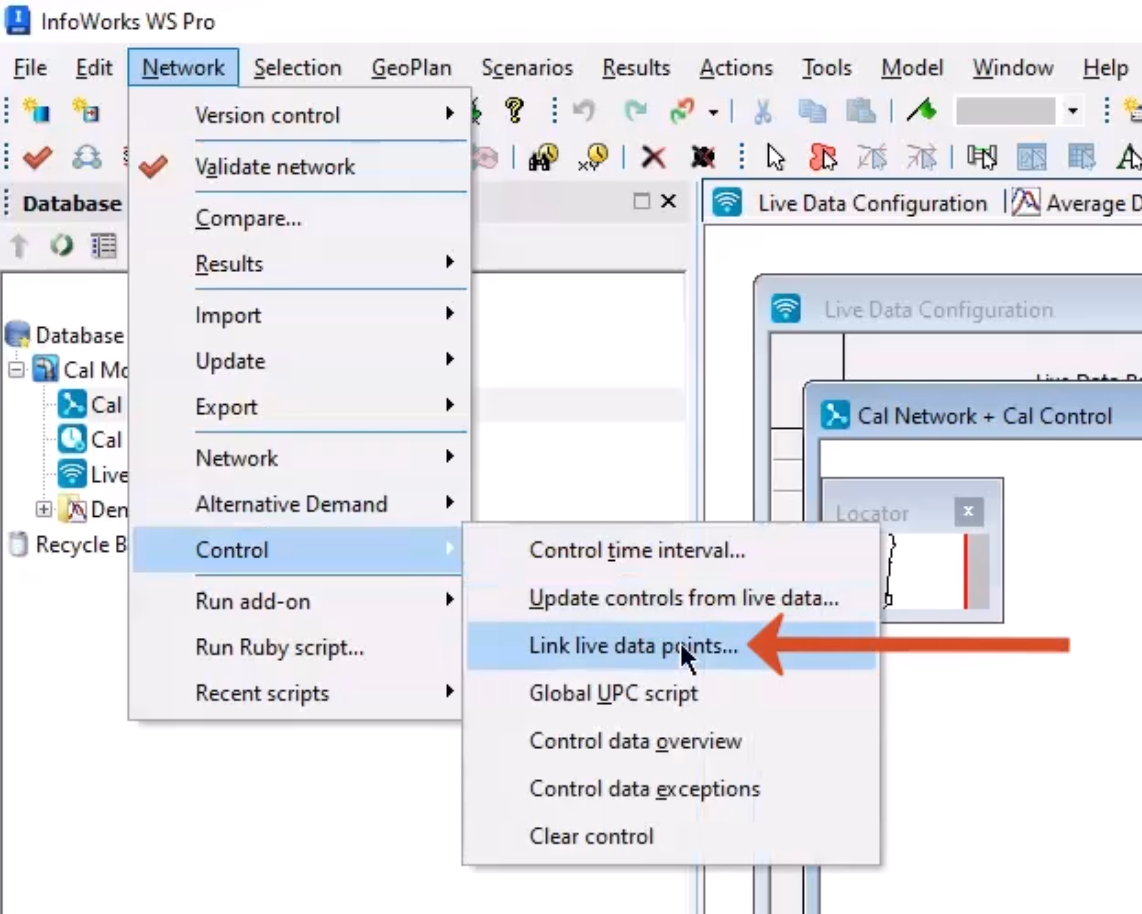
In this example, nothing is listed in the Unmatched: group box, which means that everything is correctly matched.
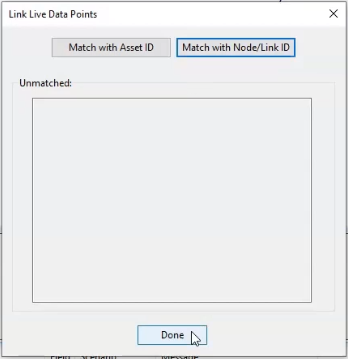
To select and highlight all the objects with live data attached:
How to buy
Privacy | Do not sell or share my personal information | Cookie preferences | Report noncompliance | Terms of use | Legal | © 2025 Autodesk Inc. All rights reserved
Sign in to start learning
Sign in for unlimited free access to all learning content.Save your progress
Take assessments
Receive personalized recommendations
May we collect and use your data?
Learn more about the Third Party Services we use and our Privacy Statement.May we collect and use your data to tailor your experience?
Explore the benefits of a customized experience by managing your privacy settings for this site or visit our Privacy Statement to learn more about your options.