00:03
When performing a Multi Solute Water Quality simulation, after the MSQ model has been set up using the Solute Data Object dialog,
00:13
the next step is to dose the network with the contaminants.
00:17
The exercise in this tutorial simulates a fixed head being a source of Contaminant A, and a reservoir being a source of Contaminate B.
00:25
Each source will be dosed with the relevant contaminant.
00:29
First, configure the options for the fixed head to set it as the source of Contaminant A
00:34
from 02:00 until 22:00 on the first day of the simulation.
00:40
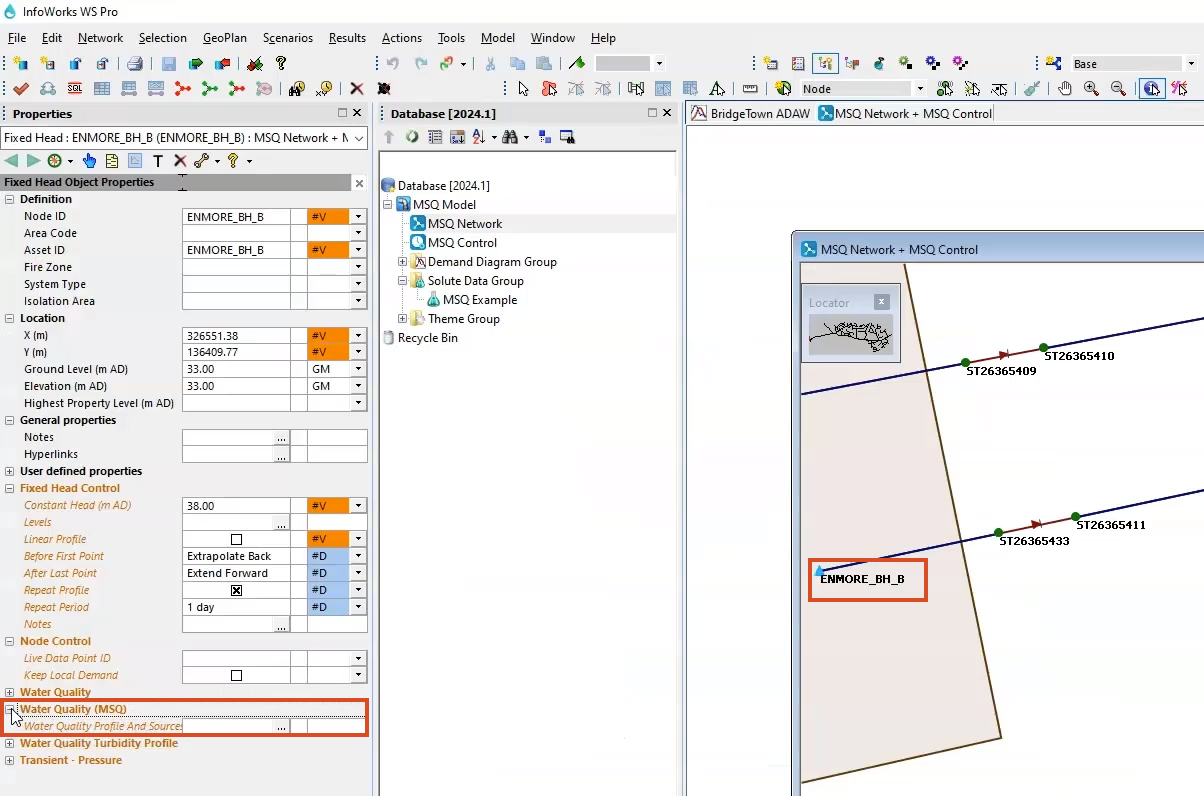
Open the MSQ Network into the GeoPlan.
00:44
Zoom into the fixed head ENMORE_BH_B, and then click the Properties tool to open its properties.
00:52
Scroll to and expand the Water Quality (MSQ) menu.
00:56
Click More (…) to open the Water Quality Profile And Sources dialog box.
01:02
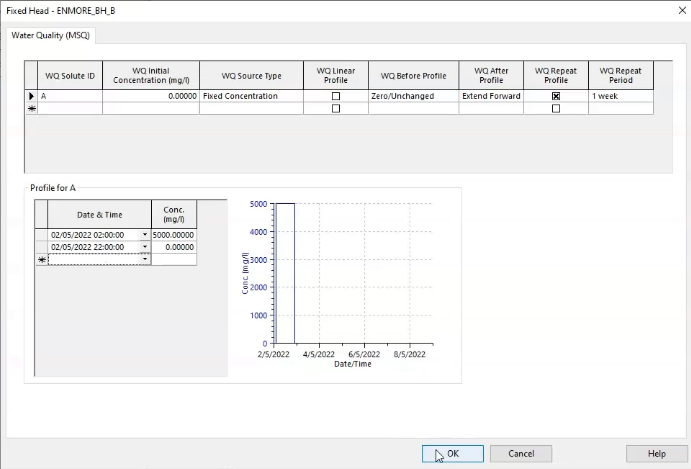
In the Water Quality (MSQ) group box, set the WQ Solute Id to A, then set the WQ Initial Concentration to 0 mg/l.
01:12
From the WQ Source Type, choose Fixed Concentration to set to the dosing profile.
01:18
Next, expand the WQ Before Profile drop-down
01:22
and select Zero/Unchanged to allow a value of zero to be applied from the start of the simulation
01:28
until the time of the contamination event.
01:31
Then, expand the WQ After Profile drop-down
01:34
and select Extend Forward to ensure the last value in the profile grid (zero) is extended to the end of the simulation.
01:43
Enable the WQ Repeat Profile option, and then from the adjacent drop-down, select 1 week.
01:51
In the Profile for A group box, in the first row, set the date and time to May 2nd, 2022 at 02:00:00 and the concentration to 5000 mg/l.
02:04
In the second row, set the date and time to May 2nd, 2022 at 22:00:00 and the concentration to 0 mg/l.
02:16
Next, you need to configure the options for the reservoir as the source of Contaminant B from 02:00 until 22:00
02:25
on the first day of the simulation.
02:27
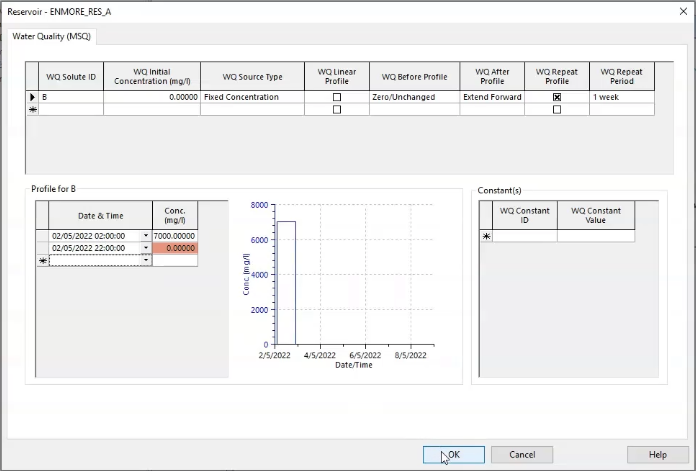
Use the Properties tool to open the properties of the ENMORE_RES_A reservoir.
02:33
Scroll to and expand the Water Quality (MSQ) menu.
02:38
Click More (…) to open the Water Quality Profile And Sources window.
02:43
In the Water Quality (MSQ) group box, set the WQ Solute Id to B, and then set the WQ Initial Concentration to 0 mg/l.
02:54
Expand the WQ Source Type and select Fixed Concentration.
02:59
From the WQ Before Profile drop-down, select Zero/Unchanged, and from the WQ After Profile drop-down, select Extend Forward.
03:09
Enable the WQ Repeat Profile, and then select 1 week from the adjacent drop-down.
03:16
In the Profile for B group box, in the first row, set the date and time to May 2nd, 2022 at 02:00:00 and the concentration to 7000 mg/l.
03:28
In the second row, set the date and time to May 2nd, 2022 at 22:00:00 and the concentration to 0 mg/l.
03:40
With the contaminants for both water sources now set up, commit the changes to the Control.
03:46
When you are ready to run the simulation, use this control object to see how the substances react.