00:04
When working in info
00:05
WS pro there may be times when you want to make changes
00:08
to multiple objects with the goal of achieving a desired simulation result.
00:14
you may want to resize several pipes to increase the flow rate within a network.
00:19
Best practice is to create a new scenario,
00:22
then create a selection list of the objects you want
00:24
to change in order to modify them all at once
00:29
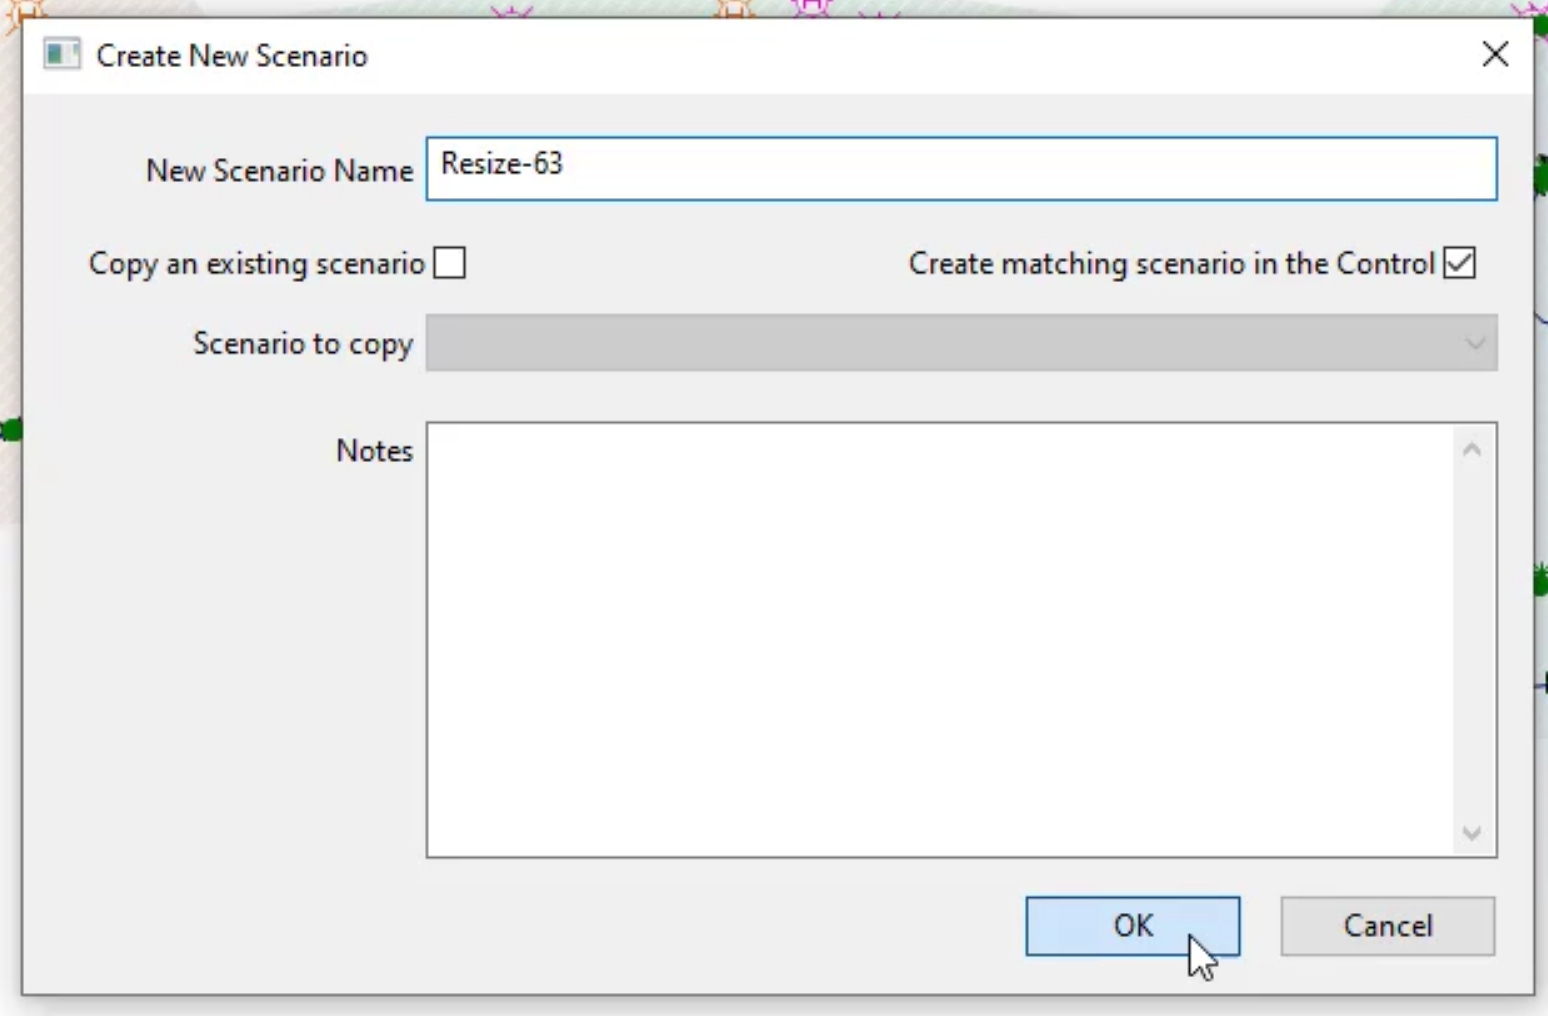
in the toolbar. Click create scenario
00:34
in the create new scenario. Dialogue. Enter the name resize dash 63
00:39
enable create matching scenario in the control
00:46
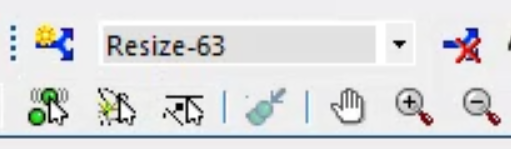
Notice that the name of the scenario changes in the dropdown located in the toolbar.
00:52
Next you need to find one of the pipes. You will be resizing.
00:56
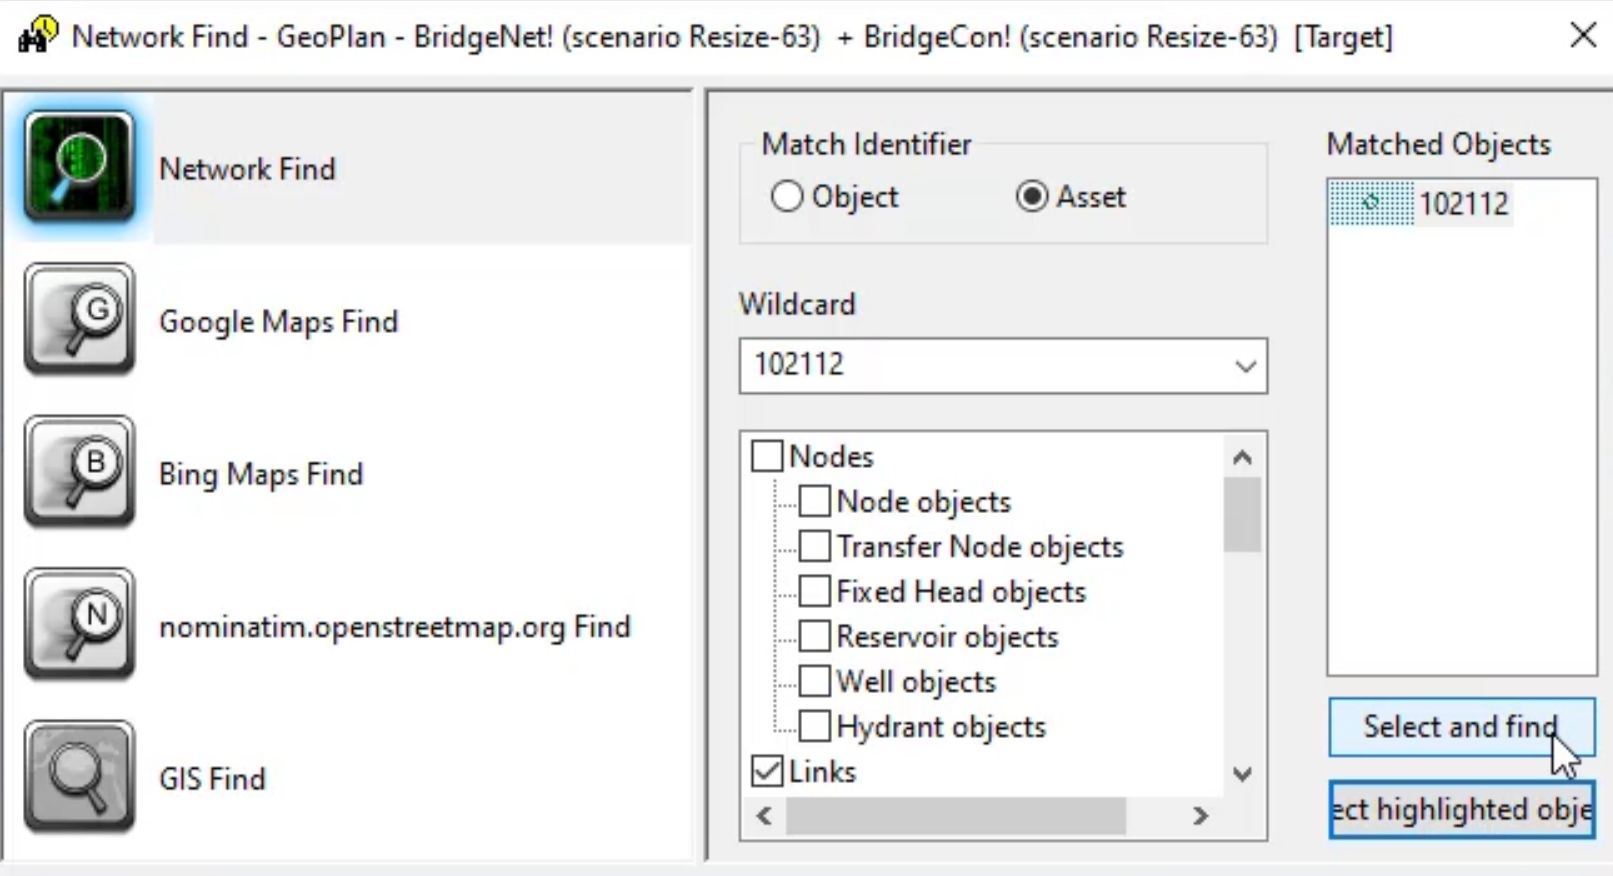
Click the find network objects button
00:60
in the network, find dialogue in the match identifier group box.
01:03
Make sure asset is selected,
01:06
check the box next to links
01:09
and then enter the asset id
01:16
Click on the pipe's asset id in the matched object's window.
01:21
Click select and find then close the network, find dialogue
01:26
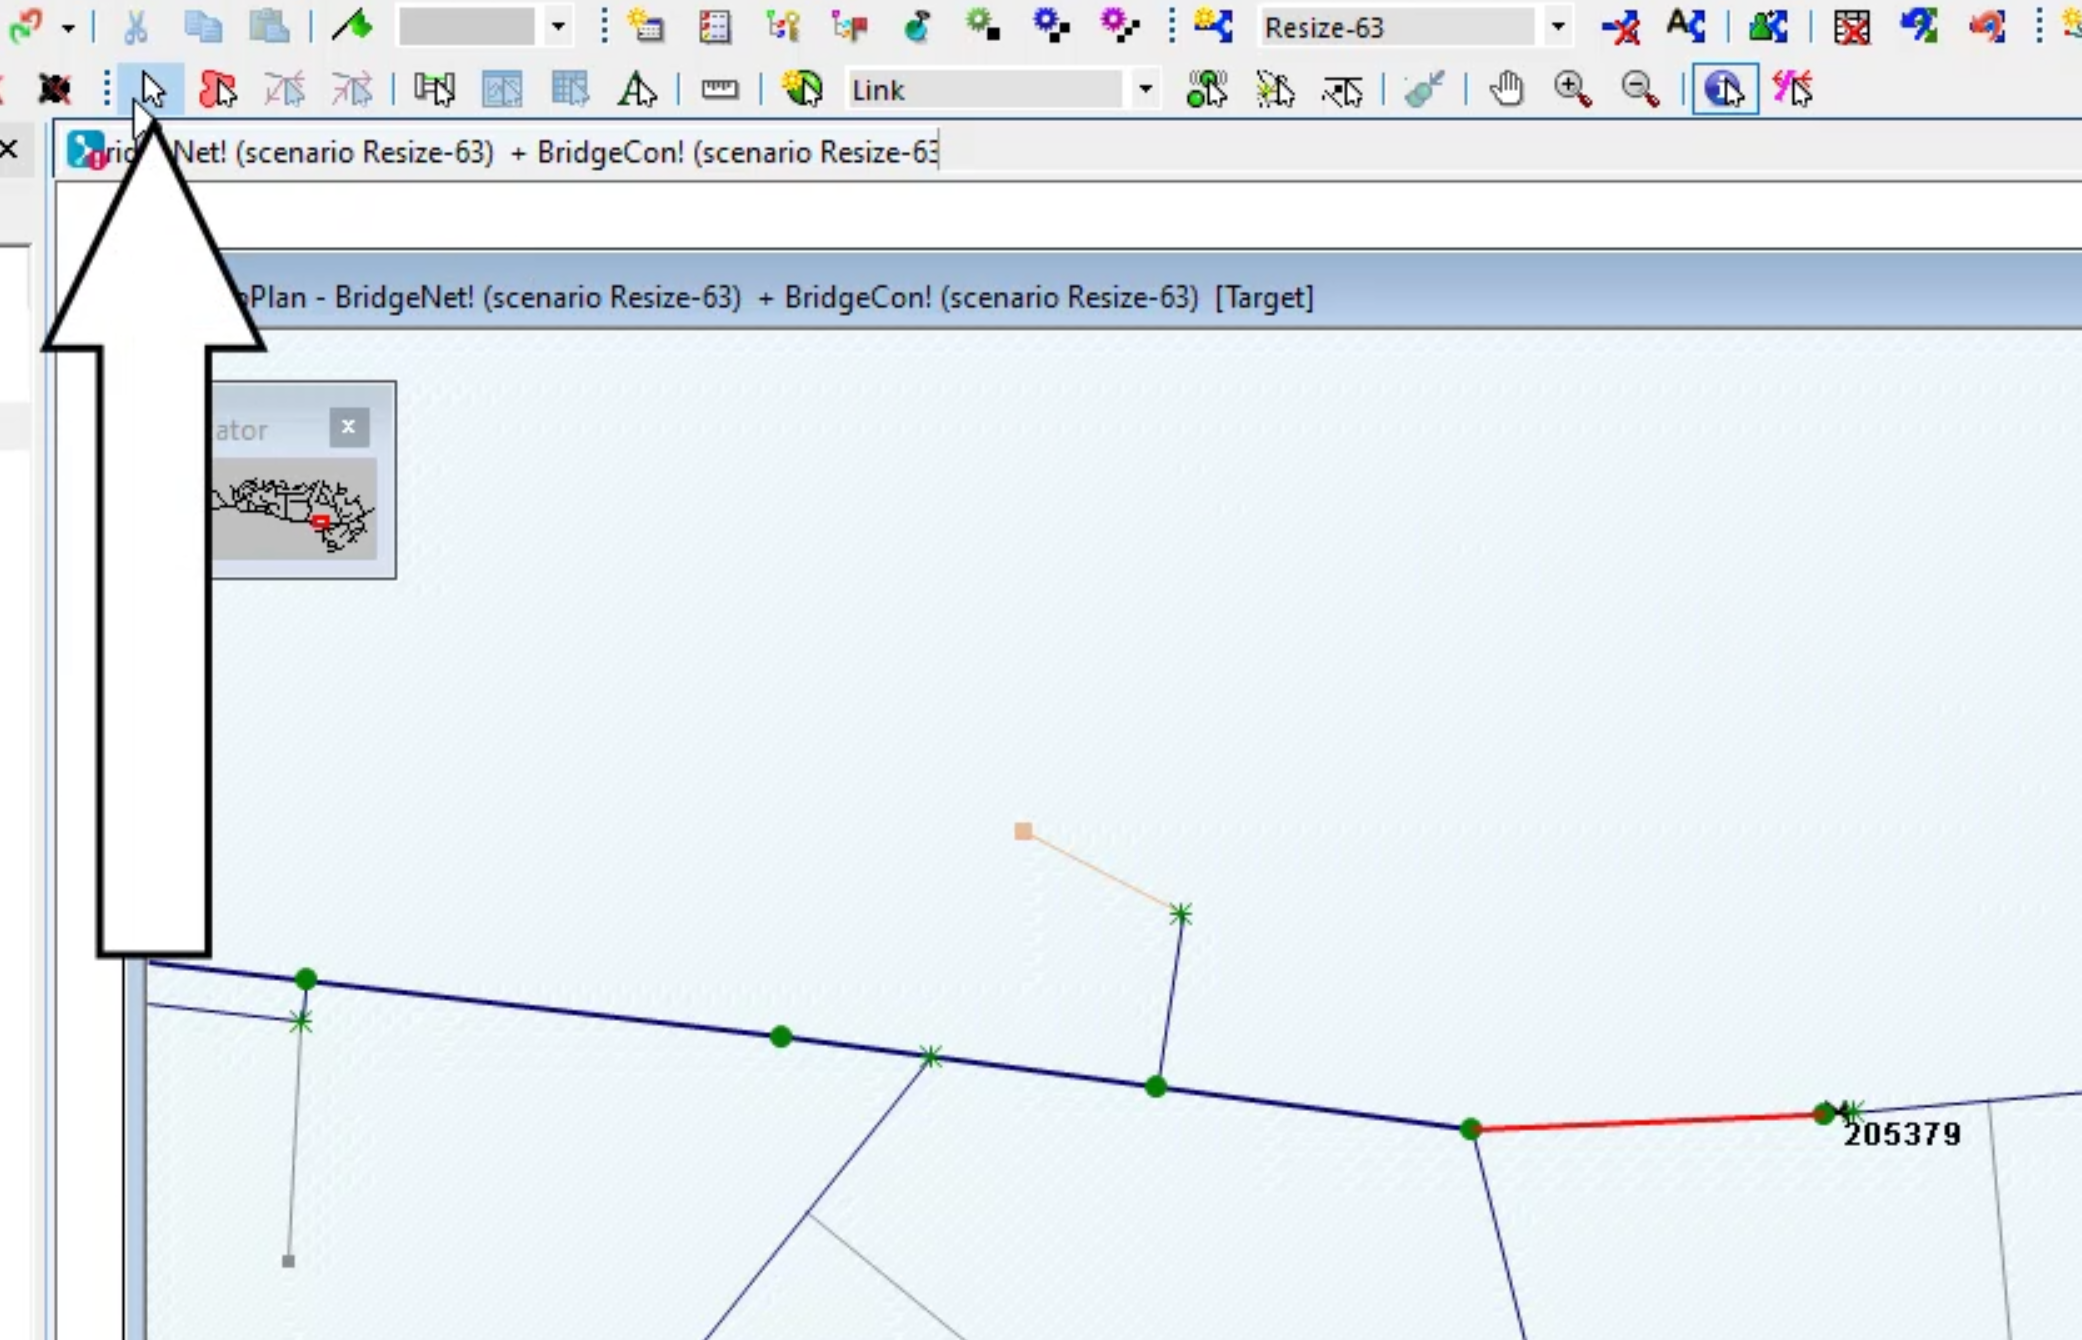
pipe 102 102 is now highlighted in red in the GEO plan
01:32
click the select tool press and hold control and then click pipe 102112
01:38
and both pipes to the left and right of it
01:41
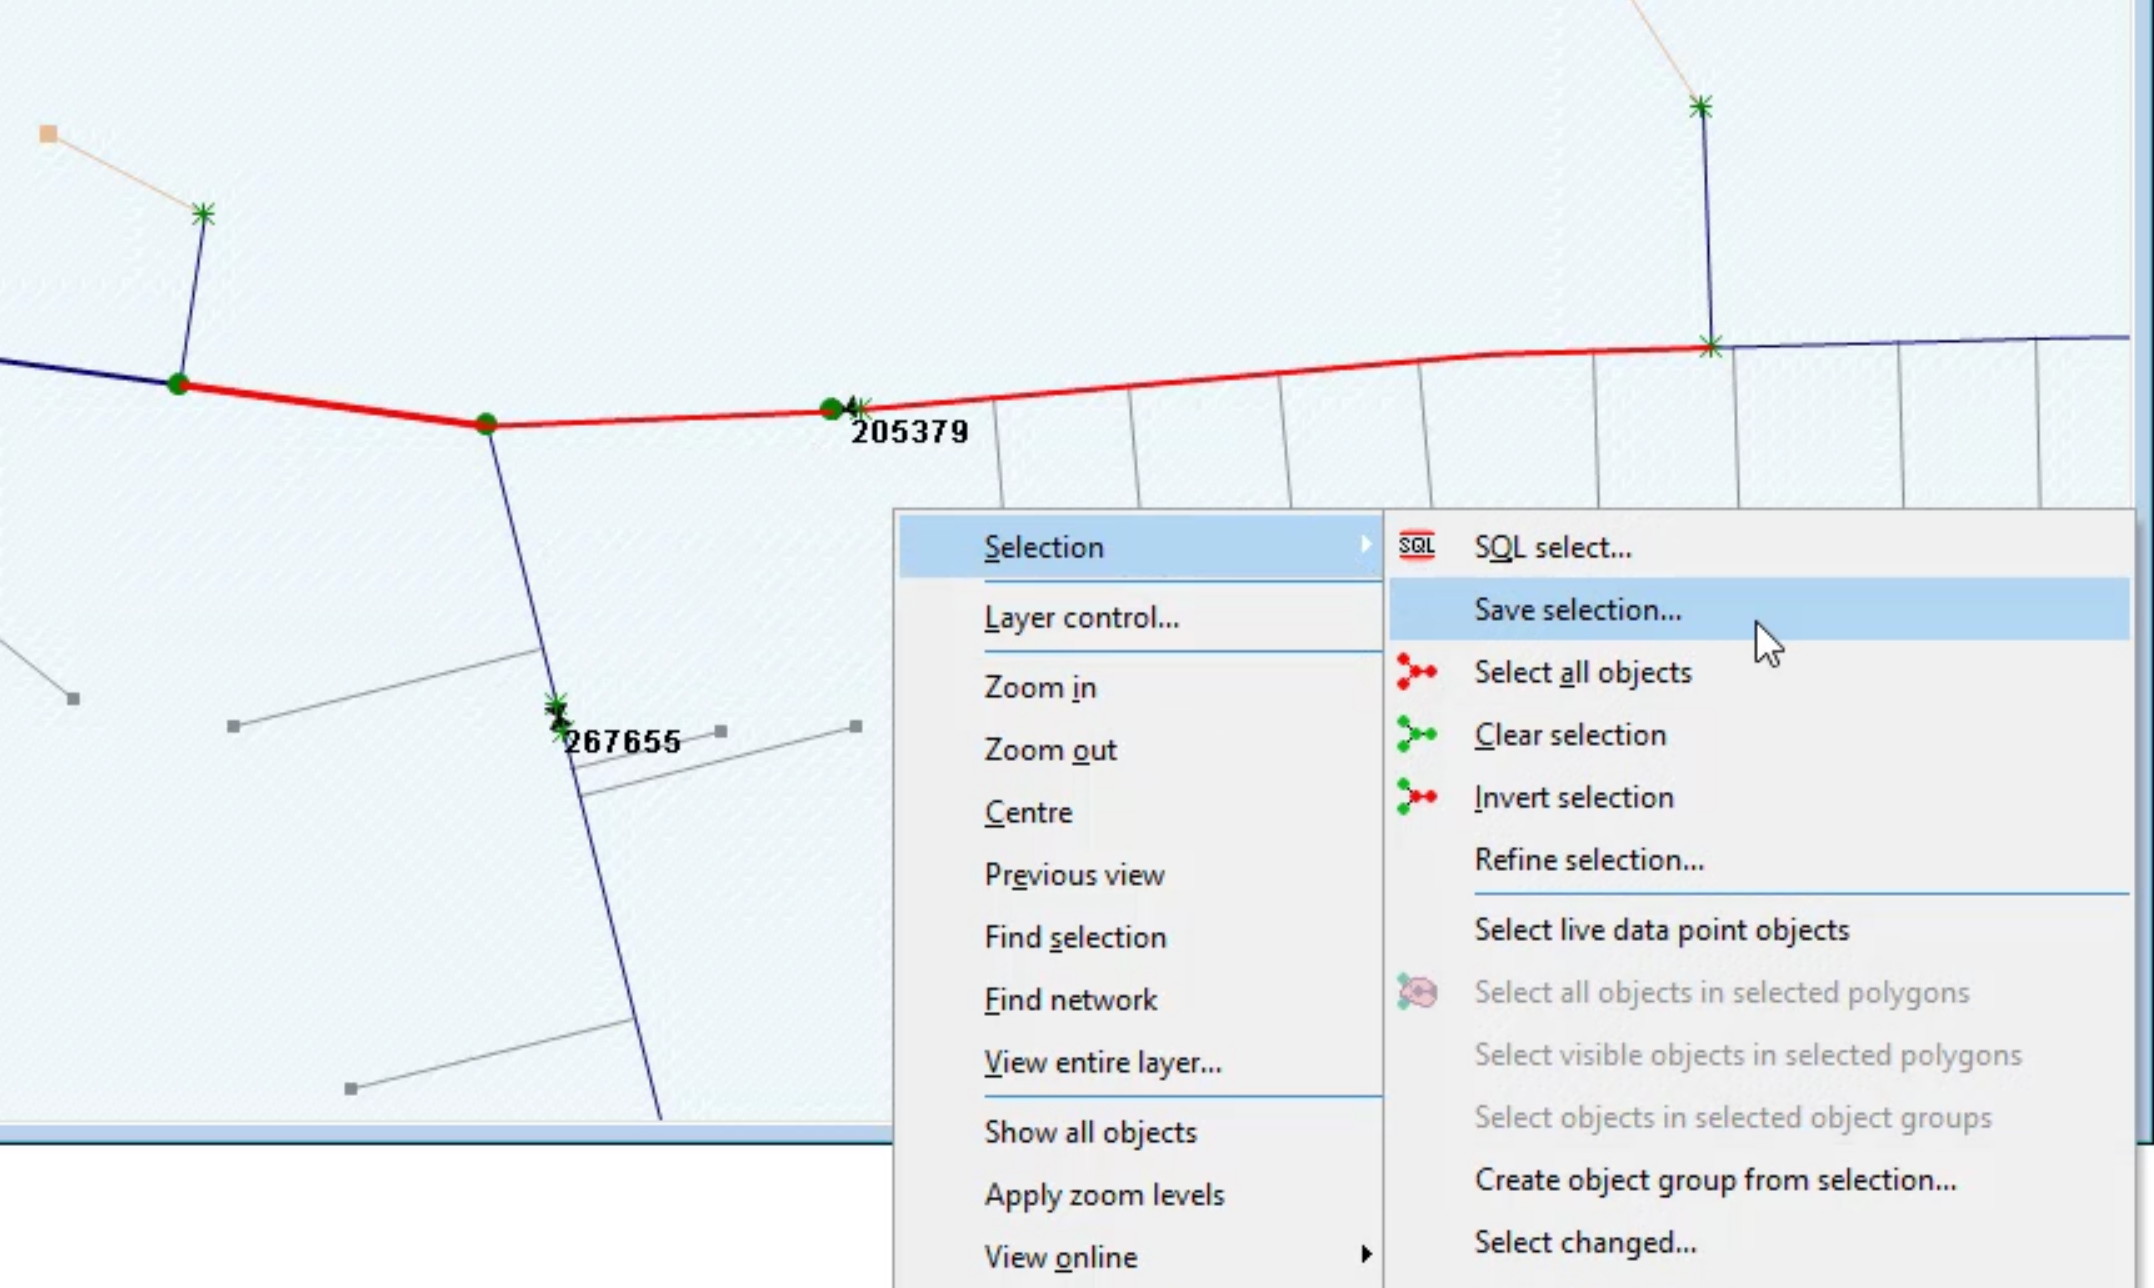
with all three pipes selected right, click inside the GEO plan and click selection.
01:50
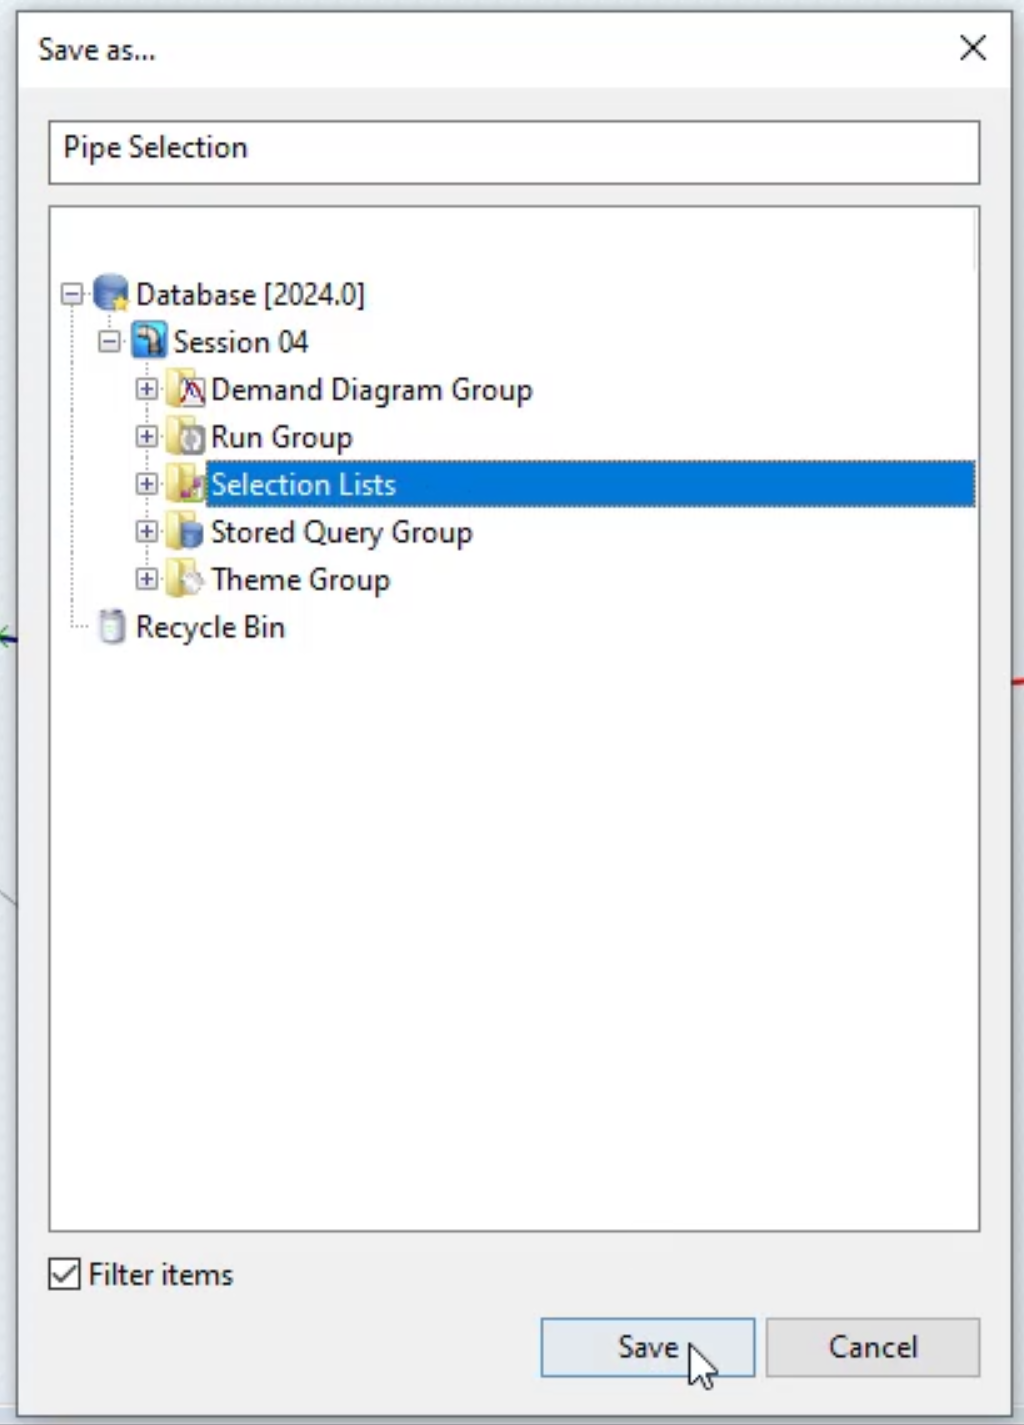
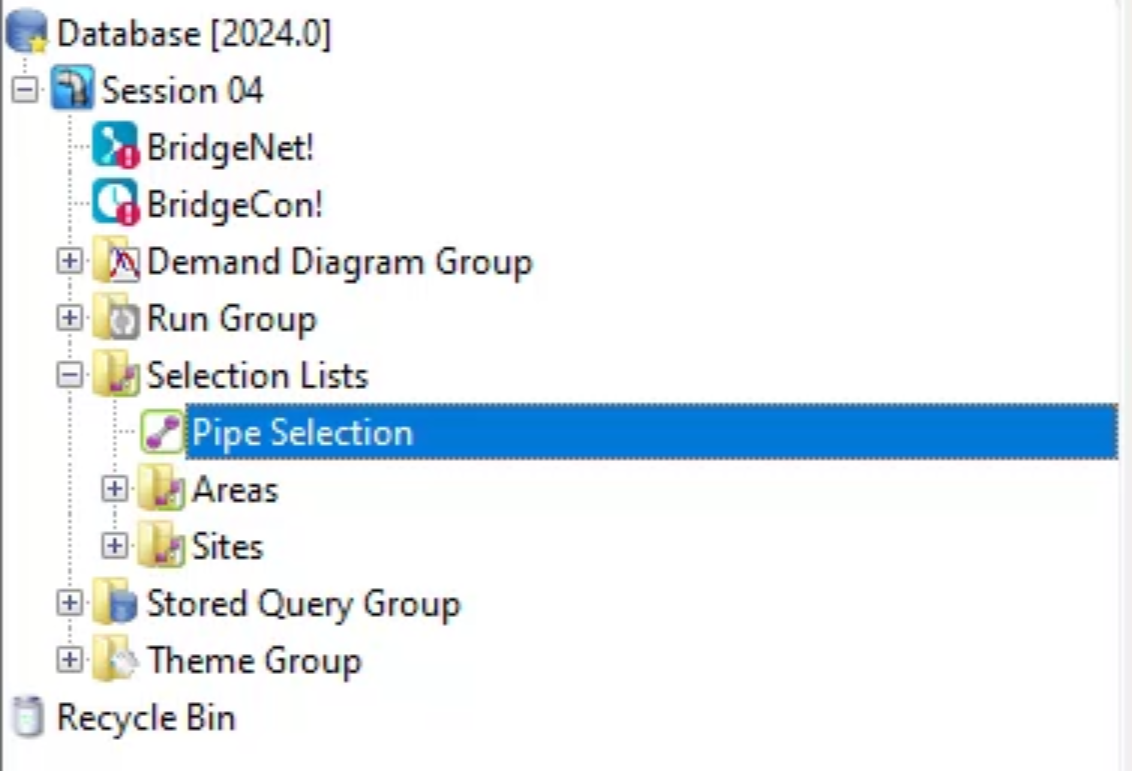
in the save as dialogue. Enter the name pipe selection,
01:54
click selection lists to highlight it
01:59
The three pipes are now grouped.
02:01
Now you can change the properties of all three pipes at the same time
02:06
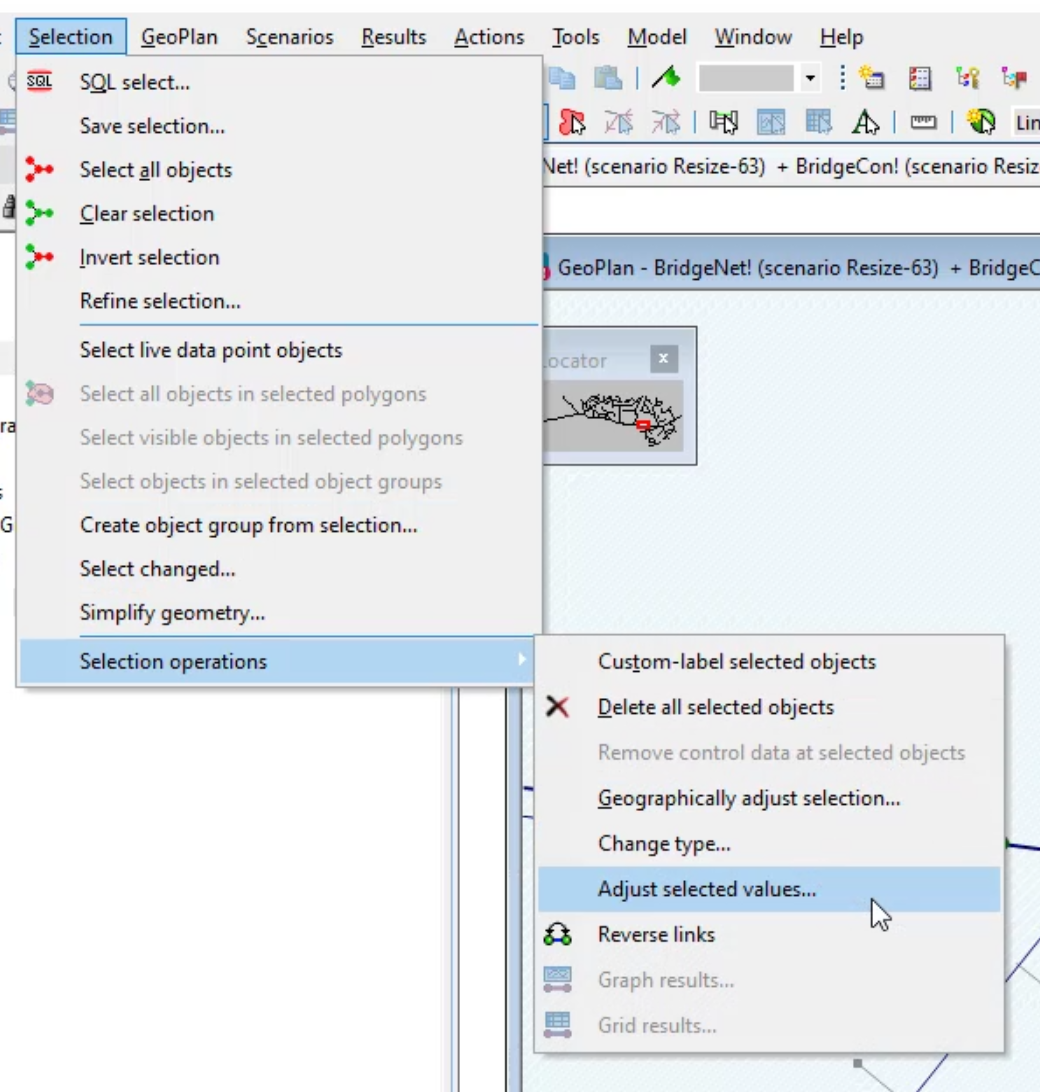
to do so. On the ribbon selection.
02:08
Tab click selection operations, adjust selected values
02:15
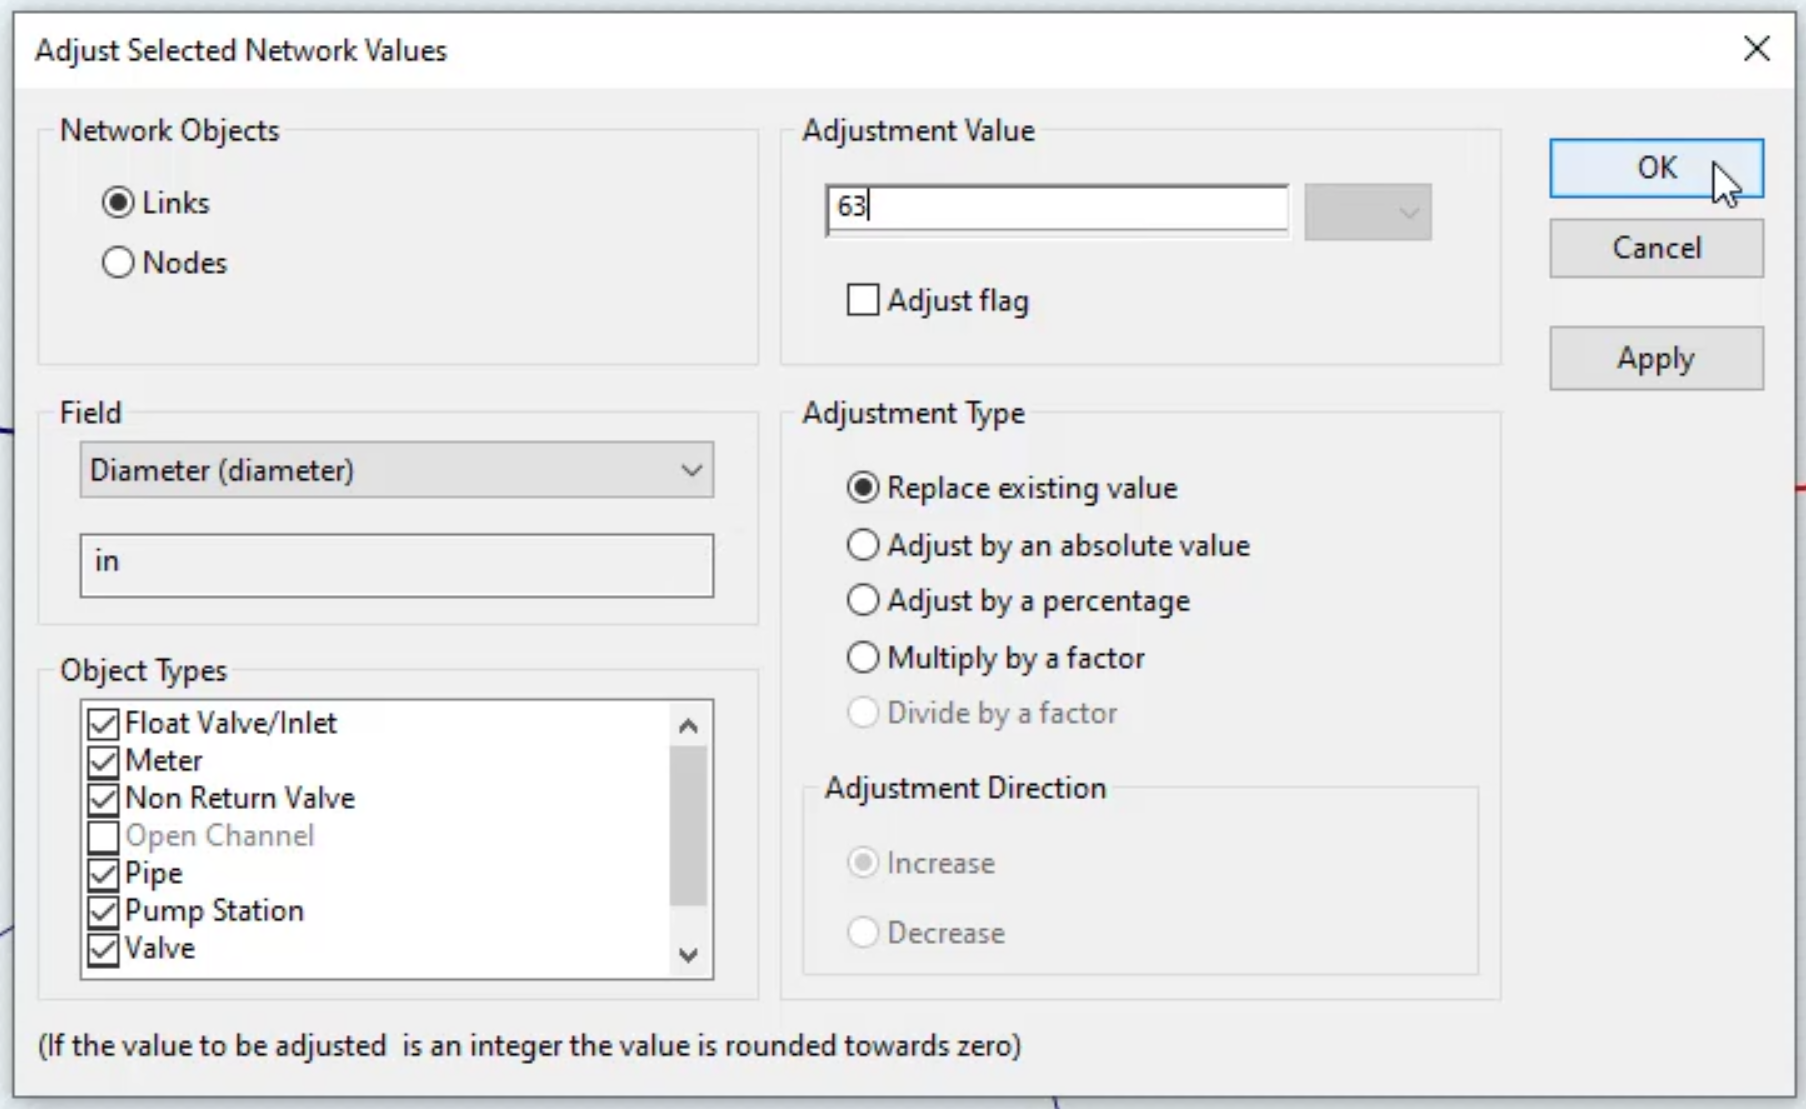
in the adjust selected network values, dialogue
02:18
and the network objects group box,
02:20
make sure links is active
02:23
in the field group box, expand the dropdown and click the option for diameter
02:31
in the adjustment value group box. Enter a value of 63
02:35
in the adjustment type group box, replace existing value should be active,
02:42
when you receive a notification asking you if you want to apply the adjustment.
02:47
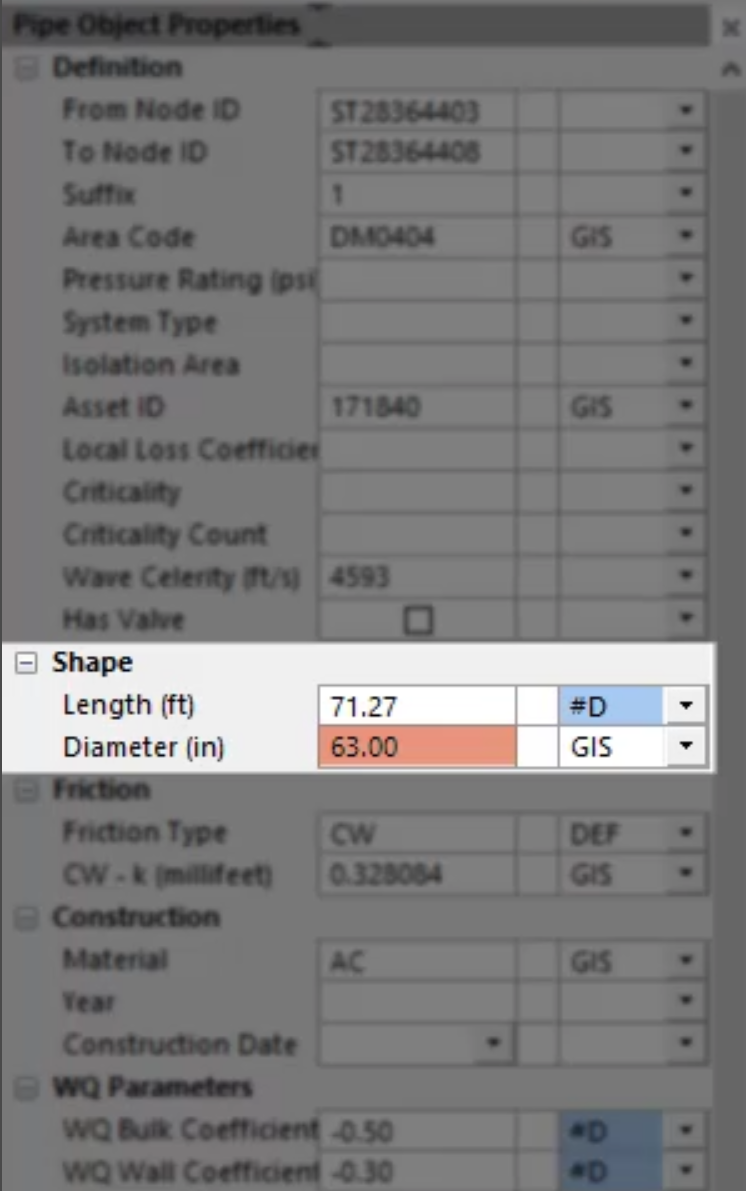
Now click the properties tool and select one
02:50
of the three pipes still highlighted in red.
02:54
In the properties window, the diameter should be 63.
02:58
You can also make changes to multiple objects using grid windows
03:02
in the model group window, expand selection lists,
03:06
then click and drag pipe selection into the GEO plan
03:10
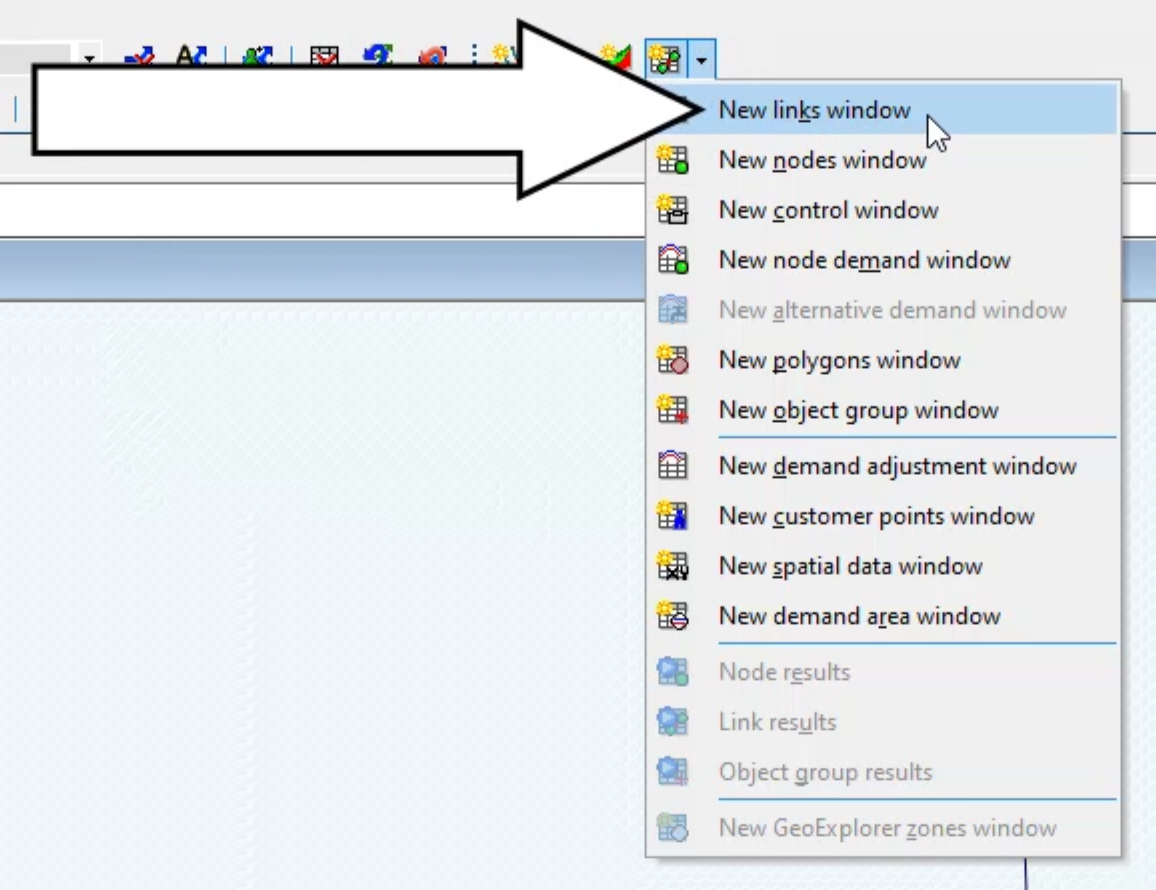
in the toolbar while pressing control expand the
03:13
grid windows dropdown and click new links window.
03:17
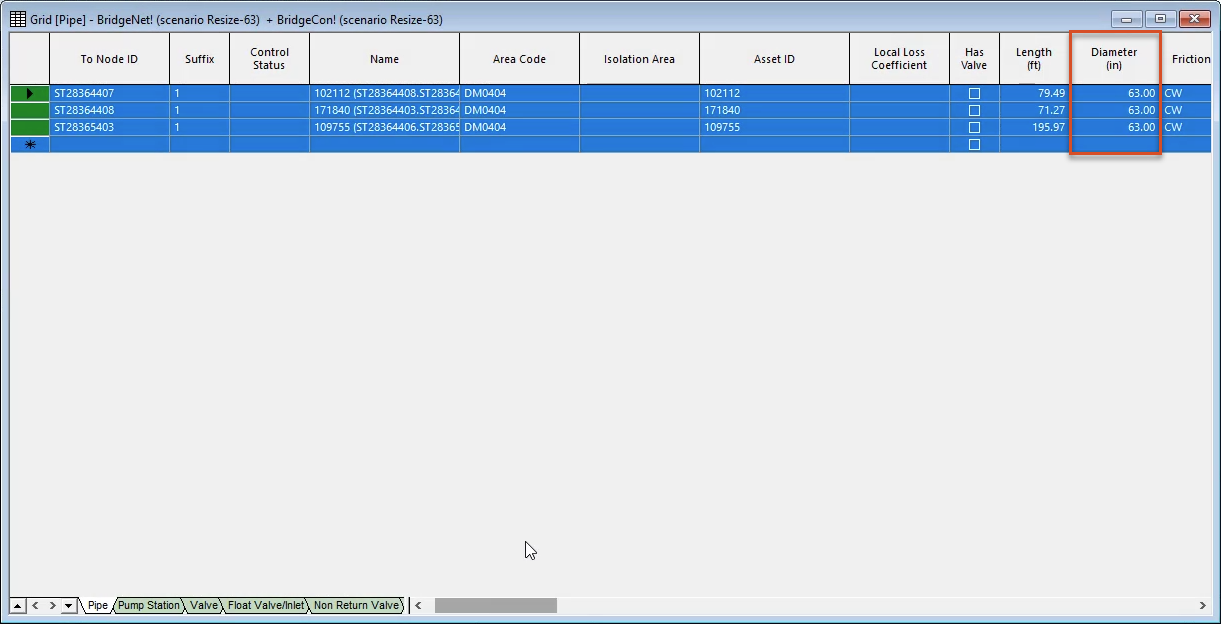
A grid window opens listing the properties of the three pipes in the selection.
03:22
Using the scroll bar, you can find the diameter column and enter new values there.
03:28
Close the grid window,
03:30
you can incorporate this scenario into an existing
03:33
run group which can save you some time.
03:36
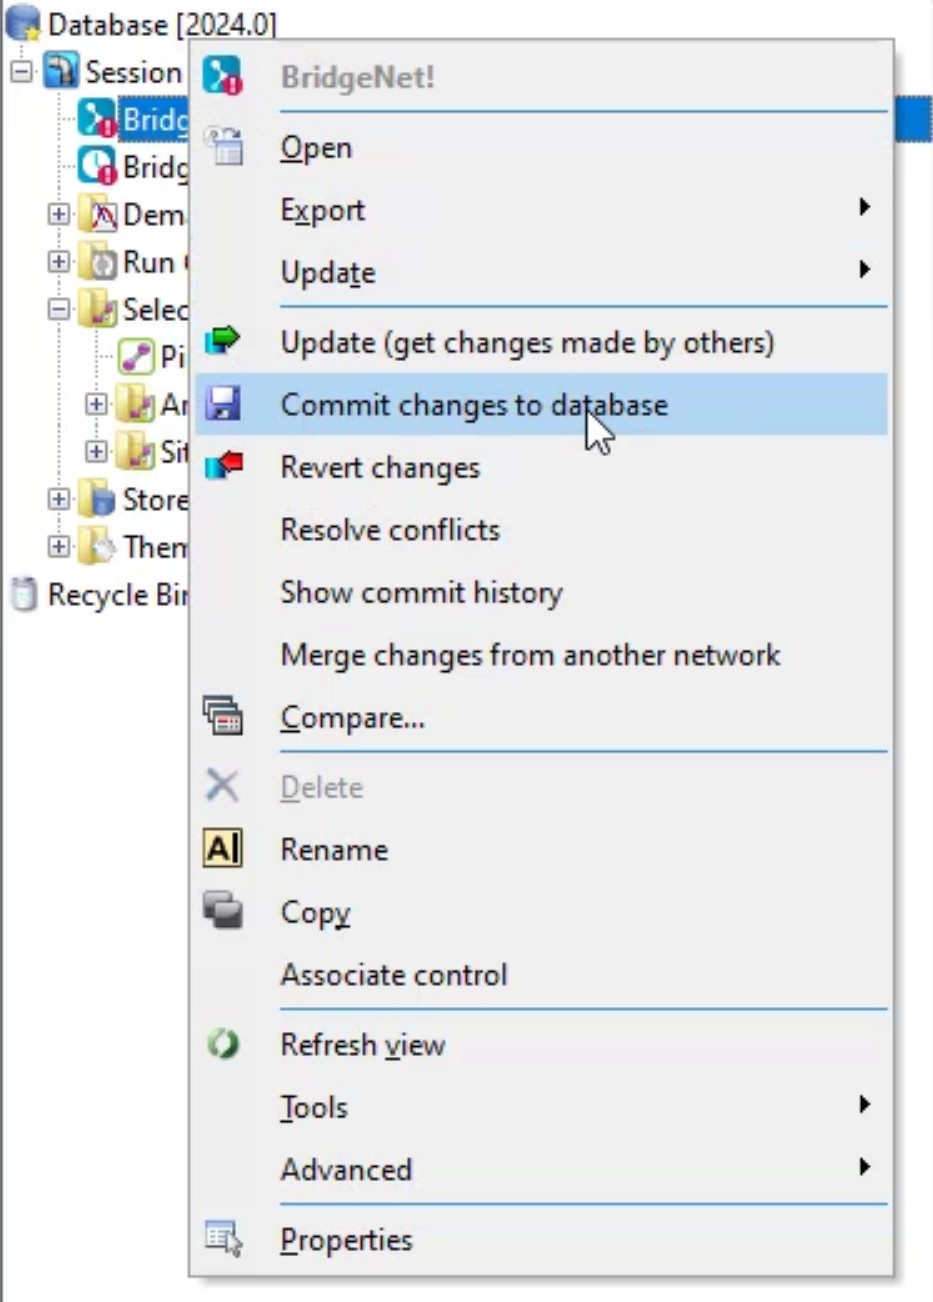
First commit the changes you have just made to the scenario in the master database.
03:42
In the model group window,
03:44
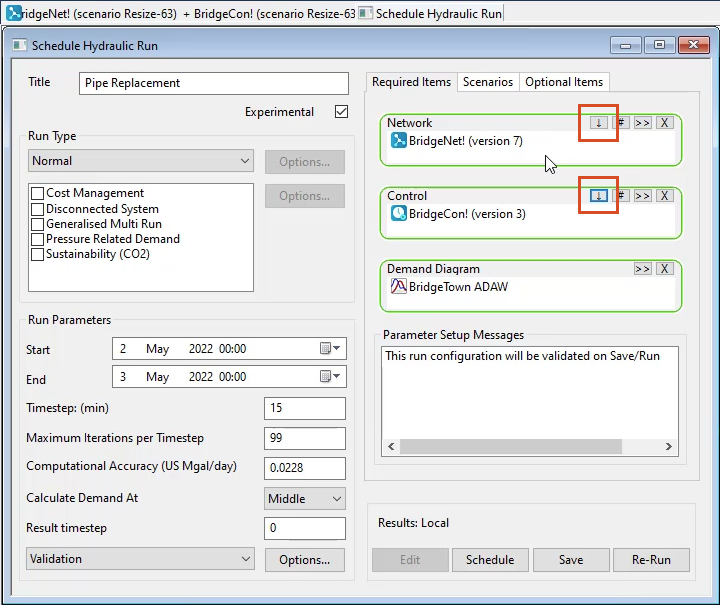
double click the pipe replacement run group to open the schedule,
03:47
hydraulic run dialogue and update both the
03:49
network and control to their latest versions.
03:55
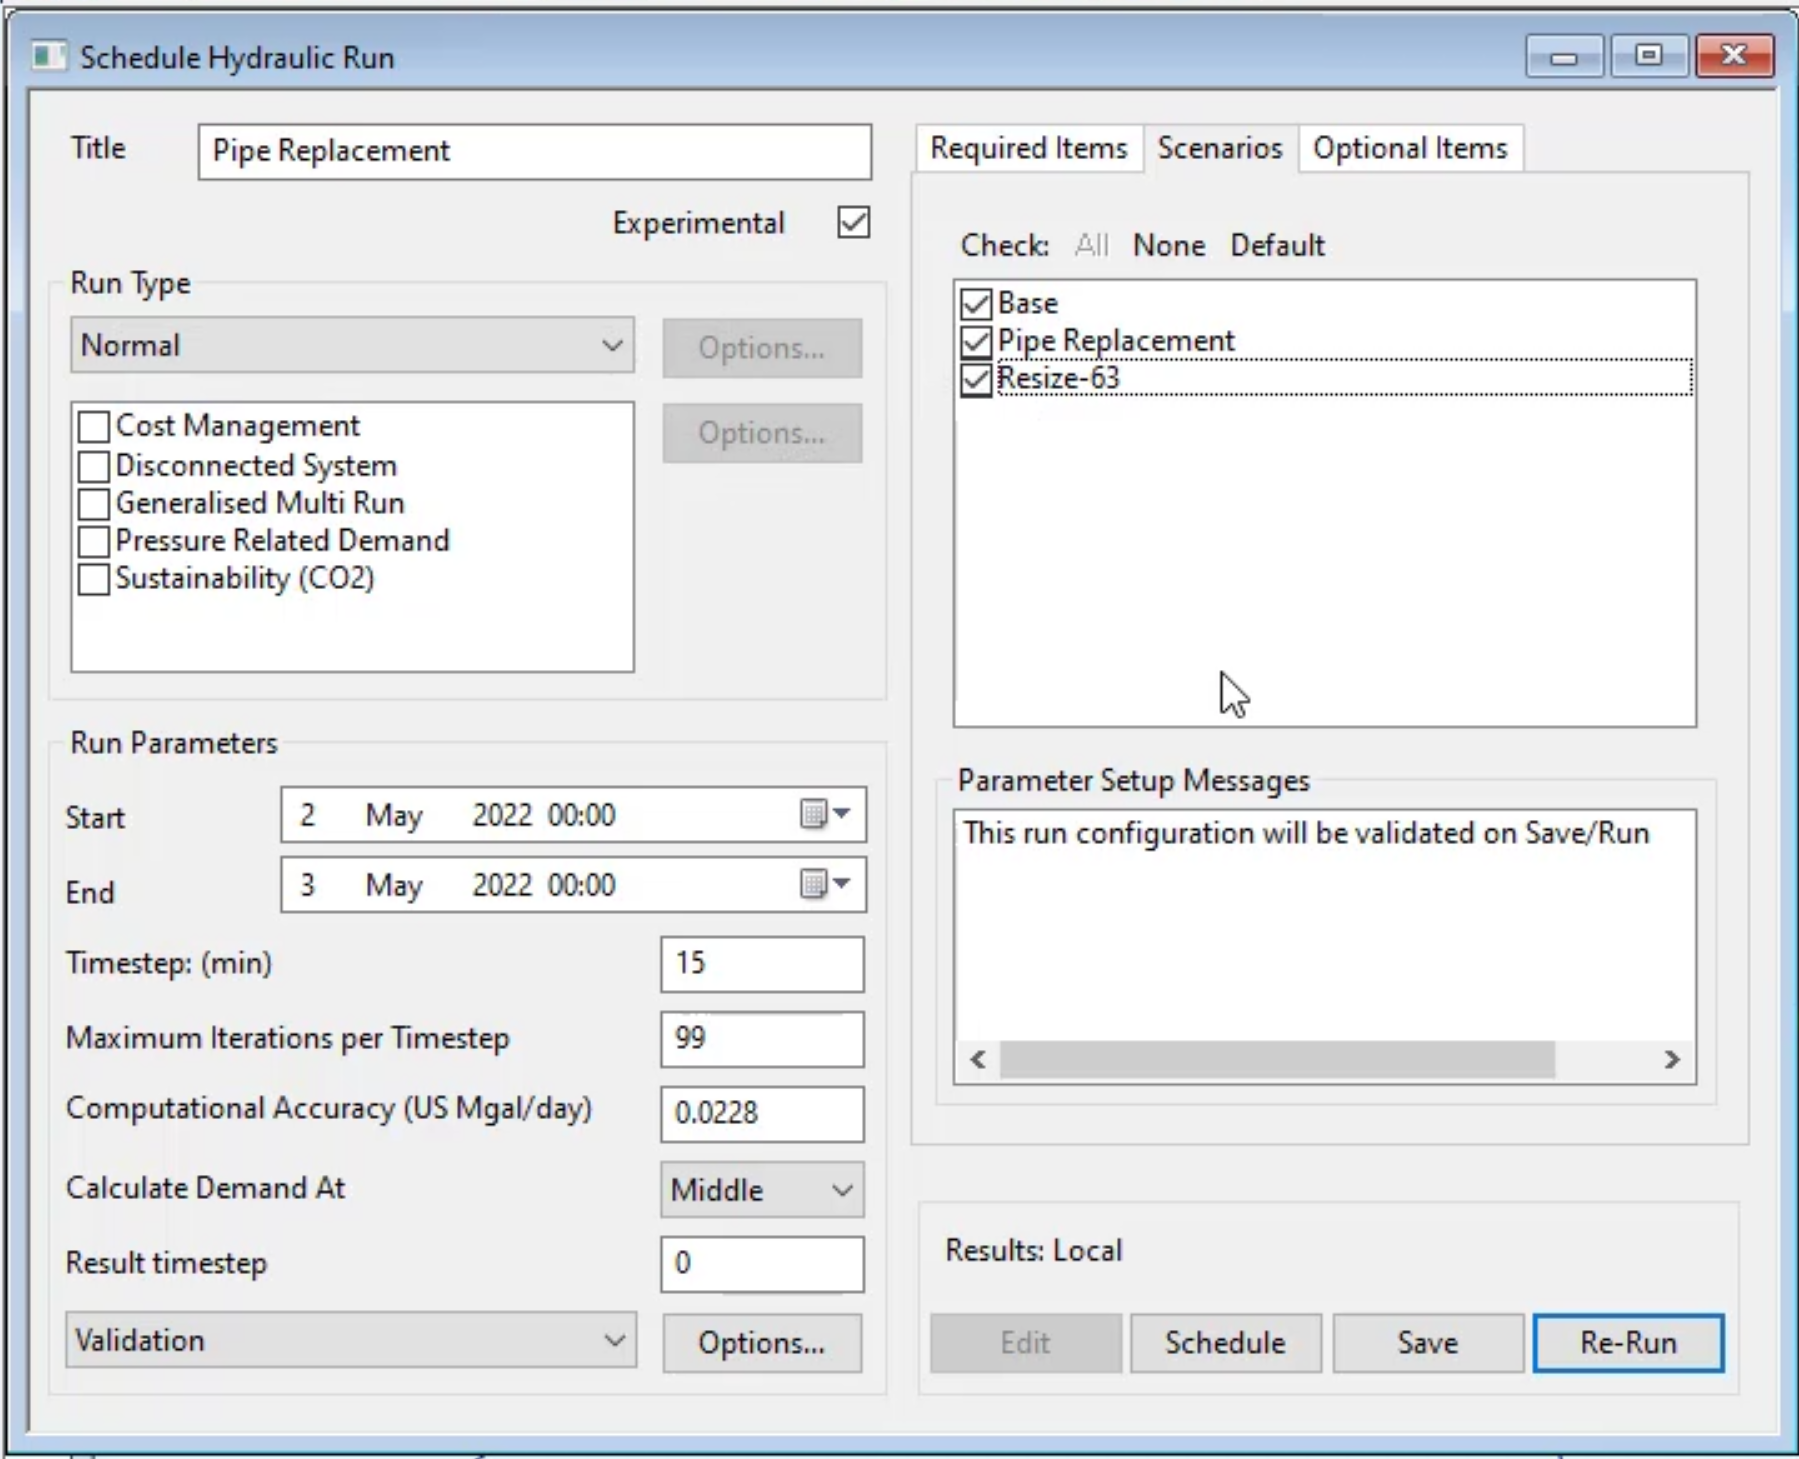
Then click the scenarios tab and check the box next to resize 63
04:02
click save and then rerun,
04:05
click. Yes. In the notification.
04:09
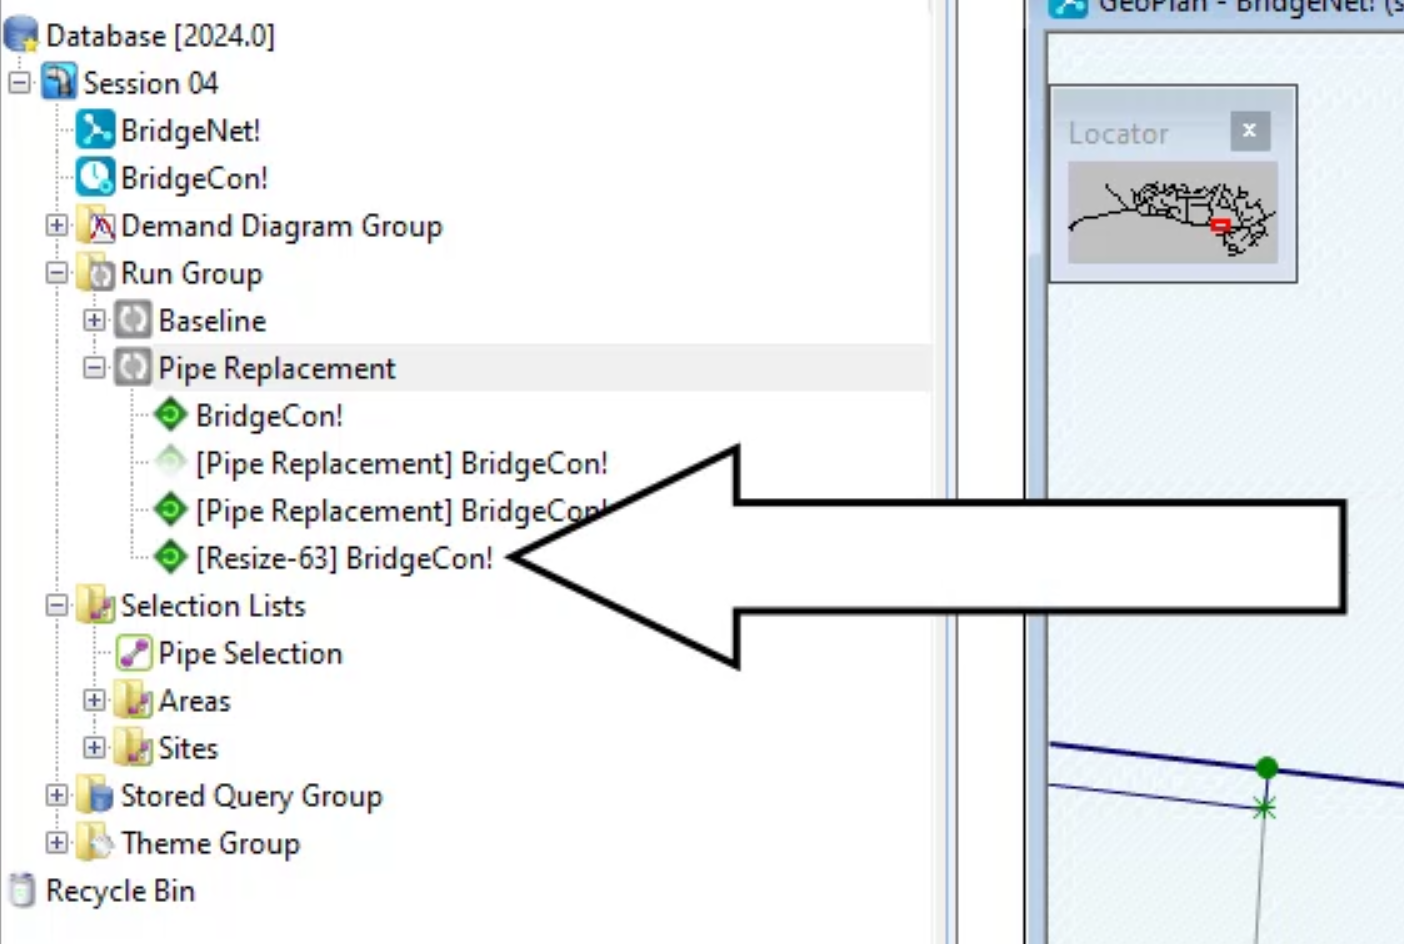
Then in the model group window,
04:11
you can see that the resize 63 scenario has been
04:14
simulated as part of the pipe replacement run group.
04:18
You can now view the results of each scenario
04:20
by clicking and dragging them into the workspace.
04:23
And you can view the graph or grid results of each.