Checking and modifying spaces in a schedule – Exercise
Task 1: Review and delete spaces
- Open the practice file, Small Medical Center-Volumes.rvt.
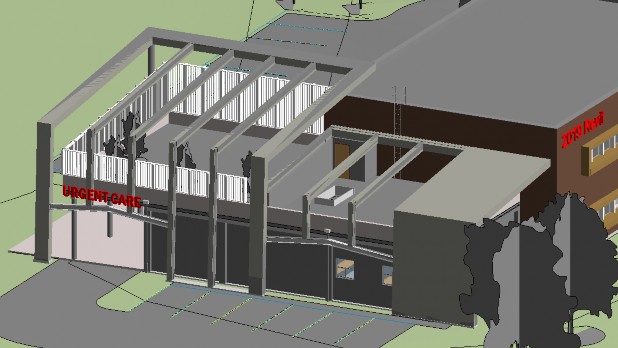
- In the 3D View, rotate around the model to get a sense of the building envelop. Specifically, notice that some spaces on the top of the Urgent Care area are open and setup as a roof top garden and visual covering for outside equipment.
- Open the 01 Ground Floor Space Plan view.
- Open the 02 2nd Floor Space Plan view.
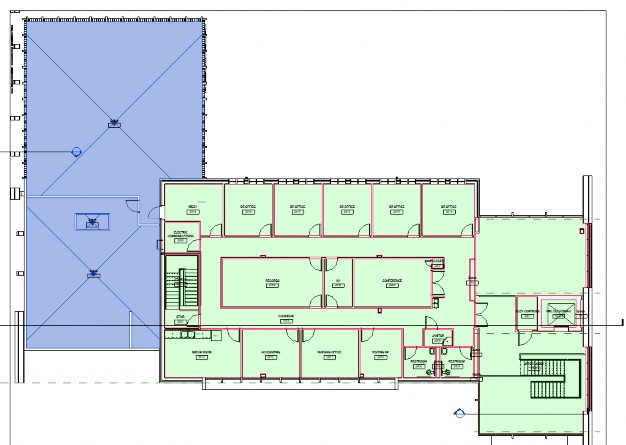
- In the 02 2nd Floor Space Plan view, you can see that spaces were added to these areas when the Place Spaces Automatically tool was use. But they are not needed for analysis.
- Select the unneeded spaces, as shown below, and delete them.
- A warning displays as shown below. Close the warning box.

- Save the project.
- In the Project Browser, in the Schedules/Quantities area, double-click on the Space Schedule to open it.
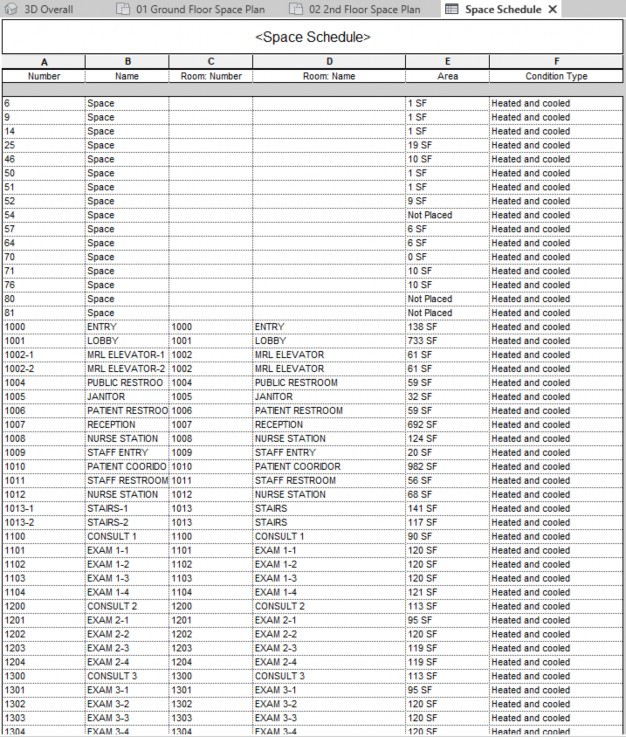
- Scroll down the schedule, as shown below. Notice that there are spaces that have a default name of Space while most of the spaces match the room number and name. You can also see that some spaces are not placed.
- In Modify Schedule/Quantities tab > Not/Placed/Unenclosed panel, click Isolate. The Spaces that are not placed display.
- Select the three spaces and, in the Modify Schedule/Quantities tab> Rows panel click Delete. Then click OK to accept the deletion of the spaces.
- In Modify Schedule/Quantities tab> Not/Placed/Unenclosed panel, click Show so the rest of the spaces are displayed.
- Save the project.
Task 2: Make modifications to chase spaces using the space schedule
Some spaces are not connected to rooms and have very small square footage. This is because they are chases or sliver spaces which are not named by the architect but important when analyzing the model for HVAC projects.
- In the schedule view, in Properties, in the Other area, beside Sorting/Grouping click Edit…
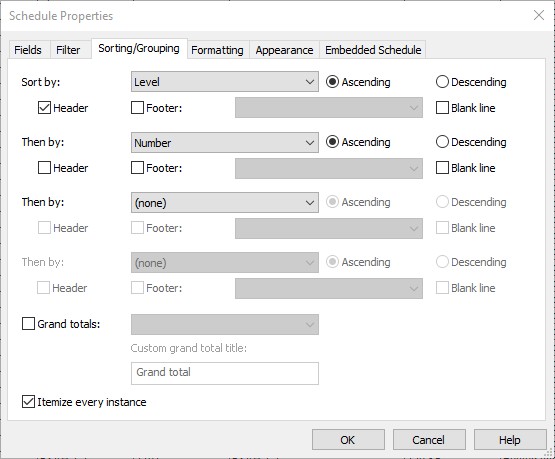
- In the Schedule Properties dialog box, Sorting/Grouping tab set Sort by: Level with a header and Then by: Number, as shown below.
- Click OK and the spaces are divided into GROUND FLOOR and SECOND FLOOR.
- In the GROUND FLOOR Level, select the first small unnamed space. In the Ribbon, click Highlight in Model. The view opens zoomed in on this space as shown below. Close the dialog box.
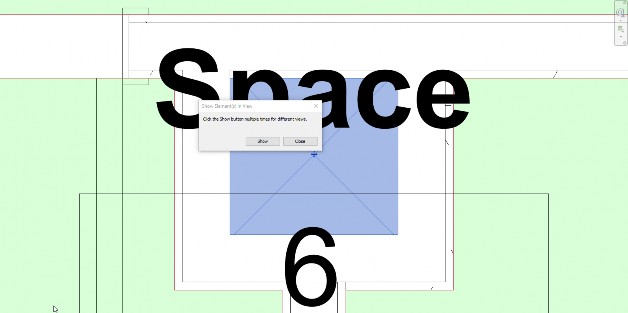
- This space is where a column is but may also be used as a chase. Return to the Space Schedule view.
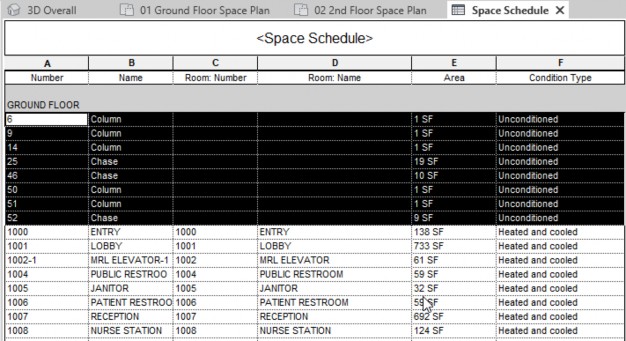
- Rename the spaces that have an Area of 1 SF to Column.
- Rename the other small spaces to Chase.
- Change the Condition Type of these spaces to Unconditioned, as shown below.
- Save the project.
Task 3: Modify the elevator spaces
- In the Space Schedule, notice that there are spaces for 1002-1 MRL ELEVATOR-1 and 1002-2 MRL ELEVATOR-2. These are both in the same general space but on separate floors.
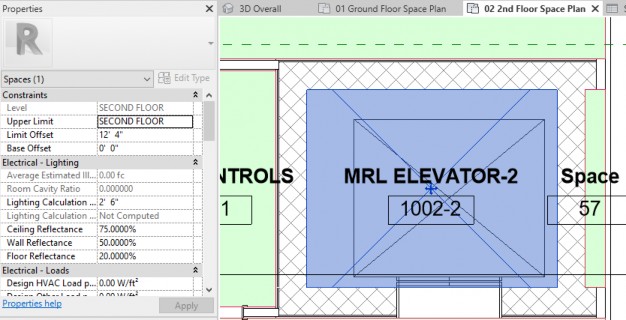
- In the SECOND FLOOR group, select 1002-2 MRL ELEVATOR-2 and highlight it in the model.
- In Properties, you can see that it has a volume – from the Level SECOND FLOOR to the Limit Offset of 12’-4”, as shown below. This was the default height for spaces when they were inserted.
- Switch to the 01 Ground Floor Space Plan view and select the elevator space.
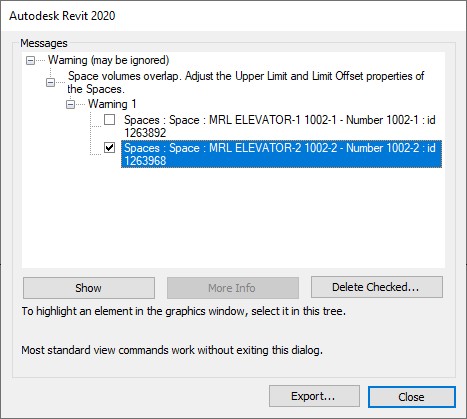
- In Properties, change the Upper Limit to Atrium Roof and set the Limit Offset to 0’-0”. A warning about the Space Volumes overlapping displays, as shown below.
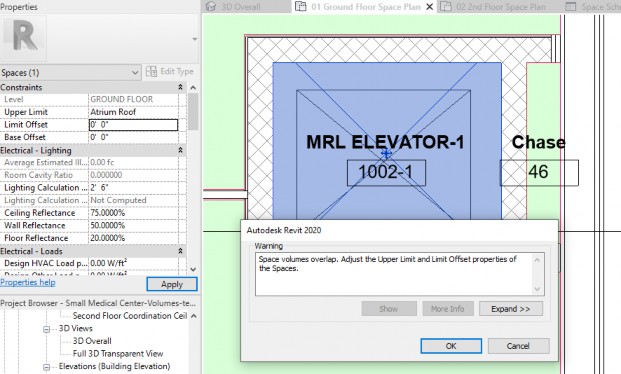
- Click OK to exit the dialog box.
- While the space is still selected, in the Ribbon, click Show Related Warnings.
- In the dialog box, expand and read the warnings. Select the MRL ELEVATOR-2 1002-2 spaces, as shown below, and click Delete Checked… and close the warning dialog box.
- Switch to the 02 2nd Floor Space Plan view. The ground floor elevator space should still be selected.
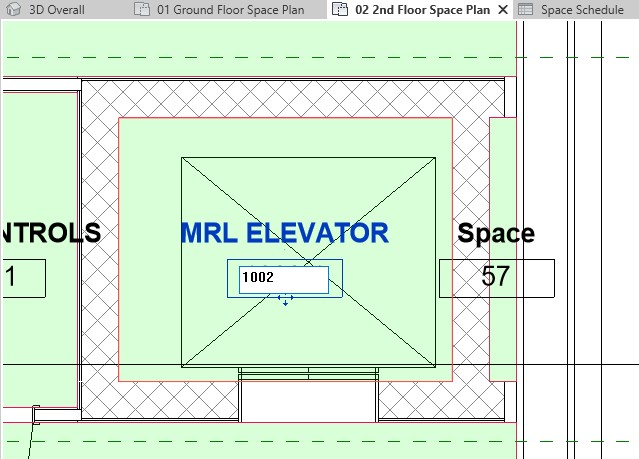
- In the Analyze tab > Spaces & Zones panel, click Space Tag. Place the tag and click Modify to end the command.
- Select the space tag and rename the space and space number, as shown below.
- Return to the space schedule. You can see that the elevator name and number is correct, as shown below.
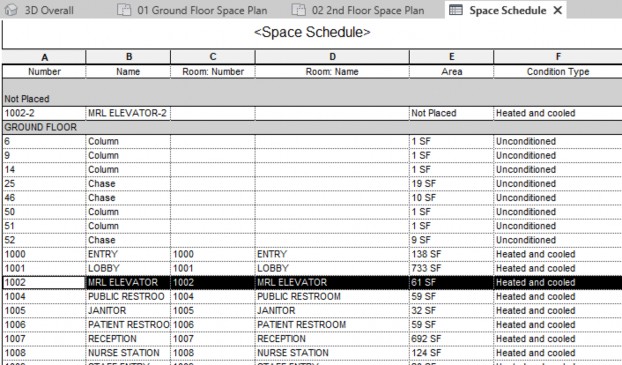
- Delete the 1002-2 MRL ELEVATOR-2 space that is no longer placed.
- Review other spaces and make changes as needed using the Space Schedule as an aid.
- Save the project.


