00:02
Now we're going to learn how to view, create and edit roles in Fusion 360 Manage.
00:08
When creating roles, associated permissions and workspaces are selected for the role.
00:15
Many roles are provided with your Fusion 360 Manage tenant as shown here.
00:20
Note the names, descriptions and associated workspaces to each role.
00:24
As we learned, the roles are a collection of permissions that determine what you can do in a workspace.
00:30
The naming scheme of the default workspace roles distinguishes between read-write permissions
00:36
from read only permissions and as an example, the change request,
00:40
R/W role is for managing change requests.
00:45
The steps on how to create a role and assign permissions are, on the Security page, click New Role,
00:51
enter the name of the role, its description if you like, and the workspace associated to the role.
00:56
Some tips when creating new workspaces include creating two permission roles for each workspace
01:02
to separate read-write permission functionality from read only permission functionality.
01:07
As an example for a new workspace called Design Review - Supplier,
01:12
you might create two new roles,
01:14
one named Design Reviews - Supplier [R/W] and the second named Design Review Supplier [R].
01:22
When working with workflows, you might also create a role for each use case in a workspace
01:28
to separate out workflow functionality and associated permissions.
01:33
Step number three, click the Create Role and Add Permissions button to display the permissions page.
01:40
Step four is to apply the permissions required for the role
01:44
by selecting permissions on the left and selecting the right arrow to
01:48
move it to the list of permissions included on the right.
01:52
When rolling over each permission, a tooltip displays, providing you a description of the permission.
01:58
Click Save to save the role with his permissions defined.
02:03
If you need to modify the role, first select the roles tab,
02:07
then select one of the following links for the role you would like to modify.
02:11
Edit allows you to change name and description and workspace,
02:15
shown here is an example of the name being changed and Delete, deletes the role.
02:21
Selecting the Groups link allows you to make changes to the list of groups associated with that role
02:26
by using the right and left arrows to add and remove groups.
02:30
And the last one is permissions.
02:31
By selecting the Permissions link, you can modify the permissions associated with that role
02:37
by adding or removing permissions again by using the right and left arrow buttons.
02:44
Next in the workflow is how to view, create and edit groups in Fusion 360 Manage.
02:51
When creating groups, let's keep in mind that collections of roles and users are associated to groups.
02:58
there are many groups that are provided with your default Fusion 360 Manage tenant.
03:03
As we learned groups consist of collections of users and collections of roles.
03:08
Here we see the groups provided in the default tenant
03:11
such as the Admin Group and groups for the various departments
03:15
such as Engineering, Manufacturing, Operations, Procurement and more.
03:20
The steps on how to create a group are, on the Security page, click New Group,
03:25
enter the name of the group, its description if you like and the Group IP Access.
03:30
To complete the creation, you can either click Create Groups,
03:34
Create and Add Users or Create and Add Roles.
03:39
If you need to modify the group, first select the Groups tab,
03:42
then select one of the following links for the group you would like to modify.
03:47
Edit allows you to change name, description or group IP access option and Delete, deletes the group.
03:54
Users allows you to edit the list of users that are members of the group
03:58
and Roles allows you to edit the list of roles that are associated to the group.
04:06
The next topic in the workflow.
04:08
Now that we've seen how to manage roles and groups
04:11
is learning how to create a new user and assign them to a group or groups.
04:17
As we learned earlier, all users must belong to at least one group
04:21
even if it's a group of one.
04:23
To create a new user, click New User from Security page
04:27
enter values for the First name, Last name and Email.
04:31
Step three for License Type, select either Participant or Professional
04:37
and step four, leave the Account Status as Active.
04:40
If a user needs to be disabled, you can set the account status to either Inactive or Deleted.
04:47
Step number five, set the Time Zone, Unit of Measure Preference,
04:52
show thumbnails for attachments, Interface Style is Modern.
04:56
In step six you can either select Create User or Create and Add To Groups.
05:03
We recommend using the Create and Add To Groups options
05:06
since you will need to add the user to a group or groups.
05:10
Step seven click Yes to notify the user,
05:12
the user will receive a welcome email with a link to log into Fusion 360 Manage.
05:18
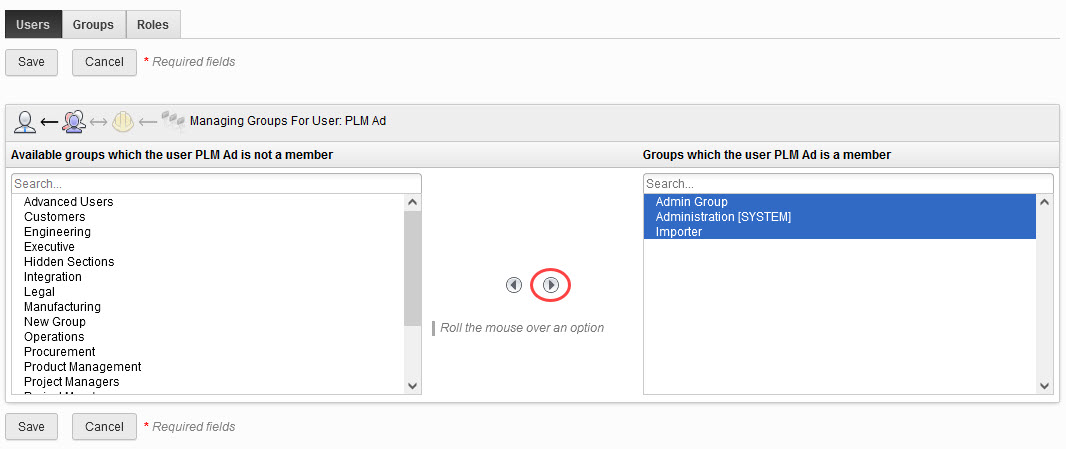
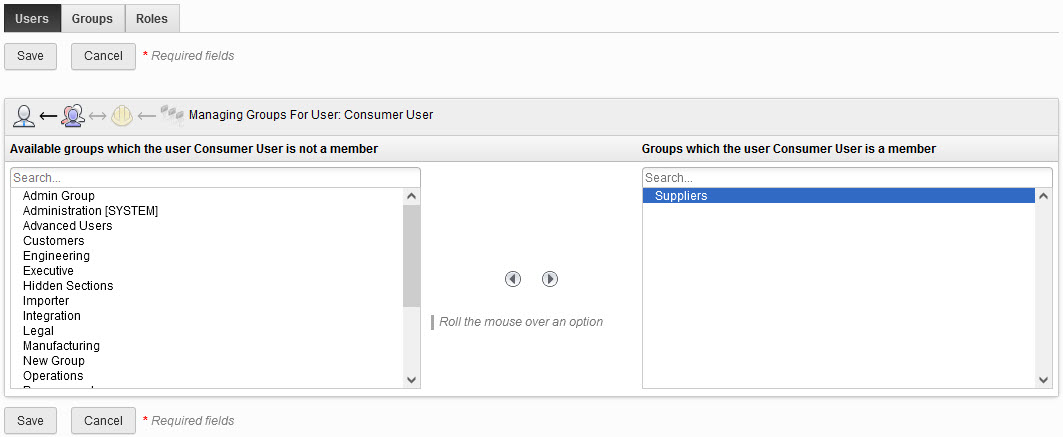
Step eight, since you selected create and add to groups,
05:22
select the groups for the user by selecting the desired groups on the left
05:26
and then the right arrow moves them to the right.
05:30
Click Save when done.
05:33
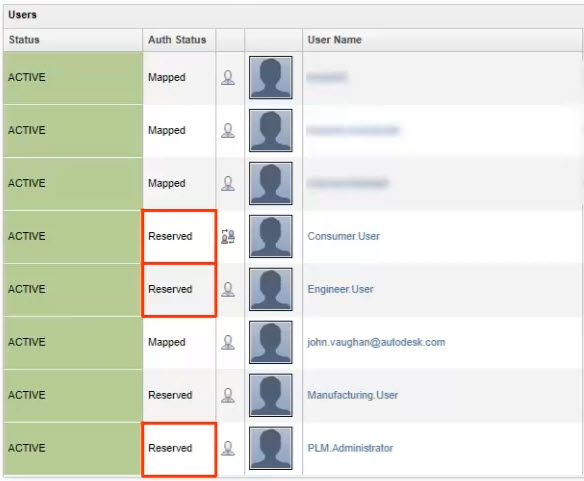
Note that a new user's Auth status is set to Reserved and after the users first log in
05:39
the Auth status changes to mapped.
05:41
Note that it is now possible to enforce two factor authentication for all site users.
05:48
One of the first things you'll want to do when you get access to your tenant is create new users.
05:53
In this demonstration we'll create three new users, the first being another admin user,
05:58
the second an engineering user and the third a consumer user.
06:02
Shown here are the three users after they have been created for your reference.
06:07
note that we have already created email addresses and Autodesk accounts for the three users.
06:12
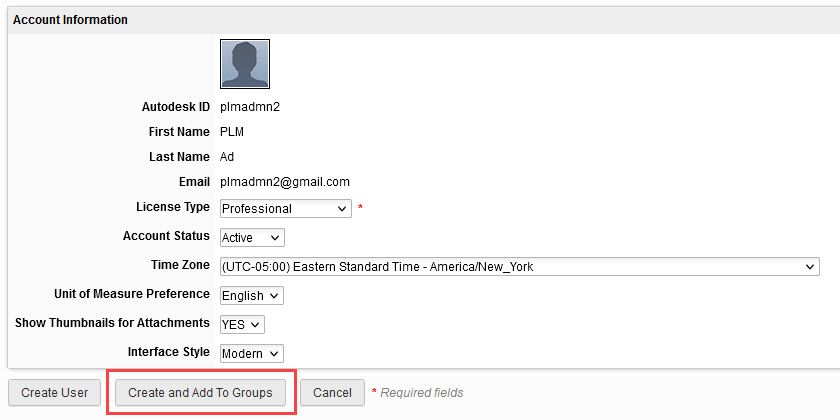
To create a new admin user, click the New User icon and fill in the first name,
06:18
last name and email address.
06:22
For the License Type, select Professional.
06:25
Now we select a time zone such as Eastern Standard time
06:32
and select Modern for the Interface Style.
06:36
Once finished, select the Create and Add To Groups button
06:39
and select Yes to notify the user about their account.
06:42
For this admin user, we assign the three groups shown
06:46
and select Save to complete the process.
06:49
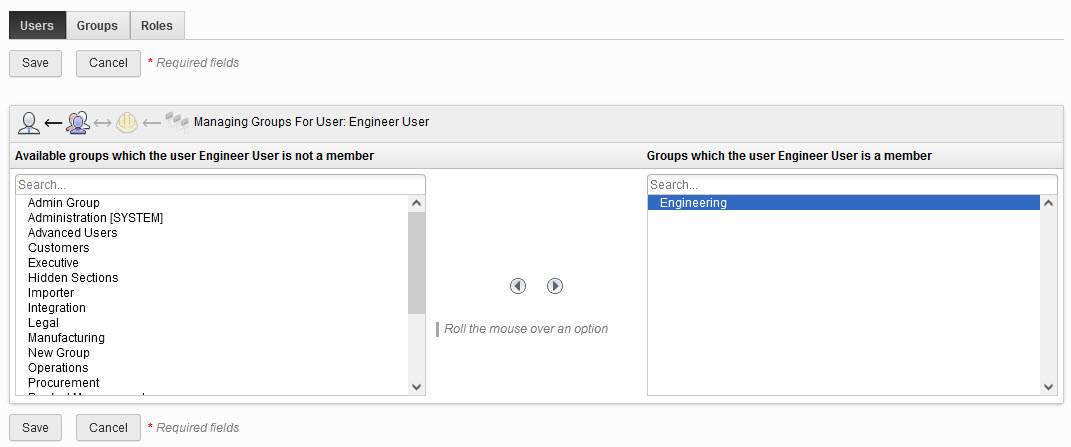
Now we'll create an engineering user using the same process
06:52
but will assign the user to a different group.
06:57
We select Professional as the License Type again,
07:01
select the Time Zone and Interface Style.
07:06
For this user will assign it to be a member of the Engineering group.
07:19
Lastly, we'll create a consumer user using the same process.
07:23
However, it will have a License Type as Participant.
07:30
Again, specify the Ttime Zone and Interface Style.
07:34
Note that you could also specify the Unit of Measure Preference.
07:41
Its group in this case will be the Suppliers group.
07:48
After saving, notice that the three new users have an Auth status of reserved until the users log in.
07:59
For each user, we selected yes to notify the user of their account by email.
08:04
Let's take a look at an example of the email that has received.
08:08
This is called the welcome email and contains a link to log into Fusion 360 Manage.
08:15
I will log in as the new consumer user.
08:20
We'll enter the email address.
08:30
Select Stay signed in
08:34
and click SIGN IN to sign in.
08:37
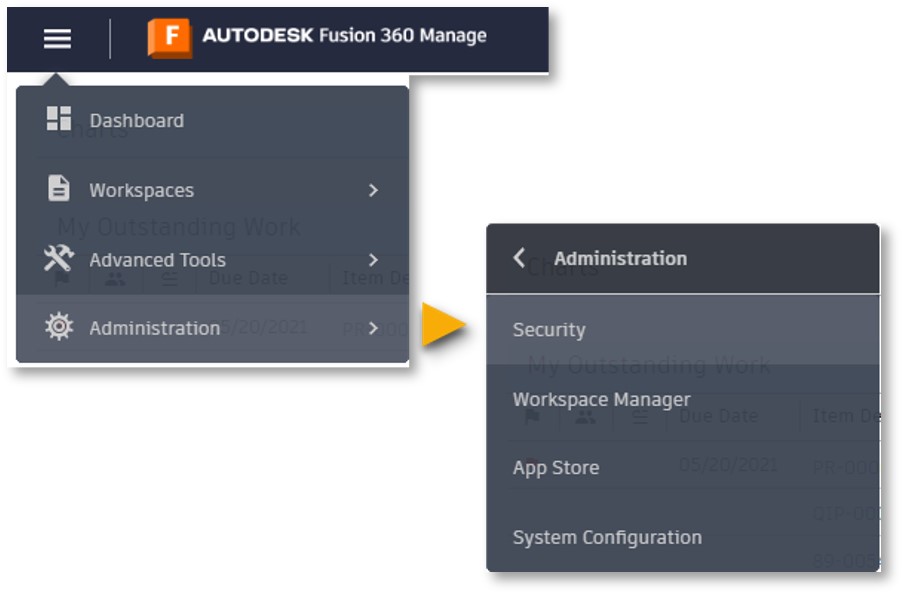
Note that this user does not have access to an Administration menu.
08:45
Here we see the workspaces that this user has access to as a member of the suppliers group,
08:50
such as a Design Review Supplier workspace and Supply Chain related workspaces.
08:60
And if we switch back to look at the list of users,
09:02
we now see that the consumer user says Mapped after the consumer user logged in.
09:08
Next we'll log in as the new engineering user.
09:11
Here we also see that the user does not have the Administration menu
09:17
and it has access to a different set of workspaces.
09:25
Finally, we'll log in as the new admin user and see that it has the Administration menu.
09:34
When we look at the list of users, we see that the new users we created
09:39
now all show Mapped for Auth status.