00:01
MARTHA HOLLOWELL ORCUTT: Working with Interference Checking
00:05
In this video, we're going to use the Interference Checking
00:08
tool to do a quick review of ducts and pipes
00:11
that are running in tight spaces in the project
00:14
so that we can make changes at an early stage in the project.
00:18
The built-in Revit Interface Checking
00:20
complements other solutions, such as the Clash Detective
00:24
in Navisworks, which is more flexible,
00:26
and BIM 360 Coordination, which is more automatic.
00:30
The advantage of Revit Interface Check
00:33
is that it runs directly on the design model, which
00:36
means issues can be found and resolved within the same tool.
00:43
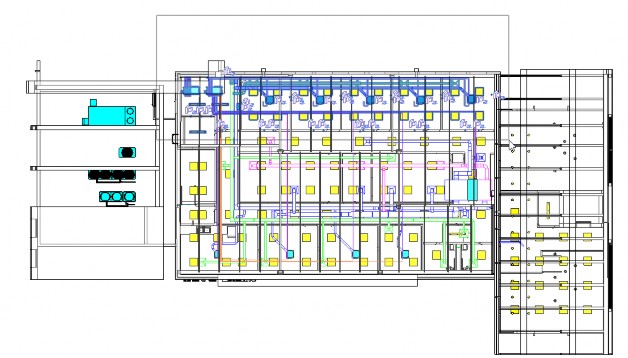
I'm working in the small medical center building.
00:46
And you can see that there are plenty of pipes and ducts
00:49
just showing in this 3D HVAC view.
00:54
I'm opening the 3D Ground Level Coordination view,
00:58
and you can see that lights are visible,
01:00
as are pipes for plumbing.
01:03
This is a 3D View shown in Top View mode,
01:06
but you can also rotate this view.
01:10
I'm also going to open the 3D Second Floor Coordination view.
01:15
Having these views open will help us discover
01:18
the location of interferences.
01:21
In the Collaborate tab on the Coordinate panel,
01:25
I'm going to expand Interference Check and select
01:29
Run Interference Check.
01:32
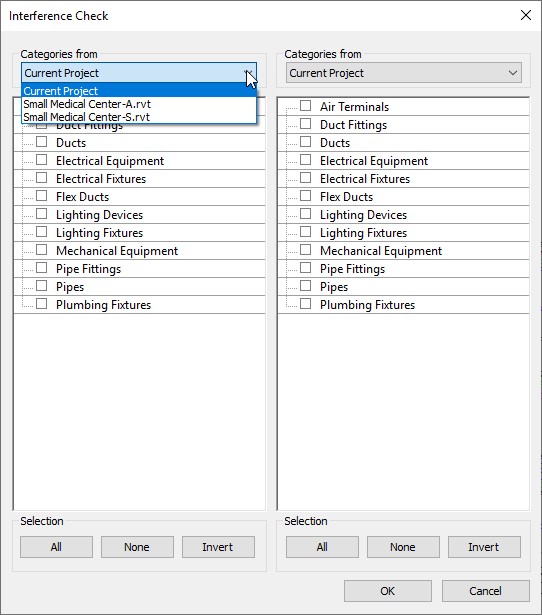
In the Interference Check dialog box,
01:34
I can select from the current project or the linked
01:38
architectural or structural file instead.
01:42
Then, I'm going to select the categories
01:44
that I want to review.
01:48
It's good practice to first make sure your own services are
01:52
clash free before checking it against another discipline.
01:56
Then, you're going to want to check for important clashes,
01:59
such as drainage pipes and foundations,
02:02
which are among the first things built,
02:04
and they cannot be easily resolved on site,
02:07
unlike a pressure pipe that can be routed over an obstacle.
02:12
And of course, you want to make sure there
02:13
are no clashes with the building structure,
02:16
so contractors won't drill holes through the beams.
02:20
Instead of running an Interference Check
02:23
on the full model, I'm going to cancel out of this dialog box,
02:27
and then try another way.
02:31
To limit the number of interferences,
02:33
I'm going to select elements before running Interference
02:38
So in the Second Floor Coordination view,
02:40
I selected some of the elements on the back of the building,
02:43
and then I'm running the Interference Check.
02:49
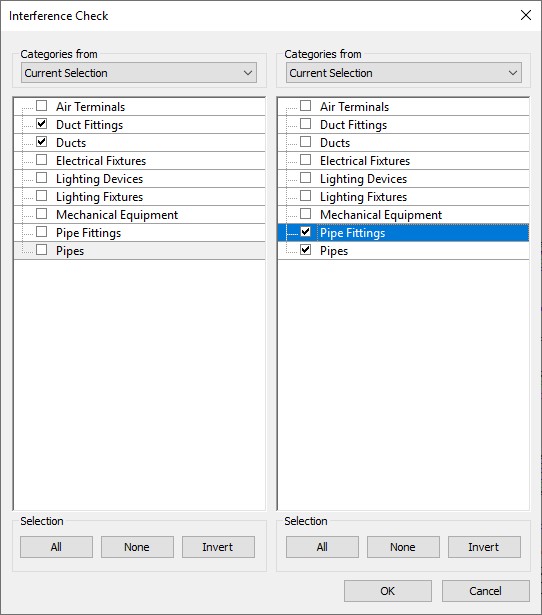
In the Interference Check dialog box,
02:51
I now need to specify which elements I want to check.
02:55
In this case, I'm going to check the ducts and duct
02:58
fittings against pipes and pipe fittings.
03:06
And let's see what happens when I click OK.
03:15
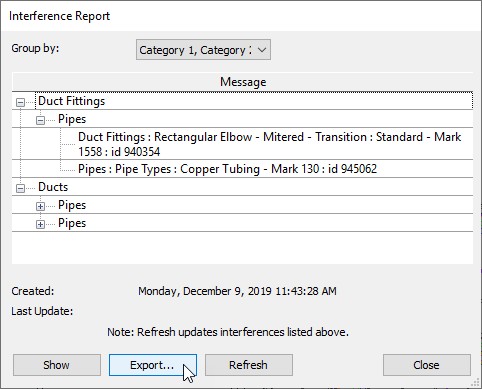
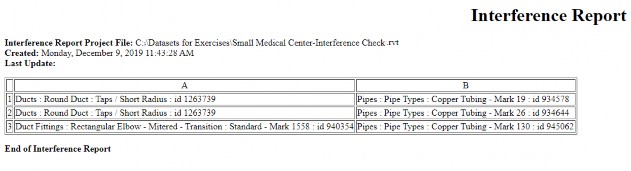
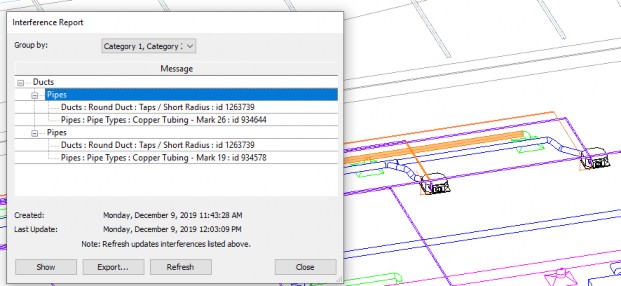
The Interference Report displays with just a few issues.
03:19
First, I'm going to select the Export button
03:22
and create an HTML file that I could share with other users,
03:28
and then I'm going to close the dialog box.
03:33
I've opened the Interference Report,
03:35
and you can see that the three interferences are listed along
03:39
with the element ID for each.
03:41
So if you pass this file along to other disciplines,
03:45
they can use the element ID number
03:47
to find the elements in the project using the Select
03:50
Elements by ID tool.
03:53
But for right now, I'm going to flip back to the project
03:56
and use other options in this case.
04:00
So I'm going to go to the Interference Check.
04:02
And I can click Show Last Report to return to my Interference
04:11
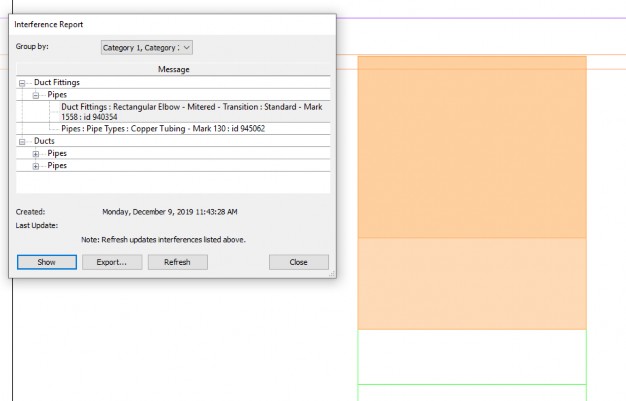
The Interference Report displays with just a few issues.
04:15
I can expand them to see what the interferences are,
04:19
but I don't really know where they are.
04:23
So I'm going to select one of the elements in the list
04:26
and click the Show button to see where they are interfering.
04:37
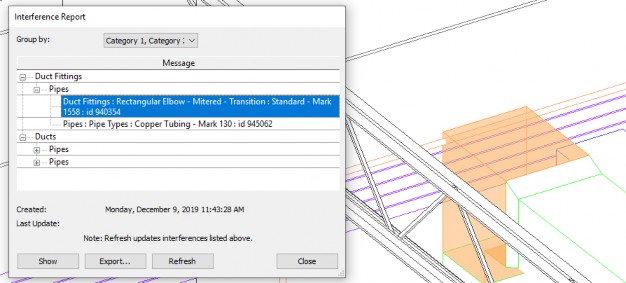
So I need to zoom out a little to see
04:39
where I am in the project and what the issue is.
04:43
In this case, it's a pipe running through a duct fitting.
04:48
This needs to be corrected.
04:50
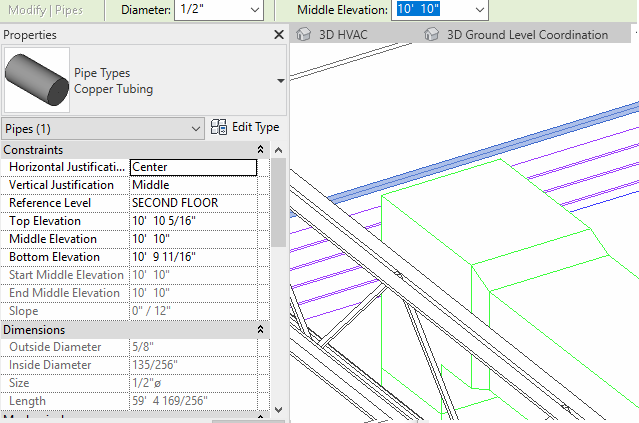
I can do this with the Interference Report dialog
04:56
I'm going to change the Middle Elevation to 10 foot 10.
04:60
That gets me over the duct fitting.
05:02
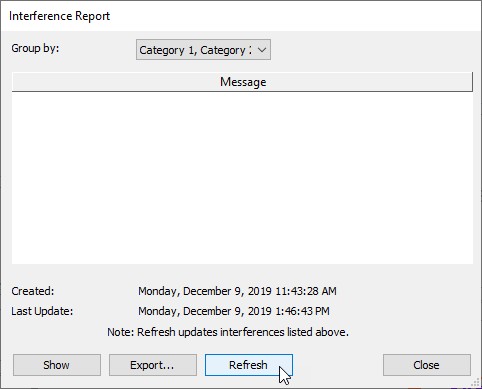
Now in the Interference Report dialog box, I click Refresh,
05:07
and you can see that that report updates.
05:12
Let's try another one.
05:15
In the next two cases, when I click Show,
05:19
you can see that we have a duct, and then there
05:23
are pipes overlapping them.
05:28
When I select the other one, it's
05:29
the same duct but a different pipe.
05:33
I recognize that these pipes are part
05:36
of a group of parallel pipes, and I need
05:39
to be careful how I fix these.
05:43
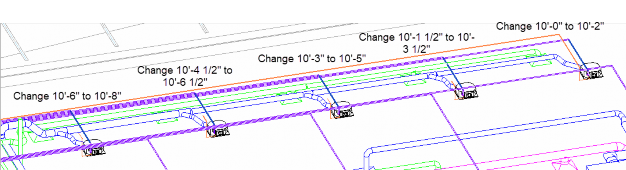
So here are the group of parallel pipes.
05:48
Each of these are part of the system,
05:52
and then these two right here are the ones
05:55
that I need to make a modification to.
05:58
But to do that, I'm going to start at this end
06:01
This is the highest at the moment.
06:03
Let me get that out of the way.
06:05
And so now, I'm going to change the height of this
06:08
from 10 foot 6 to 10 foot 8.
06:10
That's going to raise up--
06:12
I'm going to raise up my entire set of pipes two inches.
06:16
So I'm going to change this one now from 4 and 1/2 inches--
06:24
and I'm going to continue down the line.
06:30
This one we're going to make
06:37
And finally, I'm going to raise this one, even though it
06:40
didn't need it, but to keep it together, 10 foot 2 inches.
06:45
And now, when I come back in here and click Refresh,
06:49
you can see that cleaned up the interferences.
06:53
Now with all the interference corrected,
06:55
I can close the dialog box.
06:58
Fixing all these interferences now
07:01
while you're still in design development
07:03
will save a lot of time when it comes
07:05
to constructing the building.