Step-by-step guide
Define bidirectional associativity. Work with multiple views. Switch and tile views. Constrain walls to levels.
- Continue using the project you started in Part 2 of the example.
- In the Project Browser, under Elevations, double-click South to open the view.
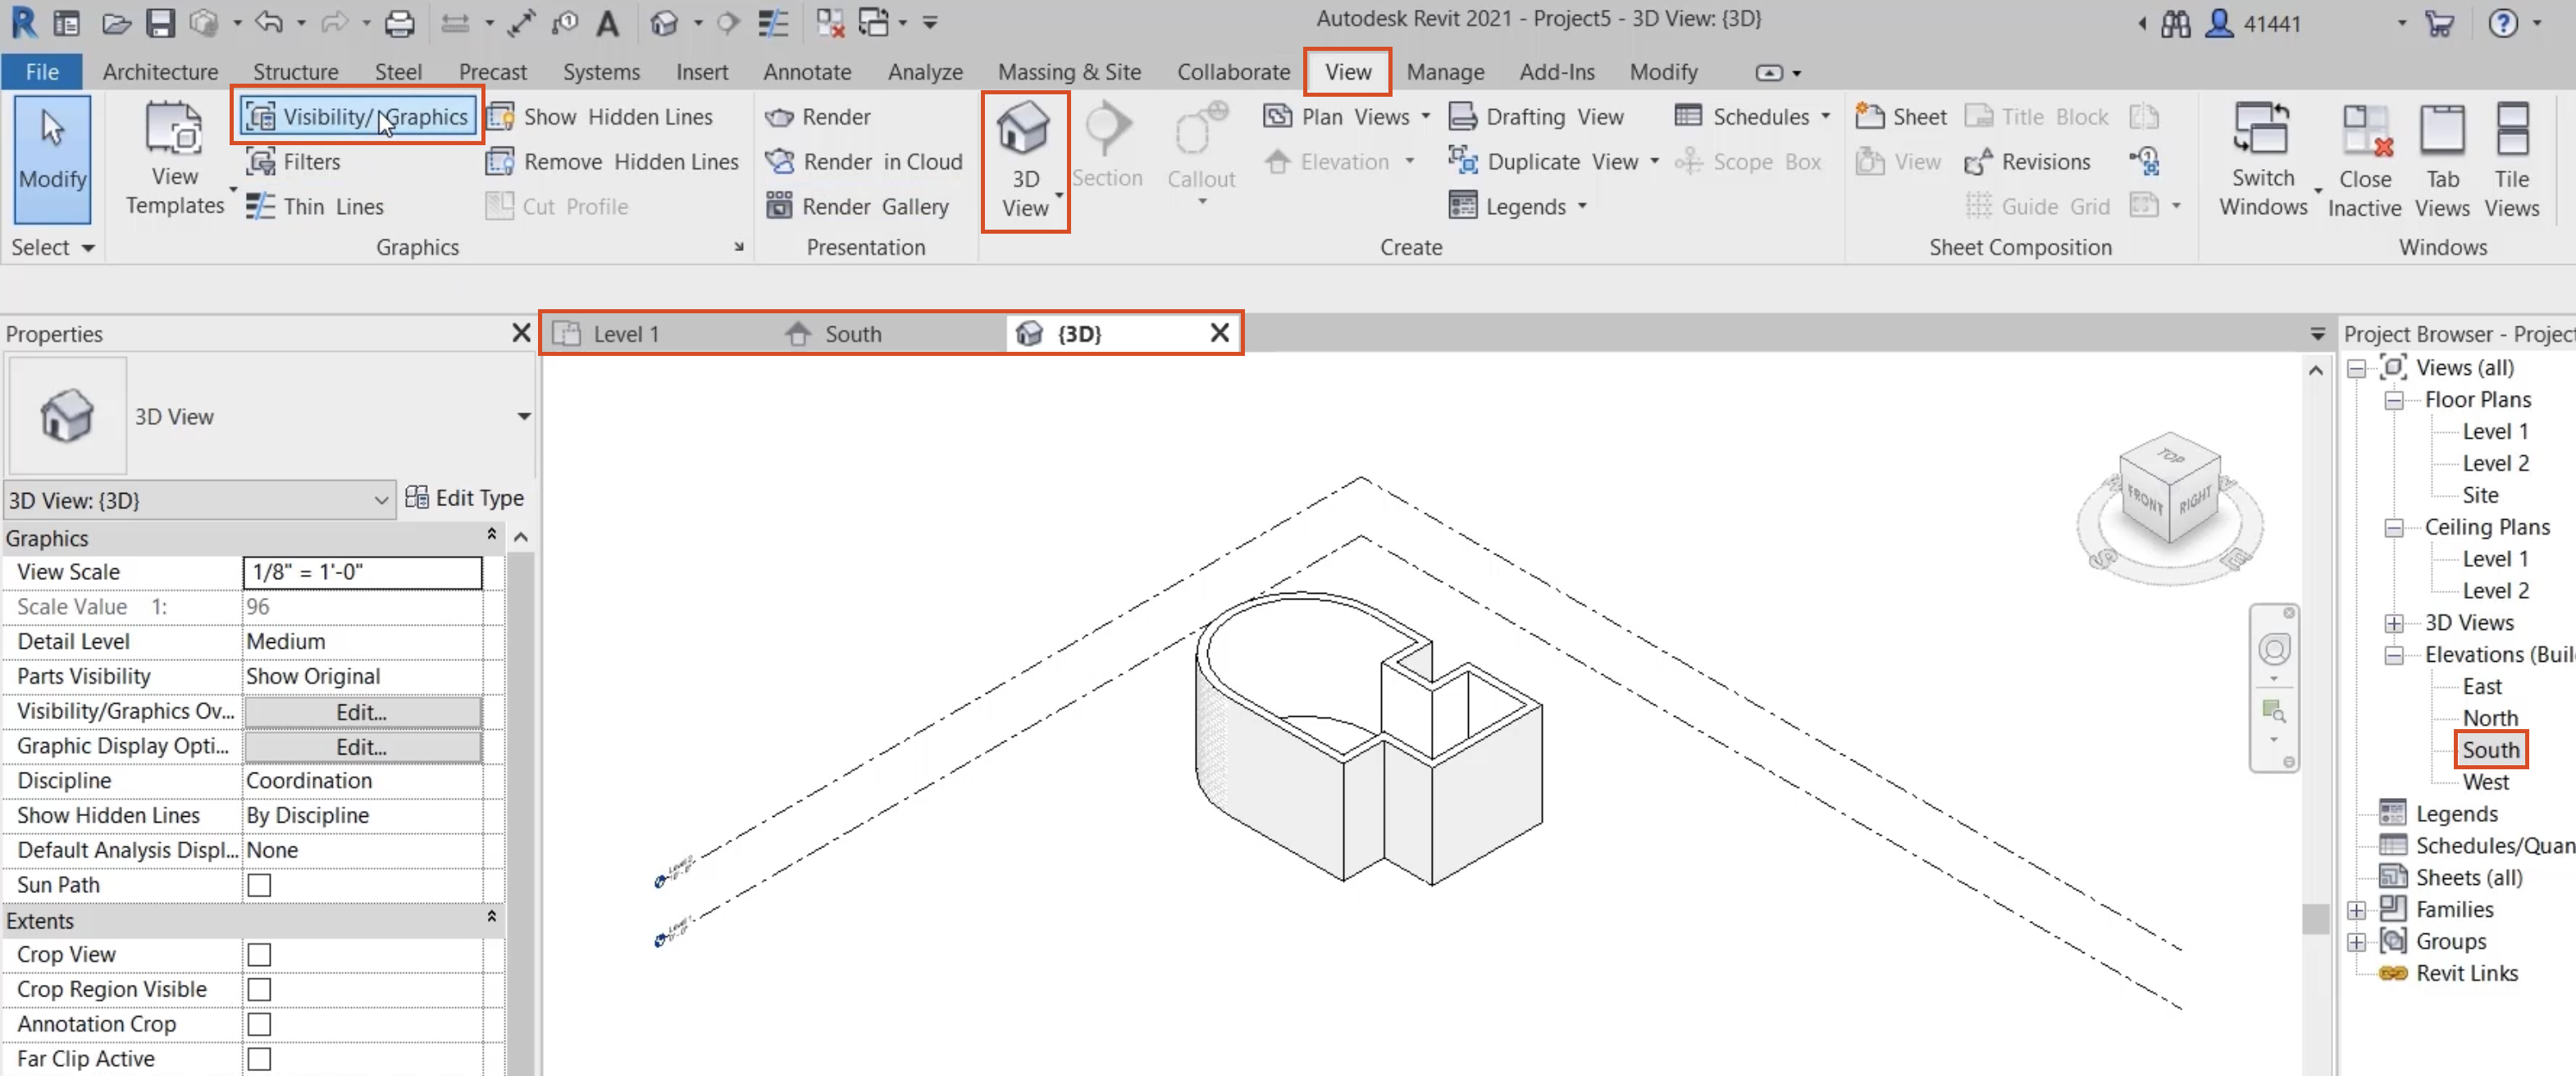
- In the View tab, Create panel, click 3D View.
To remove the level lines from the 3D view:
- In the Graphics panel click Visibility/Graphics.
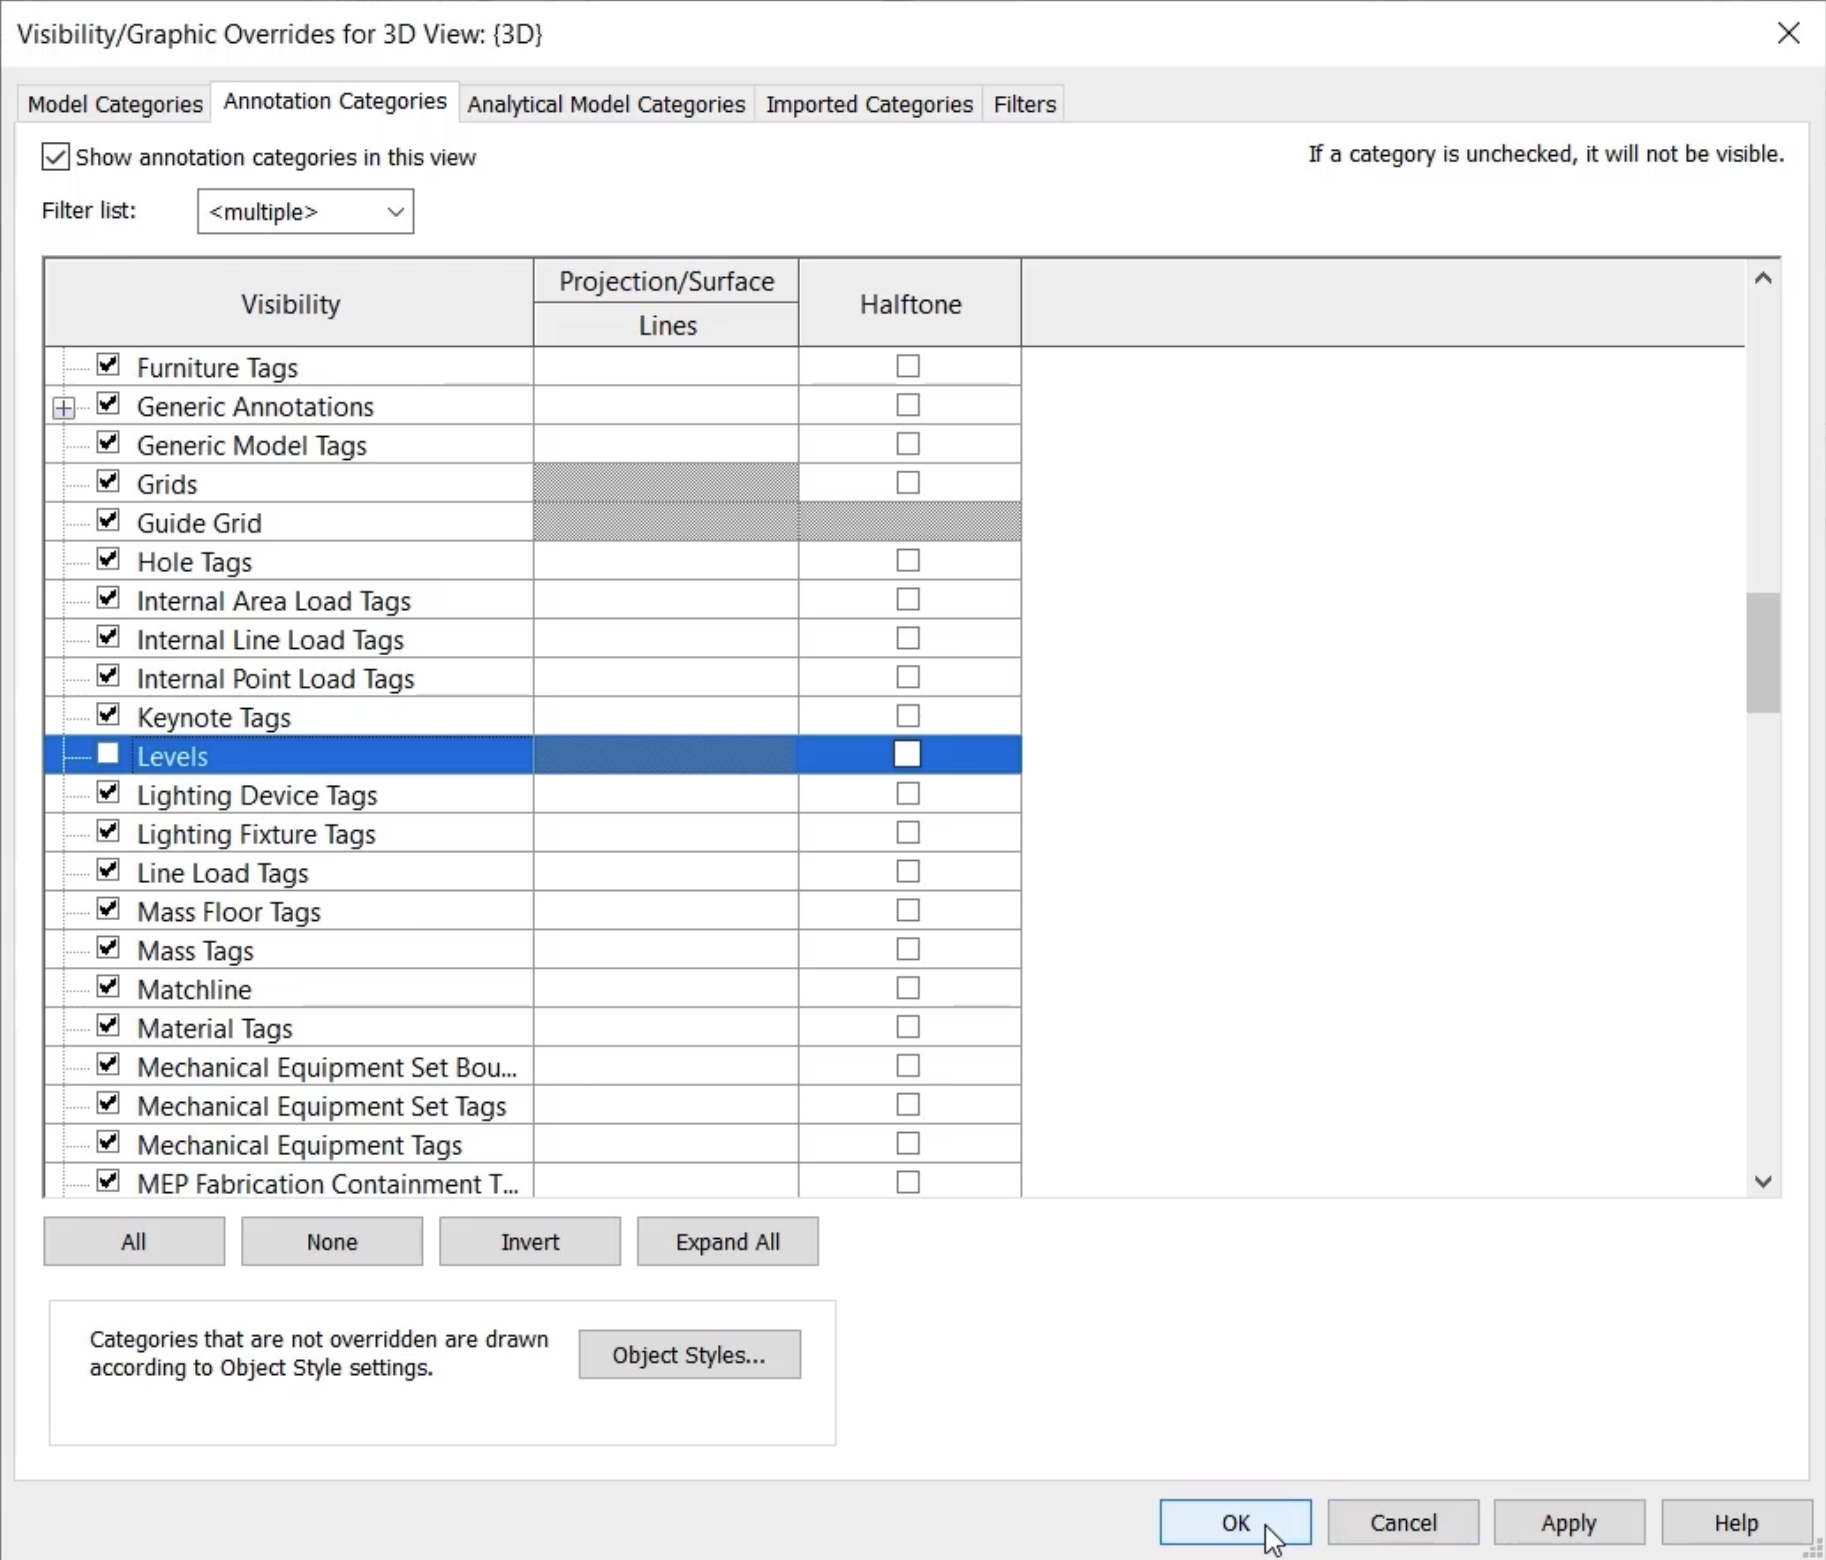
- In the Visibility/Graphic Overrides dialog box, Annotation Categories tab, scroll down and deselect Levels.
- Click OK.
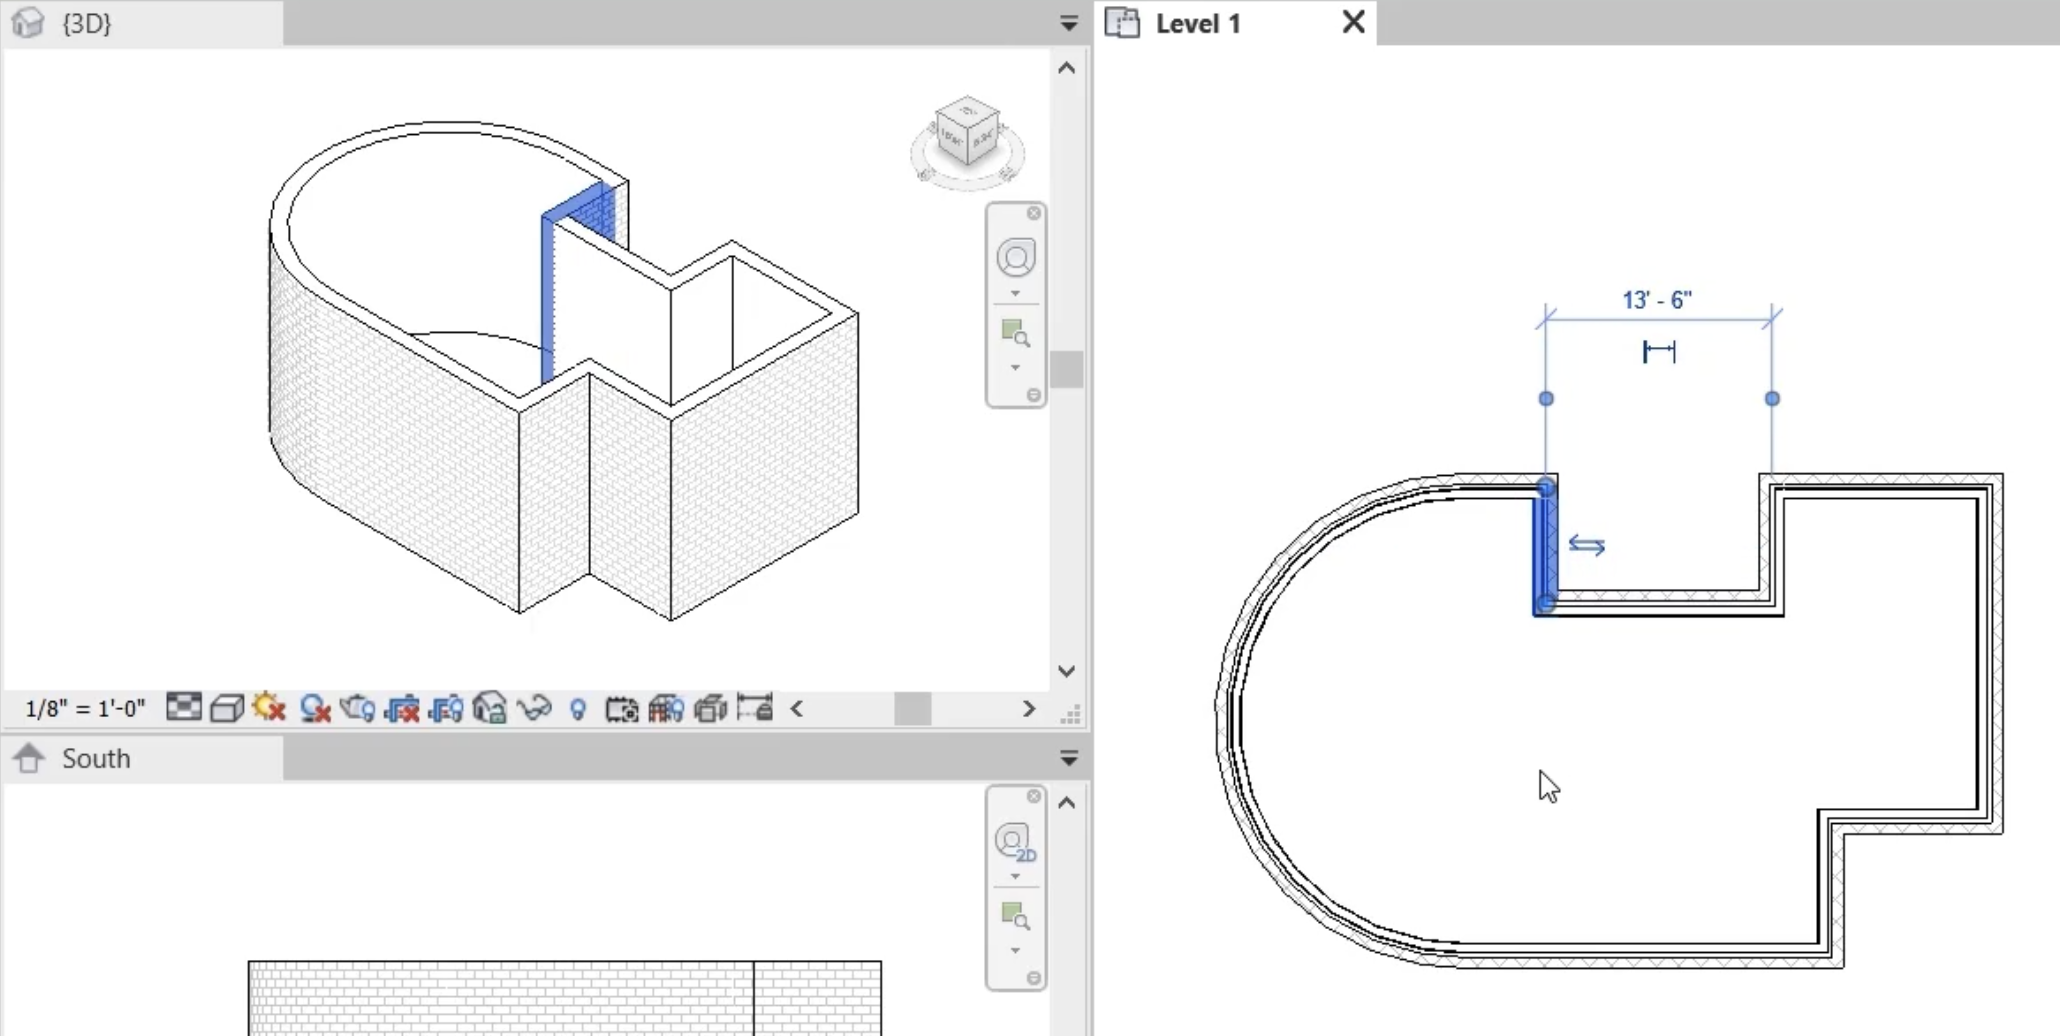
To adjust the display of the 3 open views:
- In the Windows panel, click Tile Views.
- Press ZA to Zoom All to Fit.
- Zoom into each view, as needed.
To demonstrate bidirectional associativity, make some edits:
- In the Level 1 plan view, select a wall, noticing its selection in the 3D view.
- Move the wall in the plan view, and it also moves in the 3D view.
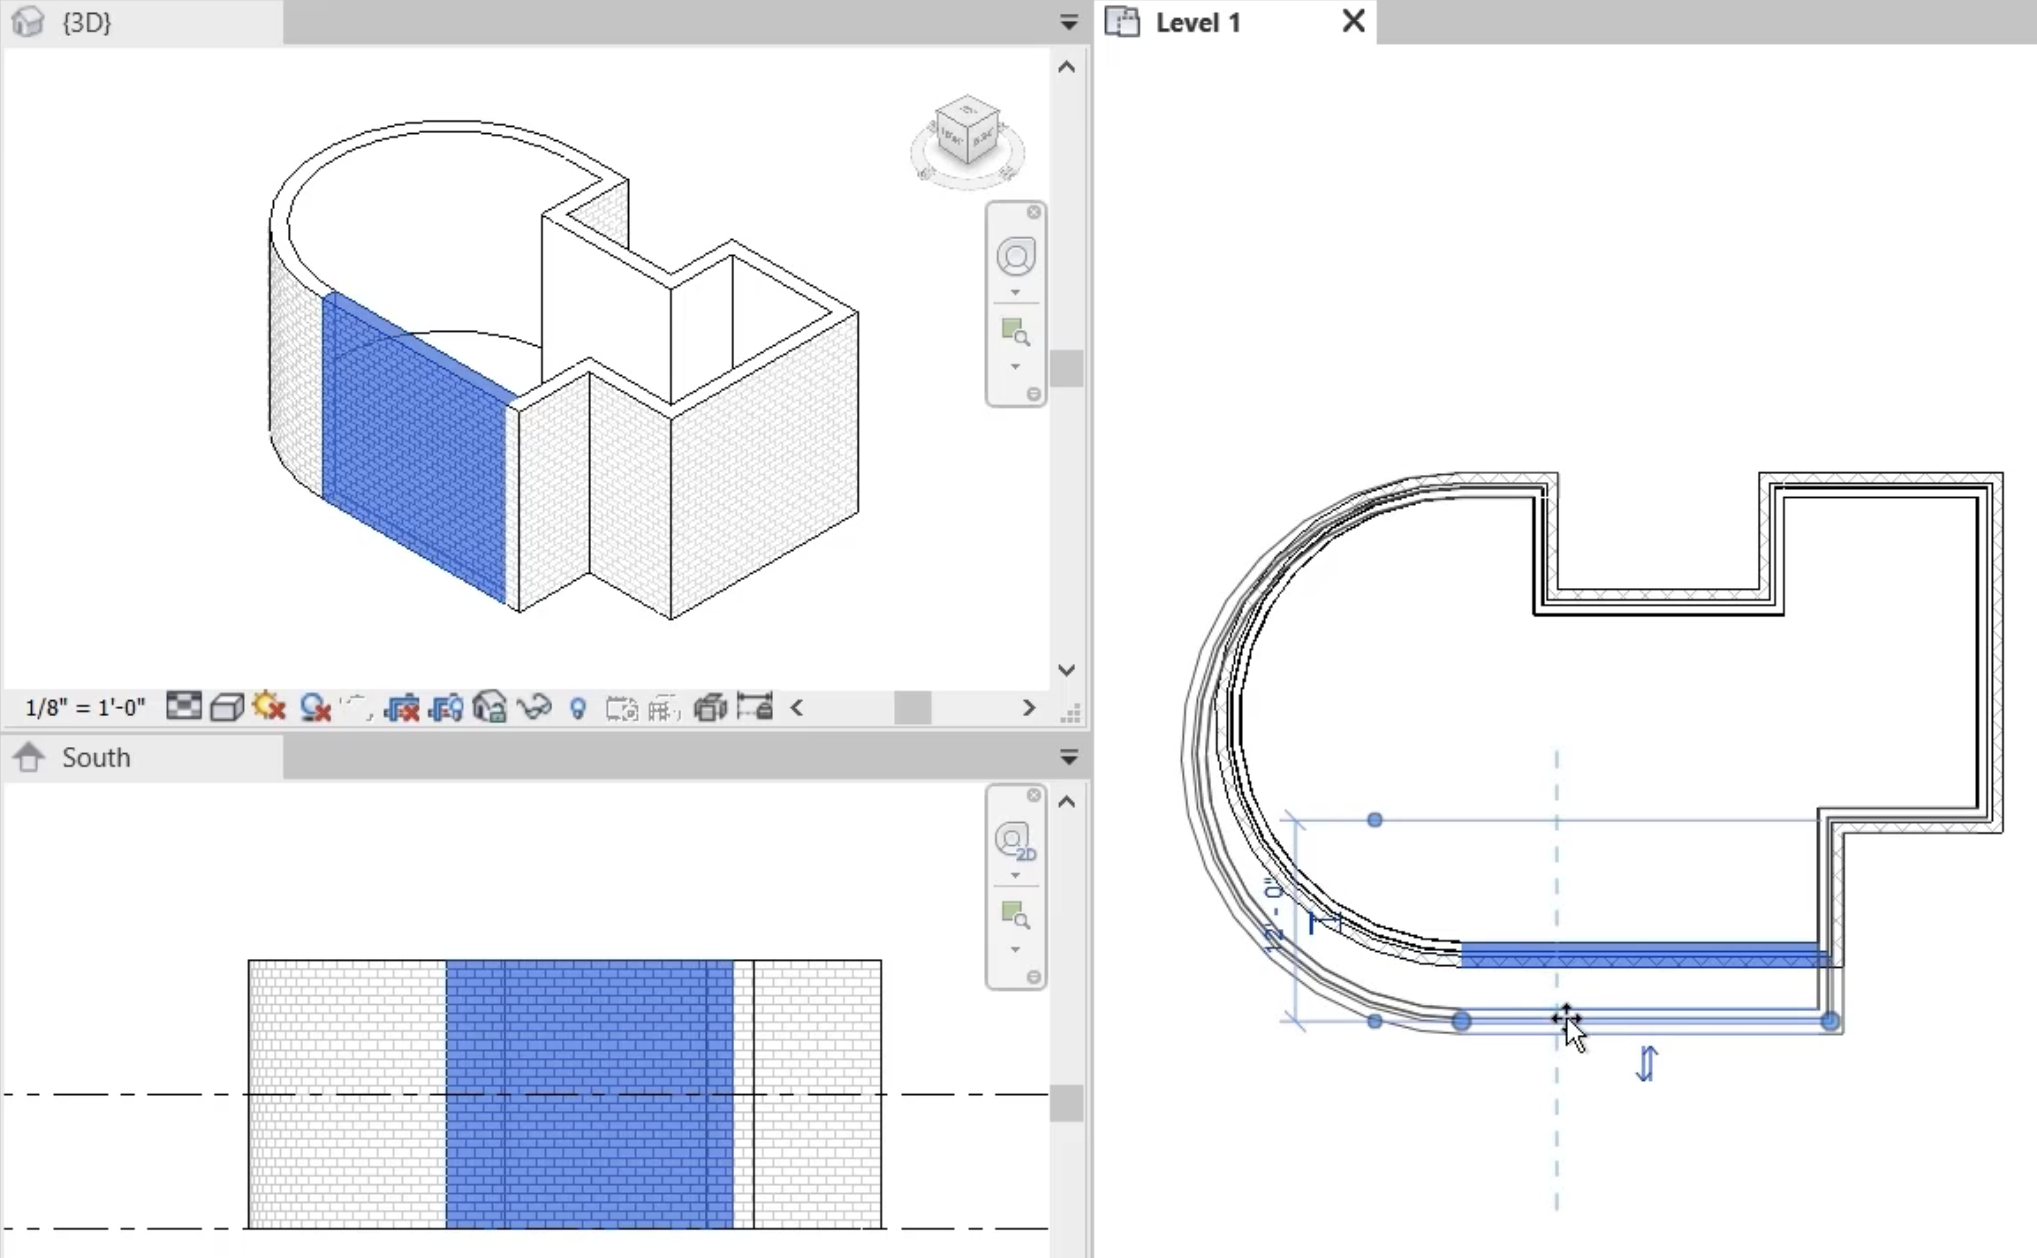
- In the Level 1 plan view, select the wall on the front of the building, which is visible in all three views.
- Move it down a little, and notice the curved wall updates parametrically.
- In the 3D view, select all the walls.
- In Properties, change the Unconnected Height to 15'-0". The height changes in all 3 views.
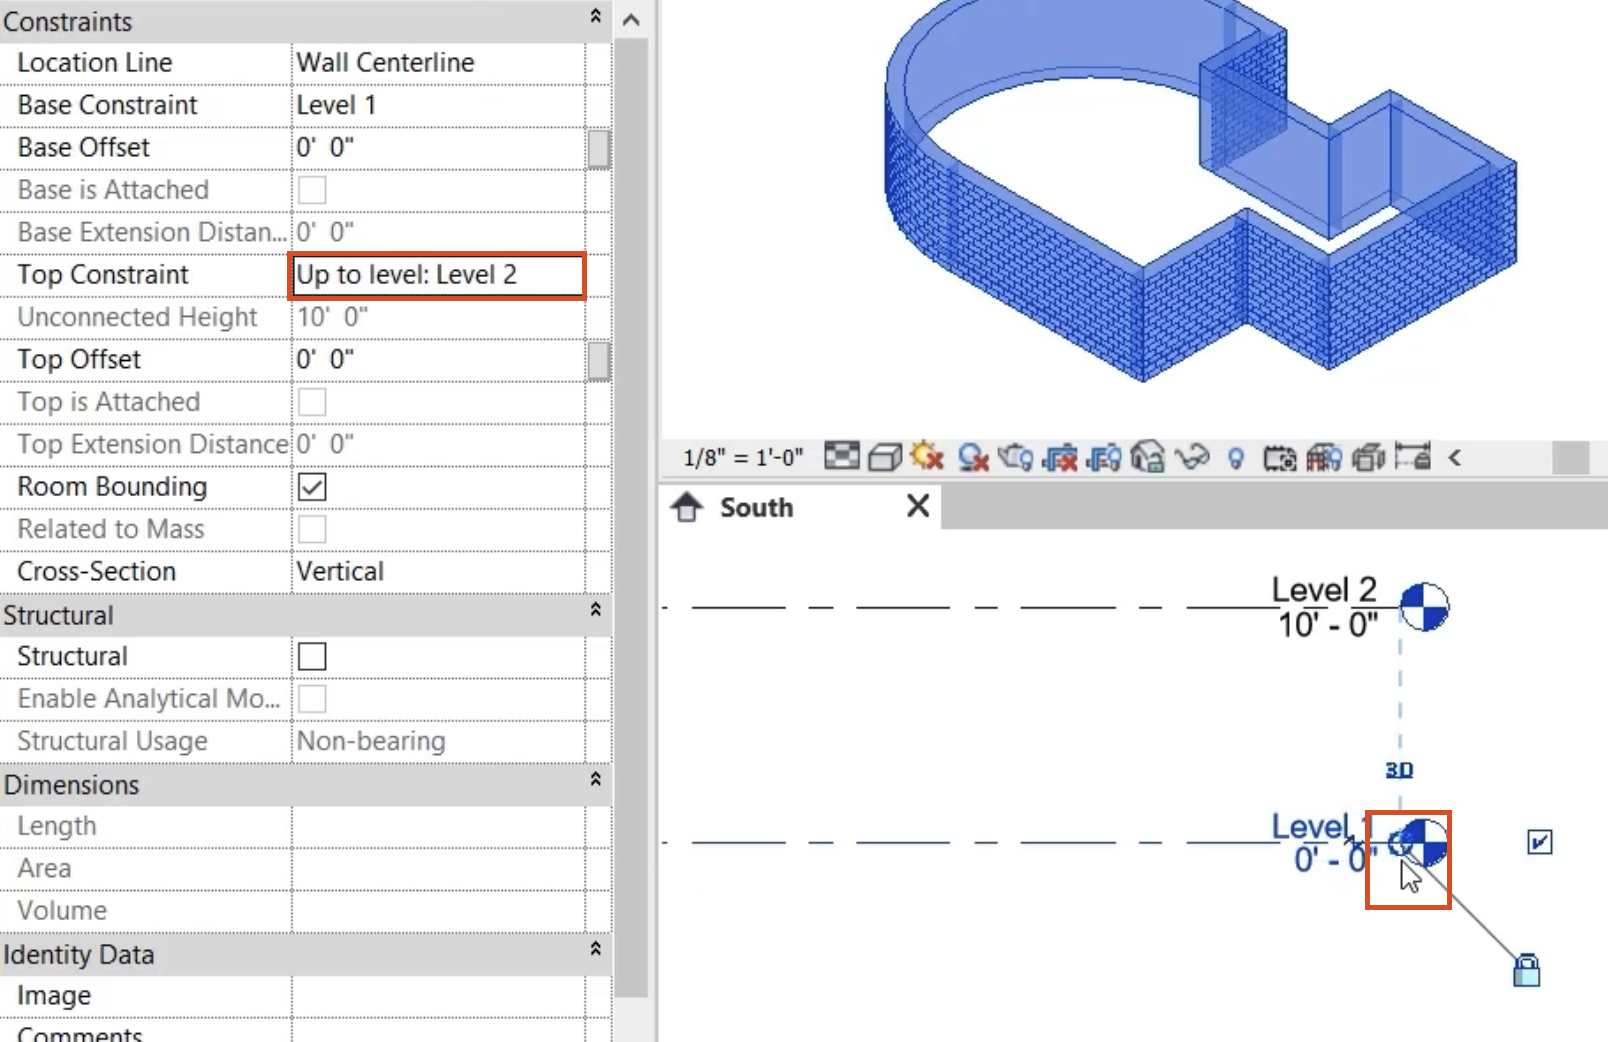
- Change the Top Constraint to Level 2.
- In the South elevation view, click the Level 1 line.
- Use the control to drag the text closer to the wall.
- Click Level 2.
- Change the height to 18'-0".
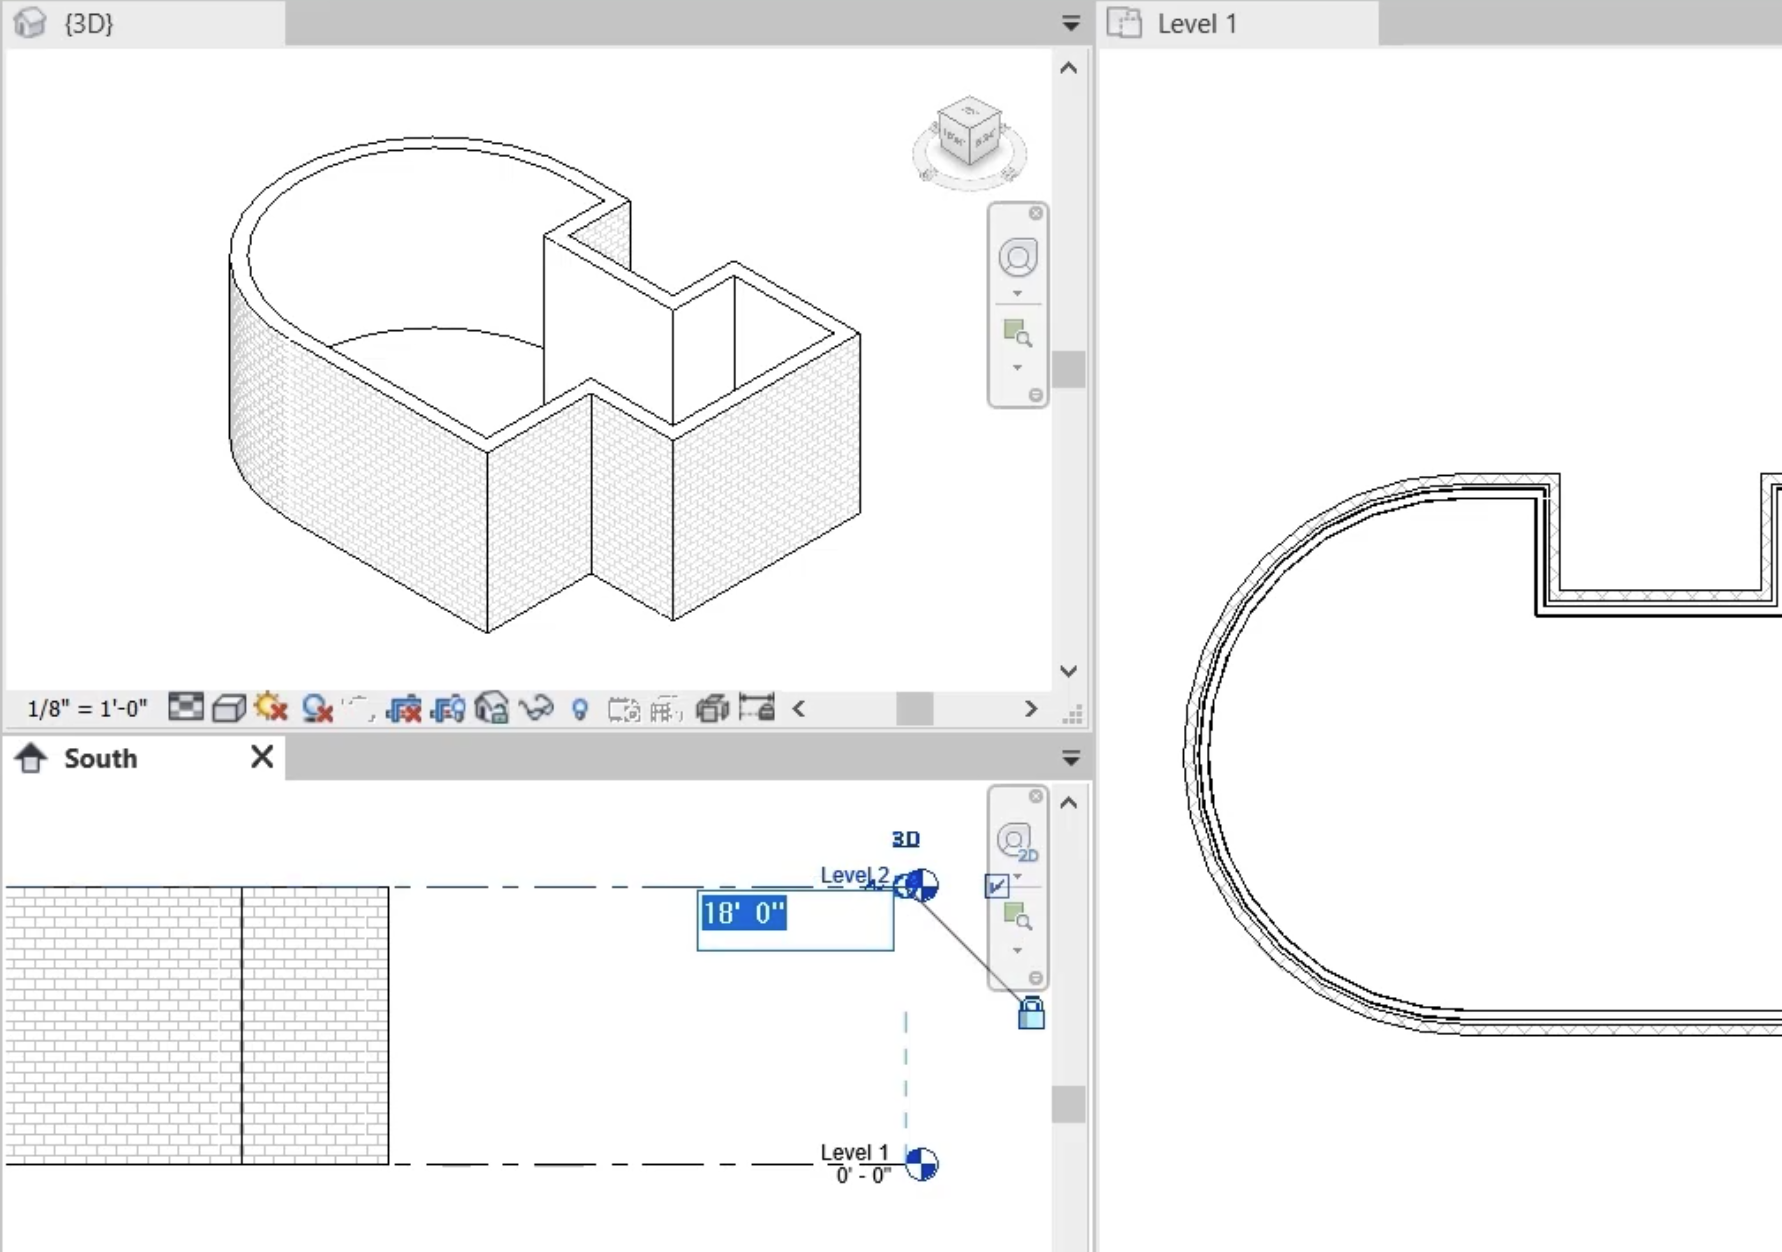
- Change the height again to 8'-0".
In all 3 views, all the walls connected to Level 2 move with the height of the level.


