00:03
Rainfall profiles and their corresponding evaporation profiles can be applied directly to the elements in a 2D mesh.
00:11
You can also separate rainfall applied to the 2D mesh and rainfall applied to subcatchments.
00:17
In this example, you set up these options to apply rainfall to the 2D zone outside of subcatchments.
00:24
To begin, open the database, and then open the desired .icmt file and ground model.
00:31
In this example, from the File menu, select Open > Open transportable database.
00:38
Navigate to the folder where you downloaded the example files, select App_Rain_2D_Mesh.icmt, and then click Open.
00:47
If you see a popup about opening the database as read-only, click Yes.
00:53
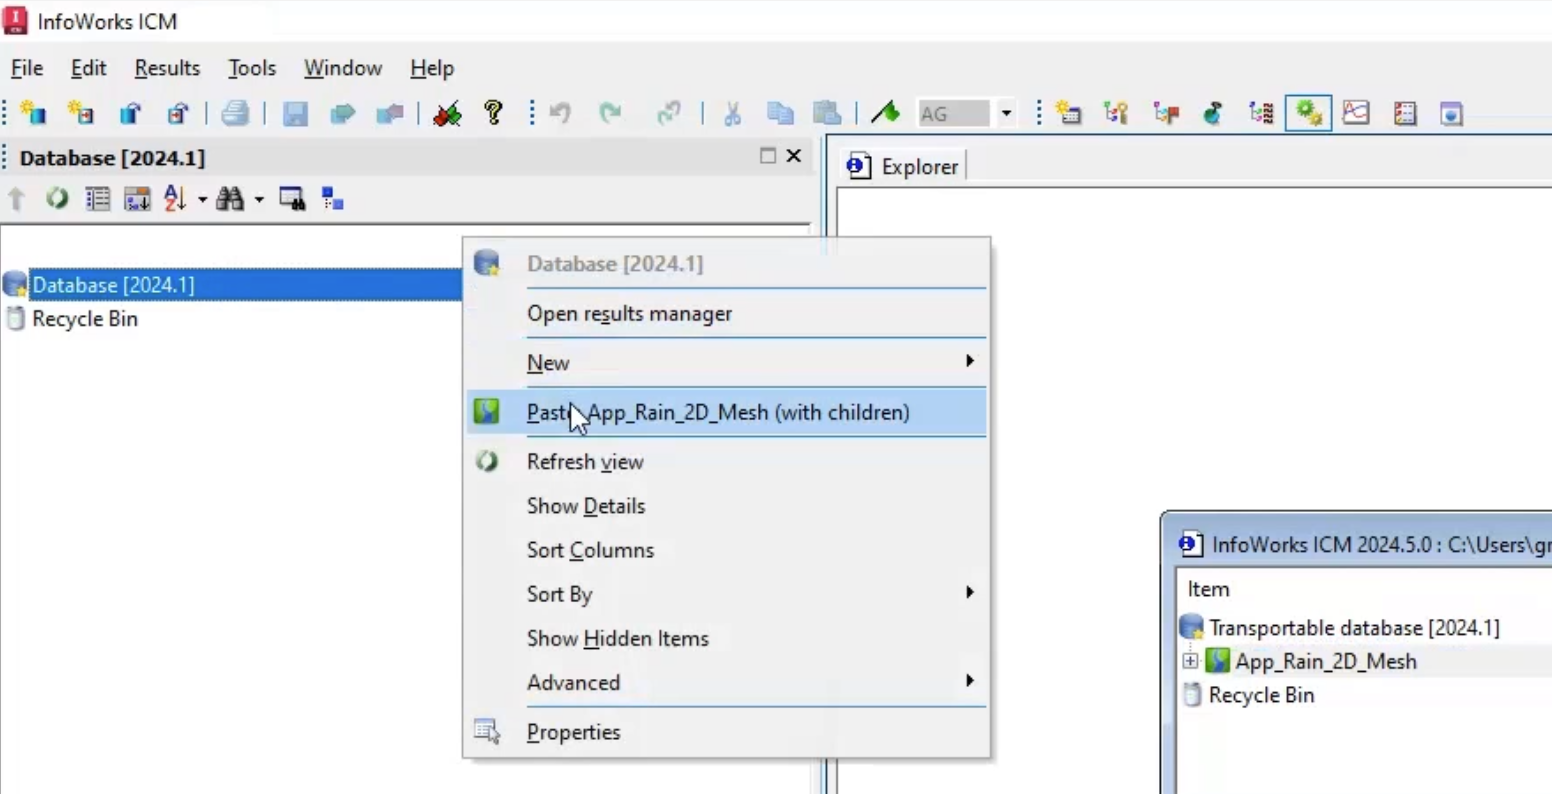
In the transportable database window, right-click the top-level folder and select Copy.
00:60
In the popup, click Continue.
01:03
Right-click the Database and select Paste (with children).
01:08
In the Copying popup, enable Copy ground models, and then click Continue.
01:14
Double-click 1D/2D Sewer Model to open it on the GeoPlan.
01:19
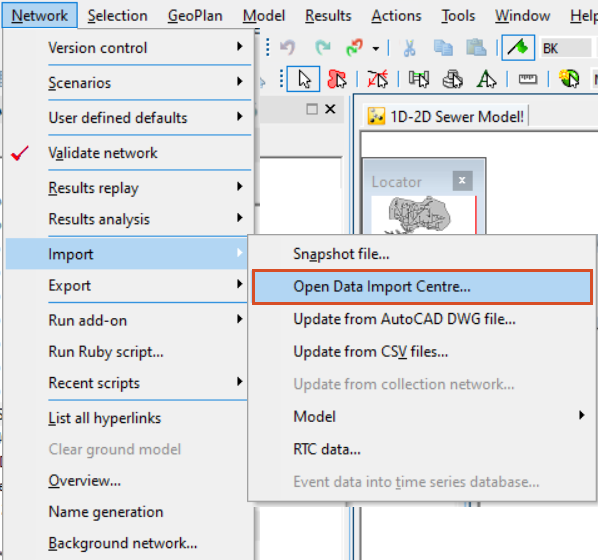
To import the pre-defined 2D zone, from the Network menu, click Import > Open Data Import Centre to open the ODIC.
01:29
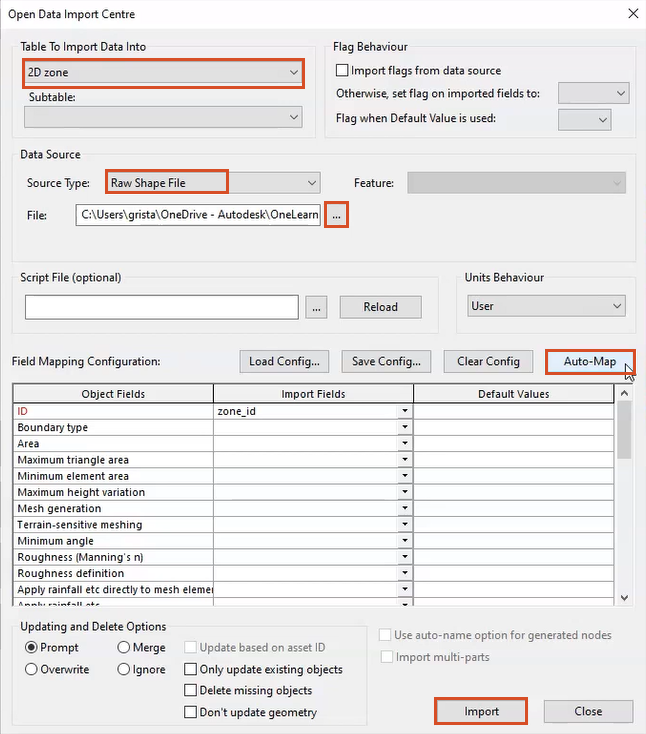
In the Table To Import Data Into drop-down, select 2D zone.
01:35
Under Data Source, ensure the Source Type is set to Raw Shape File.
01:40
Click More (…), navigate to the example files for this tutorial, select 2D Zone.shp, and then click Open.
01:49
In the Field Mapping Configuration section, click Auto-Map
01:54
to search the import file for fields that match those that define the nodes in the network.
02:00
An import notification lets you know how many objects were imported.
02:09
The 2D zone is imported into the model.
02:12
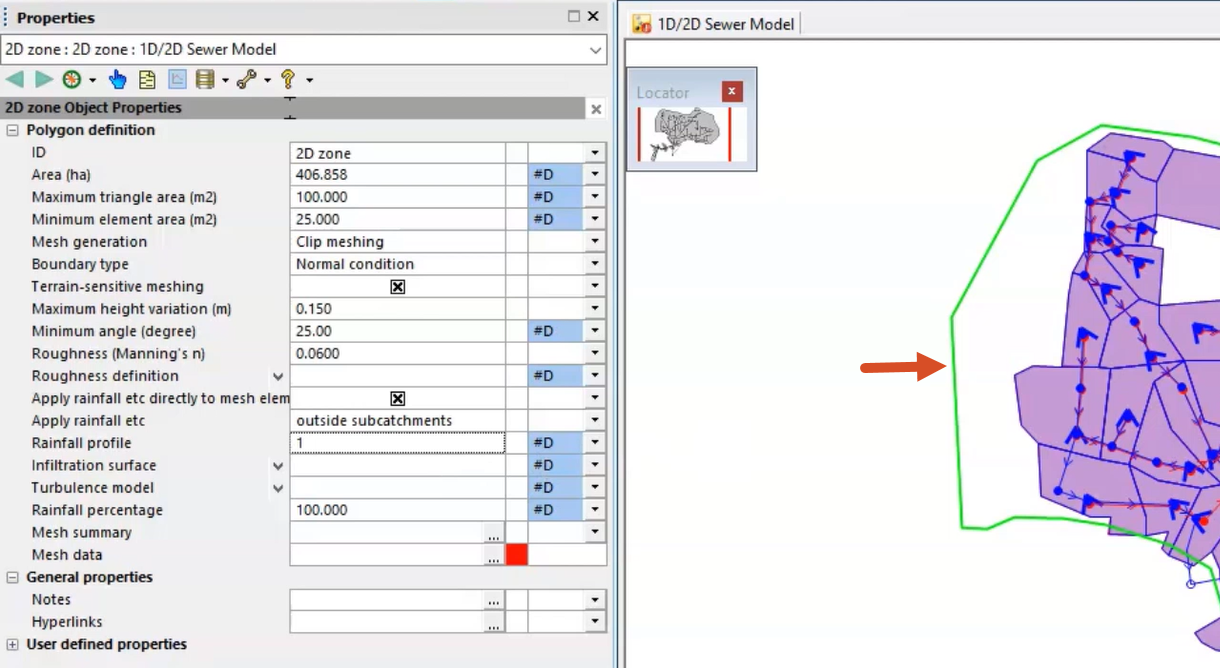
Using the Select tool, double-click the 2D zone to open the Properties window.
02:17
Adjust the 2D zone parameters:
02:21
Set the Mesh generation to Clip meshing
02:24
Set the Boundary points to Normal condition
02:27
Enable Terrain-sensitive meshing
02:30
Set the Maximum height variation to 0.15
02:35
Set the Roughness (Manning's n) to 0.06
02:40
Enable Apply rainfall etc directly to mesh
02:45
Set the Apply rainfall etc field to outside subcatchments
02:49
If 2D meshes and subcatchments overlap, the default is for rainfall to be applied to both subcatchment and 2D elements independently.
02:59
Setting the Apply rainfall etc option to outside subcatchments
03:04
prevents applying rainfall twice by restricting the rainfall to elements with centroids outside of subcatchment boundaries.
03:11
You could also specify a rainfall profile to be applied to the mesh elements which is different to that of the subcatchments.
03:19
By default, and in this example, the Infiltration surface field is set to a blank value.
03:25
With no infiltration applied, 100% of the rainfall is converted to runoff.
03:32
The Rainfall percentage value is also set to 100% by default.
03:37
This value can be used as a pro-rata adjustment to the rainfall across the entire 2D zone.
03:44
Adjusting this field could be used instead of simply applying rainfall outside of subcatchments.
03:50
For example, a scaled-down rainfall of 10-20% might be applied to the mesh elements within subcatchments for an urban area.
03:59
With the 2D zone parameters set, you can generate the mesh.
04:04
Make sure that the 2D zone is still selected on the GeoPlan.
04:09
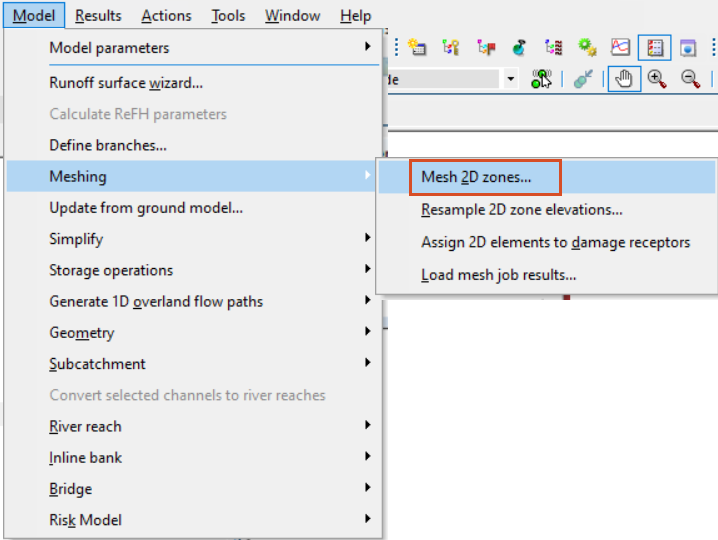
From the Model menu, select Meshing > Mesh 2D zones.
04:14
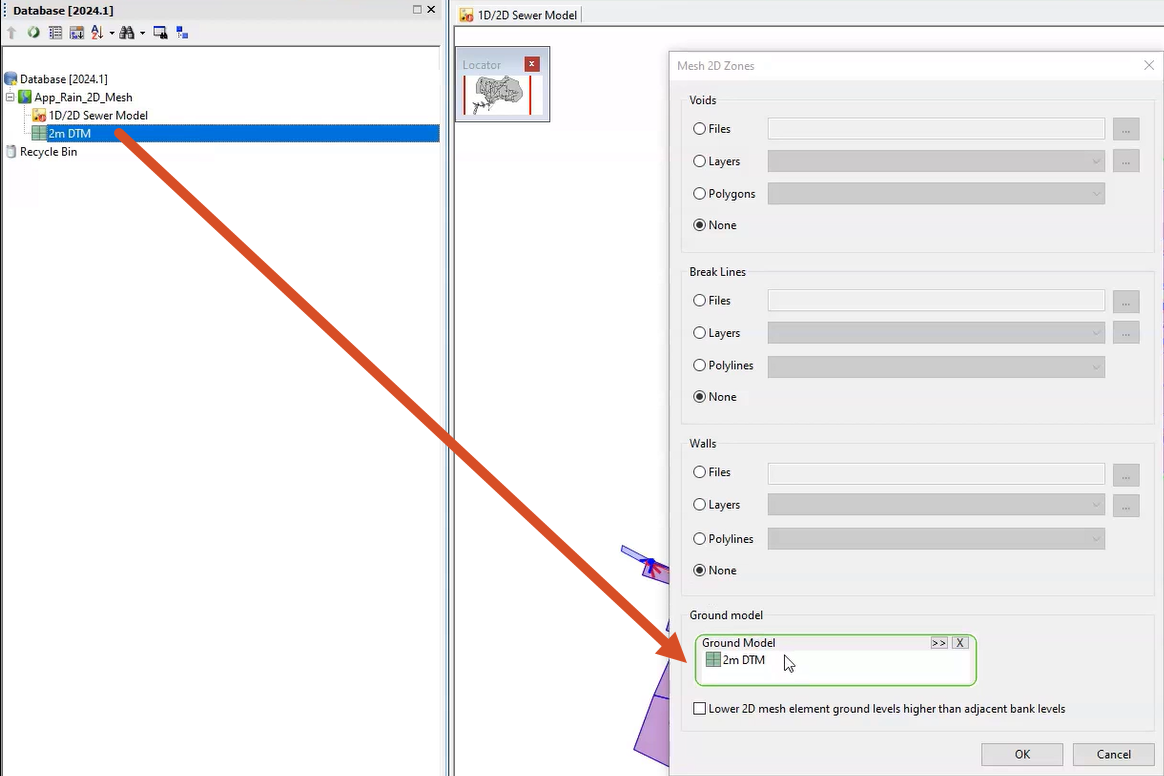
In the Mesh 2D Zones dialog, ensure Voids, Break lines, and Walls are set to None.
04:21
From the Database, drag 2m DTM Ground Model into the Mesh 2D Zones dialog and drop it into the Ground Model group box.
04:31
Click OK to mesh the 2D zone.
04:35
Note from version 2024.5 onwards you can use Ctrl + M to quickly access the mesh 2D zones dialog.
04:43
In the Schedule Job(s) popup, click OK.
04:47
From the Window menu, select Job control window to display the status of the mesh job and some information on the generation.
04:55
Once the mesh has completed, it can be loaded into the model.
04:59
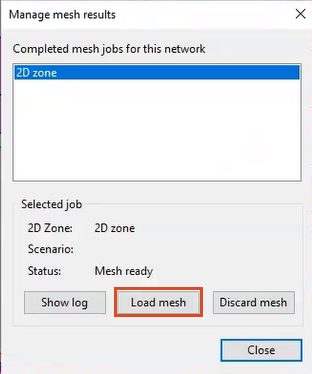
From the Job control window, click the Mesh ready status to open the Manage mesh results window.
05:06
Click Load mesh, and then Close.
05:09
Now that the 2D Zone and mesh have been generated,
05:12
the next step is to couple them to the 1D sewer network by setting the proper 2D flood types of the manholes.