• InfoWorks WS Pro

Running fire flow availability

Run a fire flow availability simulation. 


Tutorial resources

These downloadable resources will be used to complete this tutorial:

iwsp2023M12U02_Running_FIreFlow_Availability.wspt

Step-by-step Guide

InfoWorks WS Pro is capable of modelling fire flow availability. Users can determine the capacity of individual hydrants in a network to sustain additional levels of demand for firefighting.

To use the Fire Flow Availability simulation, first set up a normal run:
  1. In the Model Group window, expand the BridgeTown Fire flow model.
  2. Open the network control and demand diagram.
  3. Right-click the model and click New > Run Group.
  4. Click OK to accept the default name.
  5. Right-click the new Run Group and select New > Run.
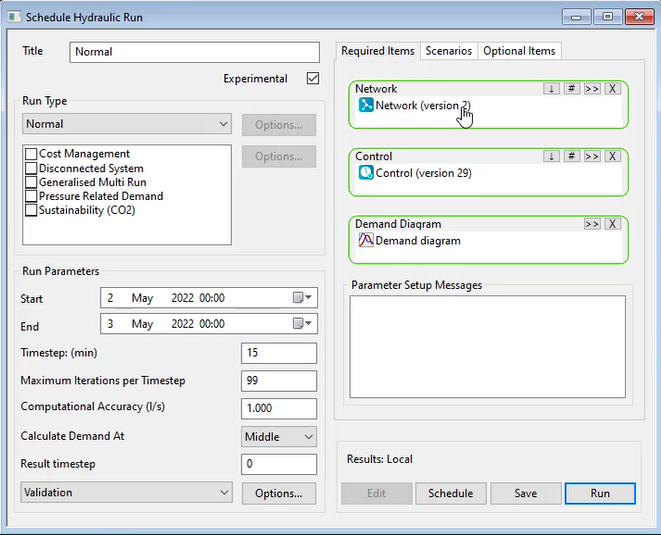
  6. In the Schedule Hydraulic Run dialog, name the new Run. In this example, it is called "Normal".
  7. Check the box next to Experimental.
  8. From the Model Group window, drag and drop the Network into the dialog.

The Schedule Hydraulic Run dialog configured for this run with the network, control, and demand diagram entered.

  1. Click Save.
  2. Click Run.

To set up a Fire Flow Availability run:
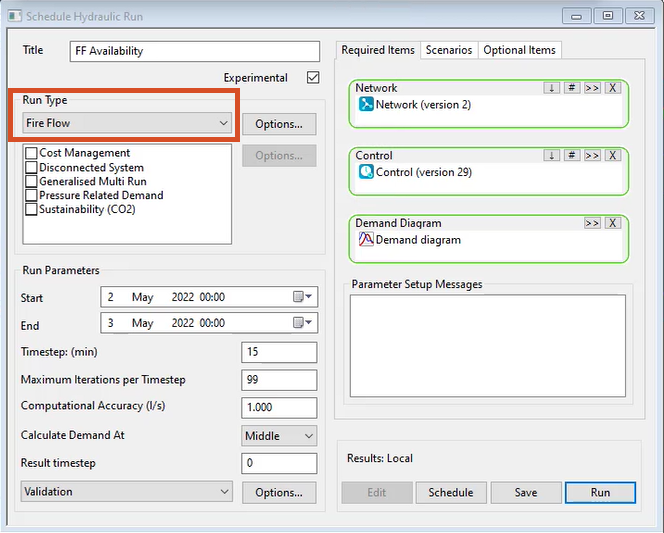
  1. Right-click the Run Group, start another new run, and name it "FF Availability".
  2. Repeat steps 6 – 8 and ensure the run is Experimental, and the Network, Control, and Demand Diagram areas are populated.
  3. In the Run Type group box, expand the drop-down and select Fire Flow.

The Schedule Hydraulic Run dialog, with the Run Type set to Fire Flow, the network, control, and demand diagram set, as well as the run parameters set.

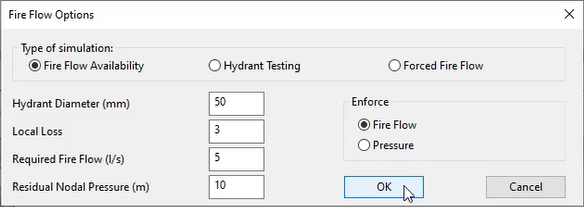
  1. In the Fire Flow Options dialog, in the Type of simulation: group box, ensure that Fire Flow Availability is enabled.
  2. Set the Hydrant Diameter to 50.
  3. Set the Local Loss to 3.
  4. Set the Required Fire Flow to 5.
  5. Set the Residual Nodal Pressure to 10.
  6. In the Enforce group box, ensure Fire Flow is enabled.

The Fire Flow Options dialog, configured for a Fire Flow Availability simulation that enforces fire flow rather than pressure.

Note: When Fire Flow is enabled, the run determines the ability of each hydrant in the network to provide the required fire flow while retaining the specified residual pressure.

Note: When Pressure is enforced, the run determines the ability of each hydrant in the network to retain the specified residual pressure while providing the required fire flow.

  1. Click OK.
  2. In the Schedule Hydraulic Run dialog, click Save.
  3. Click Run.

To graph the results:

  1. Expand the Run Group link tree to find the FF Availability run.
  2. Click and drag the results to the GeoPlan.
  3. In the toolbar, activate the Graph tool, and then select any hydrant.
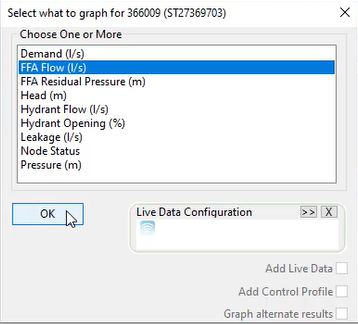
  4. In the Choose One or More list, select FFA Flow.

The Select what to graph dialog with FFA Flow selected.

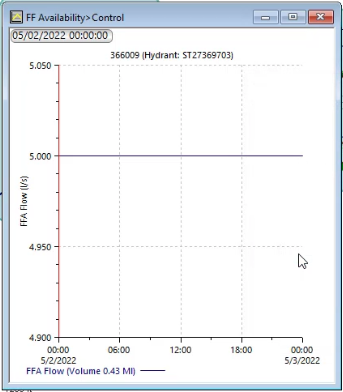
  1. Click OK to open the graph, which shows the FFA flow maintained at 5 liters per second.

The FF Availability > Control graph, showing the FFA flow maintained at 5 liters per second for a selected hydrant.

To view all hydrant performance results in a grid:

  1. In the Grid windows toolbar, expand the Grid windows drop-down and select Node results.

A grid displays the FF availability for all hydrants in the network, including values for FFA flow, head, and pressure:
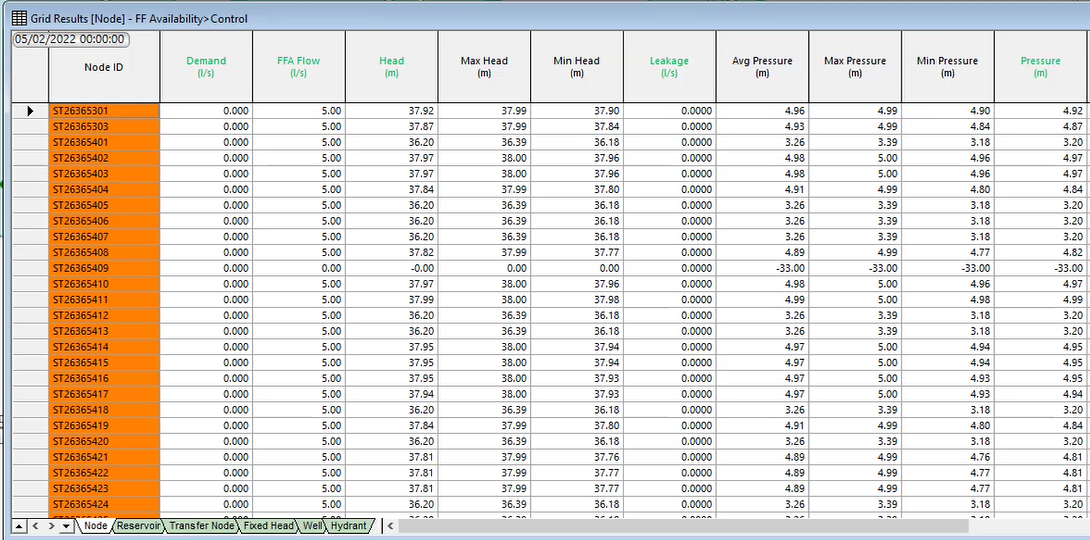
The Grid Results window for all hydrants in the network.

Essentially, it shows what is happening across the network if 5 liters per second was forced from every node simultaneously.