Create materials - Exercise
Revit gives you a great choice of standard materials, but sometimes that simply isn’t enough. Sometimes you need to make your own! There are a few ways to do it. In this exercise, you will use an image and map it to a new material.
To create a material, follow these steps:
- Open Revit.
- Open the Small Medical Center.rvt model from your project files. If you did not complete the previous exercise, open Small Medical Center-Materials.rvt instead.
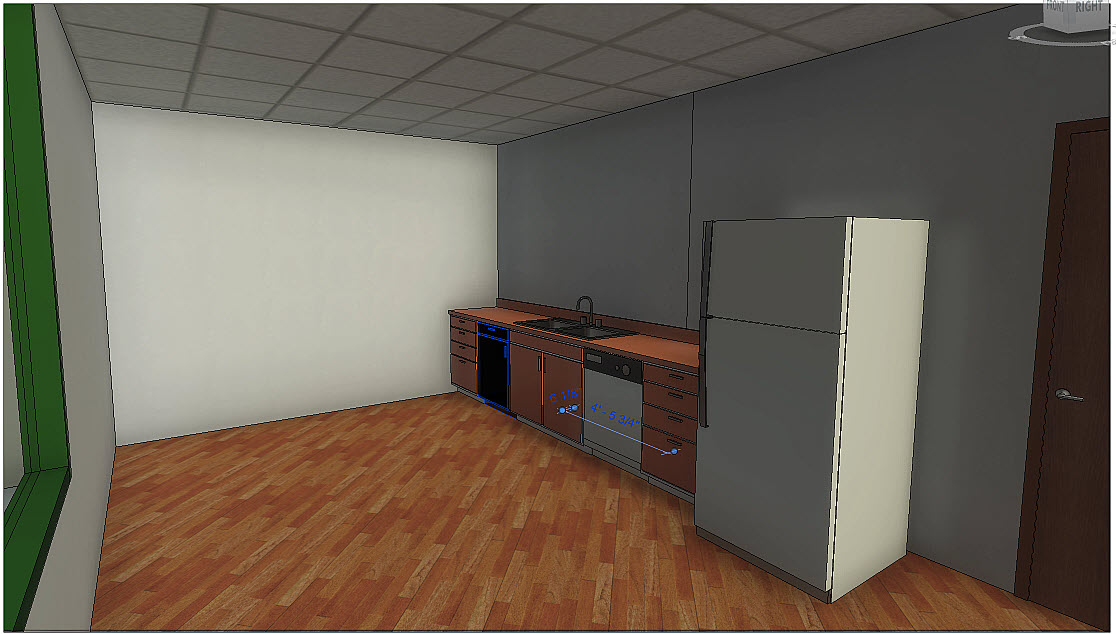
- In the Project Browser, select the SECOND FLOOR BREAKROOM 3D view to make it the current view if not already active.
- Select the floor and note that the type is Generic – 12″.
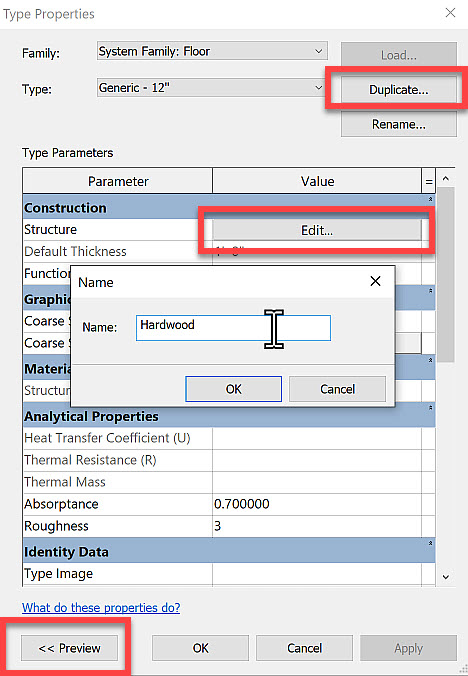
- To change it, you will create a new type of floor. In Properties, click Edit Type.
- In the Type Properties dialog box, click Duplicate… to create a copy of the floor type.
- In the Name dialog box, enter Hardwood and click OK.
- Click << Preview to expand the panel to show the section of the floor.
- Click Edit… in the Structure row to change the structure of the floor type.
- In the Edit Assembly dialog box, change the Structure [1] material by clicking on the ellipsis in the Material cell.
- In the Material Browser, type CONC in the search panel, then select Concrete, Cast-in-Place gray.
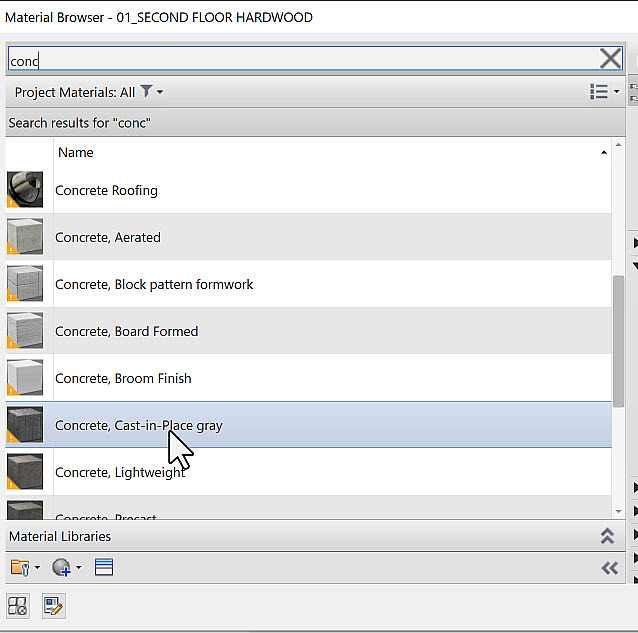
- Click OK.
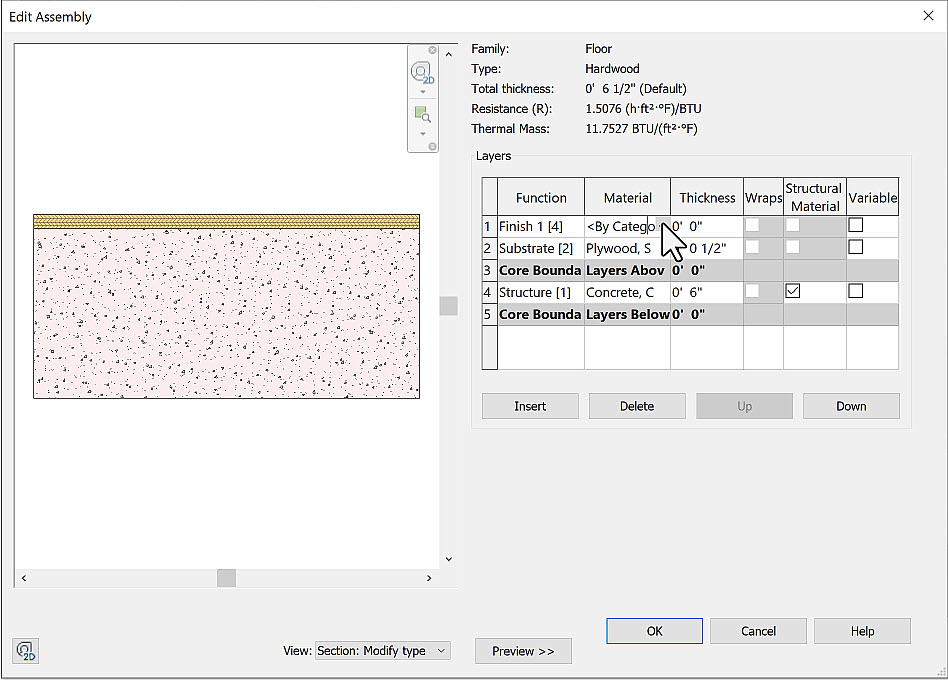
- Change the Thickness of the concrete slab to 6″.
- Select the top Core row, then click Insert to add a new layer above the core.
- Change the Function of the new layer to Substrate [2] from the drop-down list.
- Change the Material to Plywood Sheathing and change the Thickness to 1/2″.
- Insert another layer above the Substrate layer and change the Function to Finish 1 [4], as shown below.
- In the Material cell, click the ellipsis to browse for materials.
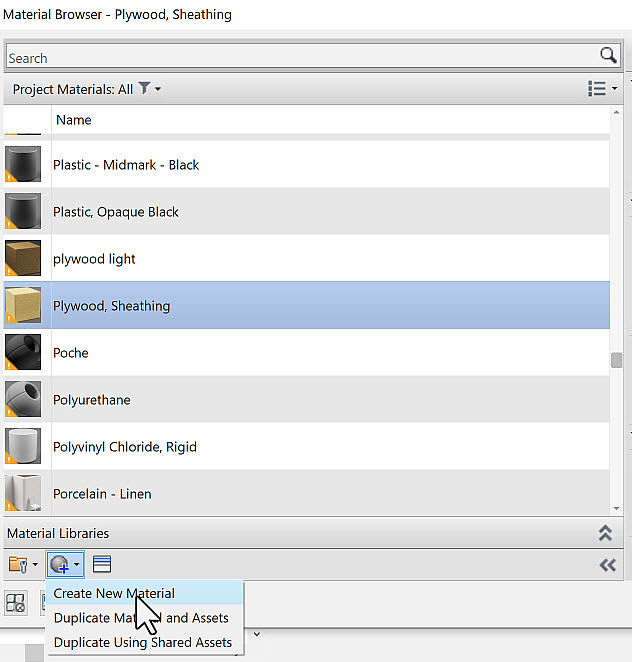
- At the bottom of the Material Browser, click Create New Material, as shown below.
- Rename the new material to American Cherry.
- On the Appearance tab, click (no image selected) under the Image field and select american_cherry.png as the material.
- Click on the image preview to launch the Texture Editor dialog box, and do the following (as shown below):
- Toggle on Link texture transforms.
- In the Scale section, set the Sample Size to 36″ (3′) for Width and Height.
- In the Repeat section, both Horizontal and Vertical should be set to Tile.
- Click Done.

- Expand the Bump section and check the checkbox, then select american-cherry.png. In the Texture Editor, set the same settings as used previously.
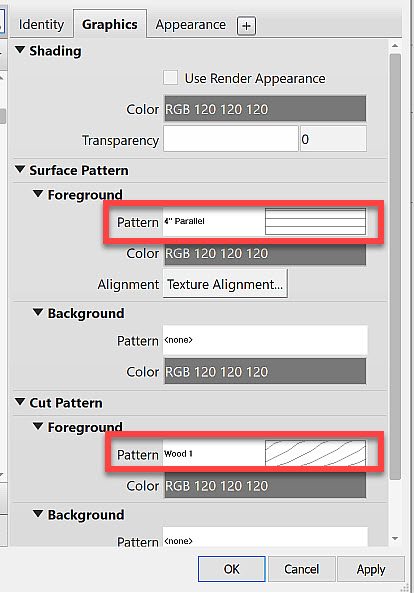
- On the Graphics tab, in the Cut Pattern section, set the Foreground Pattern to Wood1.
- In the Surface Pattern section, set the Foreground Pattern to 4” Parallel (model).
- Click Apply and then OK to finish composing the new material.
- Set the Thickness of the Finish layer to 3/4″.
- Click OK twice to finish.
- Click Modify to apply the new floor type.
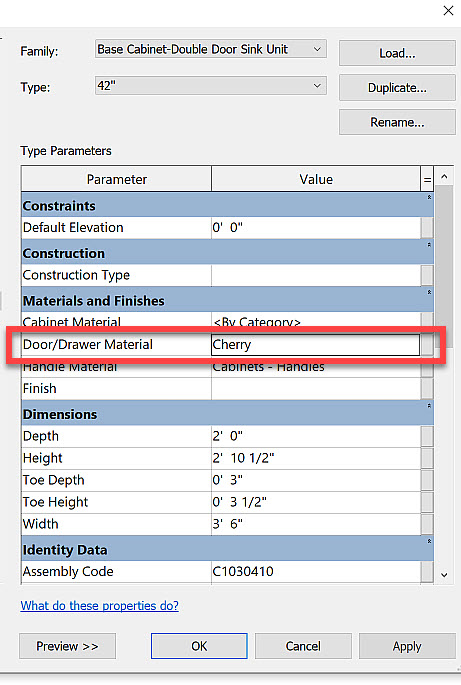
- Select the three different cabinet types along the wall and change the Door/Drawer Material of each one to Cherry, as shown below.
- When finished, your model should look like the image shown below. Save the file.