Adding lighting fixture tags and legends - Exercise
In this practice, you will setup light fixture tags and add them to the plans. You will also review and create electrical legends and place the view, a schedule, and legends on a sheet.
Task 1: Adding lighting fixture tags
- Open the Small Medical Center-Tags and Legends.rvt project in the 01- Ground Floor Lighting Plan view. This reflected ceiling plan view shows the light fixtures, switches, and detail lines that show the switch to light connections. You are now going to add lighting fixture tags.
- In the Annotate tab > Tag panel, click Tag by Category.
- In the Options bar, uncheck Leader.
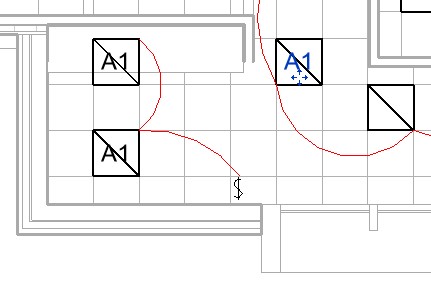
- Select one of the light fixtures. Notice that this is showing the circuit number rather than the lighting fixture number, as shown below.
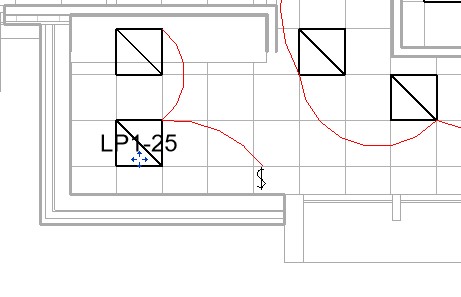
- Undo the tag.
- In the Annotate tab, expand the Tag panel title and select Loaded Tags and Symbols.
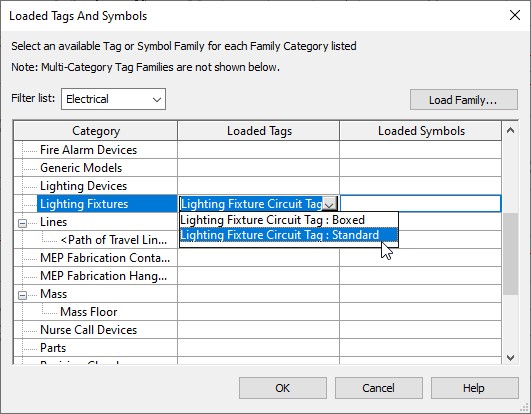
- In the Loaded Tags and Symbols dialog box, set the Filter list to Electrical.
- Scroll down until you get to the Lighting Fixtures category. You can see that the Loaded Tags for this category is set to Lighting Fixture Circuit Tag, as shown below.
- Click Load Family….
- Navigate to the Revit Library > Annotations > Electrical folder and select Lighting Fixture Tag.rfa, as shown below.
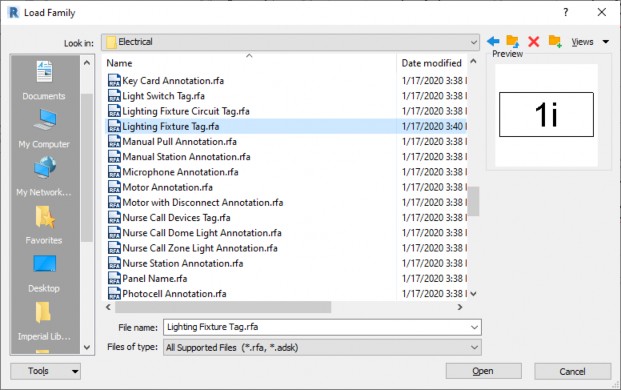
- Click Open.
- In the Loaded Tags column, select Lighting Fixture Tag: Standard, as shown below.
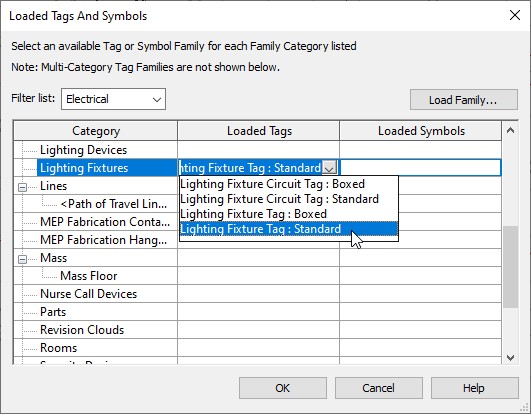
- Click OK.
- Start the Tag by Category command again and select several lighting fixtures, as shown below. The new tag is now used on the fixtures.
- In the Annotate tab > Tag panel, click Tag All.
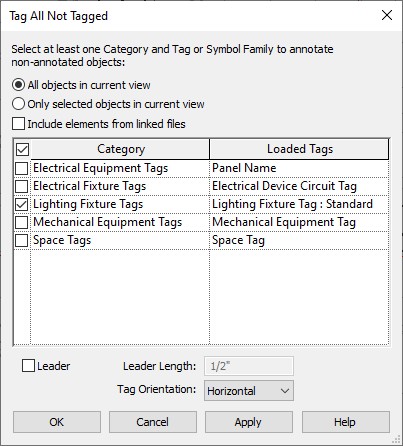
- In the Tag All Not Tagged dialog box, select All objects in current view and Lighting Fixture Tags, as shown below.
- Click OK.
- All the untagged lighting fixtures are now tagged, as shown below.
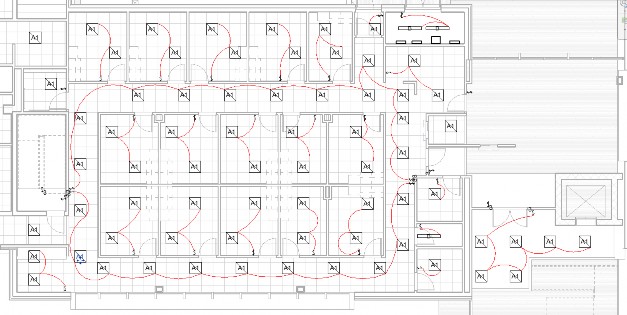
- Review the information and move the tags or switch connections if there are any conflicts. For example, the A1 tags are fairly readable as is, but the B tags would be better moved off the lighting fixture.
- Save the project.
Task 2: Setting up a sheet
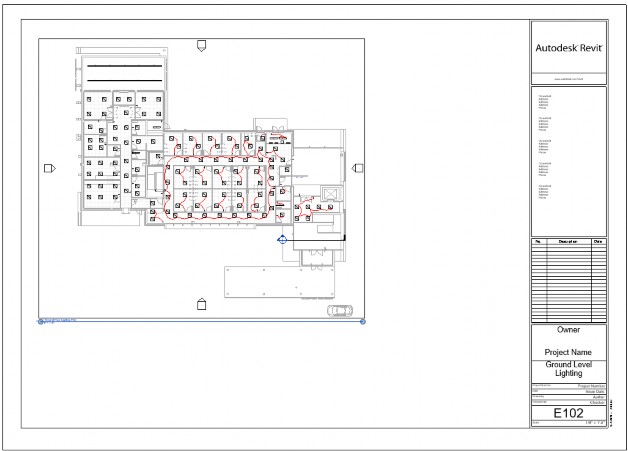
- In the Project Browser, expand Sheets (all) and double-click on E102 – Ground Level Lighting to open the sheet.
- Drag and drop Electrical > Lighting > Ceiling Plans 01-Ground Floor Lighting Plan and place it on the sheet, as shown below.
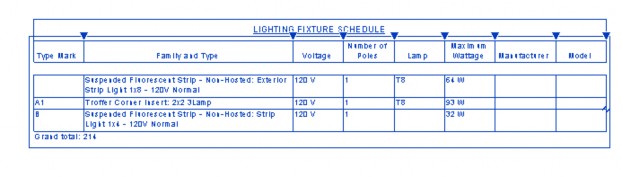
- In the Schedule/Quantities area, drag and drop LIGHTING FIXTURE SCHEDULE to the sheet, as shown below. Modify it as needed.
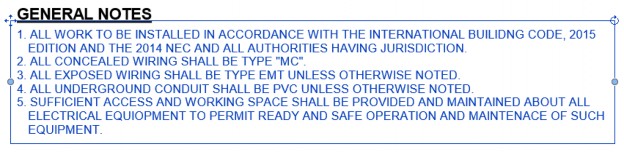
- In the Project Browser, in the Legends group, double-click on Electrical General Notes. This legend is made up of just text notes, as shown below. They are placed in a legend so they can be used on multiple sheets.
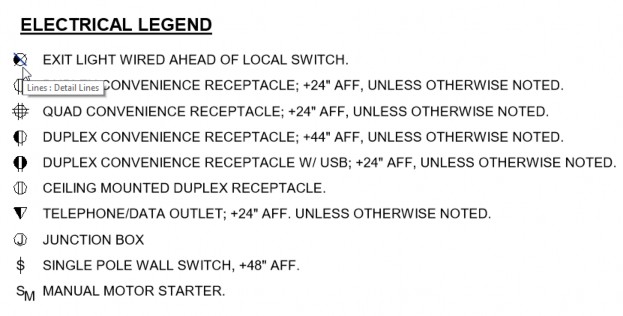
- In the Project Browser, double-click on Electrical Legend.
- This legend is also created using text notes, detail lines and filled regions, as shown below.
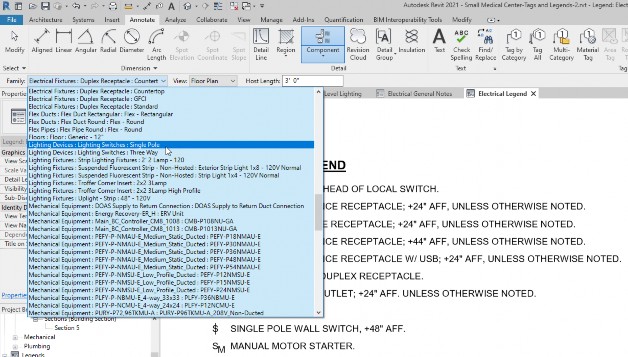
- In the Annotate tab > Detail panel, expand Component and select Legend Component.
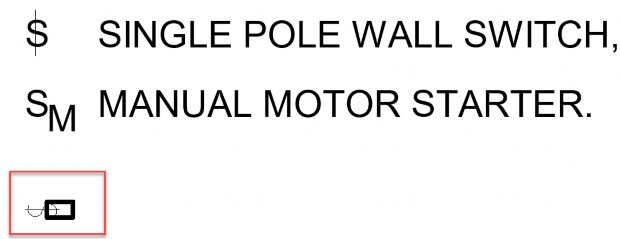
- In the Options bar, select Lighting Devices: Lighting Switches: Single Pole, as shown below.
- Place the component. You can see that when you place it, it includes a piece of wall – because it is a hosted component, as shown below.
- Delete the legend component.
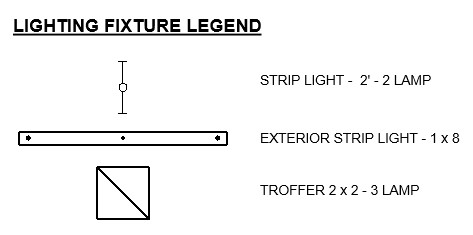
- Start the Legend Component command again and place an instance of each of the different Lighting Fixtures used in the project.
- Copy the title text above the light fixture components and rename it LIGHTING FIXTURE LEGEND.
- Copy text beside the symbols and modify them to match the names of the lighting fixtures, as shown below.
- Select the lighting fixture information and cut it to the clipboard.
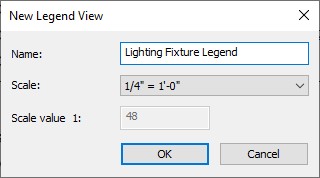
- In the Project Browser, right-click on Legends and select New Legend….
- Title the new legend: Lighting Fixture Legend, as shown below.
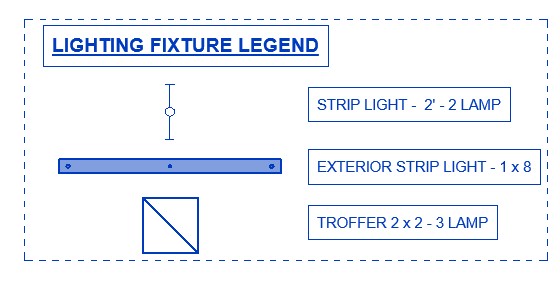
- In the Modify tab > Clipboard panel, click Paste > Paste from Clipboard.
- Place the copied information in the legend view, as shown below.
- Return to the E102 – Ground Level Lighting sheet view.
- Drag and drop the three legends onto this view below the schedule.
- Select the three legend viewports.
- In the Type Selector, change the type to Viewport: Viewport No Title. The legends display as shown below.

- Save the project.


