Reference Planes – Exercise
Reference planes work very well as a replacement for structural grids, especially when it comes to massing.
To add reference planes to a model, follow these steps:
- Open Revit.
- Open your architectural model.
- Open the Roof Floor Plan.
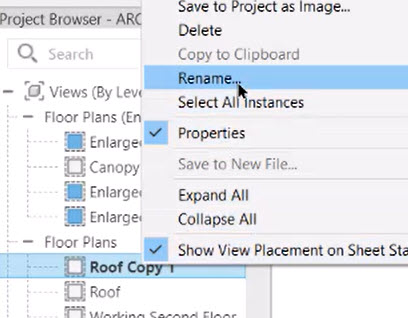
- Duplicate the Roof Floor Plan using the right-click menu.
- Rename the Roof Copy 1 Floor Plan to Garden using the right-click menu.
- Adjust the crop area to reduce the plan to just around the garden roof area.
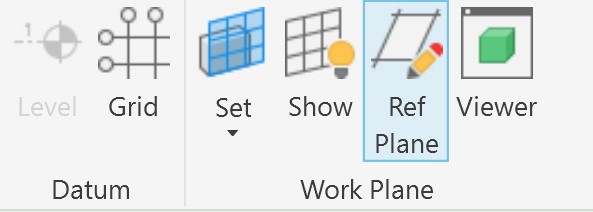
- On the Architecture tab>Work Plane panel, click the Ref Plane button.
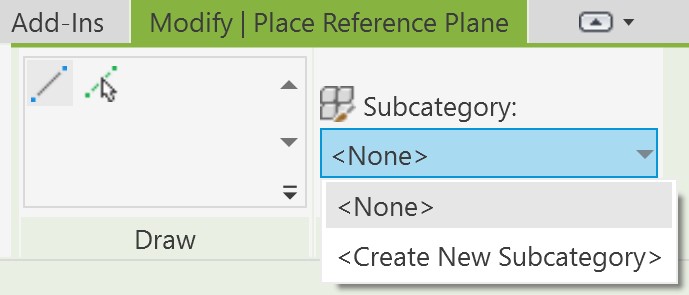
- In the Modify | Place Reference Plane tab, under Subcategory, click the drop-down list and select <Create New Subcategory>.
- In the New Subcategory dialog box, enter Garden Roof for the Name and click OK.
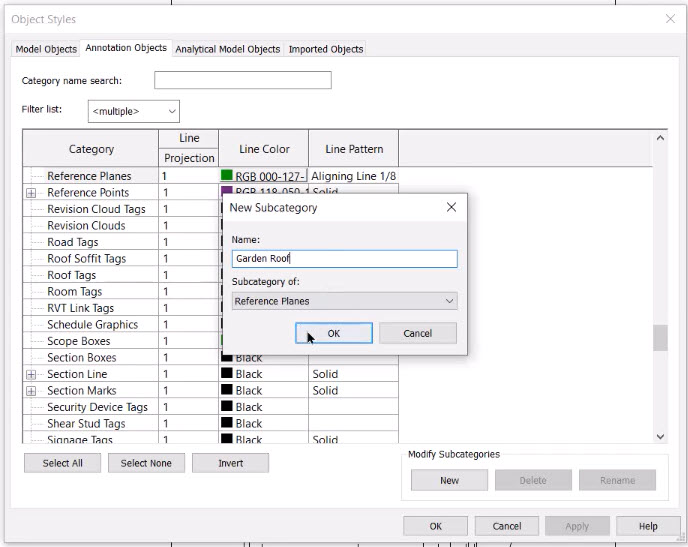
- In the Object Styles dialog box, change the Line Color to Red and change the Line Pattern to Dash Dot 3/16.
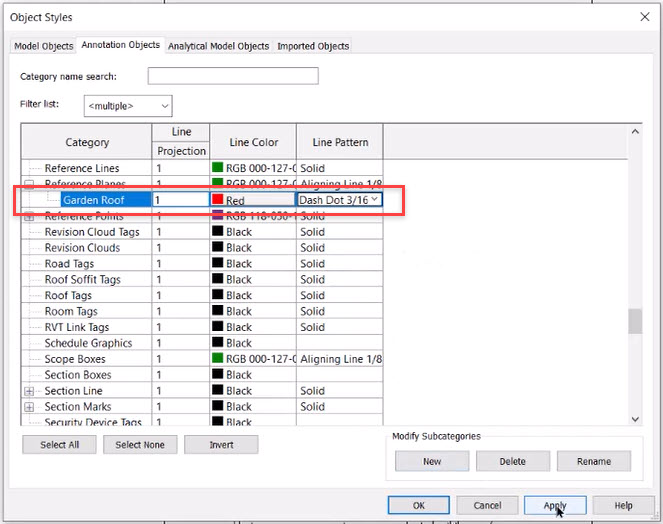
- Click Apply, then click OK.
- Type VG to open the Visibility/Graphic Overrides dialog box.
- Select the Annotation Categories tab and check the checkboxes next to Reference Planes and Sections, then click OK.
- Draw a reference plane as shown below.

- Set the Subcategory to Garden Roof.
- Select the reference plane and label it Garden-01, as shown below.
- When an object in Revit is named with a numeric suffix, Revit will automatically increase the value of the suffix when the object is copied.
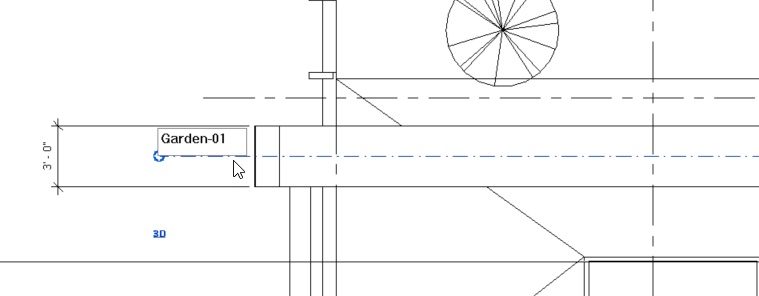
- Drag the right end of the reference plane to the right using the circular grip.
- Copy the reference plane five times as shown below.
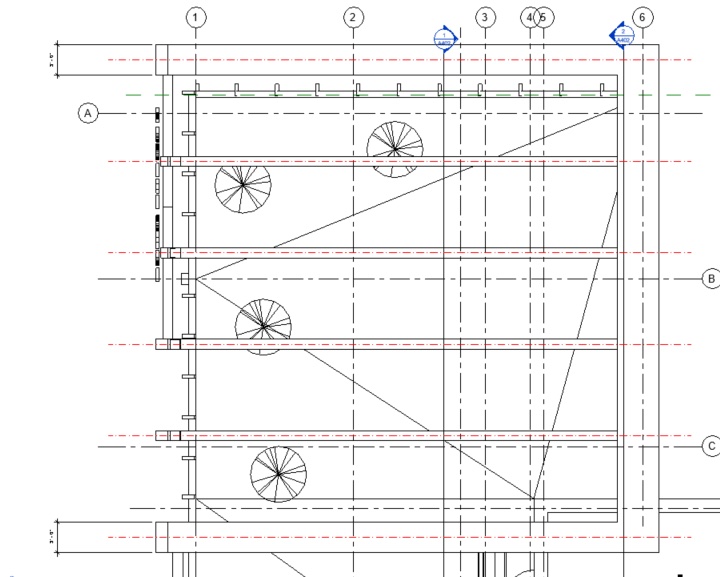
- Hover over one of the copied reference planes and note the value of the suffix has increased in the name.
- Create a section using the Section tool from the Quick Access toolbar.
- Go to the newly created section view.
- In the Visibility/Graphic Overrides dialog box (type VG), in the Revit Links tab, uncheck STRUCTURAL.rvt and click OK.

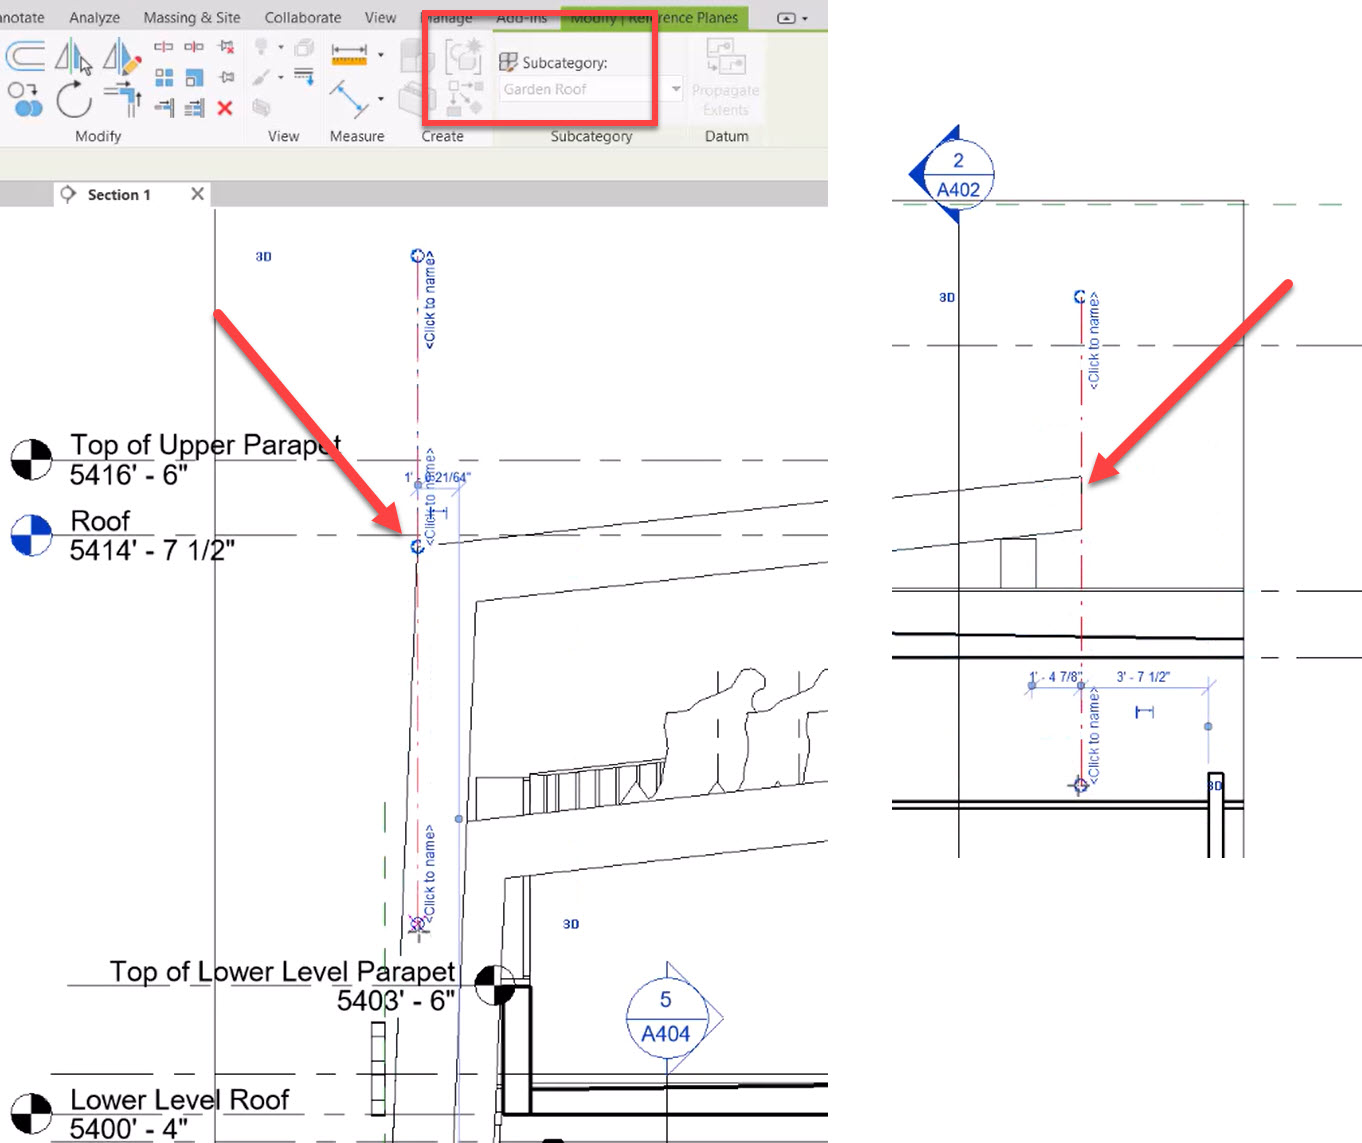
- Create two more reference planes on either side of the roof structure, as shown below. Ensure they belong to the Garden Roof subcategory.
- Save the model.


