Add Massing to a Model – Exercise
Now that we have our reference planes all set, we can add our massing. Yes, you can add massing without reference planes, but they just make it much more accurate.
To add massing to a model, follow these steps:
- Open Revit.
- Open your architectural model.
- Open the Section 1 view.
- In Properties, rename the view to Garden Roof Section.
- Type RF to start the Ref Plane command.
- Ensure the Garden Roof subcategory is selected.
- Select the Pick Lines option in the Draw panel. In the Options Bar, set the Offset to 8′-0″.
- Pick the left vertical reference plane created earlier, and watch for a blue dashed line to indicate which side the new reference plane will be offset from, as shown below. Ensure it is being offset to the right.
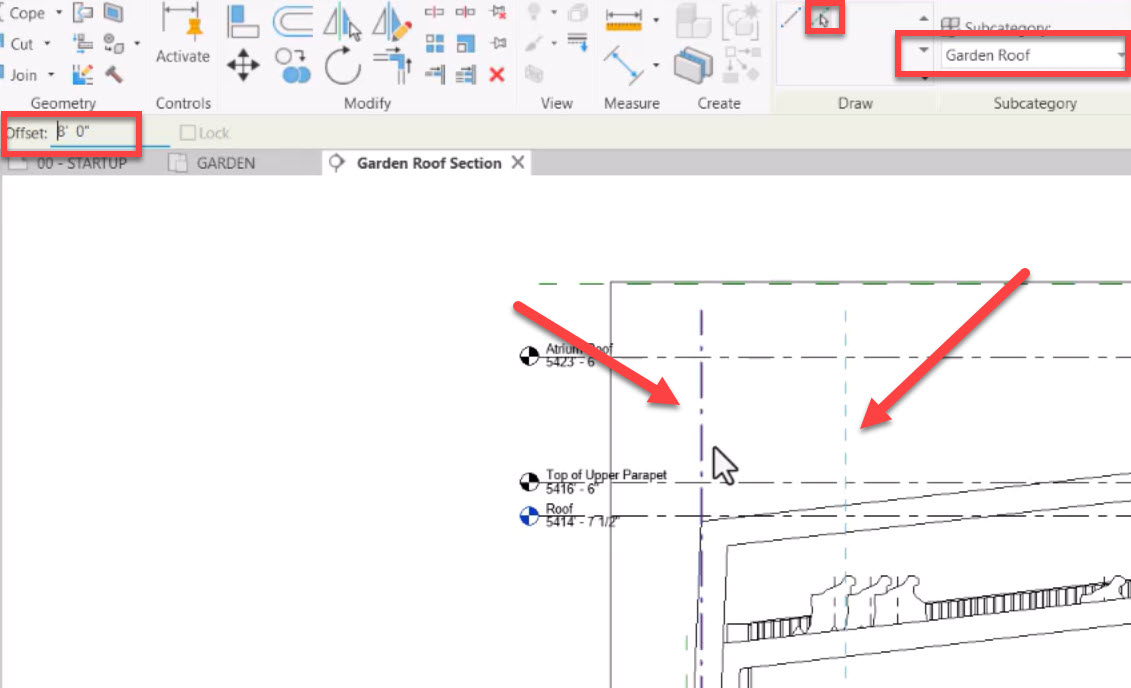
- Use the same steps to create another reference plane, but this time offset it to the left.
- On the Modify tab, click the Aligned Dimension button.
- Select the four vertical reference planes, then select an area above them to place the dimension.
- Note the crossed-out EQ text near the center of the dimension line. Click on it to enable the equal spacing of the reference planes.

- Select the roof structure and in the contextual tab, click Selection Box, as shown below.
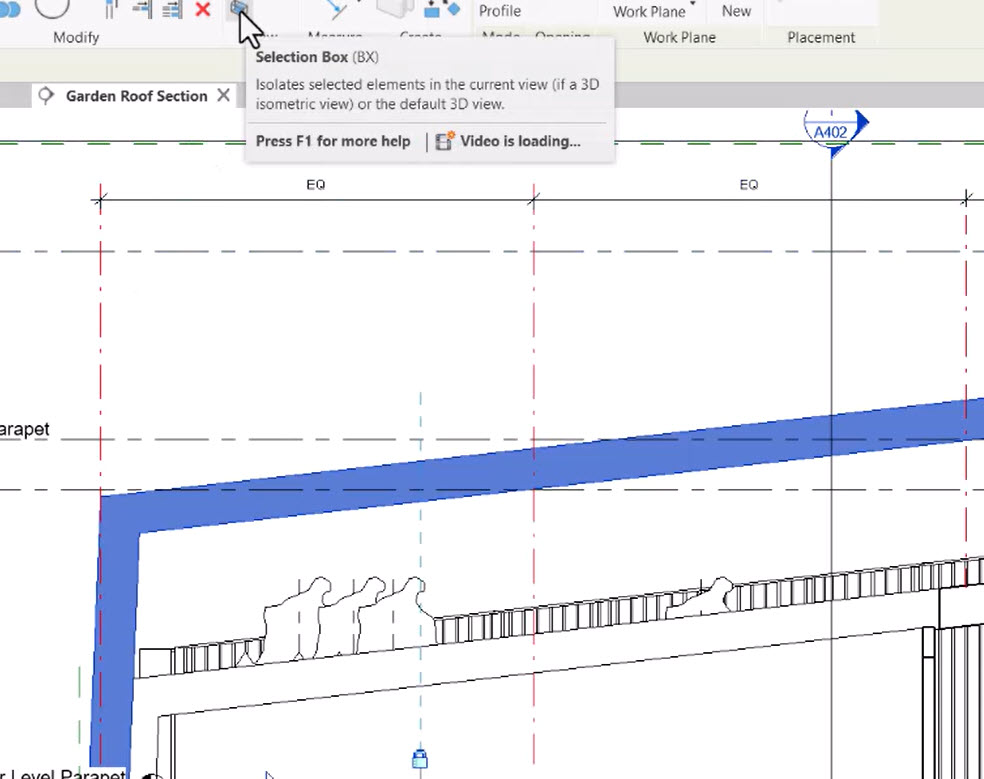
- Adjust the four sides of the section box to enlarge it.
- Rename the view to Garden Roof 3D.
- Close all other views except for Garden Roof 3D and Garden Roof Section.
- Tile the two views using the WT keyboard shortcut for Tile Windows.
- Use the ZA shortcut to zoom extents the model in all open views.
- In the Garden Roof Section view, create one more reference plane 4′-0″ above the Atrium Roof level by picking and offsetting from the Atrium level line.
- On the Massing & Site tab, click the In-Place Mass button.

- Revit will enable the Show Mass mode. That is fine. Click Close.
- In the Name dialog box, name the mass Garden Roof.
- On the Draw panel, click the Spline Through Points button.
- In the Work Plane dialog box, set the work plane to Reference Plane : Garden-01.
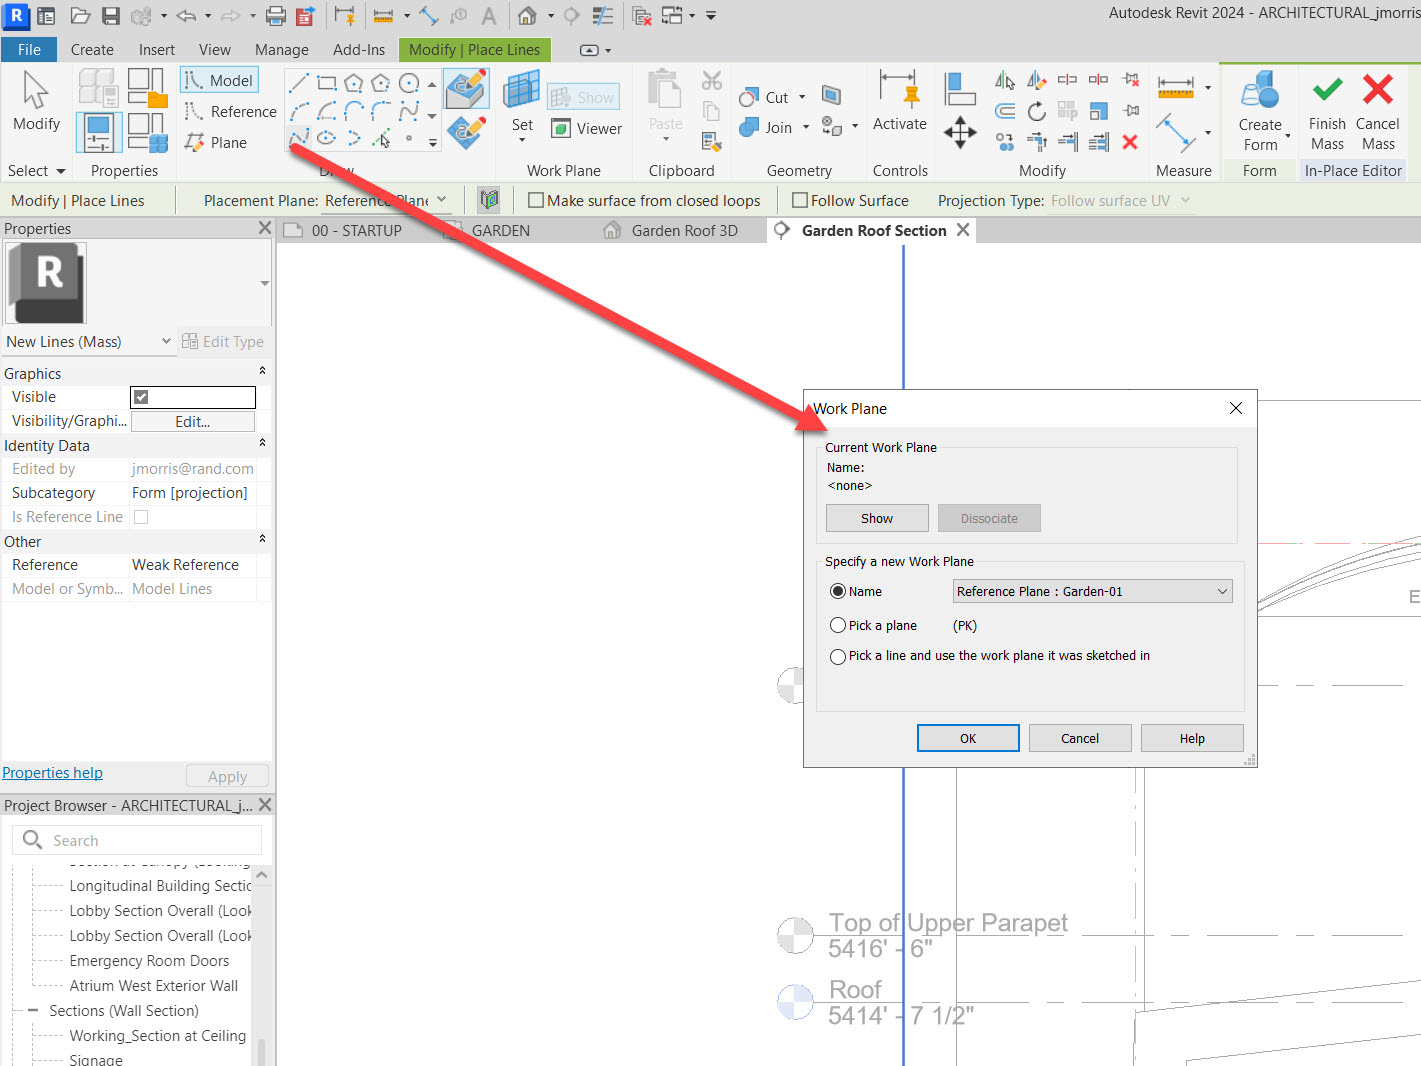
- Draw a spline similar to the one shown below.
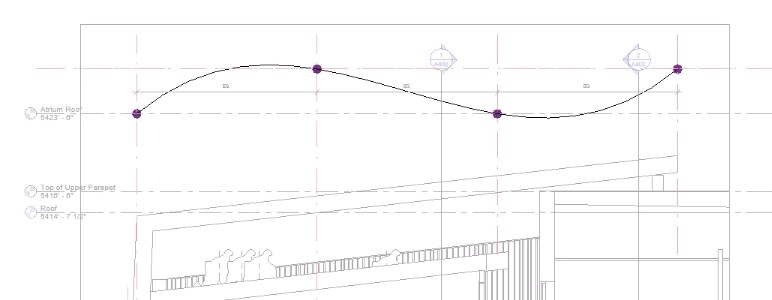
- Press <Esc>.
- Click the Spline Through Points button again.
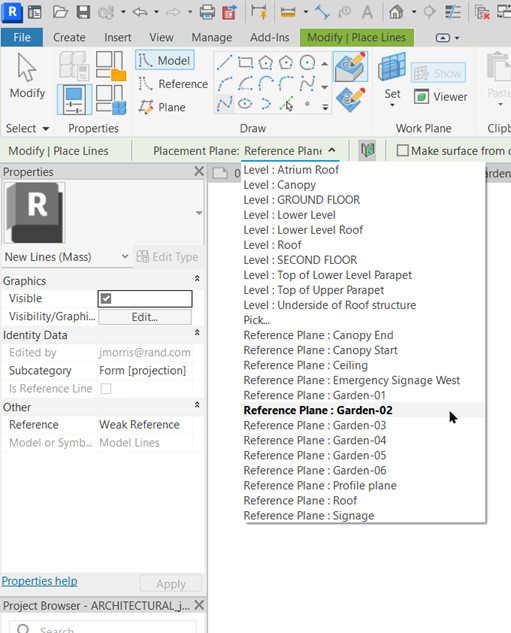
- In the Placement Plane drop-down list, select Garden-02, as shown below.
- Draw another spline on the Garden-02 reference plane.
- For the splines on reference planes Garden-03 through Garden-06, use Pick Lines in the Draw panel. Your splines should look similar to those shown below.
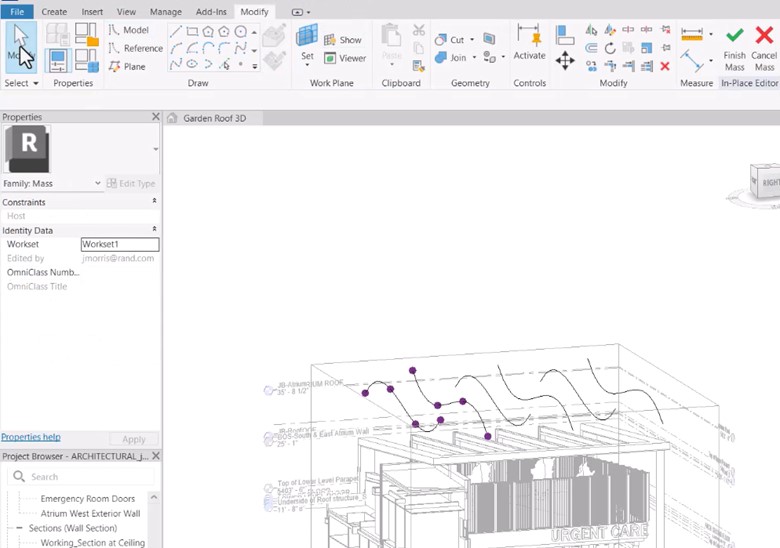
- Hold down <Ctrl> and select all six splines in the sequence they were created in.
- In the Form panel, click Create Form.
- Click Finish Mass.
- Your form should look similar to the one shown below.
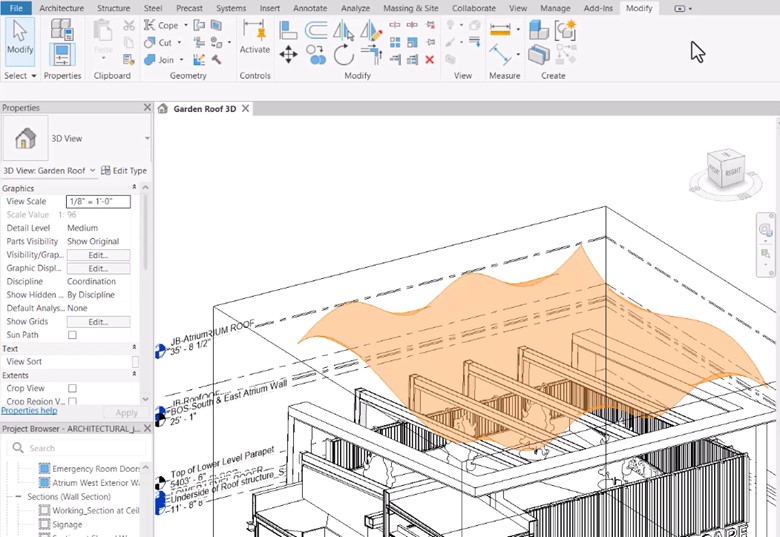
- If you get a warning that says Mass contains only mesh geometry, which can’t be used to compute Mass Floors, volume, or surface area, that’s OK.
- Save the model. You are all set to apply an actual Revit surface.


