& Construction

Integrated BIM tools, including Revit, AutoCAD, and Civil 3D
& Manufacturing

Professional CAD/CAM tools built on Inventor and AutoCAD
Integrated BIM tools, including Revit, AutoCAD, and Civil 3D
Professional CAD/CAM tools built on Inventor and AutoCAD
Adjust the size and orientation of analytical panels in a model.
Type:
Tutorial
Length:
2 min.
Tutorial resources
These downloadable resources will be used to complete this tutorial:
Transcript
00:03
In Revit, analytical panels represent the simplification of plate-like structural elements such as floors, slabs, and walls,
00:12
and they contain the necessary data for analyzing these elements.
00:16
Begin with analytical panels already created in Revit.
00:19
When these were created, analytical nodes were automatically generated at the ends or corners of the panel,
00:26
and controls were added to the panel edges.
00:29
Select a panel, and then click and drag a node.
00:33
Notice that moving a node changes the position of several connected elements at once,
00:37
modifying the geometry of the panel.
00:40
You can also adjust the geometry using the middle panel controls.
00:44
Select a control and click and drag it to modify another panel’s geometry.
00:49
To modify only the panel without changing connected elements, you must edit the sketch of the panel.
00:55
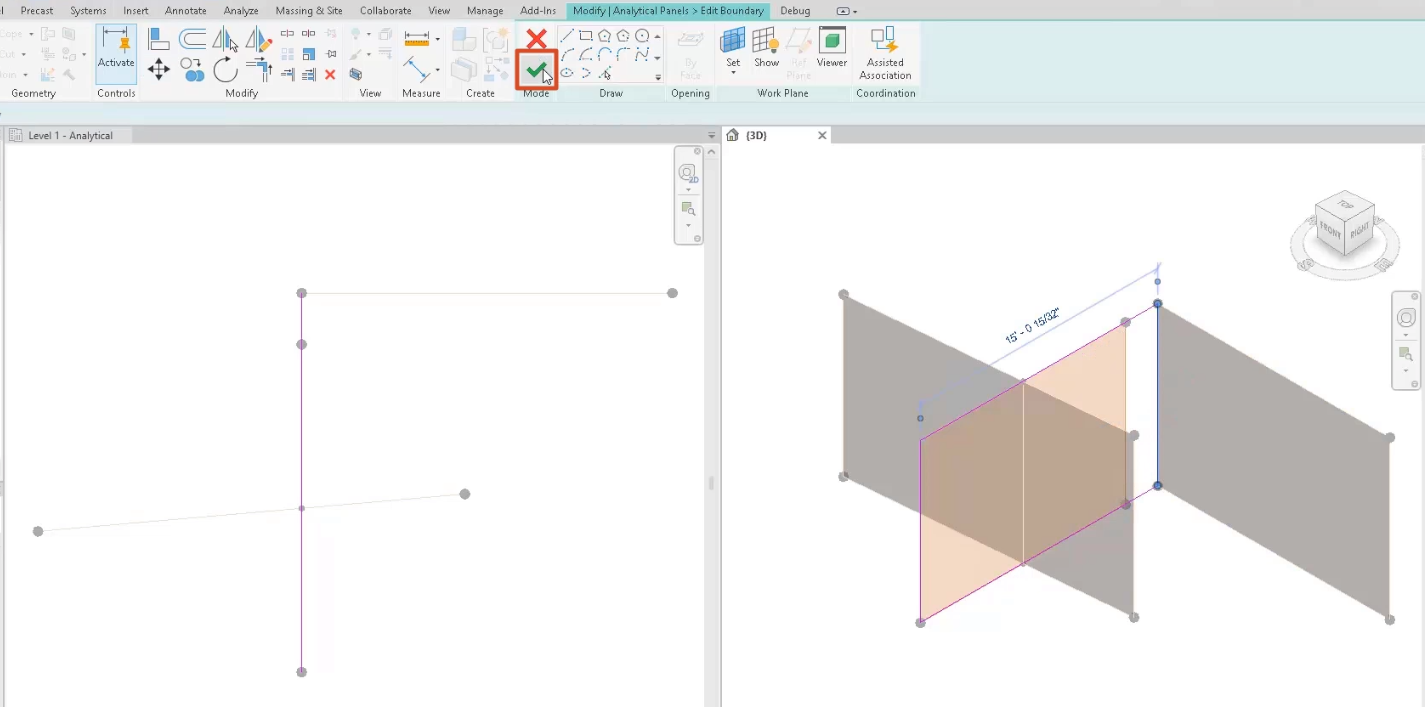
To do so, from the ribbon, in the Modify | Analytical Panels tab, Mode panel, select Edit Boundary.
01:02
Then, from the Modify panel, select Move.
01:06
Back in the workspace, click and drag an edge of a panel to adjust it.
01:11
Then from the ribbon, click Finish Edit Mode to save your new boundary.
01:16
With Revit, you can modify analytical panels directly in the canvas
01:20
to speed up the adjustment of the geometry of your analytical model.
Video transcript
00:03
In Revit, analytical panels represent the simplification of plate-like structural elements such as floors, slabs, and walls,
00:12
and they contain the necessary data for analyzing these elements.
00:16
Begin with analytical panels already created in Revit.
00:19
When these were created, analytical nodes were automatically generated at the ends or corners of the panel,
00:26
and controls were added to the panel edges.
00:29
Select a panel, and then click and drag a node.
00:33
Notice that moving a node changes the position of several connected elements at once,
00:37
modifying the geometry of the panel.
00:40
You can also adjust the geometry using the middle panel controls.
00:44
Select a control and click and drag it to modify another panel’s geometry.
00:49
To modify only the panel without changing connected elements, you must edit the sketch of the panel.
00:55
To do so, from the ribbon, in the Modify | Analytical Panels tab, Mode panel, select Edit Boundary.
01:02
Then, from the Modify panel, select Move.
01:06
Back in the workspace, click and drag an edge of a panel to adjust it.
01:11
Then from the ribbon, click Finish Edit Mode to save your new boundary.
01:16
With Revit, you can modify analytical panels directly in the canvas
01:20
to speed up the adjustment of the geometry of your analytical model.
In Revit, analytical panels represent the simplification of plate-like structural elements such as floors, slabs, and walls, and they contain the necessary data for analyzing these elements.
Begin with analytical panels already created in Revit. When the panels for this example were created, analytical nodes were automatically generated at the ends or corners of the panel, and controls were added to the panel edges.
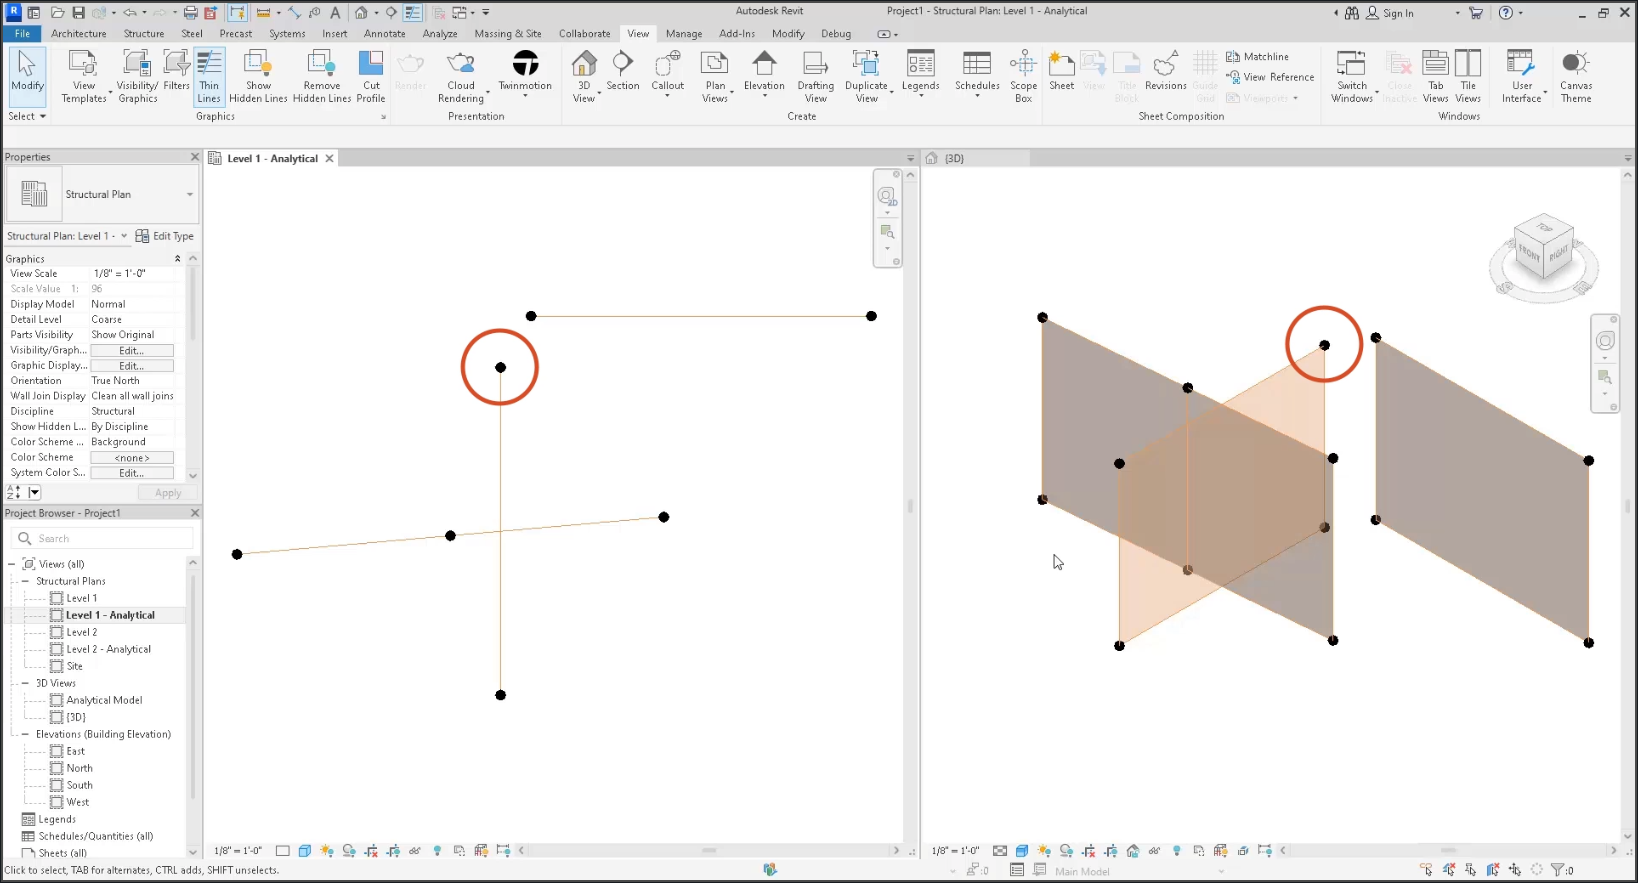
Notice that moving a node changes the position of several connected elements at once, modifying the geometry of the panel.
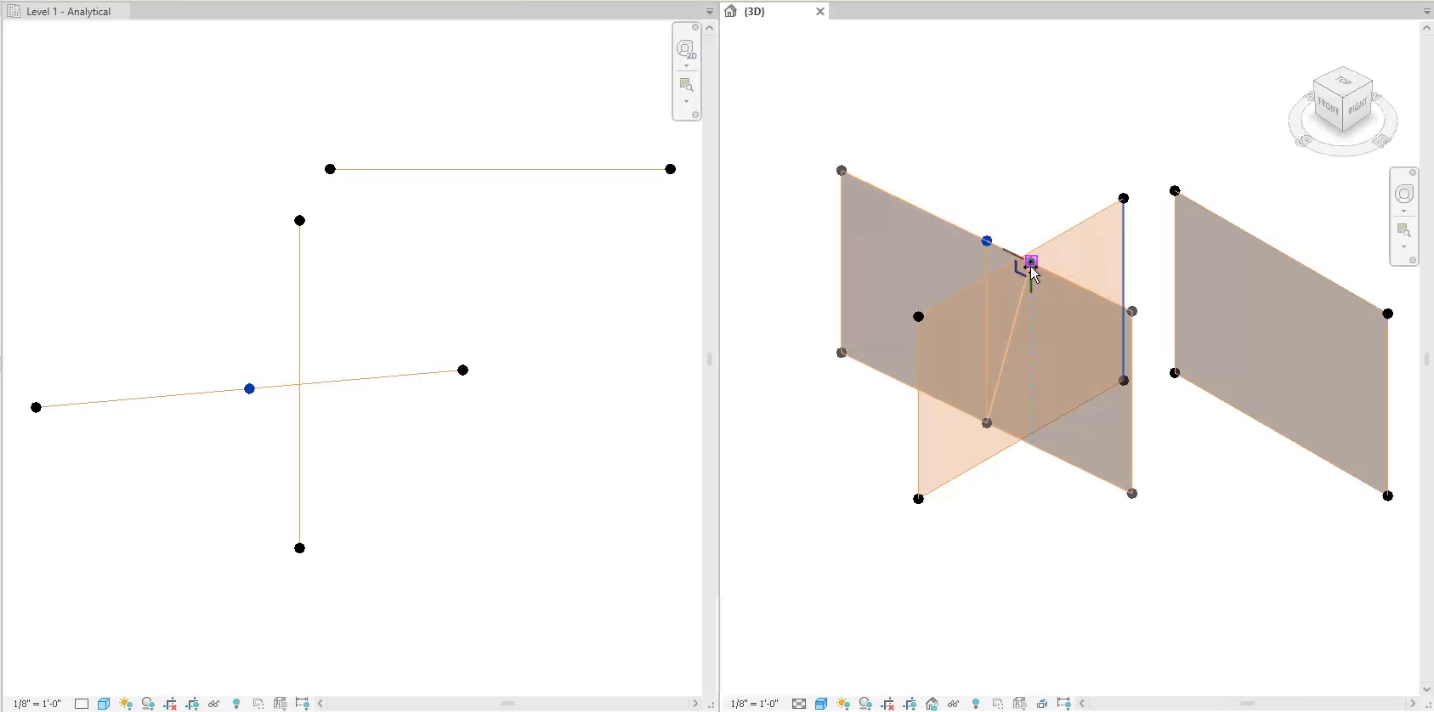
The geometry can also be adjusted using the middle panel controls.
To modify only the panel without changing connected elements, edit the sketch of the panel:
With Revit, analytical panels can be modified directly in the canvas to speed up the adjustment of the geometry of an analytical model.
Industry:
Role:
How to buy
Privacy | Do not sell or share my personal information | Cookie preferences | Report noncompliance | Terms of use | Legal | © 2025 Autodesk Inc. All rights reserved
Sign in for the best experience
Save your progress
Get access to courses
Receive personalized recommendations
May we collect and use your data?
Learn more about the Third Party Services we use and our Privacy Statement.May we collect and use your data to tailor your experience?
Explore the benefits of a customized experience by managing your privacy settings for this site or visit our Privacy Statement to learn more about your options.