Learn the basic rules of how a circuit works including voltage flow, loads, and conductive materials.

Greetings new engineers. This is a wonderful place to begin, with the simple circuit, which forms the building block to every piece of electronics in our world. Once fully understood, you’ll be ready to begin your own journey in designing and troubleshooting them yourself.
Elevate your design and manufacturing processes with Autodesk Fusion
The Building Blocks of the Circuit
Before diving into a complete circuit, it’s wise to first wrap your mind around the individual pieces that make up the whole, being flow, load, and conductivity. These are considered the basic laws that govern how circuits operate. We’ve organized these principles into three basic rules:
- Rule 1 – Electricity will always want to flow from a higher voltage to a lower voltage.
- Rule 2 – Electricity always has work that needs to be done.
- Rule 3 – Electricity always needs a path to travel.
Rule 1 – It’s All About the Flow
Every electronic circuit needs a power source, whether that’s from an AA battery that you can pop into your Xbox One controller or something with a bit more force like your wall outlet that can power a large number of devices. The electricity that comes flowing out from these sources is measured in voltage, or volts, or simply V. The movement of electric current in a circuit is driven by the supply voltage provided by the power source.
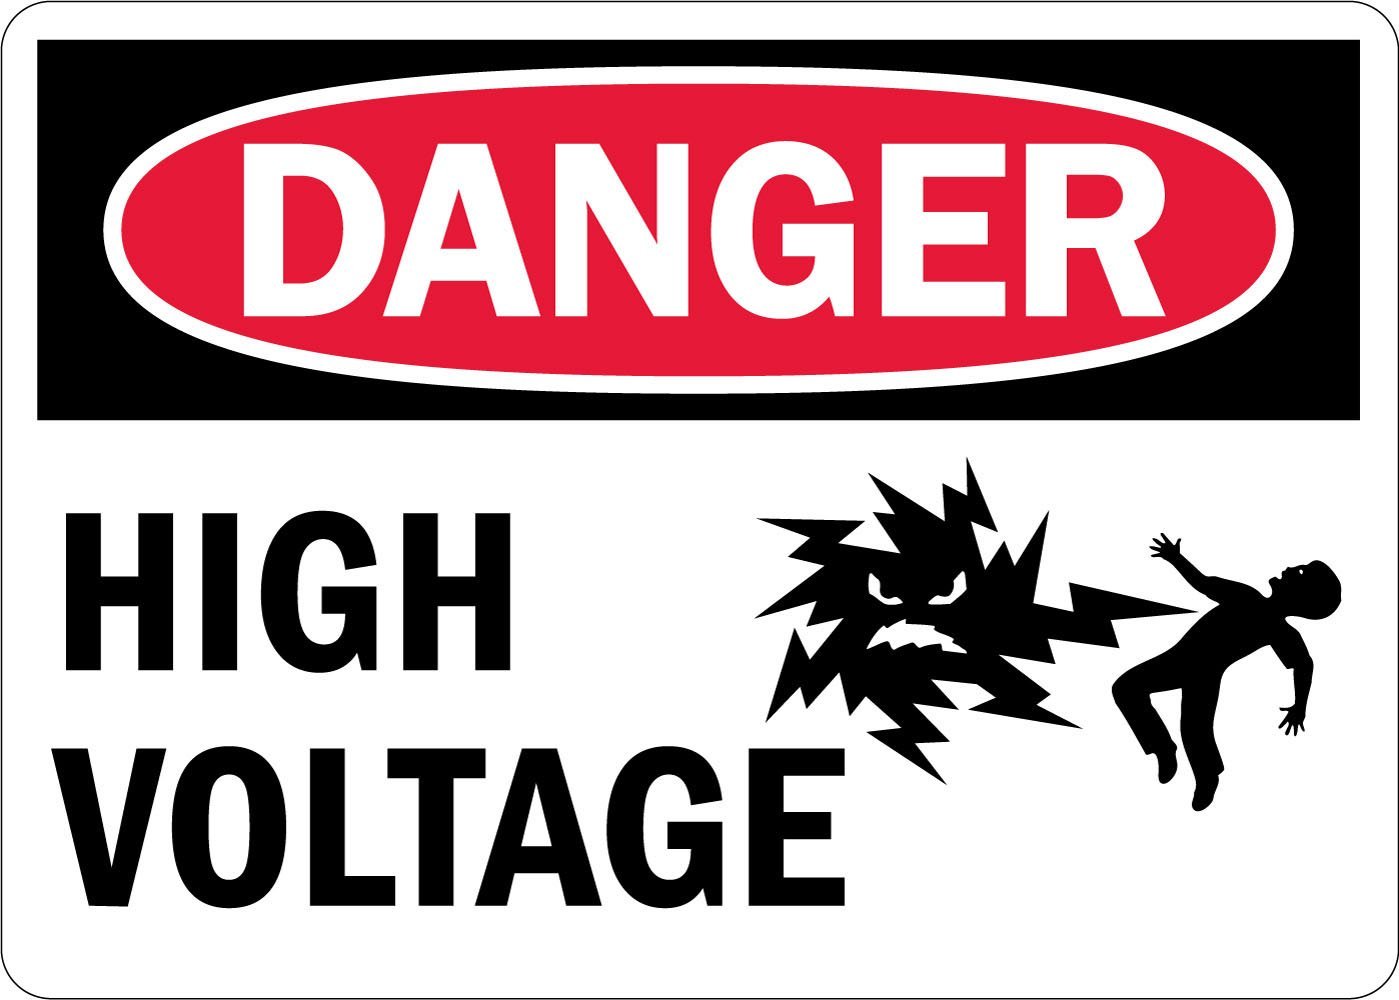
Regardless of where this power flows from, its purpose is always the same – to get from one area to another, and in the process to do some work, like charging your computer or turning on your lights.
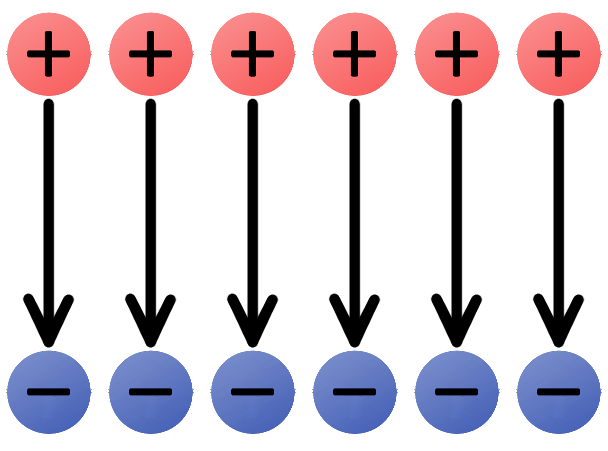
The fundamental component of this flow of power is also Rule 1: electricity will always want to flow from a higher voltage to a lower voltage. Always. This is called potential. You could say that it’s the potential electricity has to move from one area to another.
Real-word example
How does this relate to our real world? Let’s take the simple battery as an example:
- A battery has two sides (also called the negative terminal), the negative side is the low voltage, measuring in at 0v, and the positive side is the high voltage, measuring in at 1.5v.
- Energy will always want to flow out of the positive side of the battery to get to the negative side to find balance.
- To do this, it needs to flow along something, usually a copper wire, and do some work in the process, like turn on a light or spin a motor.
At the end of the day, all electricity wants to find its equilibrium at ground (0v). The only way to do this in a battery is to move from the positive to the negative side. We benefit from this natural desire of energy by placing some objects in the way that it needs to flow through, allowing us to turn on lights, power motors, and switch transistors on and off in a computer.
Rule 2 – Getting some work done
Now, you might have some electricity that wants to flow from a higher voltage to a lower voltage, but what’s the point? The only reason to make electricity flow is to give it some work to do. This process of electricity doing work in a circuit is called load. Without having a load, or some work for electricity to do, then there is no point in having a circuit. A load can be anything you can imagine, such as:
- Spinning a motor that turns the propellers of a drone.
- Turning on a LED on a charging cable to indicate that your laptop is plugged in.
- Connecting your headset wirelessly with your laptop to listen to music.
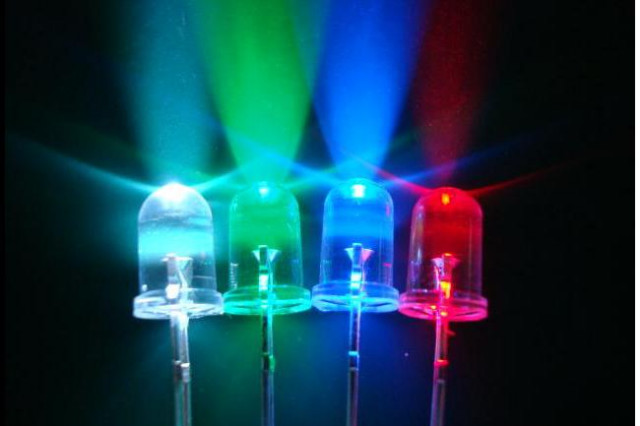
Notice that all of these loads are actions. Electricity always makes something physical happen, even if we can’t see it with our own eyes. But why is it called a load? You can think of it as a burden to whatever is powering your circuit. Spinning a motor requires electricity, and this takes energy away from the power supply that it once had. The power dissipated by a load depends on the resistance values of the components in the circuit, which determines how much energy is converted to work or heat.
Remember Rule 2 – Electricity always has work that will need to be done. Without work, then a circuit has no use.
Rule 3 – Following a path
The third and final rule is what makes the first two rules possible – electricity needs a path to travel. This path acts as a kind of middleman. Let’s say you plug your laptop charger into a wall socket, and then into your laptop. It charges, obviously, but without that cord between your computer and wall outlet, nothing would happen.
This is because electricity needs a path to follow to get from one destination to another. And the journey is always the same:
- Power – Electricity always starts from a source, like a battery or an outlet.
- Journey – It then takes its journey along a path, doing its work along the way.
- Destination – It then arrives at its final destination, finding rest at the lowest voltage point.
This path that electricity walks on is made up of what’s called conductive material, which is made up of common metals like copper, silver, gold, or aluminum. Electricity loves to travel on this stuff. Electricity is also very selective, and it won’t bother traveling on paths made up of inductive materials. This includes things like rubber, glass, and even air.
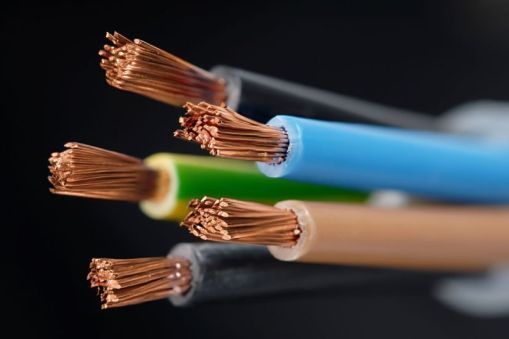
Remember Rule 3 – Electricity always needs a path to travel on. Without a path, it can’t go anywhere.
Understanding Ohm’s law
If you want to truly master electric circuits, there’s one rule you can’t ignore: Ohm’s Law. This fundamental principle is the backbone of circuit analysis, helping you understand how voltage, current, and resistance interact in any circuit configuration—whether you’re working with simple series circuits, parallel circuits, or more complex series-parallel combination circuits.
Ohm’s Law states that the current flowing through a conductor between two points is directly proportional to the voltage across those points and inversely proportional to the resistance between them. In other words, if you know any two of these values—voltage (V), current (I), or resistance (R)—you can always find the third using the classic Ohm’s Law equation:
V = I × RPutting it all together: The complete circuit
Let’s put all of these rules together now in a complete definition of a circuit.
A circuit is simply a path that electricity can flow through.
And with that simple concept, people have built some complex circuits that have sent humans to space and the depths of our deepest oceans. For now, we’ll keep things simple and put together our first circuit. Here’s what you’ll need if you want to follow along:
- (1) 9-volt battery
- (1) 470 Ω resistor
- (1) Generic LED
- (3) Test leads with alligator clips
In more advanced setups, you might use three resistors or other circuit elements to explore how the whole circuit behaves.
Step 1 – Adding a Power Source
Going back to our Rule of Three, the first says that electricity will always want to flow from a higher voltage to a lower voltage. Okay, so this means we need a power source in this circuit, we’ll add our 9v battery. Batteries are common voltage sources in circuits, and the total voltage supplied by the battery determines how much energy is available to the circuit.
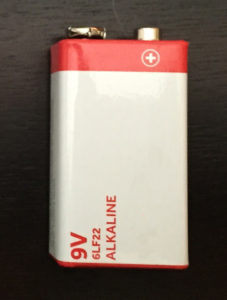
Rule 1 is now fulfilled. We have a power source that has a high voltage on the positive end (+) and 0v on the negative end (-). But all of that electricity is going to waste if we don’t do something with it, so let’s give it some work (load).
Step 2 – Adding some work
We now want our electricity to do some work for us before it can come to rest, so let’s have it turn on a simple LED light. You’ve likely seen these everywhere, in your Christmas tree, flashlights, light bulbs, etc… So we’ll take this LED and place it on the other side of our battery.
Now, the one thing to mention about an LED is that they are sensitive and can’t have too much power running through them, so we need to add a resistor. We won’t go into the details now but just know that a resistor will do like its name says – resist the flow of electricity enough for our LED to handle it. Let’s place that resistor to the left of our LED.
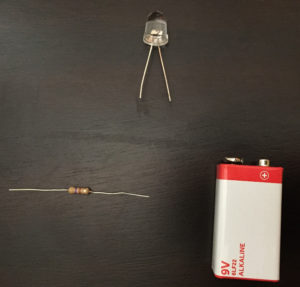
Great, Rule 2 is now complete, and our electricity has some work to do. But it doesn’t have a way to complete its work without a path, let’s add that now.
Step 3 – Providing a path
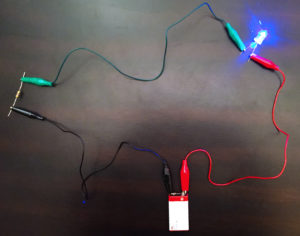
This part is simple, we just need to connect our alligator clips between all of the components on our circuit. If you do this correctly, then your LED will shine bright! Remember, when connecting wires to a battery, always connect the positive end first, then the negative. Check out the picture below for how it all needs to be connected together.
Types of circuits
Now, before you go running off into the wild and building your own circuits, you need to know about two ways to describe a circuit, one of which might ruin your circuit’s day.
Circuits can be arranged as series and parallel circuits. Understanding the differences between series and parallel configurations, including the specific benefits of parallel configurations, is essential for effective circuit analysis and design.
Closed circuit or open circuit
A circuit is considered a closed circuit when there is a complete path available for electricity to travel on. This is also referred to as a complete circuit. Now, if your circuit isn’t working as intended, then this means that it’s an open circuit. This can be caused by several things, including a loose connection or a broken wire.
Here’s an easy, visual way to understand the difference between a closed or open circuit, check out the circuit diagram below and notice that it’s the same circuit we made above, except now it has a switch.
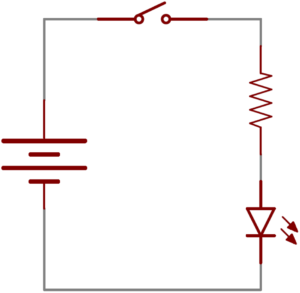
Right now, the switch is up, and you’ll see that electricity doesn’t have a smooth path to flow through since the switch is breaking the connection. This is an open circuit. But what happens if you flip the switch?
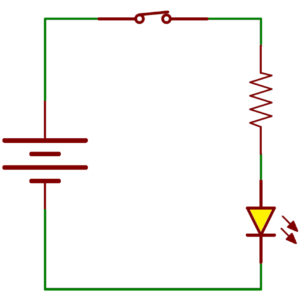
Aha! Now you just created a complete path for your electricity to travel on, and your LED will turn on! This is a closed circuit. In a closed circuit, the algebraic sum of the potential differences around the loop is zero, which is a key principle in circuit analysis.
Short Circuit
Then there’s the short circuit. When you don’t give your circuit any work to do, but you still provide some power, prepare for some problems. Check out our circuit below, we took out the LED, resistor, and switch, leaving just our copper wire and battery.
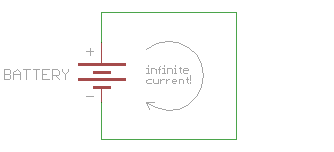
If we hook this thing together in its physical form, then the battery and wire are going to get super hot, and eventually, the battery will run out of juice. Why does this happen? When you give electricity some work to do in a circuit like lighting an LED or spinning a motor, then this limits how much electricity will flow through your circuit.
But the minute you take any of that work out of your circuit, the electricity goes crazy and runs around its path at full speed without anything holding it back. If you let this happen for an extended period of time, then you’ll find yourself with a damaged power supply, a drained battery, or maybe something even worse, like a fire!
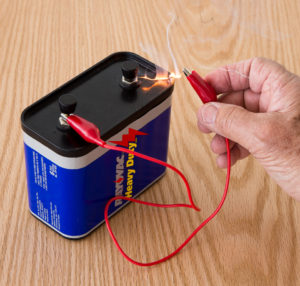
So if you ever work with a circuit and your wire or battery is getting super hot, then turn everything off immediately and look for any short circuits.
The humble circuit and its place in our world of electronics
There you go, young electronics master, you now have all the information you need to control the humble circuit. By understanding how a circuit works, you’ll soon be able to tackle projects of all shapes and sizes. As you move forward, practice analyzing circuits using different methods, try designing circuits for your own applications, and always review all the data to ensure your calculations are accurate and complete. But before beginning your own journey, remember the Guiding Rule of Threes:
- Rule 1 – Electricity will always want to flow from a higher voltage to a lower voltage.
- Rule 2 – Electricity always has work that needs to be done.
- Rule 3 – Electricity always needs a path to travel on.
And if your circuit ever gets super hot, shut it down! You’ve got a short circuit.
Ready to build your first circuit today?