& Construction

Integrated BIM tools, including Revit, AutoCAD, and Civil 3D
& Manufacturing

Professional CAD/CAM tools built on Inventor and AutoCAD
1 min read
Learn how to get more out of your 4th axis by wrapping 2D toolpaths in the Fusion 360 Manufacture workspace.
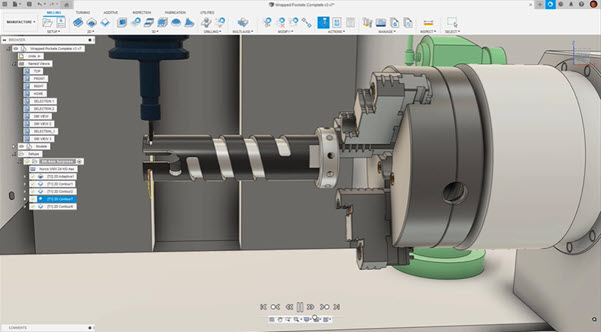
The wrap option in Fusion 360 leverages the 4th axis on your machine and can be used with 2D Adaptive, 2D Pocket, and 2D Contour. It allows these toolpaths to be wrapped around perfectly cylindrical geometry, which is machined using a rotary axis.
The image below shows a great example of a component where leveraging a rotary axis is going to provide more efficient results and optimal machining conditions.

To get started, you’ll need to ensure your setup is correct and most importantly, your WCS is oriented correctly with your X-axis aligned with your machine’s rotary axis. In this case, our rotary axis is the A-axis, we can position the X-axis perpendicular to the front face.
The toolpath itself works as easily as any other 2D operation. Simply select the geometry you want to machine and then select the option wrap in the Geometry tab. Next, select the geometry you want to wrap the toolpath around. Remember, this selection must be a perfectly cylindrical face. If it’s not, Fusion 360 will not give you the option to select it. By default, the offset value is zero. This means the wrap will be nominal to the cylinder you’ve selected. If you’d like to offset this value, you can do so in the offset parameter.
The Heights tab is slightly different when you choose to wrap a toolpath, but the concept is identical. The heights form as cylinders instead of plains due to the 4-axis nature of the toolpath.
Once you’ve made the height selections, everything else remains the same. Just make any appropriate changes in the passes and linking tab and there you have it! You now know how to use the 4-axis wrap feature in the Fusion 360 manufacture workspace.
Take a look at the following tutorial to see this entire process in action:
Ready to give Fusion 360 a try? Start today with a 30-day free trial:

By clicking subscribe, I agree to receive the Fusion newsletter and acknowledge the Autodesk Privacy Statement.
Success!
May we collect and use your data?
Learn more about the Third Party Services we use and our Privacy Statement.May we collect and use your data to tailor your experience?
Explore the benefits of a customized experience by managing your privacy settings for this site or visit our Privacy Statement to learn more about your options.