Here are five tips to consider when editing generative design studies, from the Smooth command to the Zebra Analysis tool.
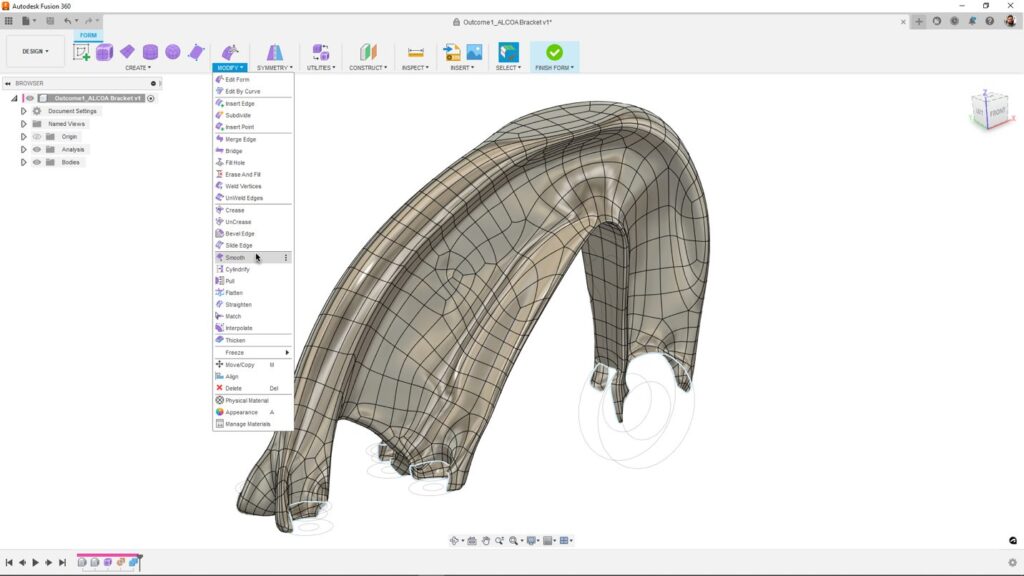
Picture this: you’ve just finished a generative design study. Your design meets all your functional requirements, but the part isn’t as smooth or as aesthetically pleasing as you had hoped.
Not to worry, there’s a reason your generative design outcome comes with a feature history — it’s because they’re editable!
In this blog post, we’ll go over five tips and tricks for working with generatively designed parts, how to edit and post-process them, and clean them up.
1. Check surface quality
For hidden parts, surface quality may not be something you find all that important. However, more complexity usually equals more manufacturing time. The quickest and easiest way to check a part’s surface complexity is through a zebra analysis.
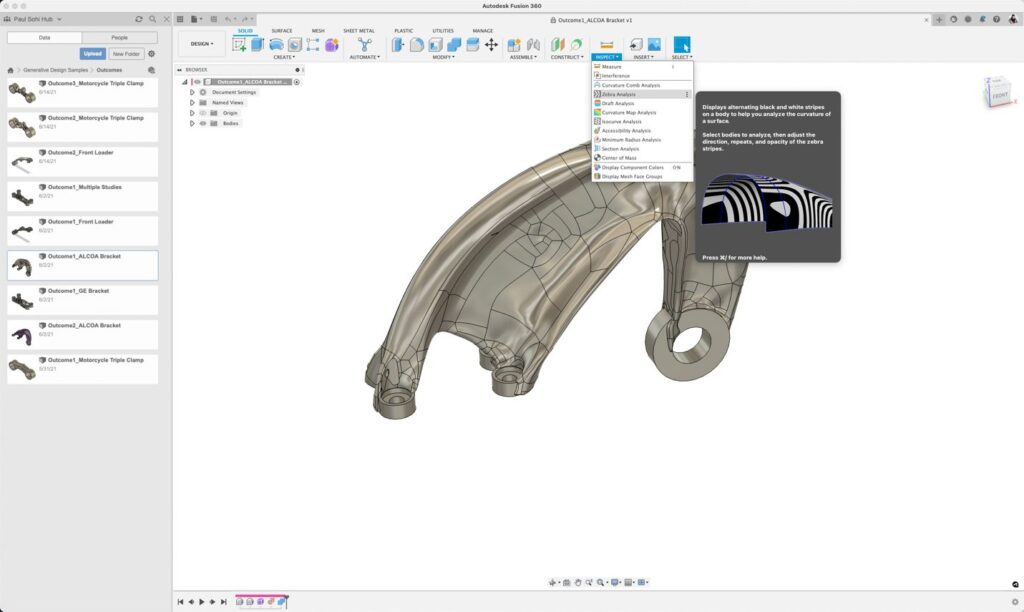
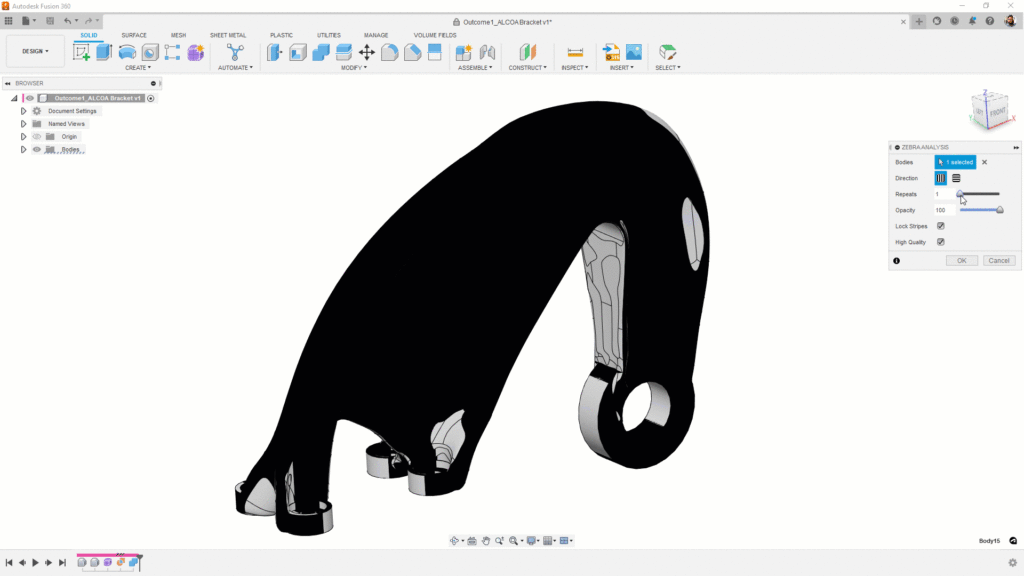
The Zebra Analysis tool in Fusion 360 might seem confusing, but it’s actually quite simple. If the black and white stripes look even, you have a nice, smooth surface. But if the bands are dramatically different, that means there’s a lot of surface complexity.
You can find the Zebra Analysis tool on the Inspect panel. After you activate the tool and select your desired body, a few controls to help evaluate your model’s complexity will appear.
2. Utilize the Smooth command
If you identify issues with your part’s complexity, how do you go about solving them? The Smooth command in Fusion 360 can help. You can either smooth your whole part or pick a series of faces to focus on.
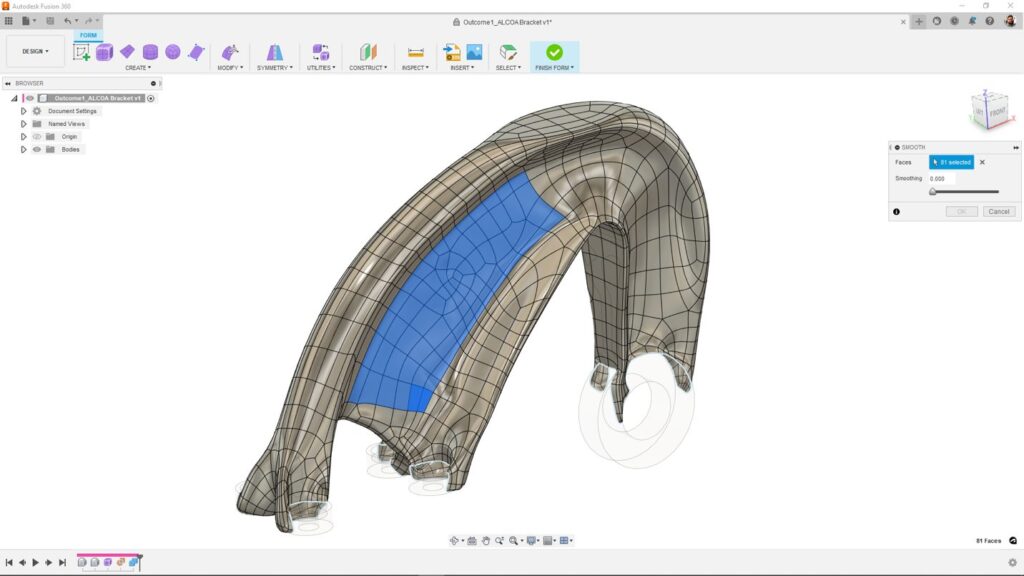
To access the Smooth command, right-click and choose the Form icon in your generative design outcome’s timeline. When working with the smooth tool, the amount of smoothing applied will display as an integer from 0 to 1 (from no smoothing to maximum smoothing). The tool works by averaging out the surfaces next to one another.
After running the Smooth command, the Zebra analysis will hopefully show dramatically less complexity where the Smooth command was applied.

3. Take advantage of editing selection tools
When working with a complex generative design, you may want to only edit certain parts without disrupting the rest. The good news is there are a ton of useful tools in the Edit Form command that are there to help. One of the most useful ones, Feature Selection, makes detecting and selecting branches.
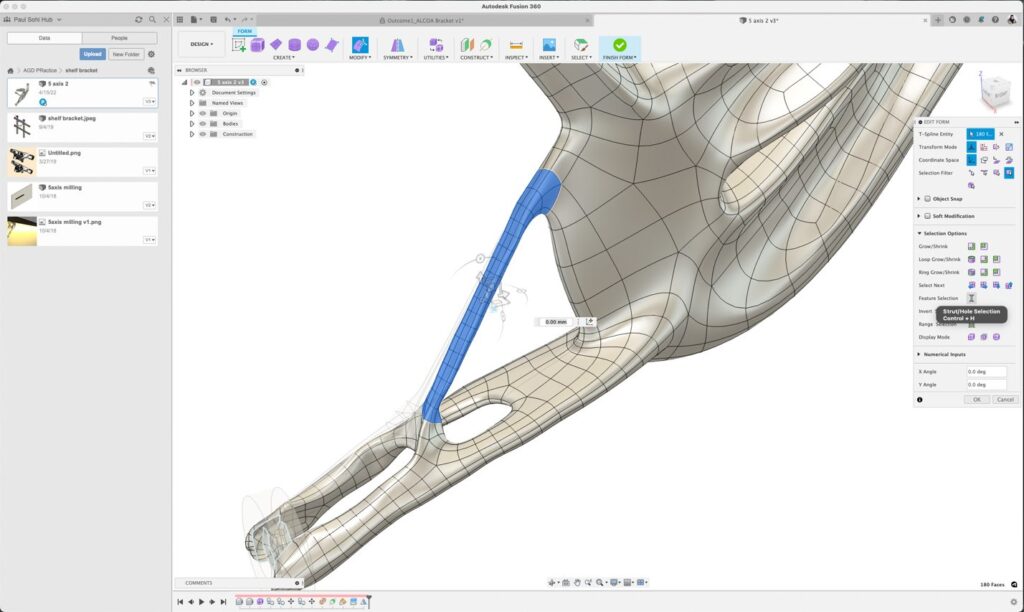
You can use the keyboard shortcut Control+H to access the Feature Selection tool or simply pick one face in the area of interest. In addition to the Feature Selection tool, you can use Range Selection to grab a group of faces in a chain, Grow/Shrink to select neighboring faces and Invert what you’ve picked to make selecting certain areas easier.
4. Identify problem areas
T-splines make modeling complex geometries easy. Be cautious, though: it’s equally as easy to accidentally create problem areas that won’t translate out of T-splines into a solid model. No worries, though! The Repair Body tool in Fusion 360 exists for a reason and does exactly what its name implies.
Within the Repair Body tool, you’ll find various options to help you reverse any unintentional errors. There’s an Error Label identifier for Error Star where more than four faces connect, Error T Points where three faces connect, and Free Edges. These three tools point out potential issues, rather than existing problems.
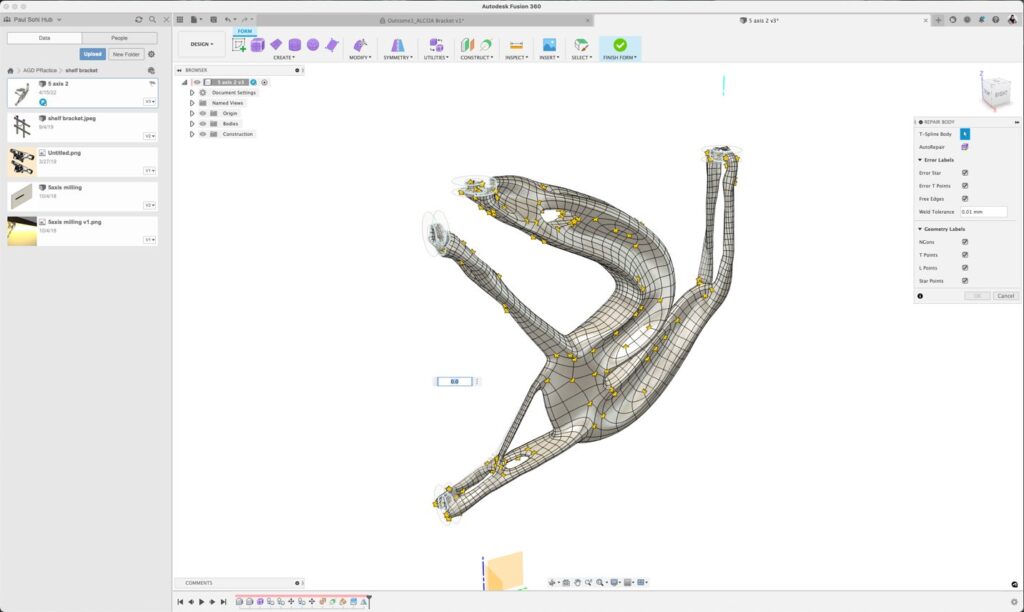
In the instance above, you can see a lot of star points. The ones indicated in yellow are highlighted as a point of potential concern but not necessarily a problem. Auto-repair will find the path of least resistance and fix the geometry so can convert it to a solid.
5. Run an FEA analysis
Generative design outcomes result from your specific constraints. Any editing done to the geometry may change performance. We recommend always running an FEA analysis after editing to be safe. Generative design study data is automatically linked, so you can easily jump over to the Simulation workspace to check how your changes have impacted the design. You can learn exactly how to do this here.
Now you have four strategies when editing generative design studies. And you can learn even more tools here. Ready to put what you know to practice?
