Elevate your design and manufacturing processes with Autodesk Fusion
In these days of all work transitioning remote, collaboration is paramount. In a recent article from McKinsey & Company, Kevin Sneader says, “One has to do with the human imperative to communicate. In this sense, the death of distance continues to be very real, and very positive. Individuals, communities, businesses, and governments alike are all learning new ways to connect: almost everyone knows a story of the grandparent who finally learned to Zoom, Skype, or FaceTime.”
We also see these trends in the CAD/CAM industry, as the new normal of design, engineering, and manufacturing begin to take shape. Take a look at these four easy steps to kick start your collaboration efforts with Fusion 360 Team.
What is Fusion 360 Team?
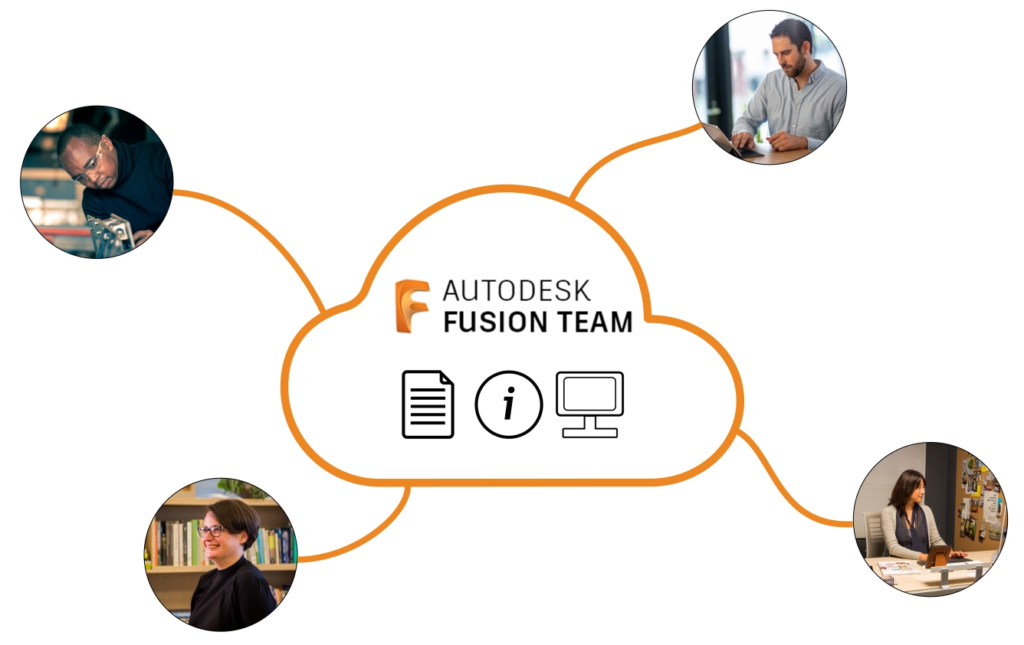
The first thing you may be asking yourself is, what exactly is Fusion 360 Team?
Fusion 360 Team is a cloud-based collaboration tool that lets designers, engineers, customers, and other stakeholders, work efficiently in one centralized workspace.
With Fusion 360 Team, you can:
- Share, access, and edit data with other users, and you are not limited to a department or organization
- Manage users and their access privileges to respective projects
- Communicate and discuss with those on the project using the markup tool and comments box
- View data from any device and from anywhere giving you greater accessibility
- Share files with other stakeholders, including your customers and suppliers, who typically do not have access to the design software tools
Simply put, Fusion 360 Team is a tool that helps you collaborate effectively by putting people and data all in one place.
1 – How to set up your Team Hub?
Now, you’re thinking this all sounds amazing, but how do I set up my Team Hub?
When you first open Fusion 360, you will come across the following screen, which asks you to join an existing Hub. This is based on the domain of your email, so anyone who has an existing hub with the same domain can be found here. Or, you can set up your own.
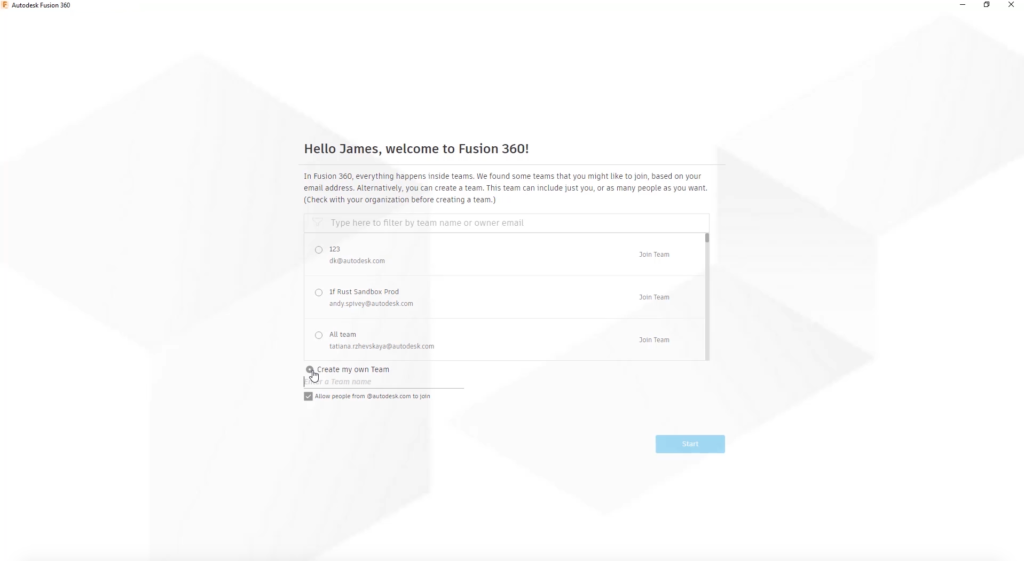
Simply join or create your own, press the Start button, and you are good to go!
If you have previously set up a personal account and can’t access this screen, then go to your team hub choice to onboard yourself.
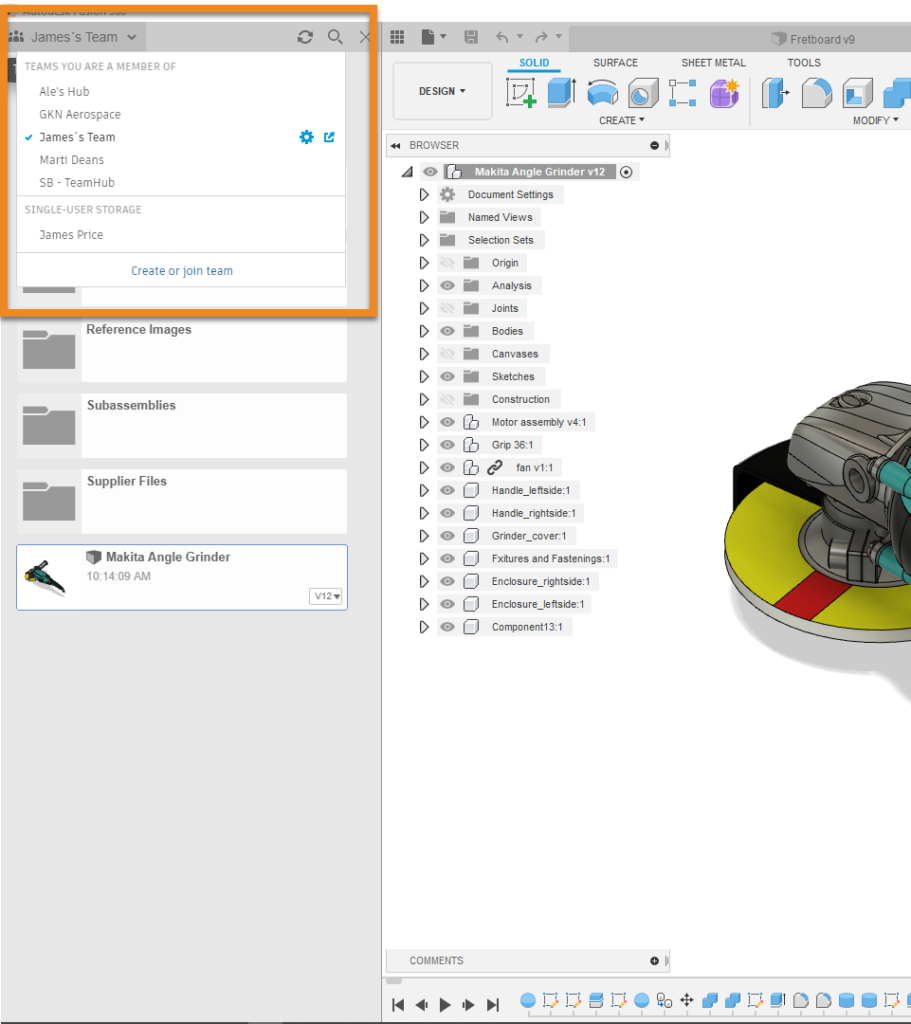
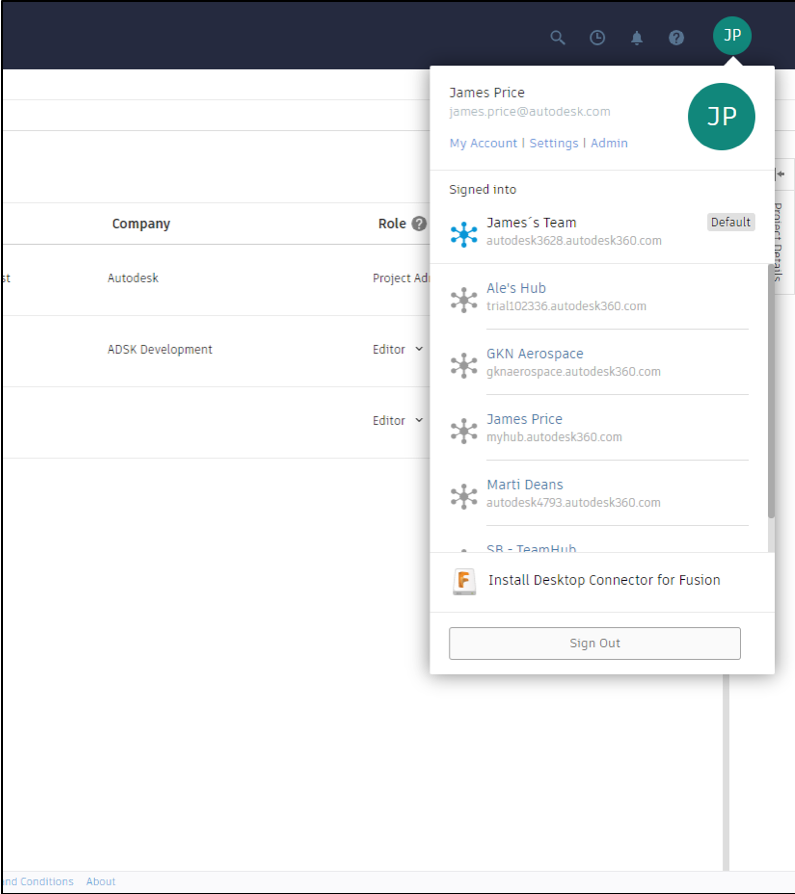
You can be a part of any number of hubs, and to change between them, simply use the dropdown from your data panel in Fusion 360 or on the Team Hub under your profile.
2 – Inviting users and project roles
You’ve now joined or set up your own team, but you don’t want to be all alone here, so next, we’ll see how we can invite users and set their access rights.
First, you need to create a project, which can be done either from your Hub or from directly within Fusion 360. Once created, you are now ready to add users.
Project roles
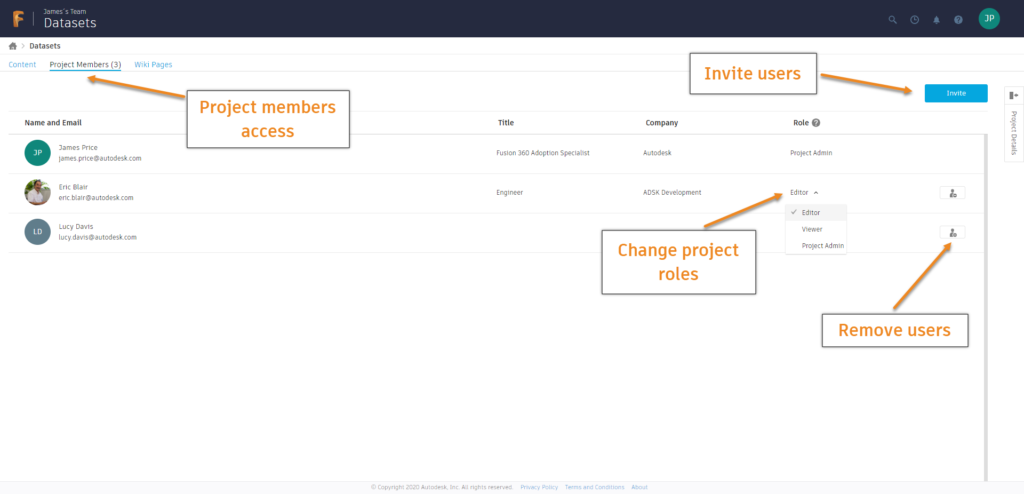
You can either invite a user to a project from the People’s tab on the data panel, or the Project Details tab on the web portal. Just enter their email address(es), and set their role to be Editor, Viewer, or Administrator. More details on Project Roles can be found here.
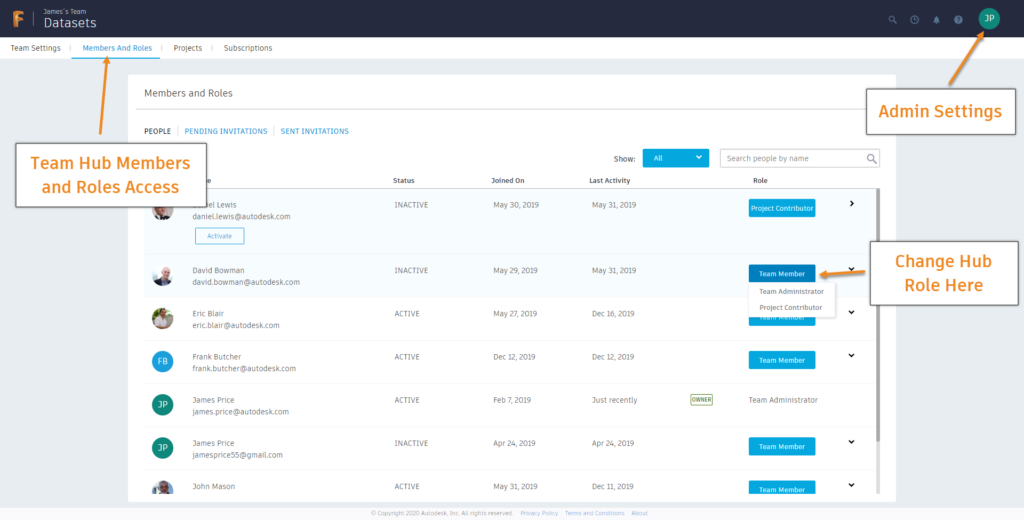
Team Hub roles
You can also set Team Hub specific roles from the Members and Roles tab under your Admin Settings to be Team Administrator, Team Member, or Project Contributor. More details here.
3 – Communicating with your Team
Your Team is set up, you have created a project, added users, and set their project roles; now you are ready to start creating and sharing data, and communicating with your team.
First, you can upload data to your project directly from the data panel or the web portal using the upload button.
Version history and milestones
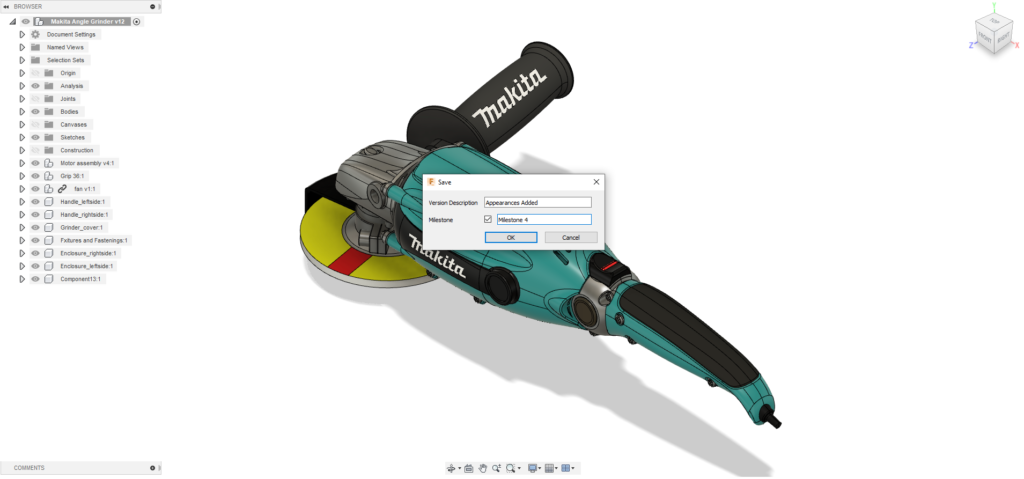
Once you start designing, you will need to save at some point. Every time you do save, the file will automatically increase in version number. This means you are always working on the most up to date version, helping to avoid working on out of date designs.
Also, you can add a milestone to your design for those times you have reached a significant stage. With both, you can add a description so those who access at a later date will understand the reasoning behind them.
In either case, you can always promote a previous version if you find a mistake that has been made, and you want to revert to a previous state.
Commenting
You can also comment on your design directly in Fusion 360 or from the Team Hub, and all comments are saved with that file meaning anyone with access to the design can see those same comments. So, rather than screenshotting, editing, and sending via email with your comment, all can be done directly within Fusion 360 and Fusion 360 Team. Also, if you ‘@’ another user, they will receive an instant notification.
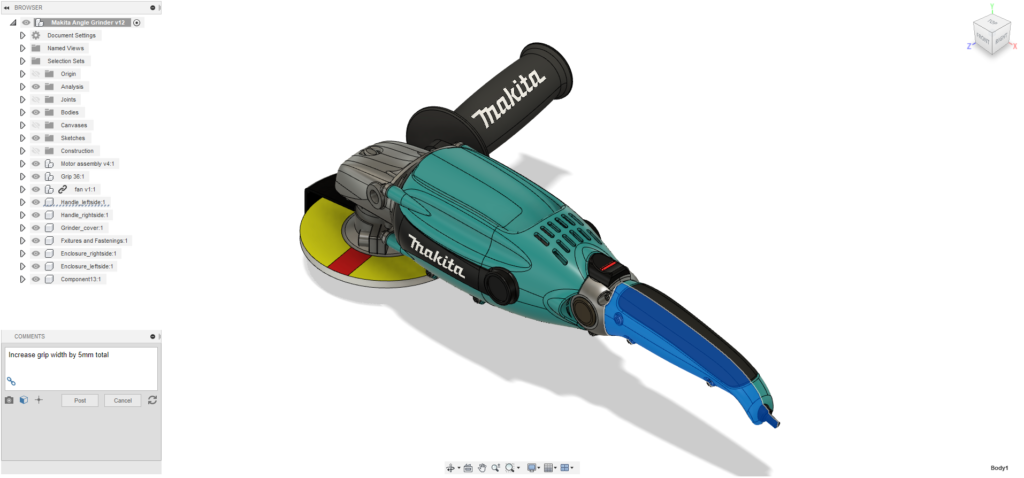
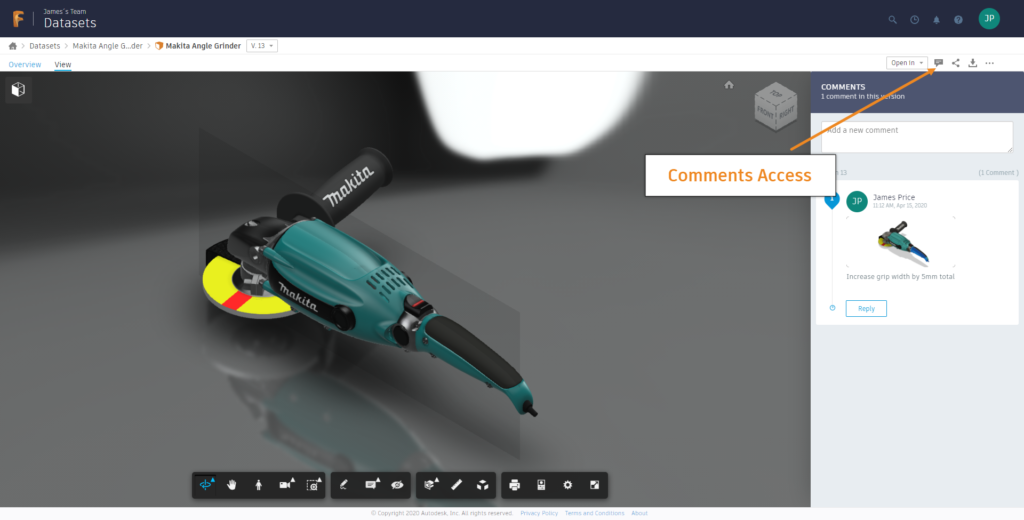
More details on commenting can be found here.
4 – Working with non-native files
If working with suppliers or sub-contractors, or even other internal departments, you will typically find yourself working with any number of file types, not limited to CAD data.
Fusion 360 Team is a powerful tool that lets you work with not only non-native CAD data but also general file types.
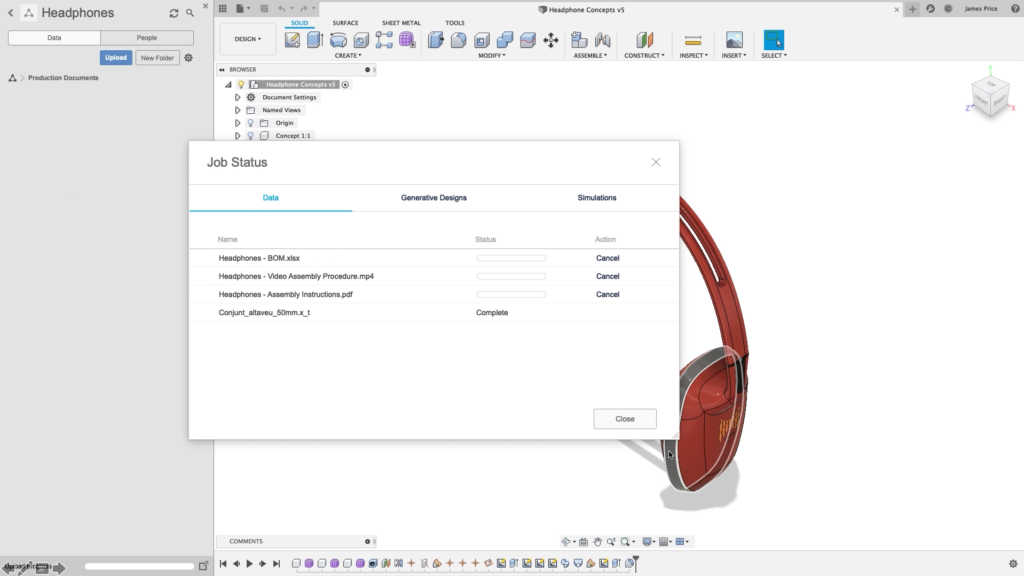
You can upload Excel spreadsheets, pdfs, movies; basically any file type you can think of. It also lets you work with non-native CAD data, for instance, Solidworks, Inventor, STEP files, etc., and through the use of AnyCAD, you can open and work on these in Fusion 360. Note, this functionality requires a commercial subscription to Fusion 360 or Fusion Team.
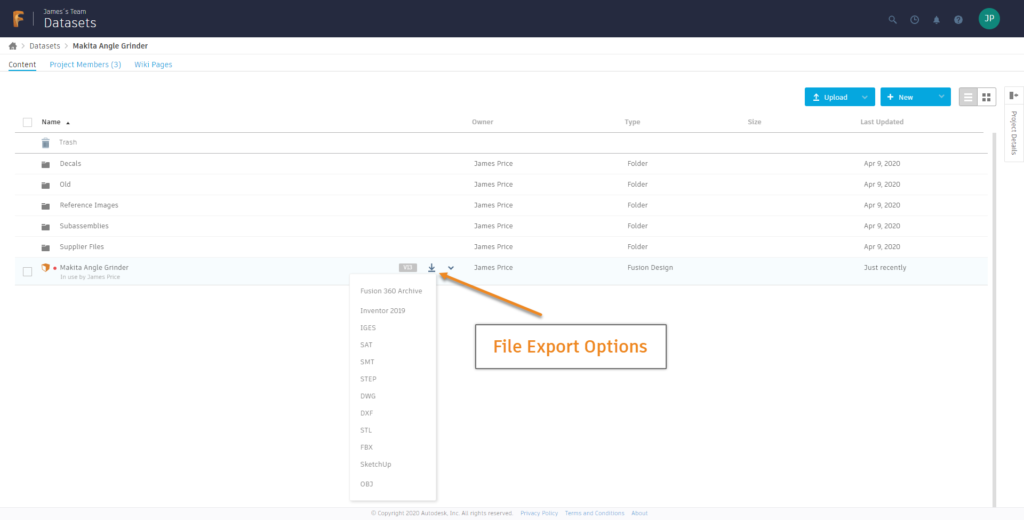
Finally, if you want to export these files to a supplier friendly format, then you can do so directly from the Hub or by exporting from Fusion 360.
Connect, communicate, and collaborate with Fusion 360 today.
