Elevate your design and manufacturing processes with Autodesk Fusion
This post is also available in: Deutsch (German)
Fusion 360 releases include so many new features that it can be easy to overlook and forget exciting new functionality. We want to make sure you’re aware of all of the cool things you can do during your 3D modeling workflow with Fusion 360. To help add to your toolkit, improve your workflow and perhaps even spark some new ideas, here’s some things you (probably) didn’t know Fusion 360 can do.
1. Replace an appearance material by dragging a new material onto the existing material
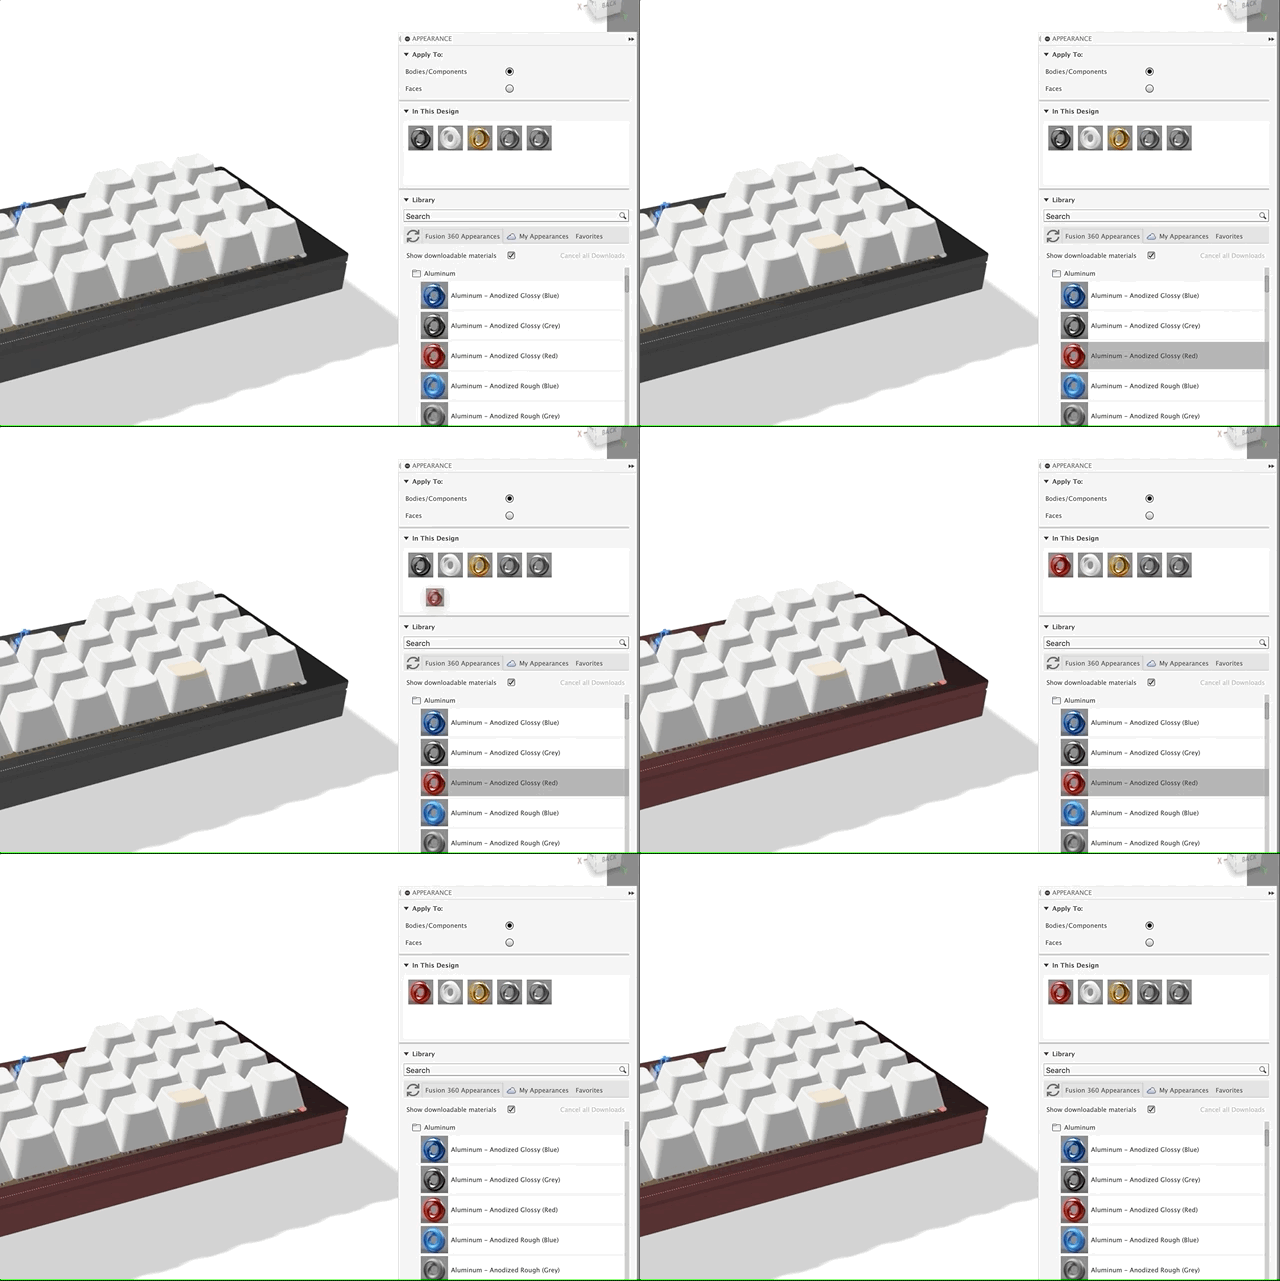
You’ve finished the model, you get the render going, and then the client calls you: “We want to go with a different finish.” Your heart drops. That’s over 30+ components to reconfigure, right? Wrong. Replacing all instances of a certain texture with a different texture is much easier than you think. If you need to replace a texture, just drag the new one over the old one in the model:
2. Custom textures
We’re going to show this one in 2 stages. I typically describe the texture pack that comes with Fusion 360 as the “kit lens” that comes with a DSLR. It’s good, it’s functional, and it will yield great results, but once you get to a certain skill level, you want an upgrade. Rendering in Fusion 360 (and in any other rendering package out there,) is no different.
Depending on the texture you are applying, the edit options you have available to you are different. In the screenshot below, you can see we have a translucent plastic (ABS) texture. You can modify the refractive index and absorption distances as integers, but it goes even deeper than that.
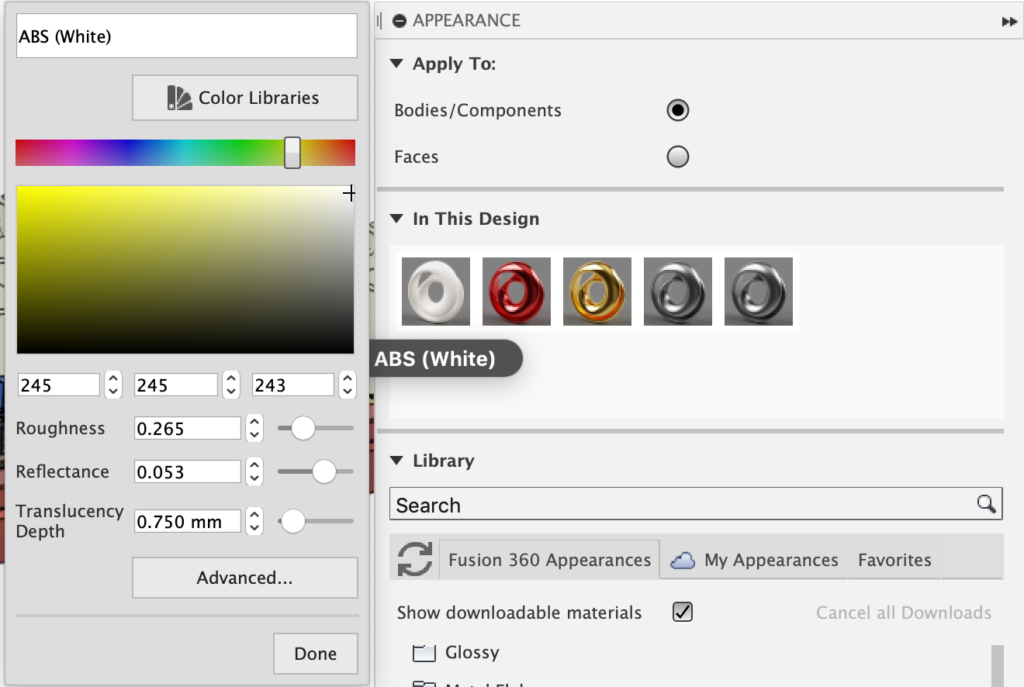
Key for above image:
Roughness: surface texture, you will see the material go from rougher to smoother as you slide this
Reflectance: exactly what it sounds like! How glossy is the finish?
Translucency depth: this determines how far the light will penetrate the material before it becomes obfuscated. The larger the number, the further into the volume you will be able to see!
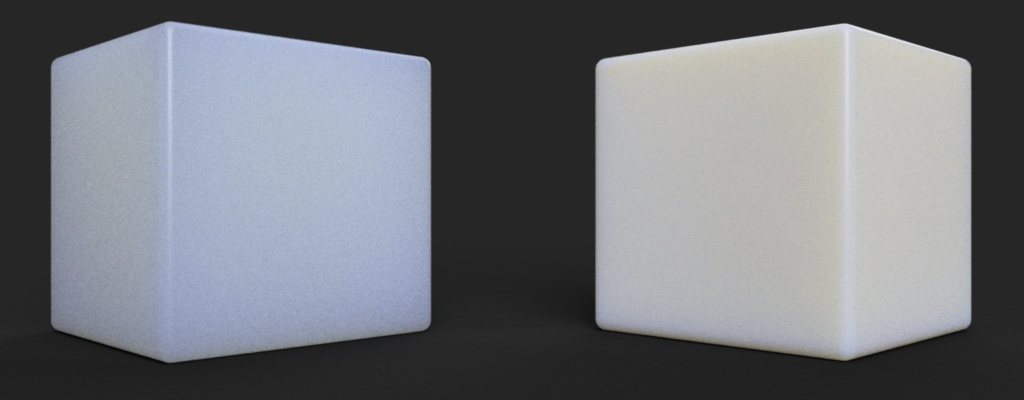
When looking into advanced settings, you’ll notice some common options that will enable you to modify the textures. You can dive into applying your own custom tessellation patterns, using textures to emulate light sources, and more.
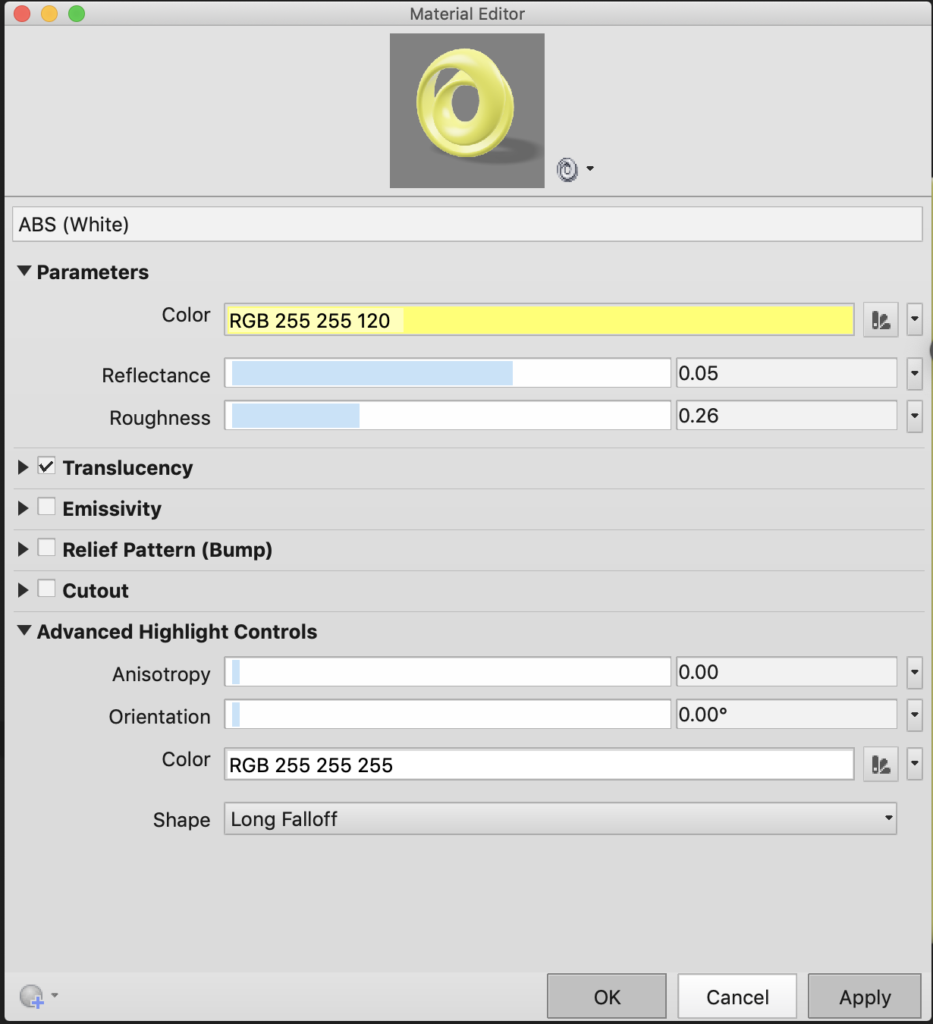
Want to turn any texture or body into a light source? Emissivity has you covered. Want to add a custom texture? Bump mapping to the rescue. Cut out any tessellation with cutout. Ready to get really intense? Try out the advanced highlight controls.
3 – Create a direct model sandbox in history modeling with “Create Base” feature
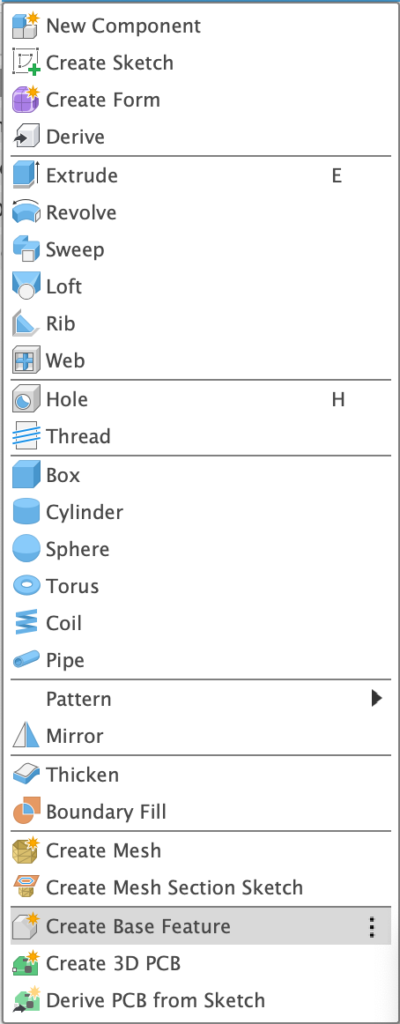
Everyone loves the parametric functions. The thing with parametric functions, though, is they can start to make a file drag if you’re just exploring. Sometimes sketching needs a boost with some 3D work, roughing out ideas, and just testing and trying things out. Of course, everyone knows you can just switch off the timeline, but you can do it in an even more effective way. Just go to create a base feature, and you will give yourself a timeline-free sandbox in Fusion 360. Boom, you just got the best of timeline-free and parametric modeling altogether.

4 – Use “Compute All” to find broken references in your design
Red spots, yellow spots—we’ve all seen them in our timelines before. I have even been guilty of this, particularly as a deadline gets closer. But did you know there’s an easy way to find and fix them?
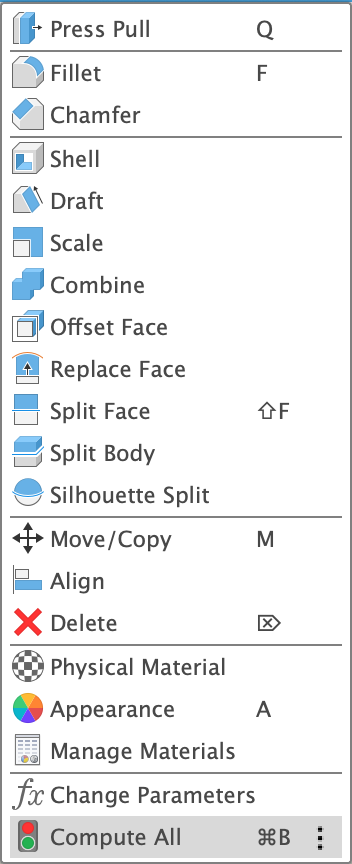
The “Compute All” function at the bottom of the modify tool is designed to help you find and fix all those yellow and red errors in your timeline. “Compute All” literally computes all the parametric functions, allowing you to not worry about pesky timeline errors until you absolutely have to.
5 – Access your designs from the web with Fusion Team
When a colleague calls you during your vacation saying, “There’s something we desperately need your input on?” Your go-to excuse is probably: “Sorry, my workstation is back at home.” Well, I’m about to ruin your vacation. You probably didn’t know already, but all of your data is viewable online with Fusion Team, including full commenting abilities. You can even do some light editing in browser too. Simply log into a360.autodesk.com, and you will be able to sign into, open, and even upload data for any project you are working on.
6 – Electronics
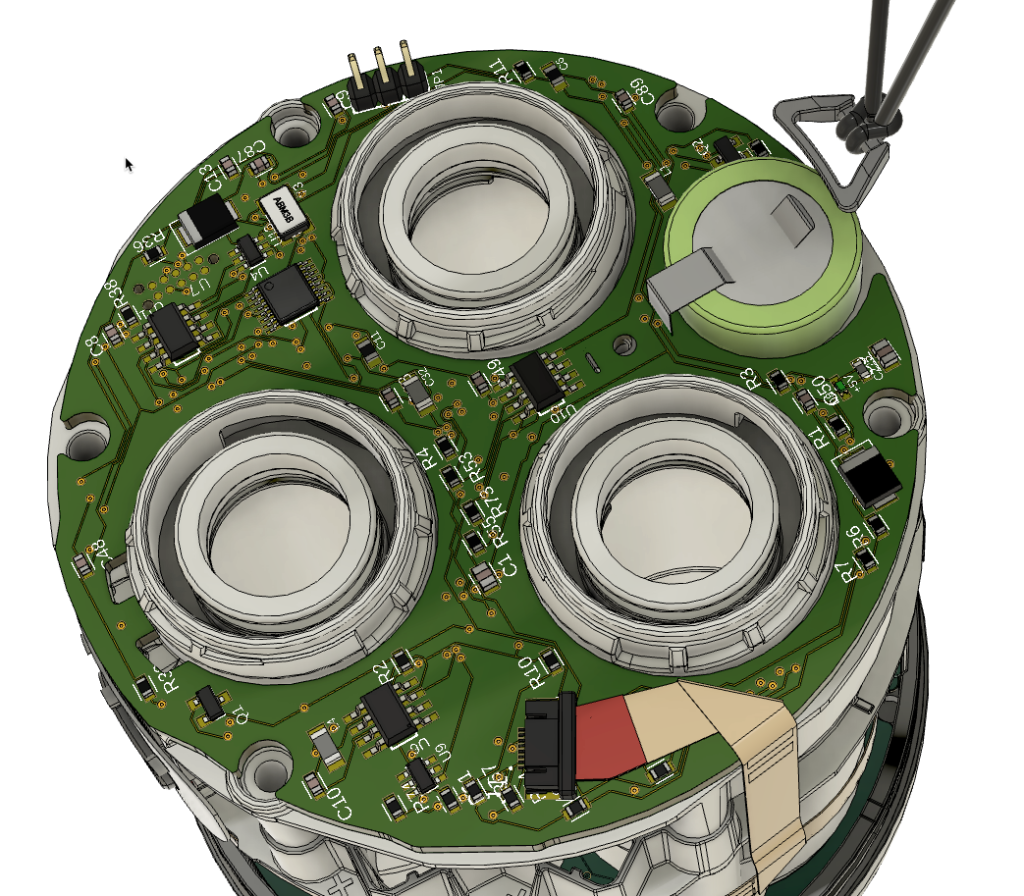
Visit file > new electronics design, and you will have all the functions you would expect to see for an electronics CAD space at your fingertips. Full schematics, PCB, SPICE—it even pushes 3D models straight to Fusion 360’s main space.
7 – Get volumes
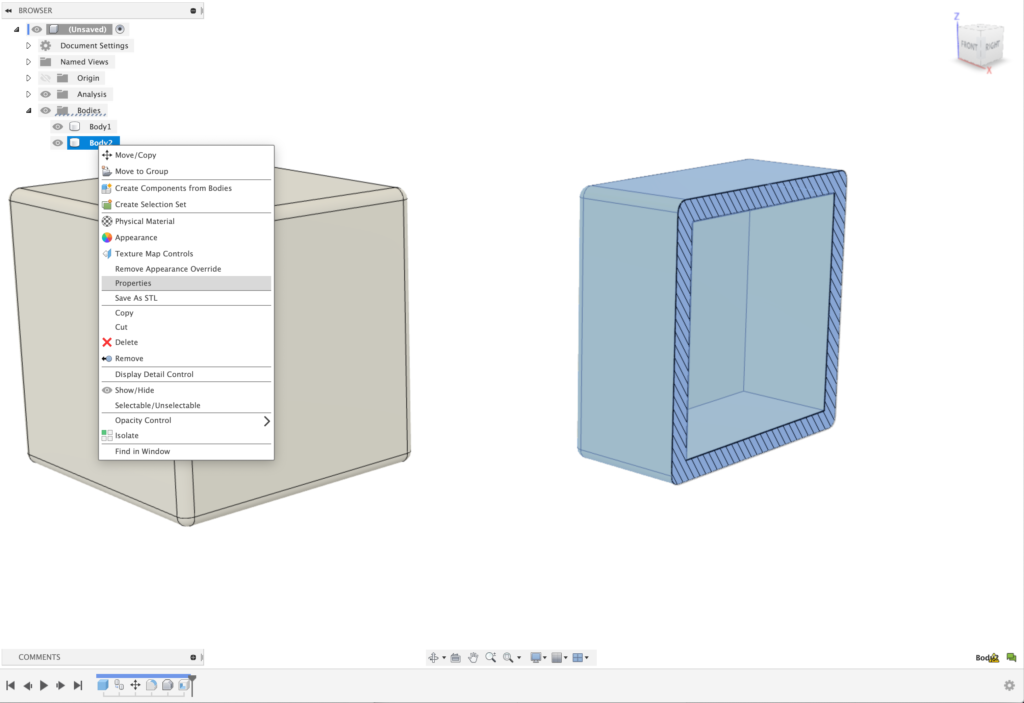
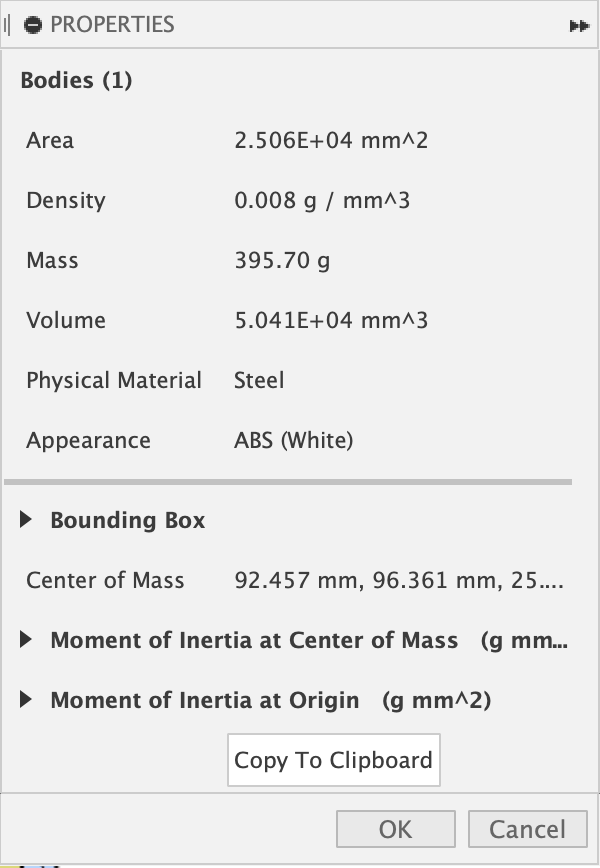
You have a few options for figuring out the volume of something in Fusion 360. If you right-click on any body in the browser, you will see an option to view the properties of that part. In there you will find the volume of your solid model.
8 – Make custom physical materials
The physical material library in Fusion 360 is really good. It’s designed to work with NASTRAN, so we want it to be as accurate as possible. However, sometimes you just need to load your own material. It’s possible, it’s quite in-depth, and it’s not worth us going through the finer details in this blog post, so you can check out exactly how to do it here.
9 – Class A geometry
Yeah, we’re gonna keep banging this drum for a while longer. Check out an in-depth blog post on Class A Geometry in Fusion 360 here.
10 – Custom HDRI
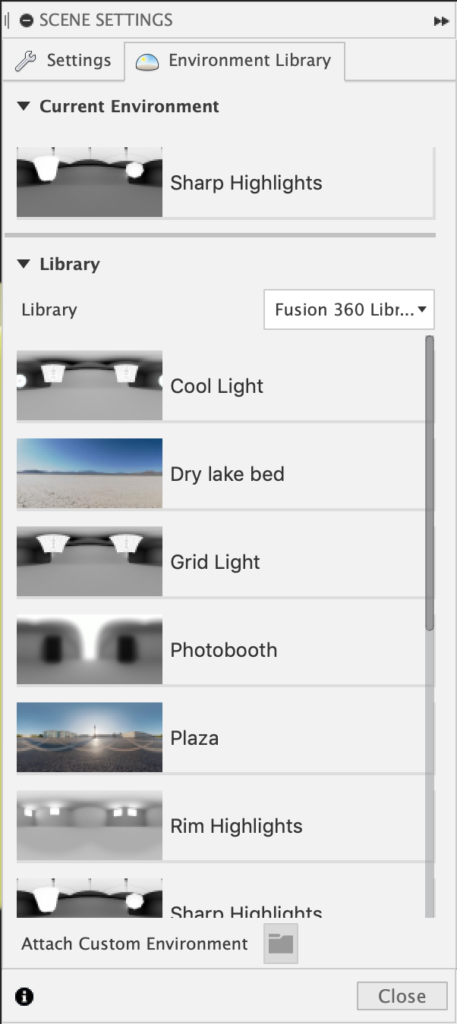
You’ve been working on your renders. Your custom lighting is spot on, you’ve dialed in textures to your taste, but you want to take it to the next level. Enter the custom HDRI. When you are rendering in Fusion 360, unless you switch the brightness slider to 0, the main source of light is coming from the environment itself. HDRIs include light data in them that is specifically tied to the white areas of the image. The HDRI itself is best thought of as one of those 360 view images wrapped around your model as the environment it’s rendered in.
The perk of using an HDRI system is that you can load anything that’s in HDRI format and use it for rendering purposes. Maybe you’re modeling a car and need a street scene or outdoor gear that you want to show in context. The best part is you can even produce them with a 360-degree camera yourself.
That completes our list! Let us know what your favorite lesser-known Fusion 360 tricks are in the comments. And don’t forget to try out a free trial of Fusion 360 (if you haven’t already) here.
