& Construction

Integrated BIM tools, including Revit, AutoCAD, and Civil 3D
& Manufacturing

Professional CAD/CAM tools built on Inventor and AutoCAD
5 min read
Welcome back to our final SPICE Simulation Series, Part 6! In Part 5 we showed you how to make your existing schematic designs SPICE compatible, but what about your parts? Chances are you have your own libraries that you know and trust. In this blog, we’ll be showing you how to make those libraries SPICE compatible in a few simple steps.
We’re going to assume that you already know how to create libraries in Autodesk EAGLE. If you don’t, be sure to check out these past installments to learn how:
Our focus here won’t be on how to create a new library from scratch. Instead, we’ll be showing off the difference for how to make SPICE compatible parts. All this requires is the addition of one final step when you create a new device.
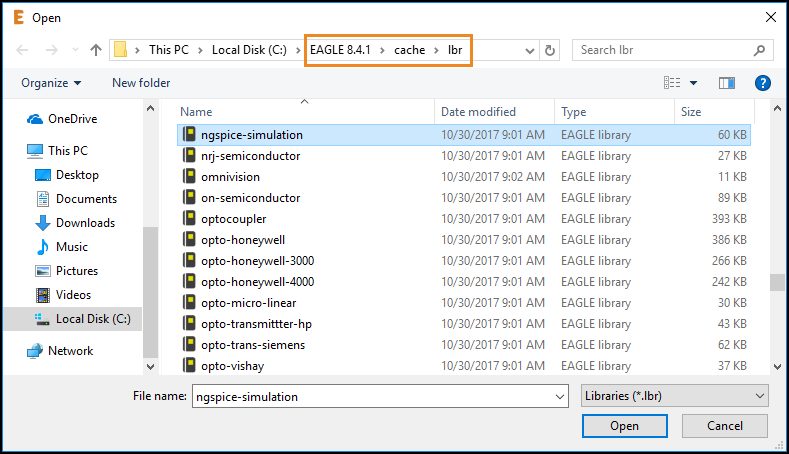
We’re going to run through this tutorial using the existing ngspice simulation library. If you want to follow along open this library now from your Autodesk EAGLE Control Panel. Select File » Open » Library, then open the ngspice-simulation.lbr file. This can be found in the /cache/lbr folder in the Autodesk EAGLE directory.
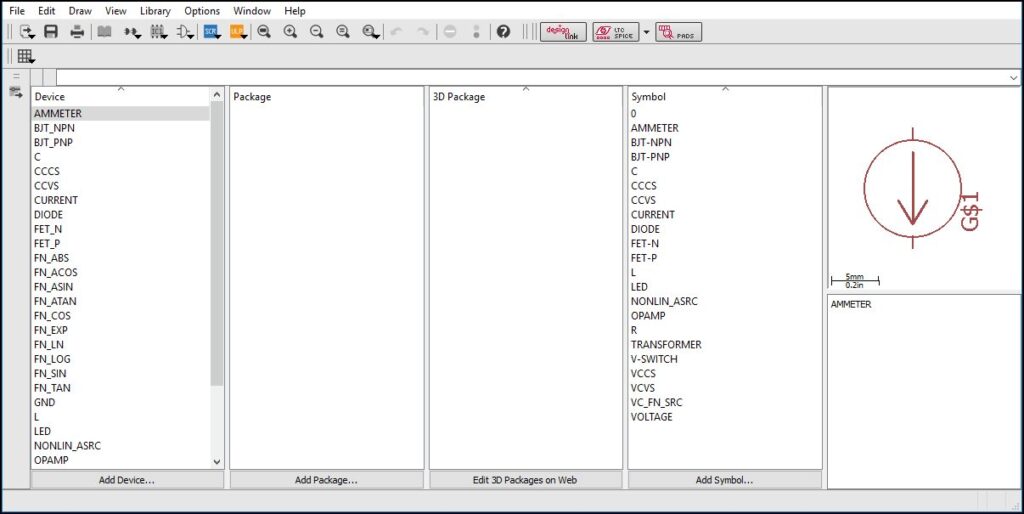
After opening the library file, you’ll be greeted with the Library editor. In a typical workflow, you’ll first create a package and symbol and then link those together with a device. As you can see in this library, we have some pre-populated symbols and devices. Packages aren’t needed since this library is made solely for SPICE simulation.
All of the magic to convert an existing part to a SPICE compatible one happens in the Device editor. Let’s start this process from scratch and pretend that we need to make a new device. Follow along:

This will open a new Device editor, which is where we need to do several things including adding a symbol and mapping it to a spice model. Here’s how:

We now have a symbol added to our device; this is a standard process that you should be used to when making a library. As you can see this symbol already has its gate and value fields added. Let’s make it SPICE compatible with the following steps:

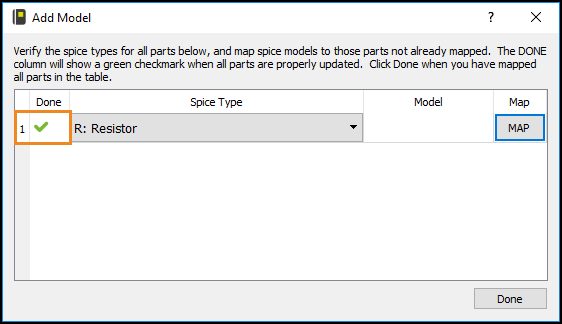
Back on the Add Model dialog, you’ll notice a green checkmark has been added next to the listed resistor. Your device is now simulation ready! Save it, and you’re good to go.
The resistor device was super easy to convert to SPICE since it uses the default Intrinsic Device type. However, what happens if you make a device that requires a model? We’ll look at that now.
This time we’re going to make a diode SPICE compatible, which requires the addition of a loaded model. Head on back to your Library editor, make a new device, and you’ll meet us once again in a new Device editor.
Just like before we’ll go through the process of adding a diode symbol to our device
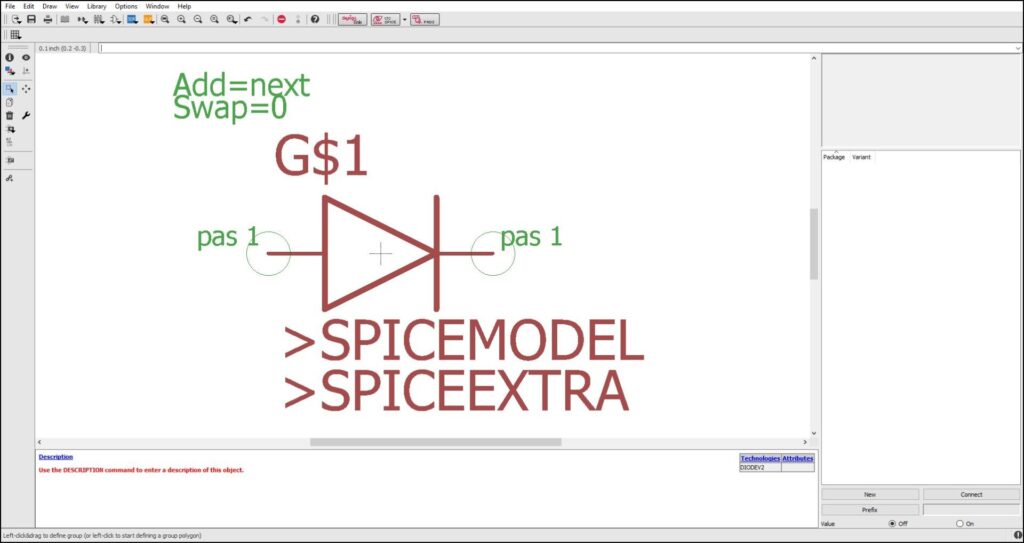
Now we have our diode symbol added to our device, with a similar gate and value as our resistor example. This process has been identical up until now. Let’s look at the differences when mapping it to a SPICE model:

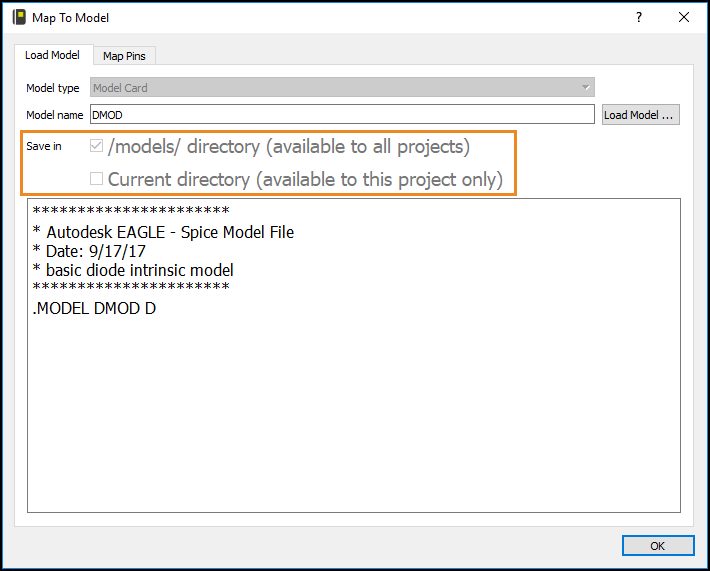
Here’s where things look a little different. When working with our resistor it took us to the Map Pins tab first, but for a diode, we have some settings to configure the Load Model tab.
By selecting the Load Model button, you can load a model saved locally on your computer. In this example, we can use one of the EAGLE default models. Look in the /models folder within the EAGLE directory and select the DMOD.mdl file.
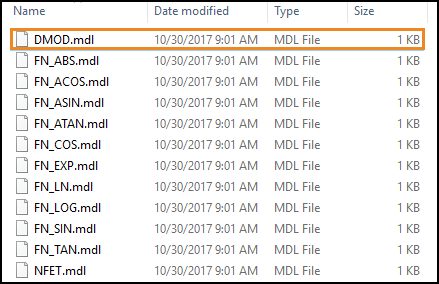
The second setting to configure is where to save this particular model. There is no need to save this model in any location as it will be saved within the library. Once your model is loaded select the OK button to continue.
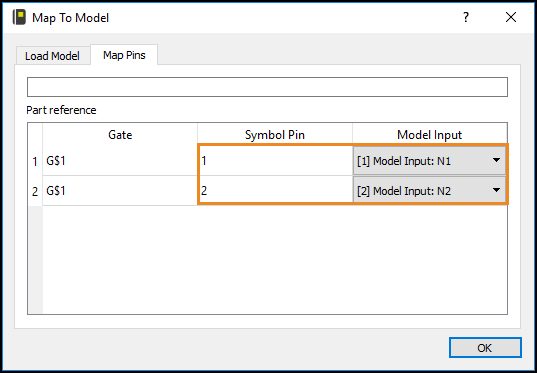
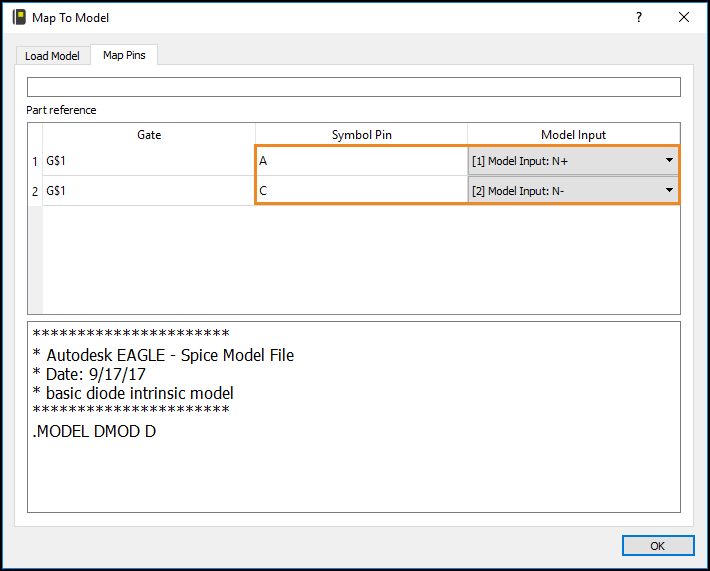
Now we need to map our Symbol Pins to the correct Model Input. EAGLE might have already done this for you. If not, click the OK button at the bottom of the dialog, this will lead you to the Map Pins tab, then change Symbol Pin A to link with Model Input: N+, and Symbol Pin C to link with Model Input: N-. Once those are set select OK to finish.
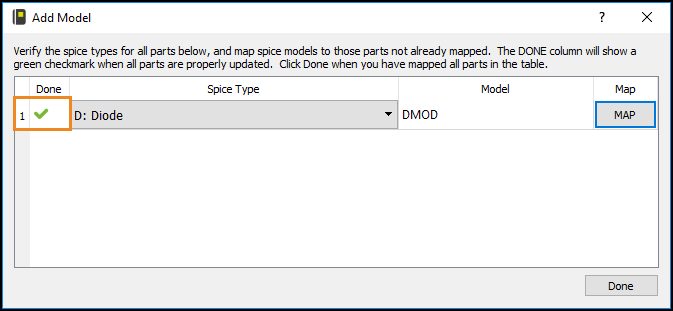
Back on the Add Model dialog, you can see we have our checkmark next to this diode. It’s now simulation ready!
All it requires is one extra step to go from a regular library to one that’s simulation ready. Whenever you make a device in the future to be sure to add a SPICE model to it, and then map pins to models to keep your parts future proof. When you place any of these converted devices on your next circuit design, you’ll be able to run your SPICE simulation without any extra work. Remember though, EAGLE ships with a ngspice-simulation library that includes plenty of SPICE compatible parts. Before reinventing the wheel be sure to check this library to see if your device hasn’t already been created.
Ready to make your libraries SPICE compatible? Try Autodesk EAGLE 8.4 for free today!
By clicking subscribe, I agree to receive the Fusion newsletter and acknowledge the Autodesk Privacy Statement.
Success!
May we collect and use your data?
Learn more about the Third Party Services we use and our Privacy Statement.May we collect and use your data to tailor your experience?
Explore the benefits of a customized experience by managing your privacy settings for this site or visit our Privacy Statement to learn more about your options.