& Construction

Integrated BIM tools, including Revit, AutoCAD, and Civil 3D
& Manufacturing

Professional CAD/CAM tools built on Inventor and AutoCAD
13 min read
Bryce and Aaron are back at it again with the what’s new video!
Updated Keyboard Shortcuts – In the Simulation workspace, use the C key to invoke New Constraint.
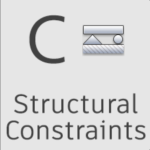
We also made a couple of changes based on your feedback:
Component color cycling: Since you’ve been telling us that it’s way too easy to accidentally hit the N key and not know that you just toggled Component Color Cycling on, now it’s SHIFT + N. Keep calm, don’t panic. All is well.

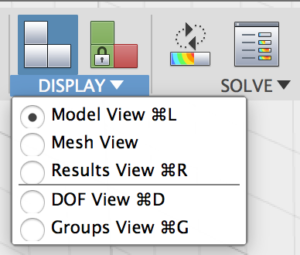
Model View in Simulation: Previously you can press CTRL+M or Command+M in the Simulation workspace to bring up Model View. We realized that this conflict with the Mac OS hotkey of minimizing windows, so now it’s CTRL+L (Windows) or Command+L (Mac OS).
Copy and Paste login password – For all of you who use password management apps like LastPass or Keypass – you can finally copy and paste your passwords into the Fusion sign-in fields. I know, this was an annoying one, but we finally got it sorted out!
Fixed – There was an issue where non-ASCII usernames were causing projects to be unaccessible. Whoops, our bad. You know how sometimes you get so focused on something that you forget there’s a whole world out there? Yeah, that happened. Now it’s fixed.
Fixed – Autumn.S reported a really annoying workflow where if he changed the selection filter in the modeling workspace and switched to CAM, he wasn’t able to change the selection filter in CAM and had to go back to Modeling to make the change. Now you can do it right from the CAM workspace.
Fixed – SwissPL shared his experience of how he couldn’t zoom in further than 0.2mm. Apparently once you get to 0.5mm, Fusion no longer lets you zoom in any further. Now you can zoom in as close as 0.05mm, or 50 µm.
Fixed – There was an issue where if you enabled Contact Sets on a specific design we were testing, Fusion would crash. Apparently Fusion was allergic to that design, so we gave it some allergy pills and now Contact Sets works without a hitch.
Fixed – If you were editing a design, then decided to sign out of Fusion for whatever reason, a dialog popped asking you if you wanted to save your changes. If you selected Save, Fusion’s UI would get locked up before it goes away. That felt very odd to us and after some digging, turns out it was crashing on our test builds. Now this is fixed.
Fixed – There was a crash issue with the timeline where if you went to the beginning of the timeline, then went to the very end, and then clicked and dragged the slider between 2 rigid joints. Do this enough times and Fusion would get fed up with you and decide that it was game over.
X & Y offset for Joint Origins – Previously you were only allowed a Z offset for Joint Origins. Now you can also do a X and/or Y offset. Eventually this will support all joint types, but we’re starting with rigid.
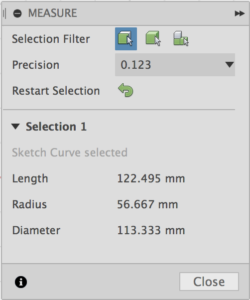
Measure an Arc radius – Previously when you did this, the Measure tool only gave you a distance between 2 points. Now you measure an arc sketch, you’ll see the Radius right inside the command dialog under Selection 1. Another great idea implemented!
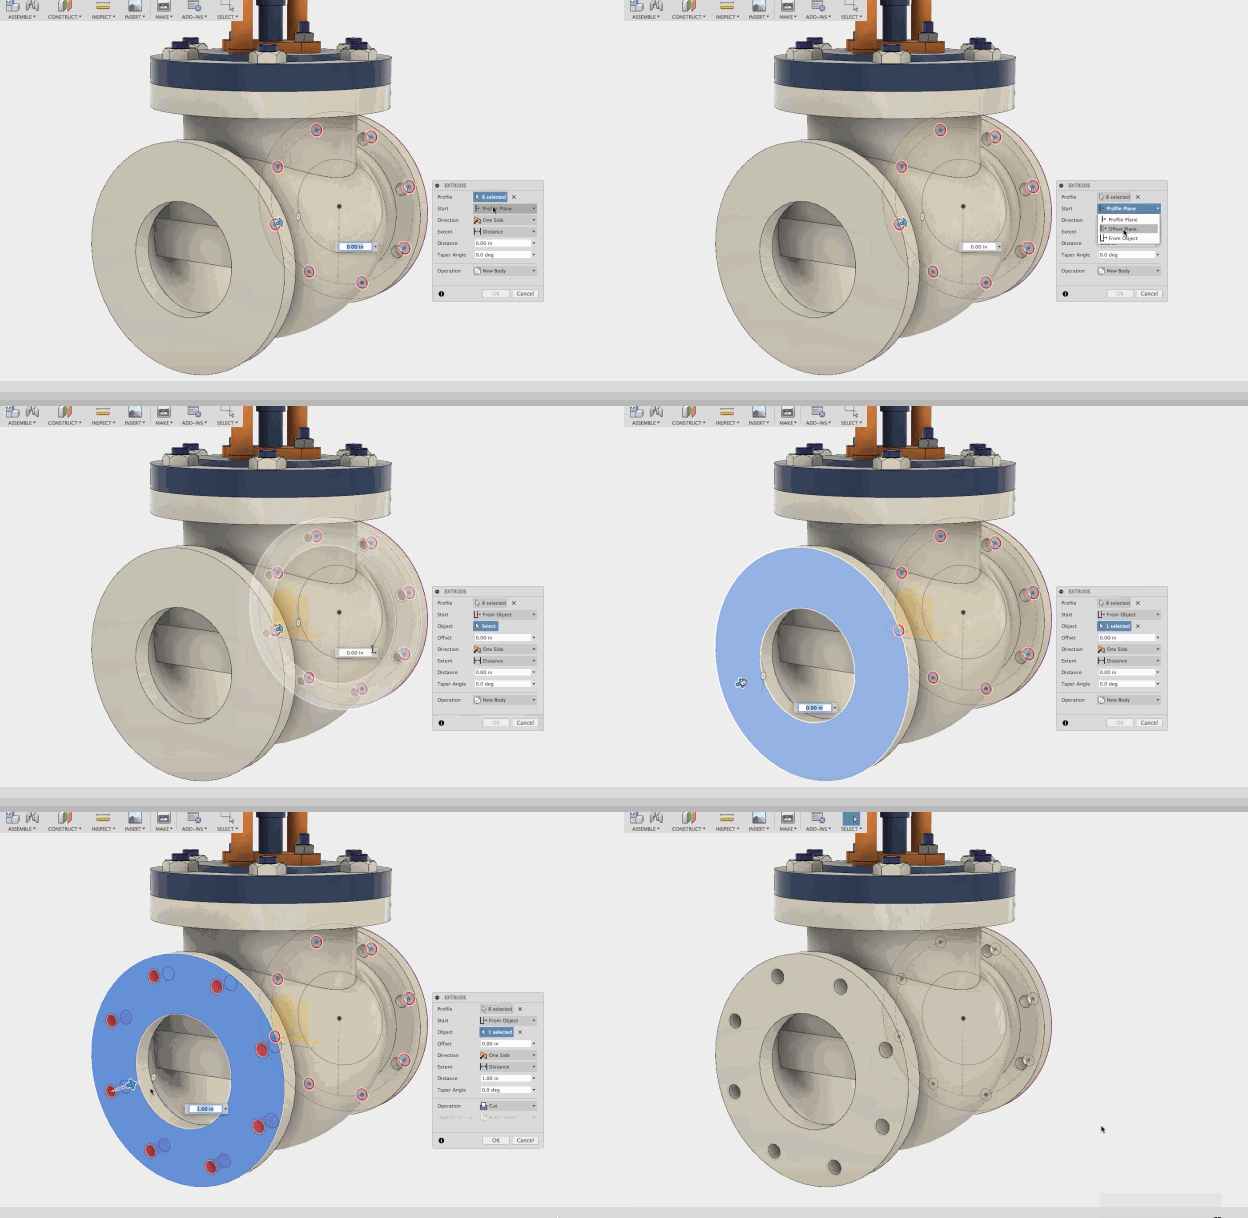
Extrude Command Enhancements – Now when you in the Extrude command, you can choose where the Extrude should start from and end at. Options include Start from Profile Plane, Offset Plane, or From Object. From Object is super neat since it makes your extrusions that much easier. There are more workflows that have benefited from these enhancements; Bryce will be doing a deeper dive on them in the near future!
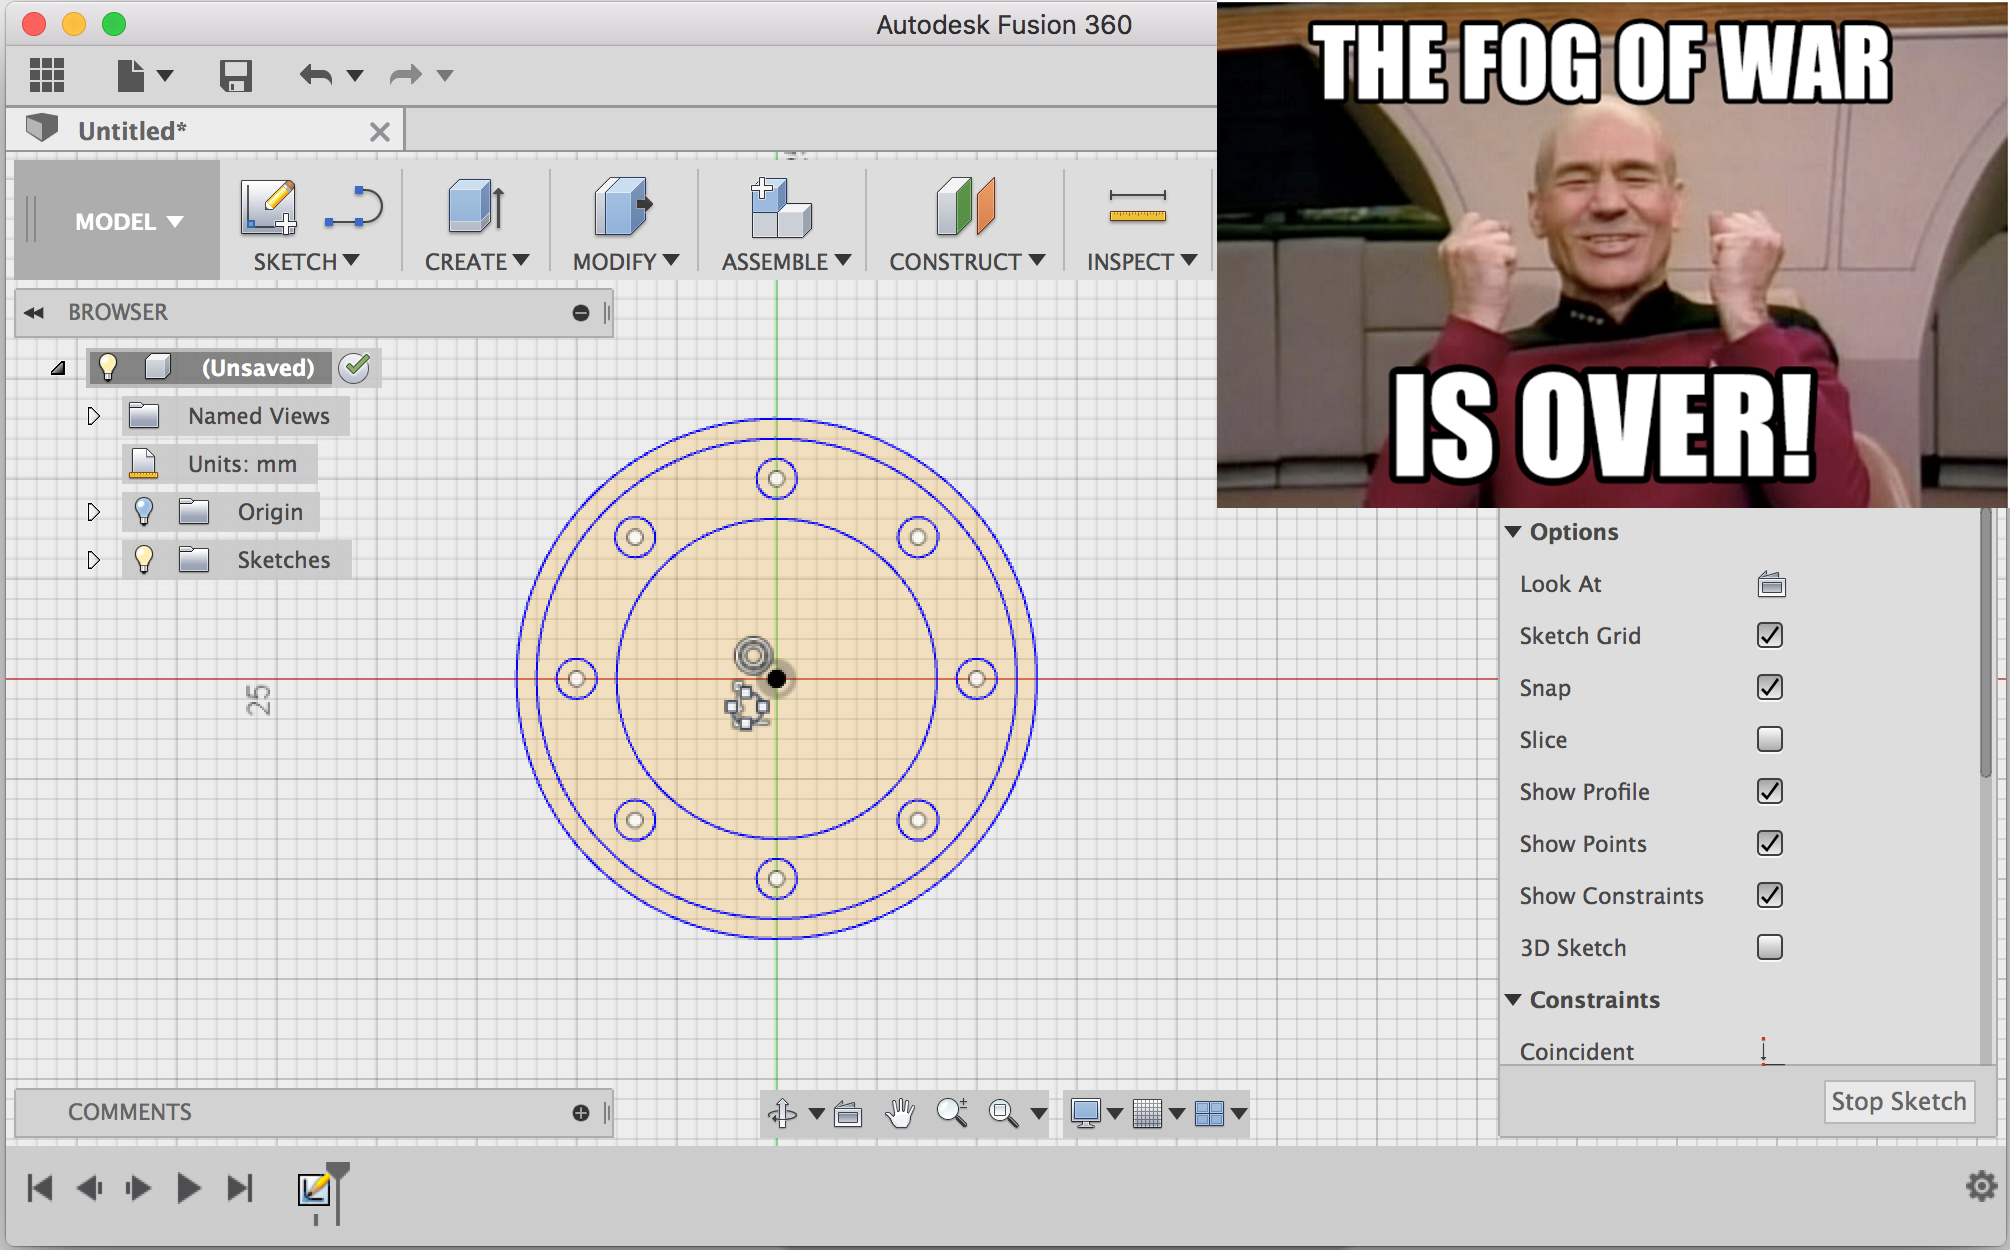
Grey gradient removed in sketch – Goods news! The fog of war is over! Now when you get into the sketch environment, you will no longer see a foggy grey gradient, as if the entire grid is smudged with lead (lefties, you know what I’m talking about). The grid is now nice and clean for you to sketch on.
Fixed Sketchup performance – Previously, Fusion had a hard time handling complex Sketchup models where there are thousands of mesh bodies and get all bogged down. Our modeling team integrated new code that consolidates connected faces into a body, instead of creating a new body for each face. Now complex Sketchup models are more usable.
Fixed – Apparently when you’re uploading a design from the data panel, the progress bar at the bottom of the panel shows a completely different progress than the one in the upload dialog. It’s like Fusion is uploading it’s own thing and doesn’t even care about yours. Now this is fixed.
Improved – Live review is one of the coolest features in Fusion (you haven’t forgot about it, have you?). We improved the chat history window so that it wraps the text content so you don’t have to keep scrolling through long chat convos.
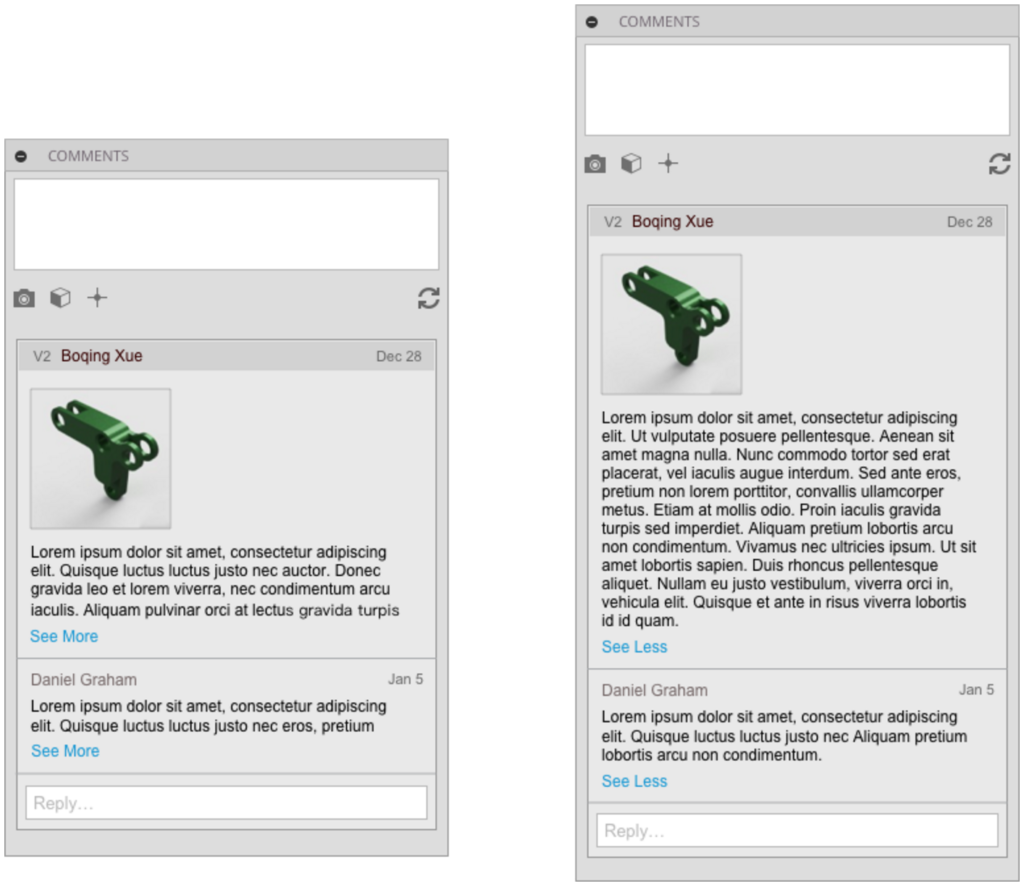
Improved – Related to long chat convos, we also made tweaks to the comments dialog within Fusion, so that if you have a team member that is especially verbose, you can “See More” of what he’s yabbering about, and “See Less” when you’ve read it all (which you should, because it’s obviously important).
Tiger Maple and Quilted Maple Appearances – Let’s talk about wood and guitars – we have a lot of them in our gallery, and wouldn’t it be sweet if you could create something like this?
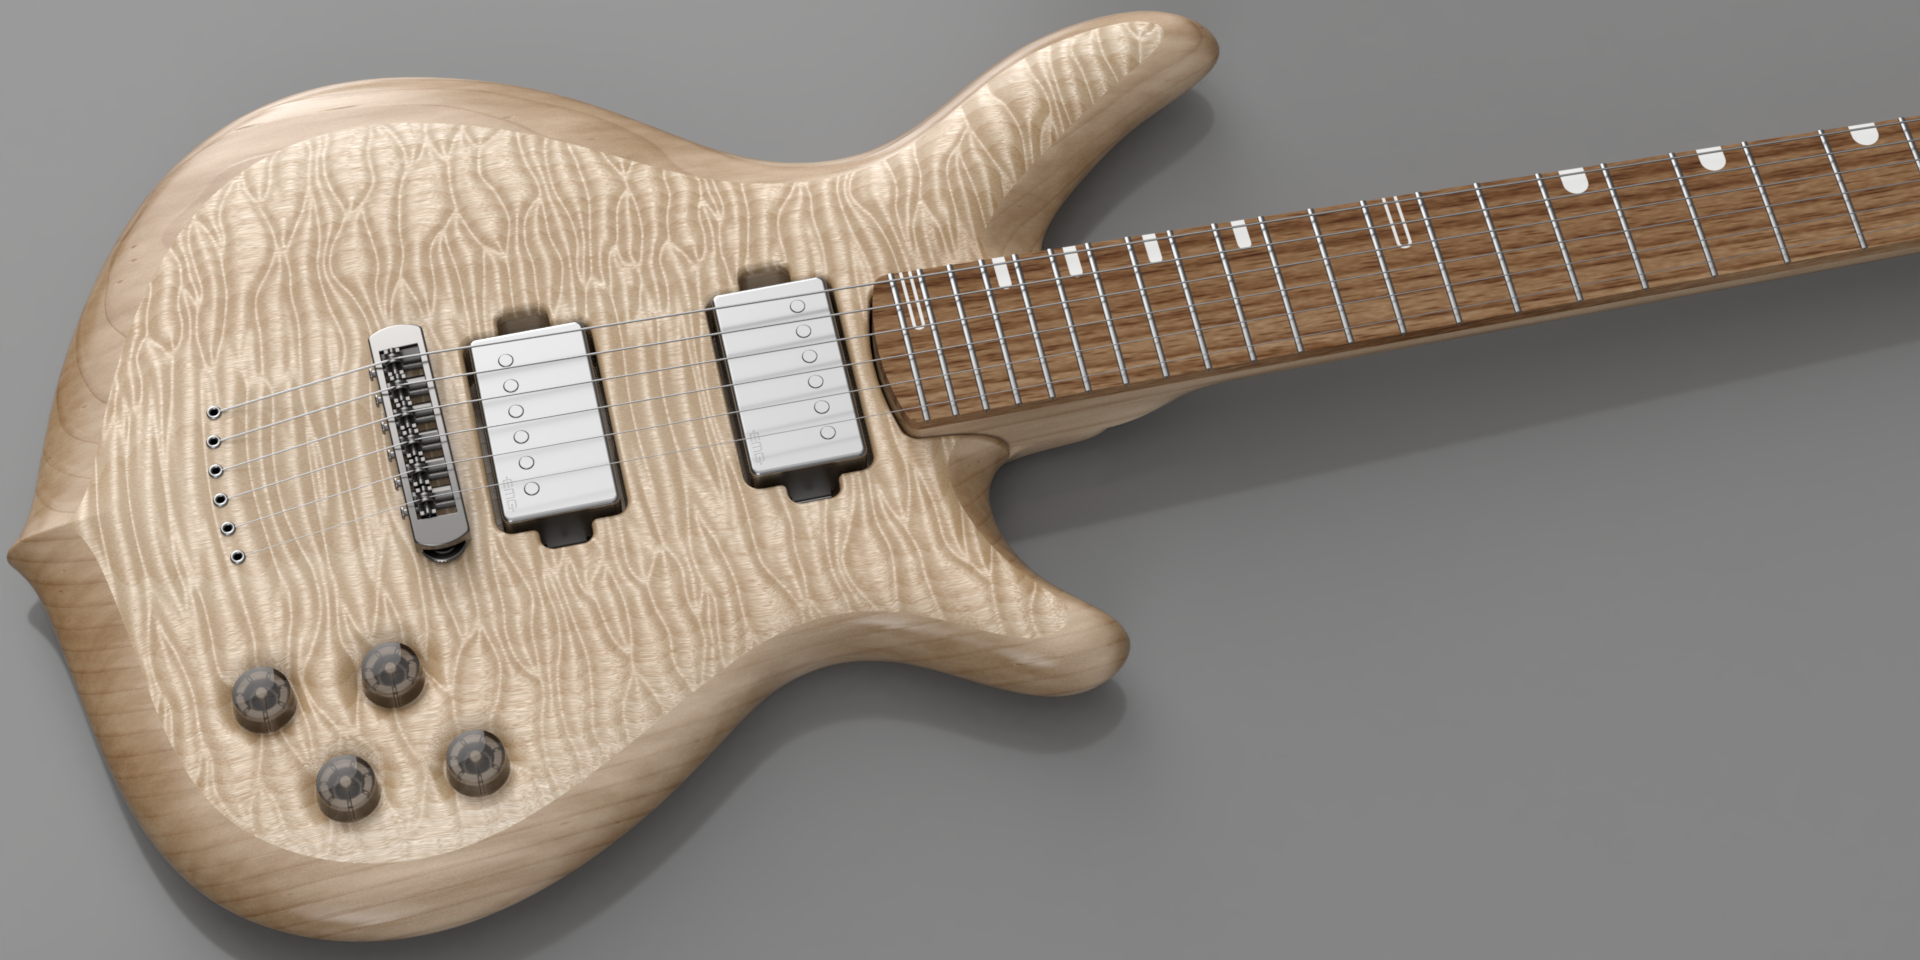
Rendered in Fusion 360. Queue the “ooooooos and aaahhhhhs”…
Well now you can, with sophisticated secondary highlights options to create Tiger Maple and Quilted Maple appearances. Here are some notes from our developers:
“The biological reason of forming this kind of highlight pattern is due to the interesting way how wood fiber grows for certain wood species, such as maple, which is periodically bumpy along the tree radial/tangential direction. In the previous 3D wood release, our method correctly computes the local fiber direction to simulate the secondary highlight. However, the distortions that are applied to the 3D wood cannot simulate such a periodical curly variation in small-scale, and therefore we cannot reproduce this kind of fancy secondary highlight effects. The first part of 3D wood enhancement is to fix this gap and reproduce this kind of visual effects. Essentially, we figured out a method to approximate such a small-scale curly variation in 3D for wood fibers by using an input 2D distortion map, which is created using the photos of the real wood secondary highlights. The experimental results of our method can be shown in the following videos, which simulate the tiger maple and quilted maple, respectively.” – a super smart Fusion 360 developer that I need to spend more time with.
This is how Quilted Maple (left) and Tiger Maple (right) looks like in Fusion:
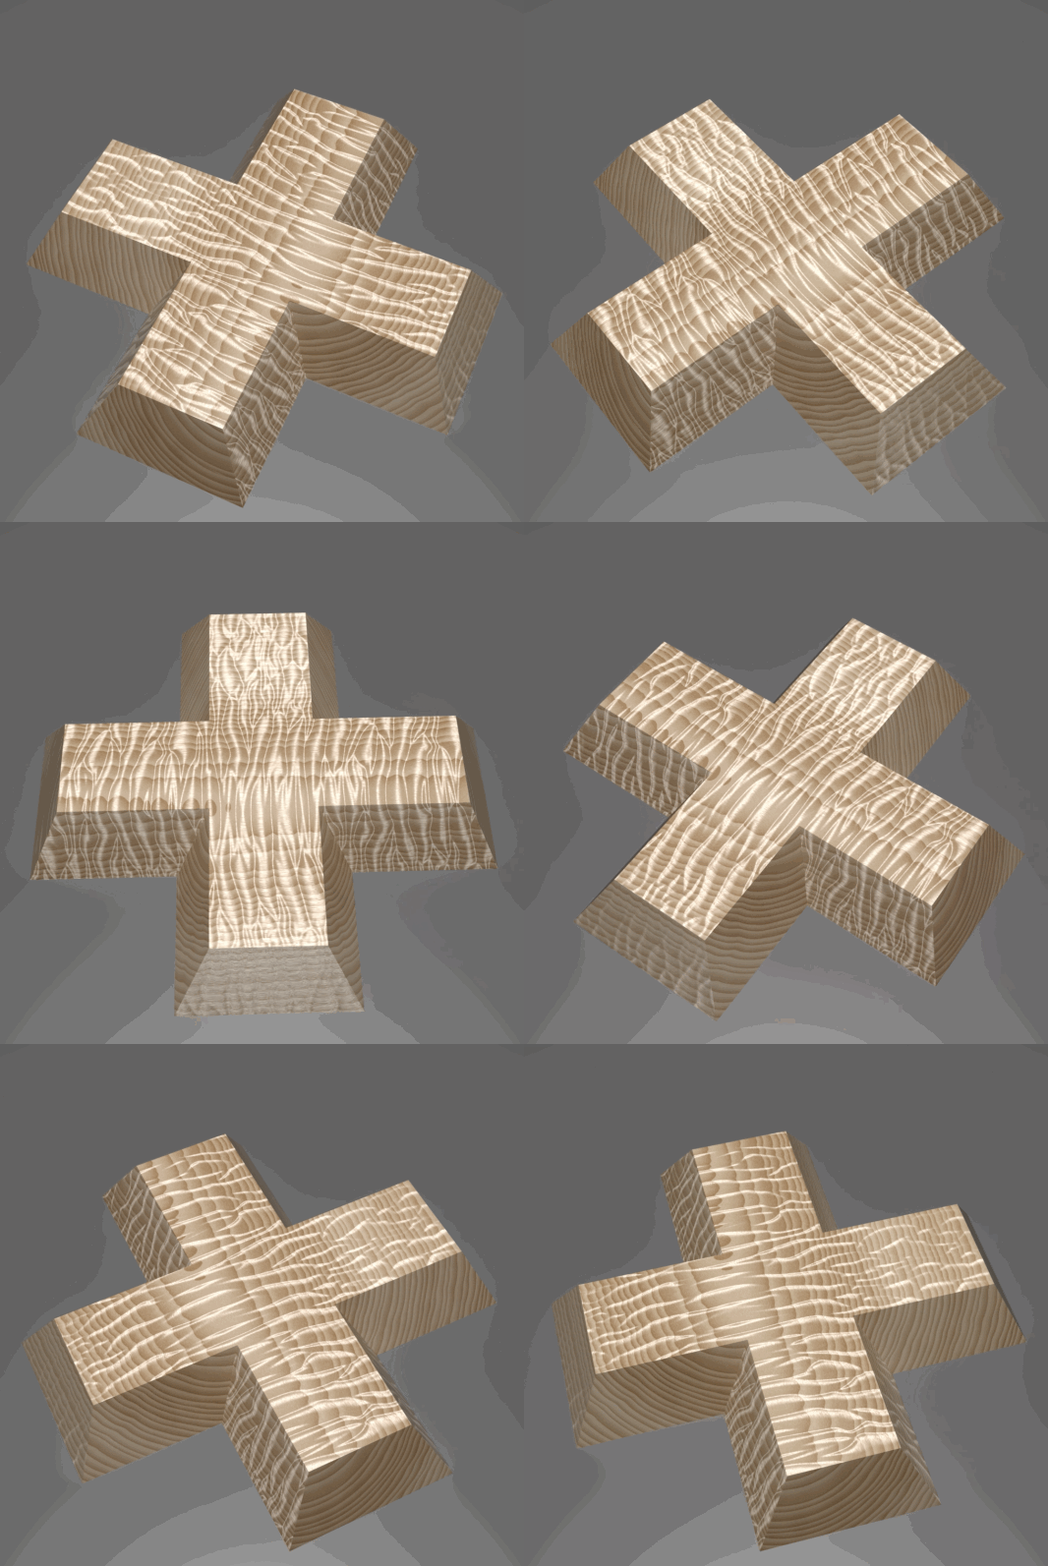
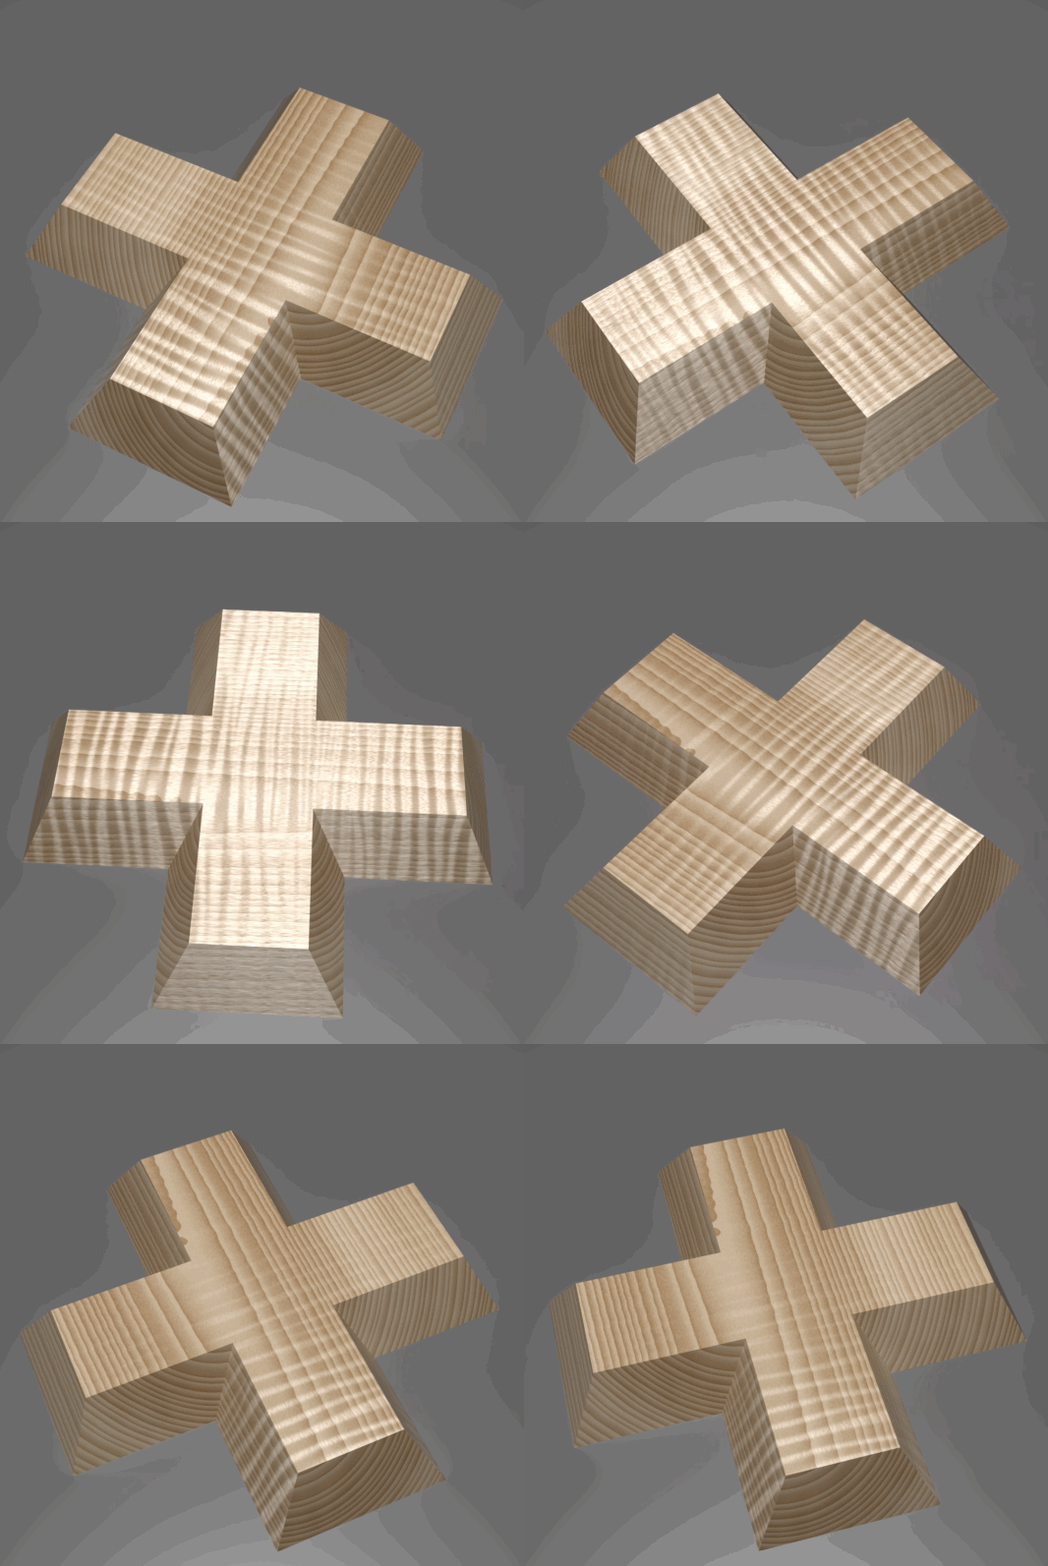
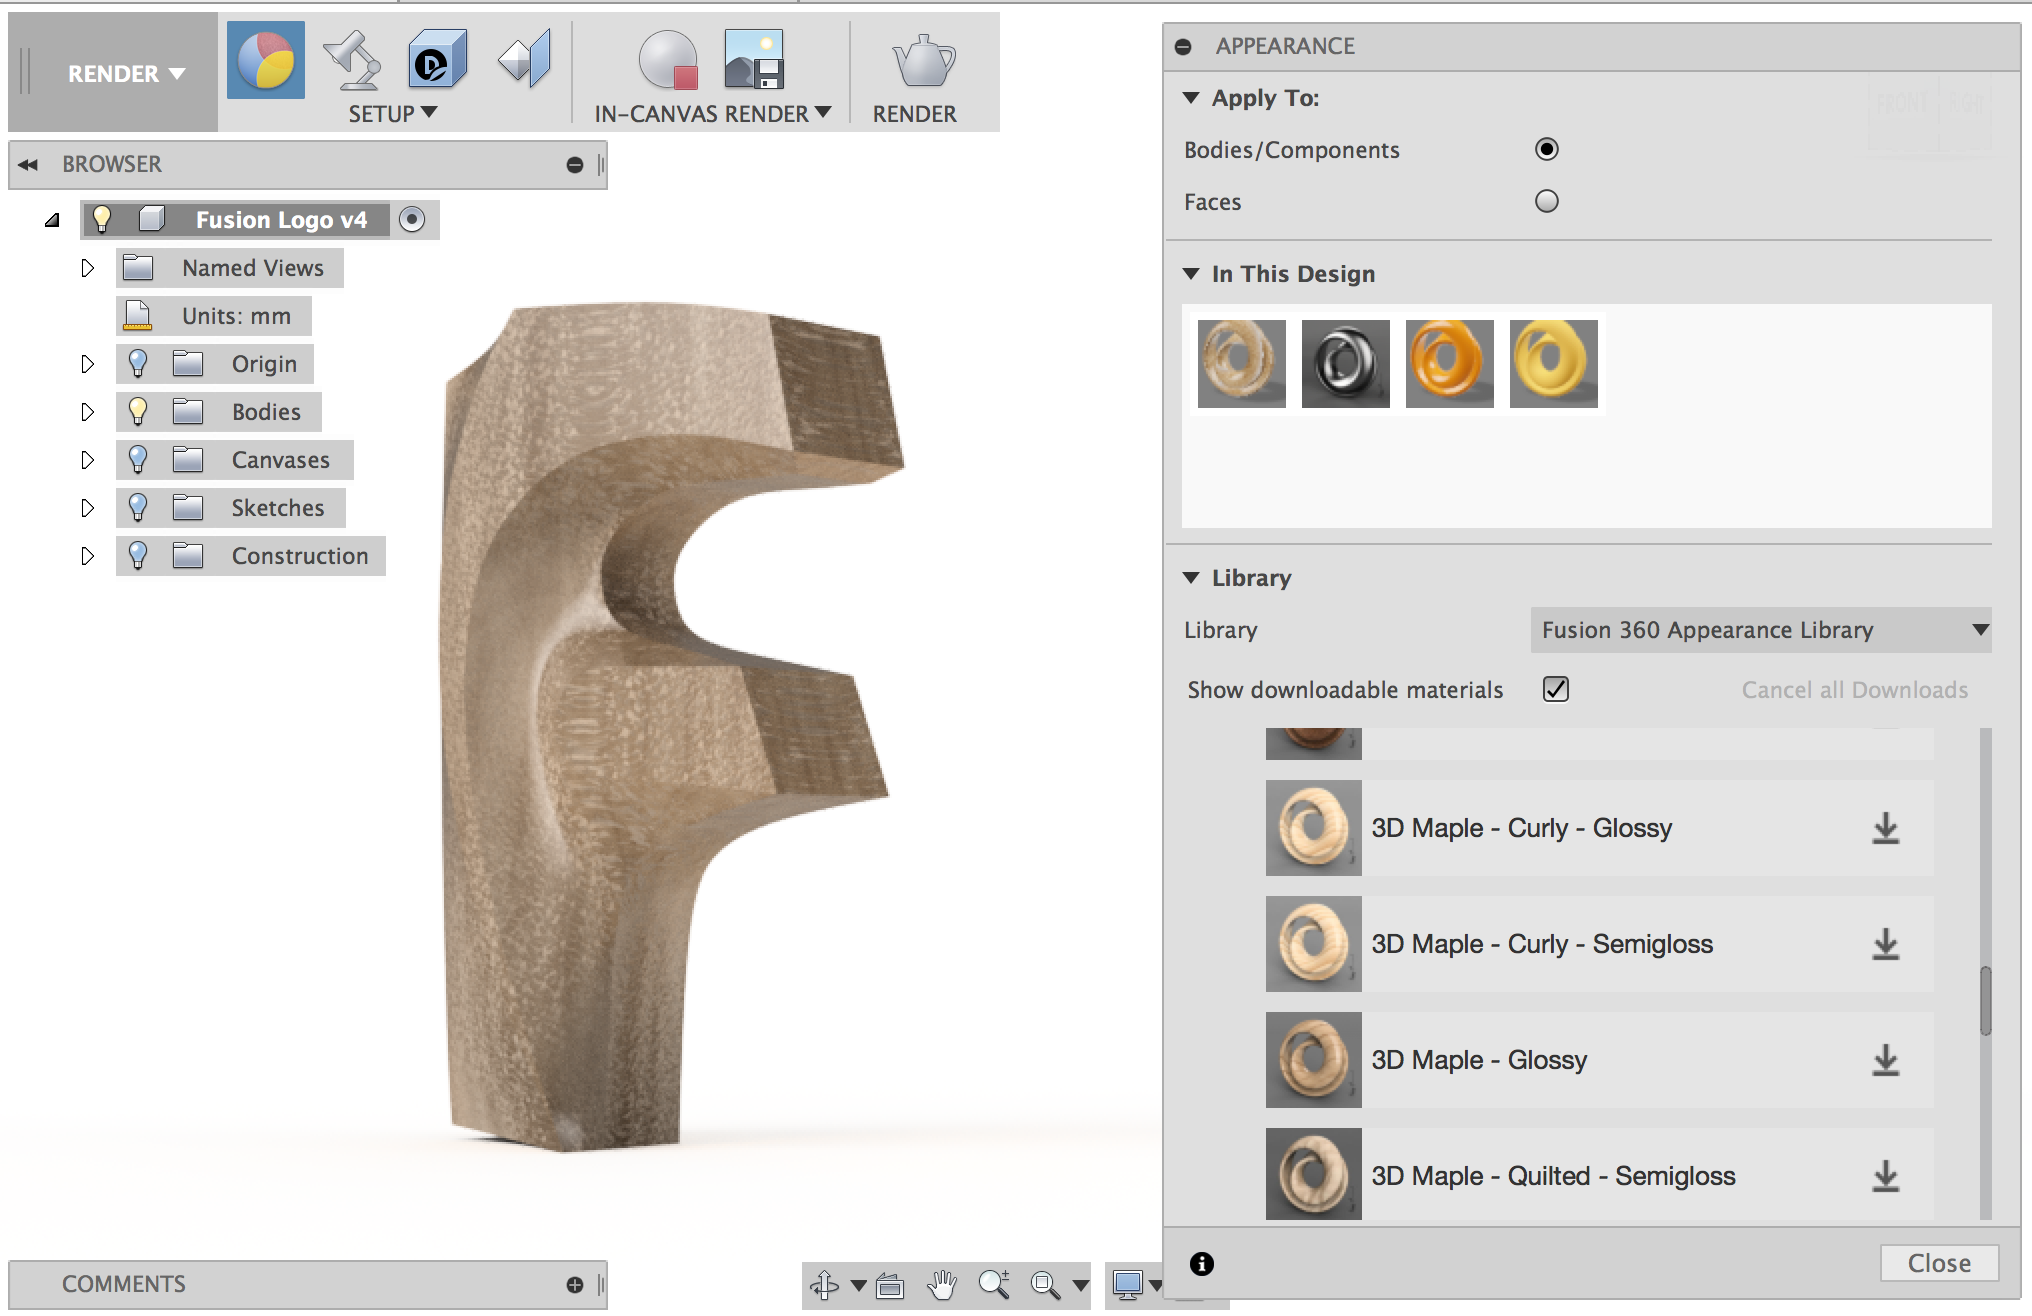
And no, this isn’t something you’ll have to going to the material editor and tweak. We literally made it as easy as possible. You can find and download these materials In your Appearance library under Wood (Solid) > 3D Maple. There are a number of them named “Curly” and “Quilted”. Once you apply it to your design, the patterning won’t preview; you’ll have to render it to see the true effect.
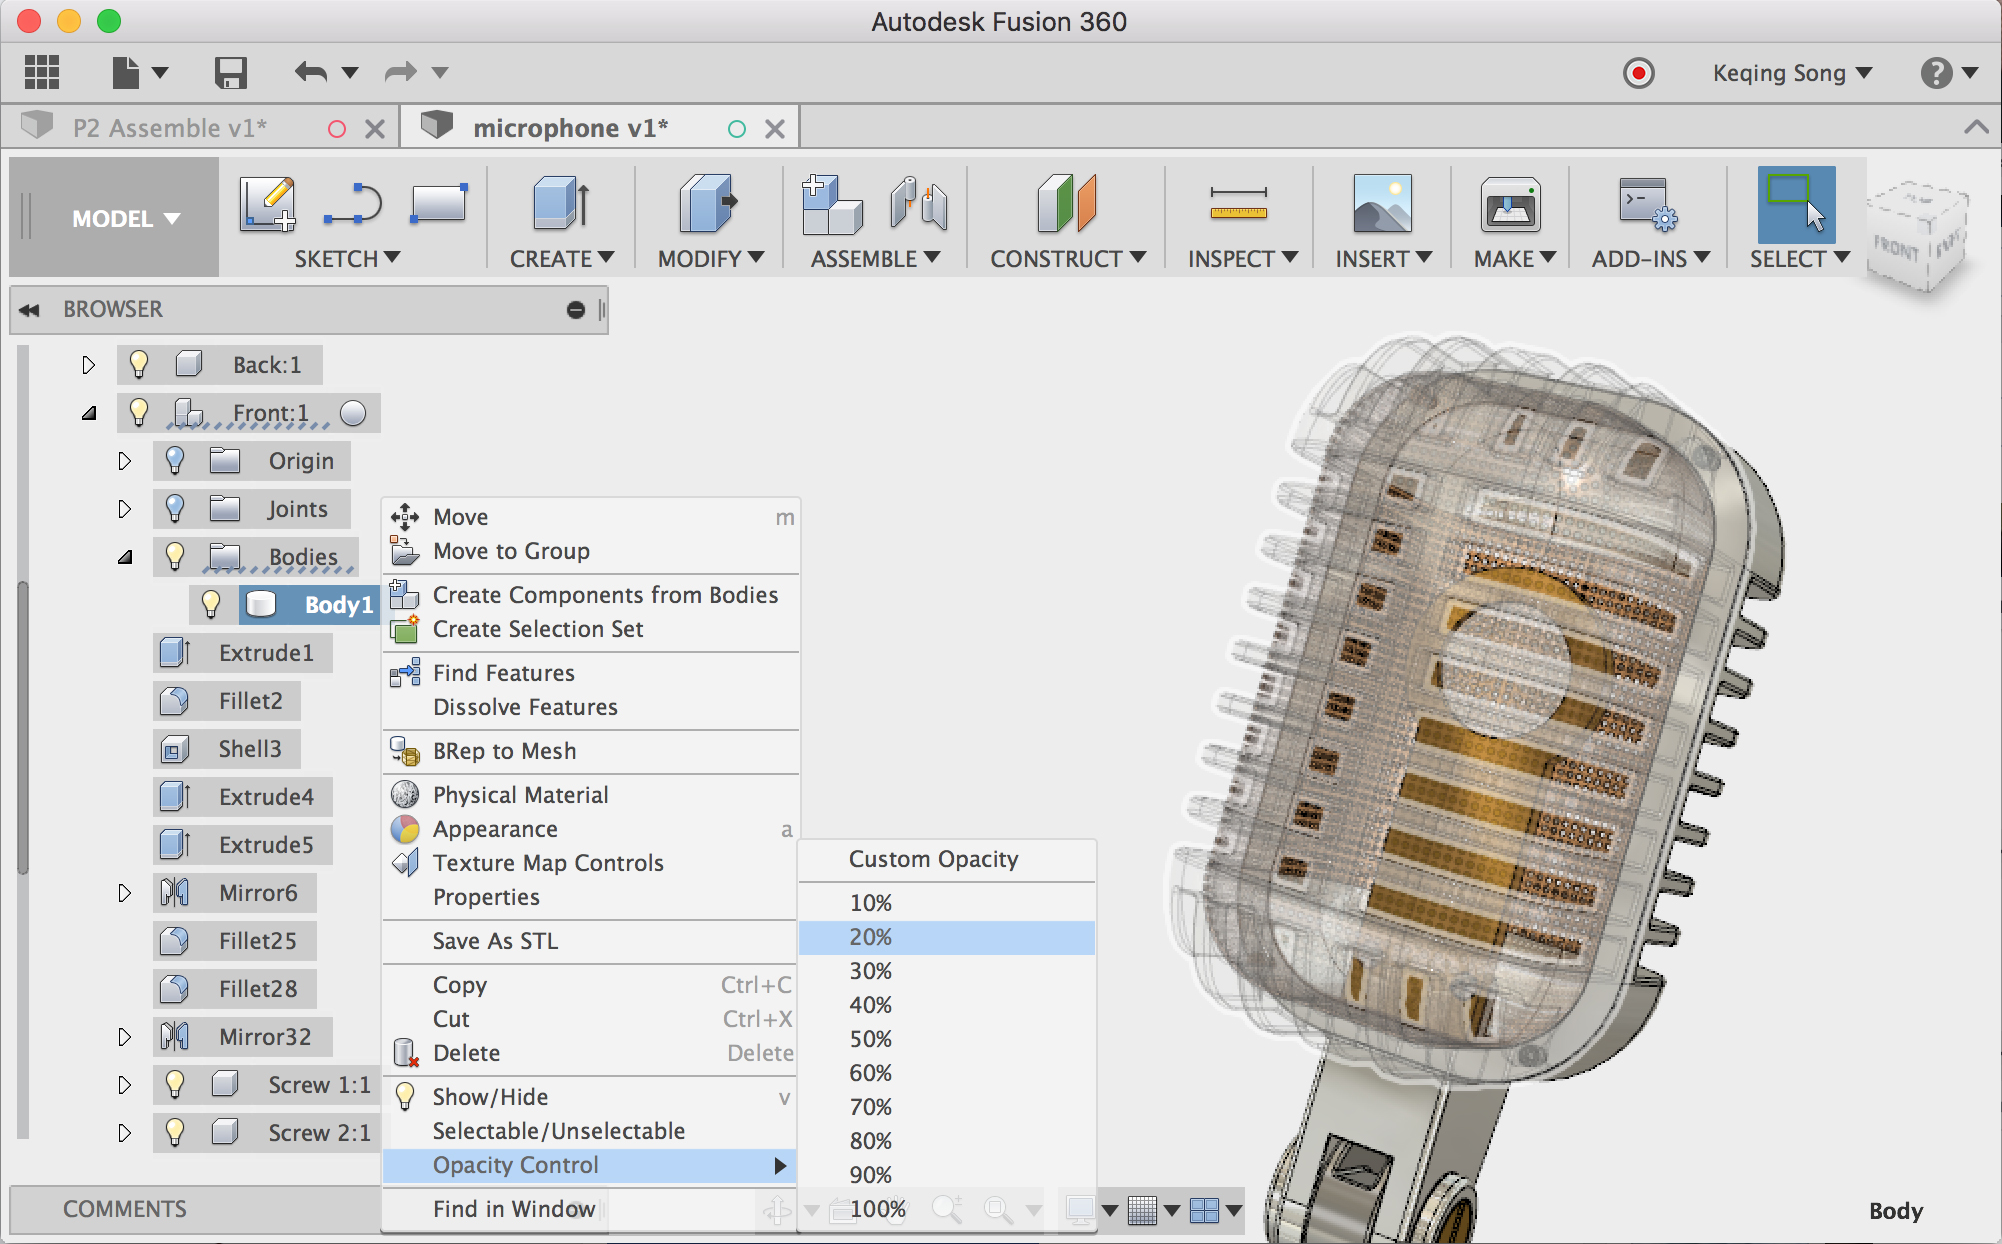
Body level opacity – Since you’re already used to opacity control for component, we thought it’d be a good idea to also enable opacity control for bodies. So go ahead, have at it. Just don’t start designing a bunch of awkward semi-transparent portraits and tag us. We had nothing to do with it. Thanks for the idea submission cekuhnen!
Hashmarks in Section Analysis – In addition to the section analysis improvement from Sept. 7, we’ve updated both in-product and the web viewer to have hash marks so that they are consistent with each other.
Improved – Previously when you had a very large assembly (and I mean VERY large), you’d get poor FPS performance. We’ve made tweaks to the graphics code and have dramatically improved FPS during editing as well as moving around the assembly (by 173% to 181% to be exact).
Improved – The default environment lighting settings have been updated so that you are not looking at the light source with a shadow casting towards you; the light source is now behind you (photography 101 really…). This only affects new designs that you create; existing designs will still retain the previous lighting settings so that we don’t mess up what you had before.
Fixed – We fixed a nVidia driver crash issue that was affecting Windows 10 users.
Fixed – We found an issue where if you changed the texture map on a referenced design and then decided to render the assembly, the texture map changes did not update in the cloud rendering. Now it saves and updates correctly, and both local and cloud renderings come out consistent.
Bryce wrote a great Fusion Forecast post around how we’re developing the Simulation workspace, and how it will not only help you solve problems in your designs before you run into them in real life, but it will enable you to create the best designs possible.
Cloud Simulation now available – This is part our “new solver” efforts; give you better options so you can be more productive. Now when you do a solve for your simulation study, you’ll have the option choose between a local solve (using your computer’s hardware) or a cloud solve (harnessing the power of the internet).
Here’s why cloud simulation is so sweet. If you did a local solve today (using your computer’s power), you can only run one job at a time, wait for it to solve, and then move onto another one. With cloud simulation, you can submit multiple studies at the same time, and they will all run simultaneously. Boom.
As a direct result of solving studies on the cloud, you’re no longer bogged down with waiting on the job to finish; you can continue to work on the design in a different workspace, and let the cloud do all the heavy lifting. You can even pack up and go to the gym since the solve is independent from your Fusion 360 session. So go run 5 miles while you run multiple simulation studies. Simultaneously. You’ll redefine what being “productive” really means.
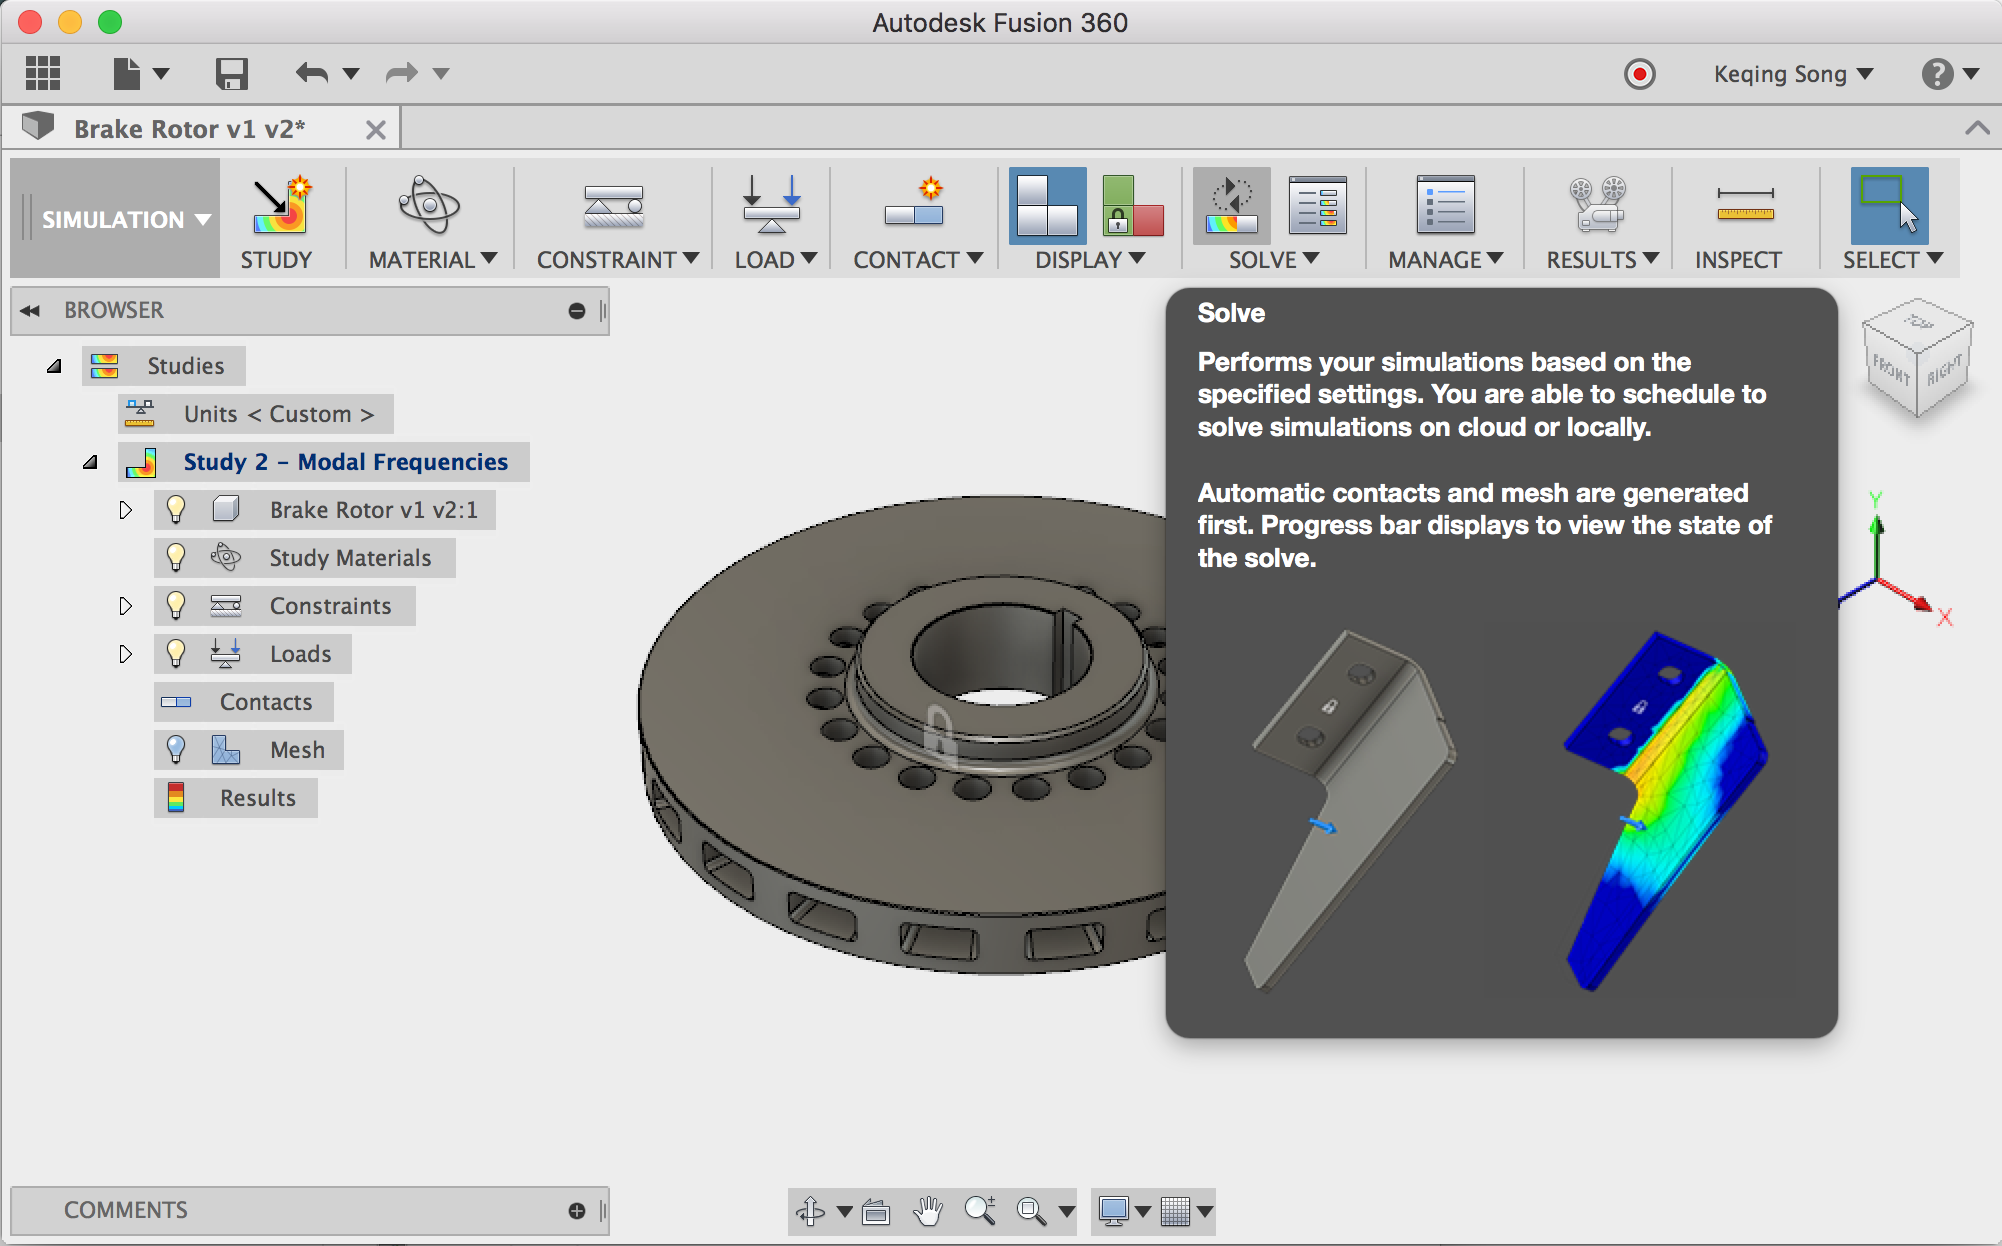
Click the Solve command to start the solve process.
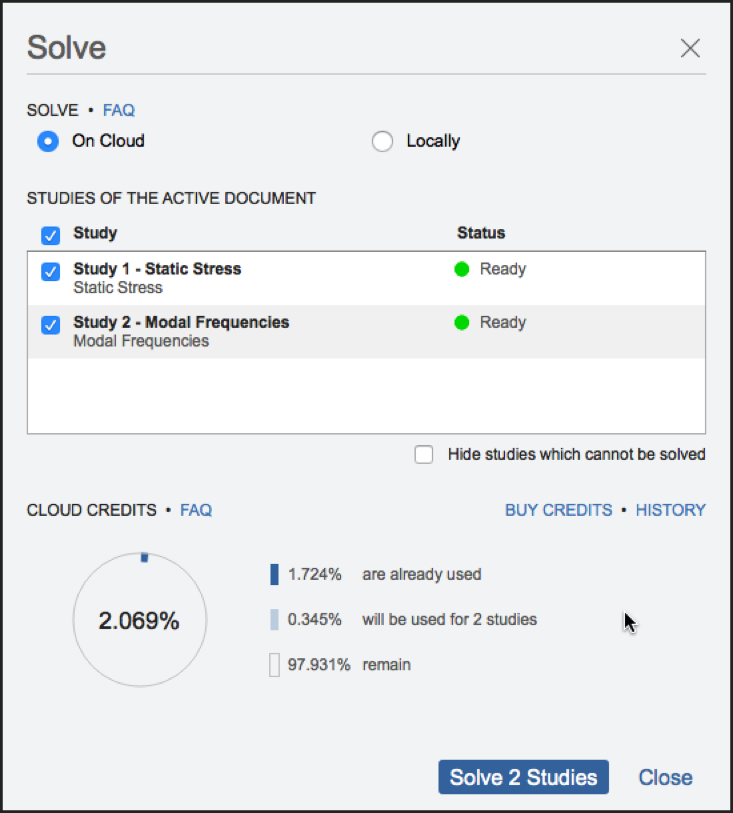
The Solve dialog will ask you whether you want a cloud solve or local solve. It’ll also show the studies you want to solve.
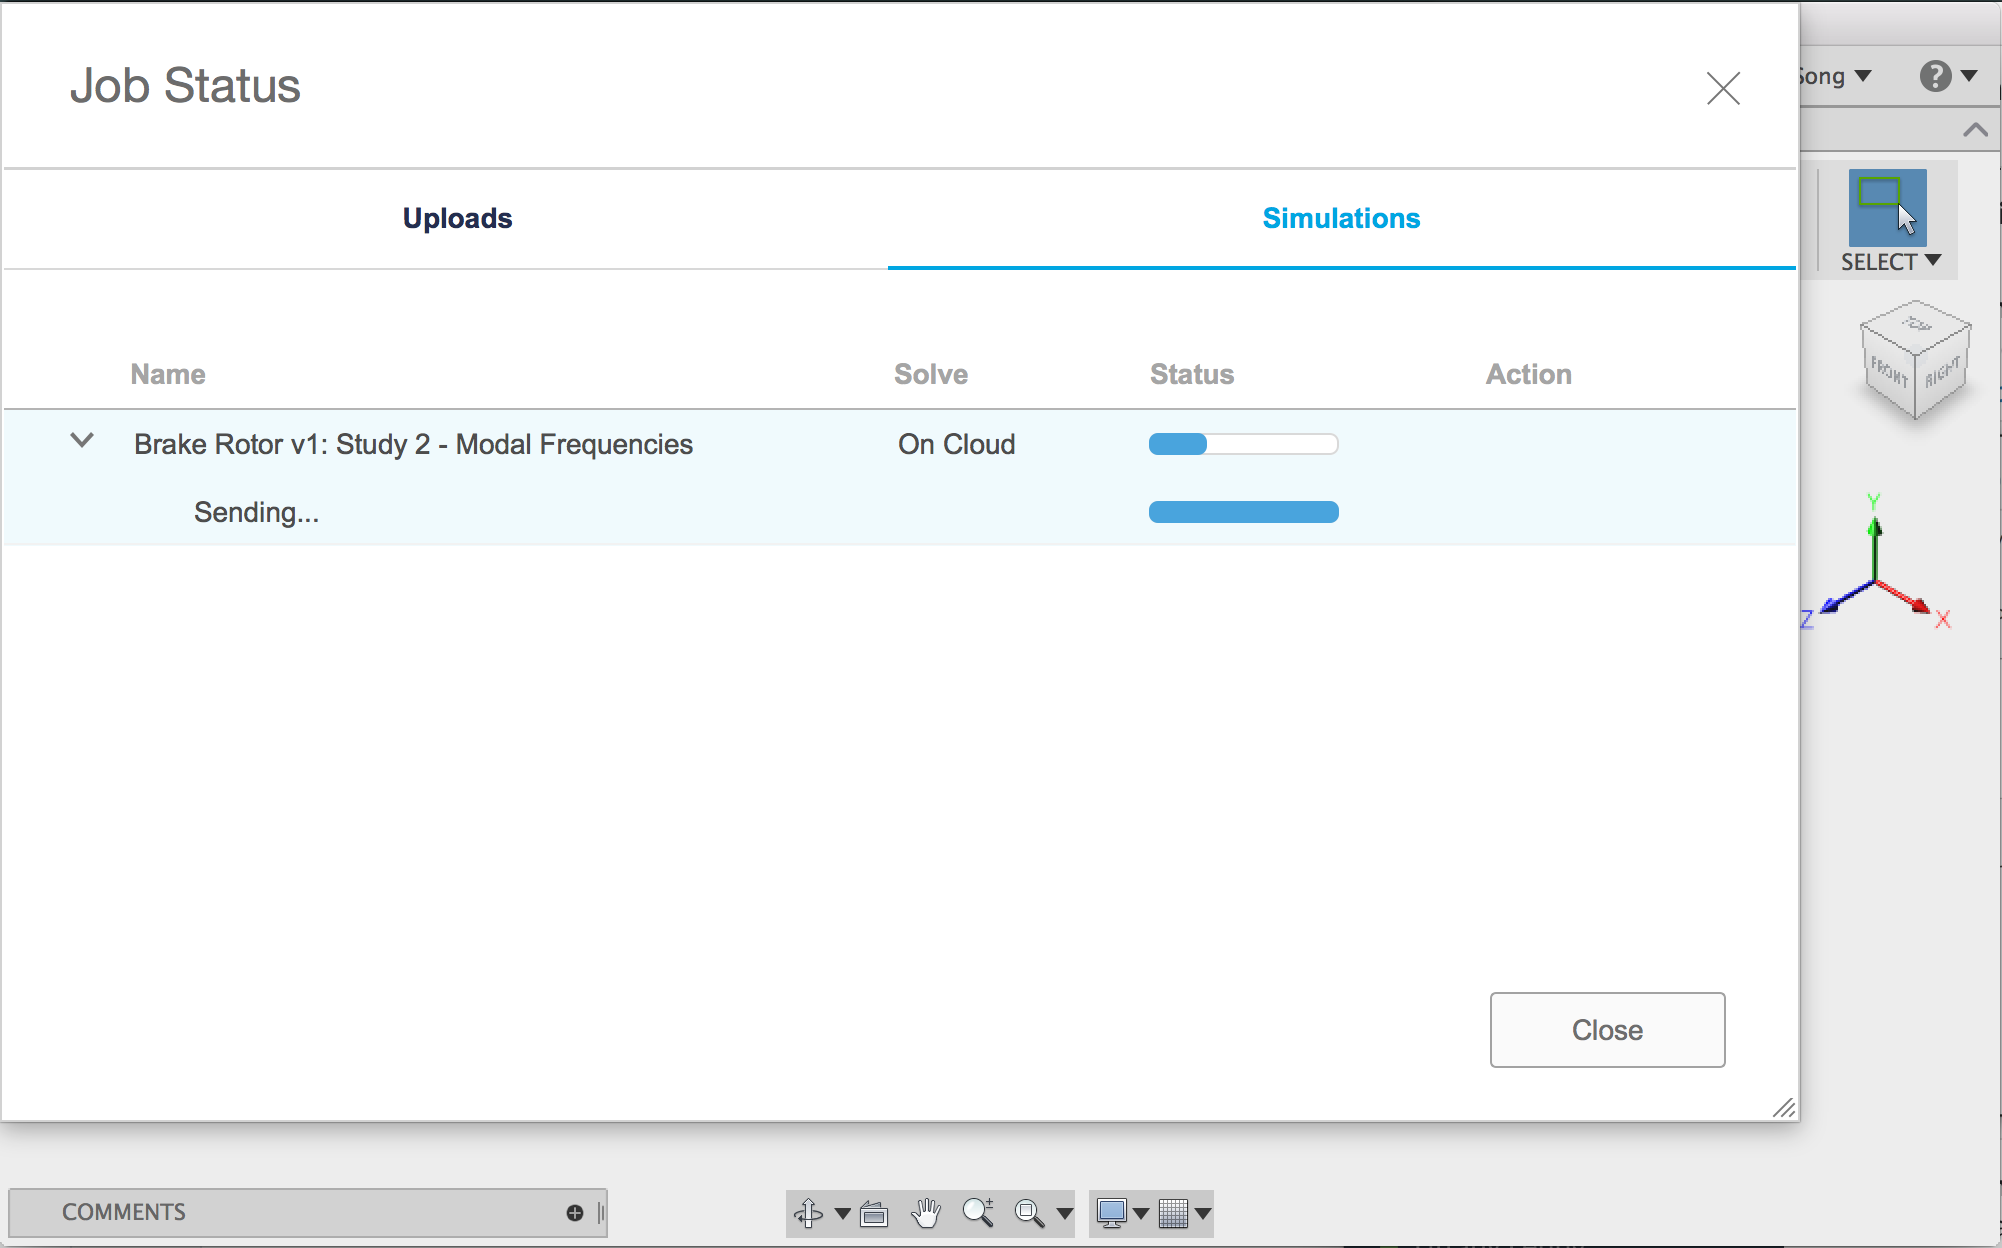
Once it starts, you can see the details of the solve by expanding the item to show progress.
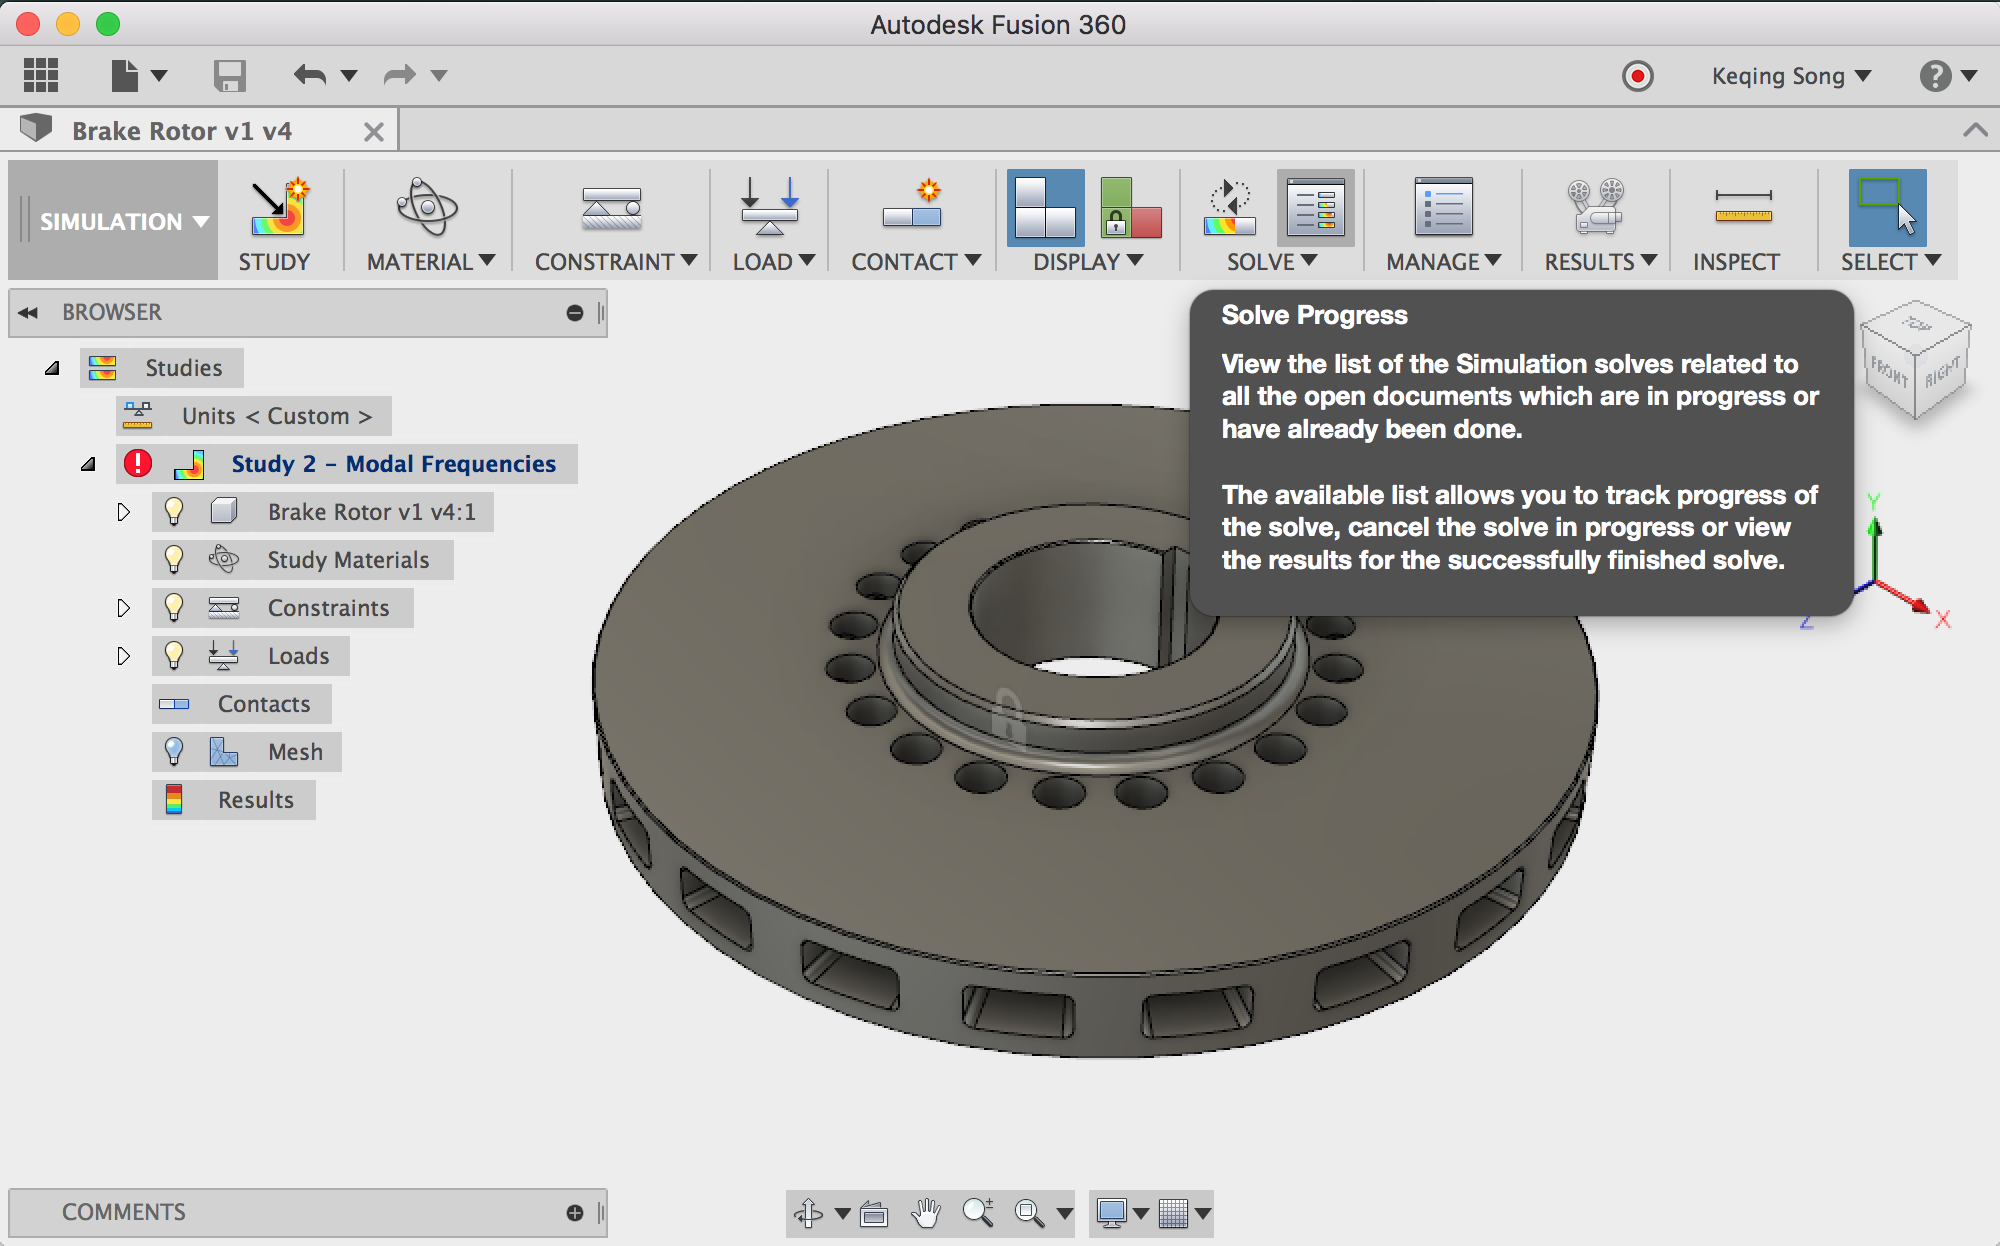
If you close it, you can check on the solve progress at any time by clicking on the Solve Progress command. Keep in mind that cloud simulation functionality require cloud credits, and each solve uses up 5 credits. You can learn about about how to get credits on our cloud credit FAQ page.
Looking forward to the next update, we have Nastran and Event Simulation solvers in the oven, getting the bake time they need. We’re also working on bringing in technology known as Shape Generator that will allow you to “lightweight” your designs where it makes sense to do so, saving material without sacrificing structural integrity.
Fixed – There was an issue where Fusion crashed when you tried to create a new operation when there was no default folder for you to copy and paste to. That’s no good, but yes, we got this sorted out.
Fixed – Lawrence.yun reported an issue where the trace operation traced along a curve once and then back, when he only wanted it to trace it once. We’re happy to report that we nipped this issue in the bud and it’s now working correctly.
Fixed – Also related to 2D Trace, we fixed an issue in the kernel that didn’t allow you change direction of the toolpath by clicking on the red arrow. Now it you can.
Fixed – It looked like Fusion wasn’t able to generate the correct 2D contour toolpath for sketch arcs and splines. We found out that this was a regression issue; this is now fixed.
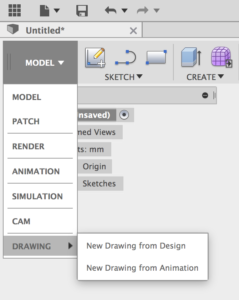
Now accessible from the workspace switcher – 2D Drawings environment is now part of the workspace switcher. We should have done this a long time ago, because this makes it more discoverable and just makes sense. It’s okay though, you can still create a drawing based on a design just like how we had it before.
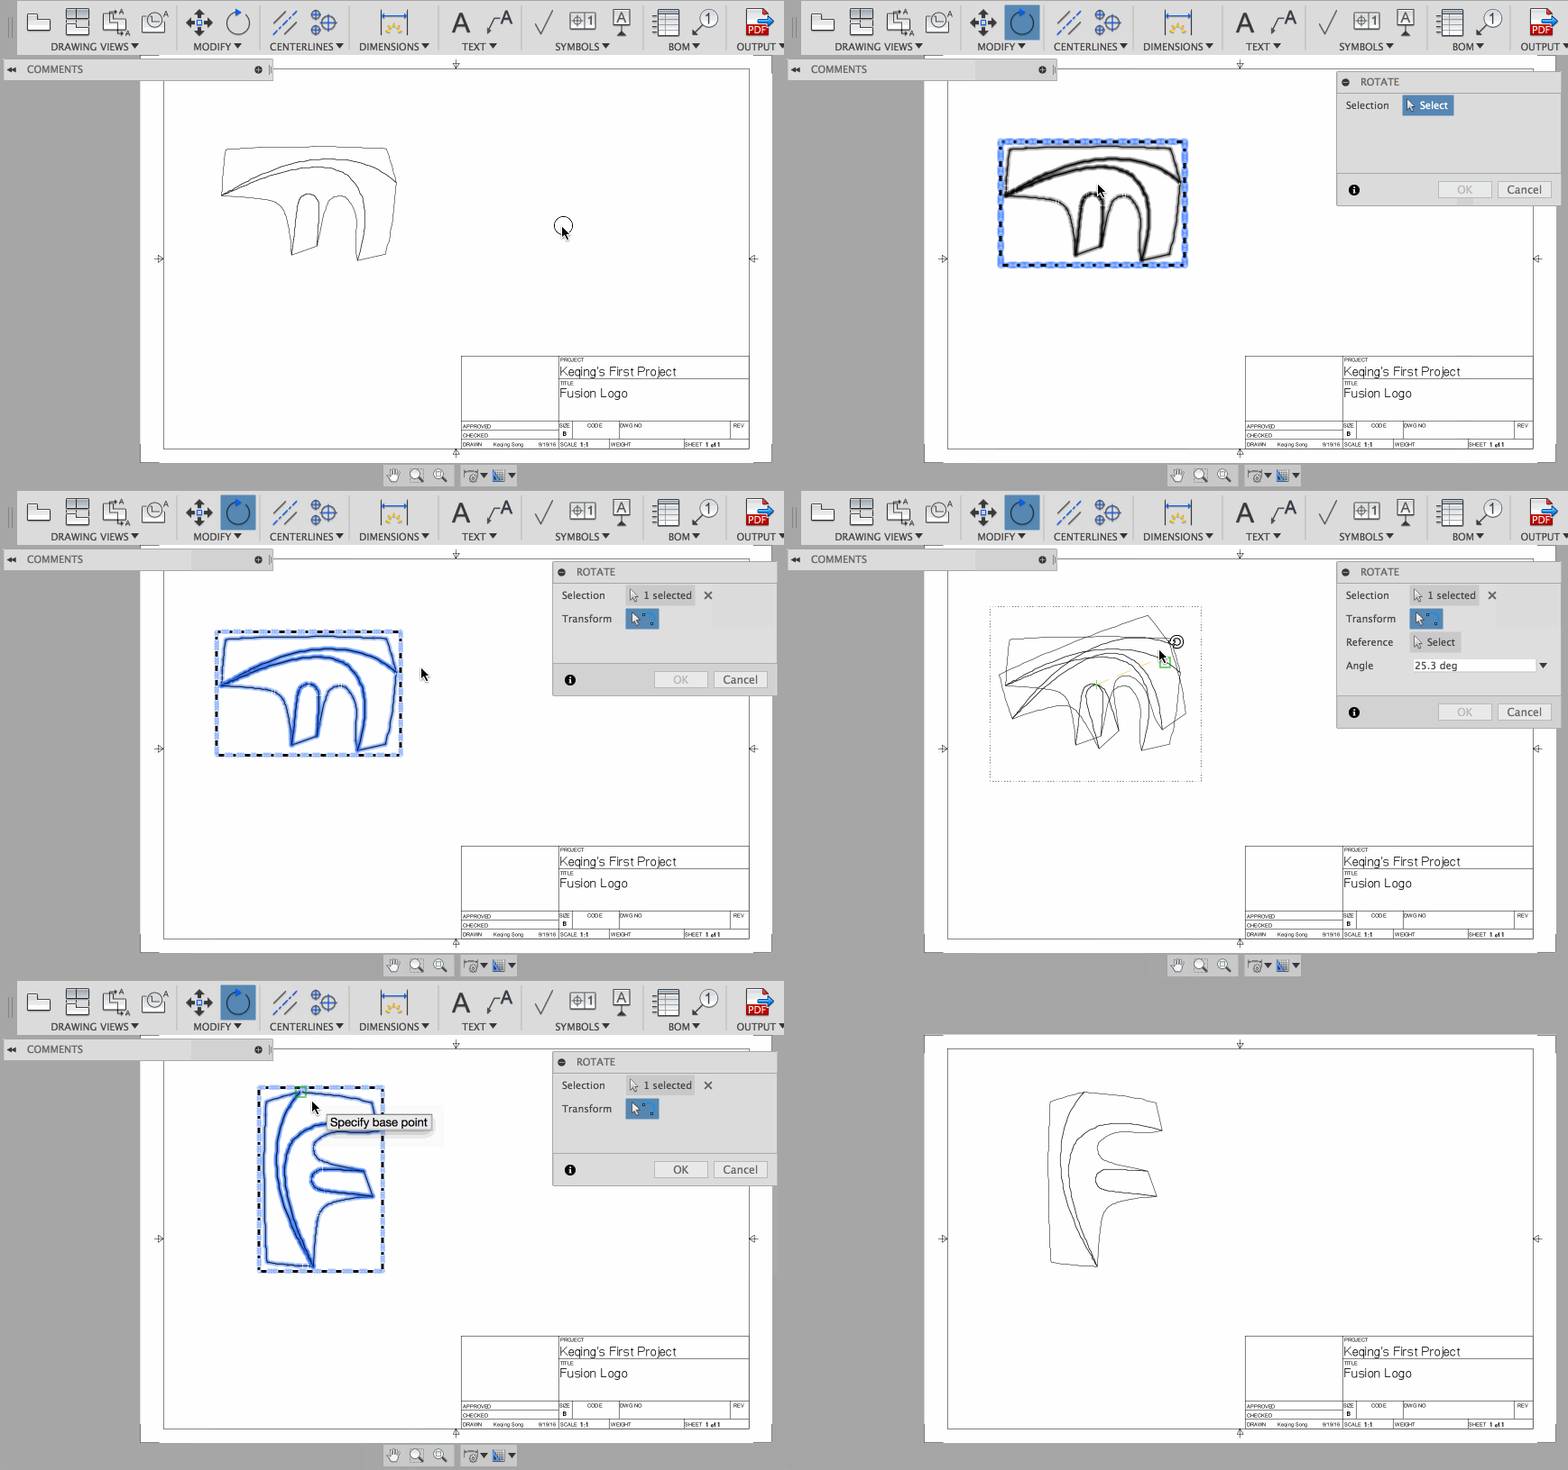
Rotate Views – There are multiple IdeaStation submissions (here, here and here) around this feature, and it’s here! You can now rotate your drawing views on your sheet with a dedicated Rotate Command right next the Move command. Simply click on the view you want to rotate, then set where you want it to rotate from, and voila. You can also specific the rotation with a number of degrees in the dialog. Piece of cake.
No one knows our API better than our very own Brian Ekins (he’s like the David Attenborough of our API world). The following was provided by Brian, so if you’ve met him, read the following in his voice, it’ll make that much more official.
Create Driven Dimensions – An optional argument has been added to all of the methods that create sketch dimensions to allow you to create driving (the default) or driven dimensions.
Note that this is a breaking change to any C++ binaries that create sketch dimensions and they will need to be recompiled. No code change is required since it is an optional argument but it will need to be recompiled. No change is needed for Python or JavaScript programs because the optional argument will default to the previous behavior of creating a driving dimension.
Table Command Input – A new command input that supports a table arrangement (rows and columns) of command inputs is now supported. Below are some examples of where Fusion commands use the TableCommandInput and you can read more about in the Command Inputs topic in the API User’s Manual.
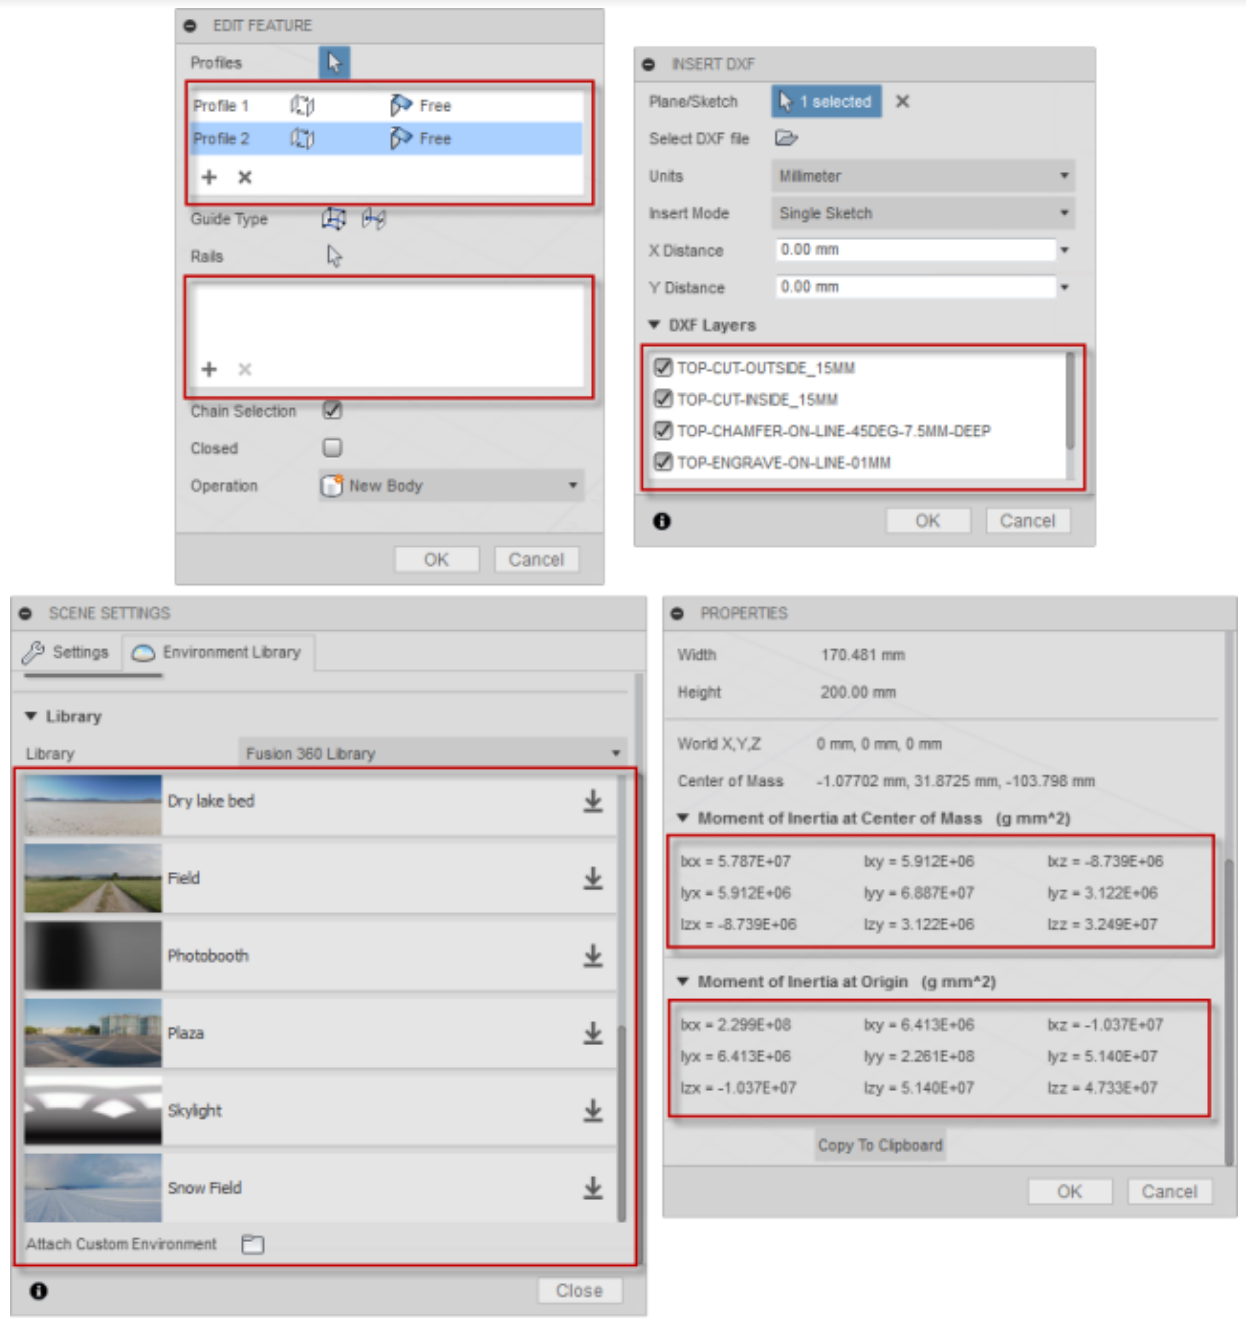
Additional Data Panel Support – You now have access to all hubs and the projects within each hub. Additional functionality is also supported for files (copy, delete, getting child references, etc.).
Support for Contact Sets – yes, you can now also define, query, and enable contact sets.
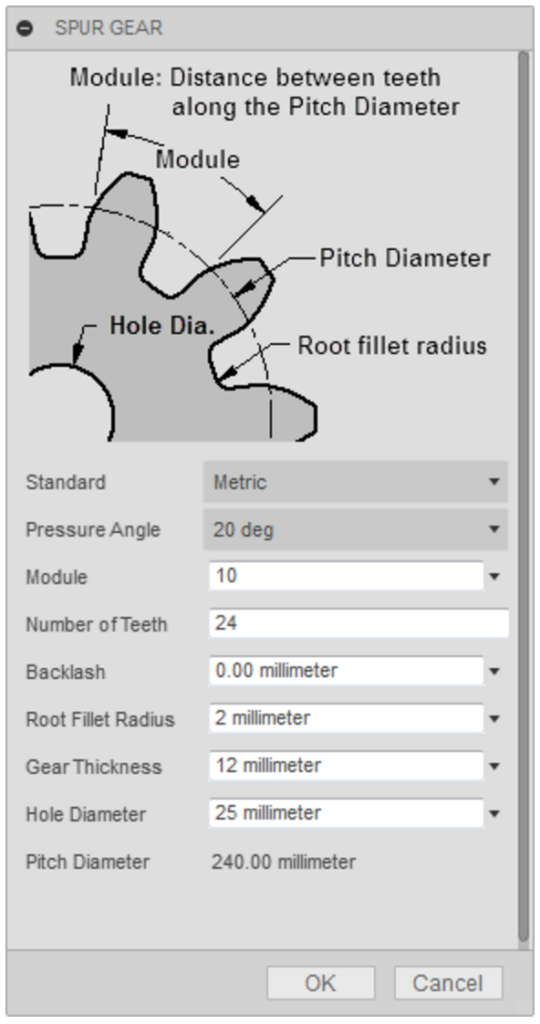
Enhancements to the Spur Gear Samples – We’ve updated the Spur Gear sample script and add-in ,which fixed a units issue. Here are some details around how the script behaves, as mentioned by Brian Ekins, our API guru:
That’s it for this update, stay tuned for the next one!
Cheers from the Fusion 360 Team
By clicking subscribe, I agree to receive the Fusion newsletter and acknowledge the Autodesk Privacy Statement.
Success!
May we collect and use your data?
Learn more about the Third Party Services we use and our Privacy Statement.May we collect and use your data to tailor your experience?
Explore the benefits of a customized experience by managing your privacy settings for this site or visit our Privacy Statement to learn more about your options.