Let’s take a look at the different ways of defining tool orientation in the Fusion 360 manufacturing workspace and what tool is best for each situation.
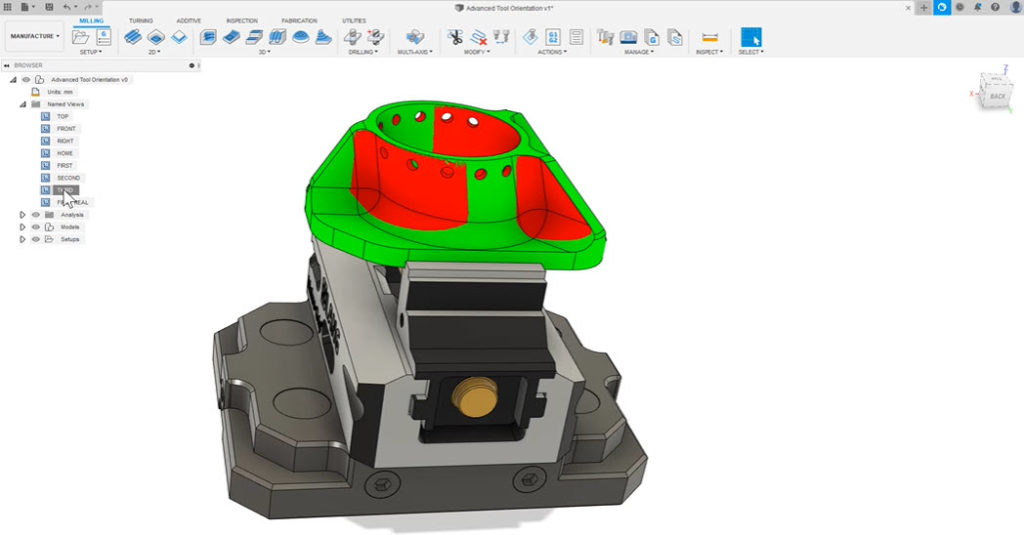
You may encounter geometry on components that isn’t accessible in a 3-axis orientation. To see what’s accessible from a selected orientation, you can use accessibility analysis shading within Fusion 360. In the example below, everything in green is accessible and everything in red is not. The tool axis orientation is defined via the selection of a linear edge, planar surface, or true cylinder.

Tool orientation in Fusion 360
Once you have this information, you’ll know which areas you’ll need to leverage tool orientation. The simplest form of setting tool orientation is via the selection of linear edges, planar surfaces, or true cylinders.
When you select a linear edge or true cylinder, the tool orientation will run parallel with the selection. If you select a planar face, the selection will run perpendicular to this selection. When dealing with 2D geometry, this type of selection is ideal, although this type of selection is not exclusive to 2D geometry.
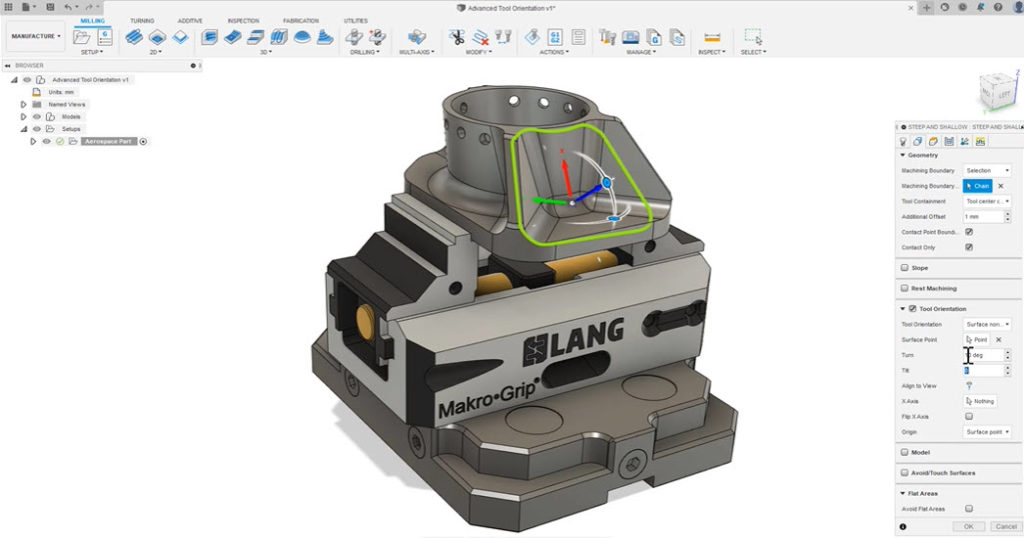
When you don’t have geometry similar to this to reference, there’s a tool called surface normal, which lives within the tool orientation form. This is useful when the geometry is more free form. Surface normal allows you to reference the tool orientation from 3D surfaces. Any selection you make will output a tool orientation that is perpendicular to the selection.

When the mouse hovers over the surface, the tool orientation dynamically changes, giving you a preview of the tool orientation before you make a selection. Once you make a selection, you have the option to edit the orientation via the grab handles. You can manipulate these if you need further adjustments. You can also make incremental changes via inputting values in the turn and tilt parameters.
Align-to-view
Finally, there is align-to-view. Occasionally you may see a perfect tool orientation but have no geometry to reference from. This is when align-to view-comes is a perfect option. Align to view captures the camera view and places the tool orientation normal to that view.
And that’s it, you’ve learned how to achieve tool orientations that aren’t achievable with the basic orientation controls. Take a look at the following video to see the entire process in action:
Ready to give Fusion 360 a try? Get started today with truly integrated CAD/CAM.
