Learn how to use Automated Modeling in Fusion 360, a new tool focused on improving your productivity and ability to rapidly explore new design concepts.

We recently announced a public preview of a new tool called Automated Modeling. This is the first release of new automation capabilities focused on improving your productivity and ability to rapidly explore new design concepts and possibilities early in your design process. Let’s take a closer look.
What is Automated Modeling?
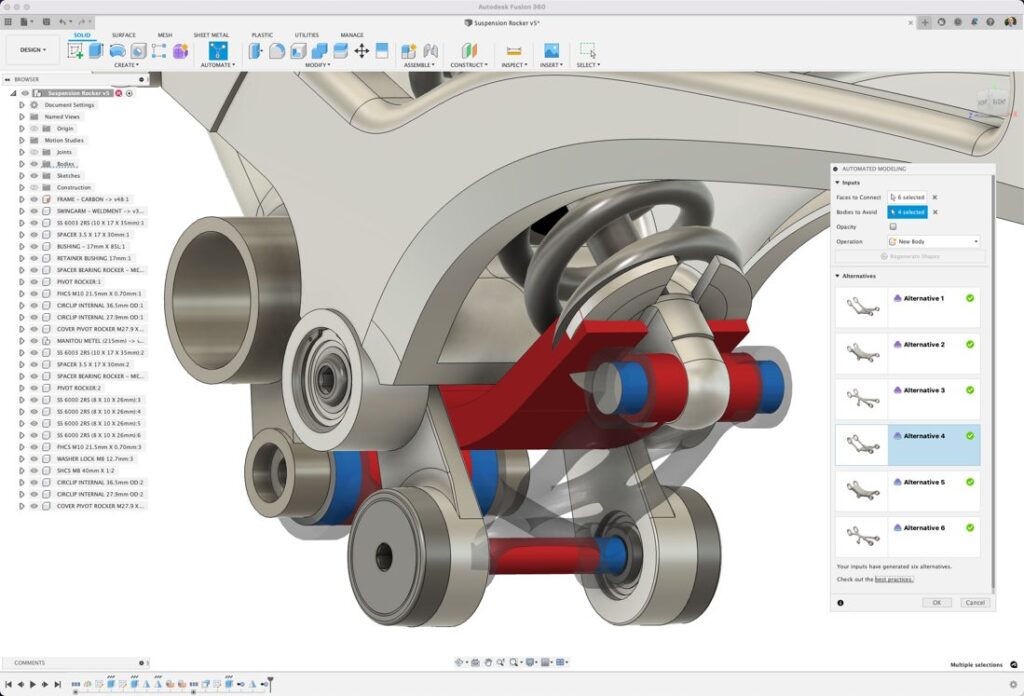
Automated Modeling is a new tool in the Design Workspace that automates the process of exploring and creating new design concepts based on simple definitions of what to connect and what to avoid. We take these basic inputs and combine them with our patented generative design technologies to produce multiple designs in a matter of minutes. A selected design becomes a new body or component in your design that you can further edit, refine or simply use as inspiration to solve a familiar problem in a unique new way.
At first glance, the basic concepts of Automated Modeling probably sound very similar to some other modeling tools in Fusion 360. As you look closer, you will see that Automated Modeling is quite different and incredibly powerful.
What sets Automated Modeling apart?
Existing modeling commands in Fusion 360 like Loft and Sweep allow you to create geometry that connects selected faces or profiles together in a single operation, but they’re limited to just two locations — a start and an end. On the other hand, Primitive tools like Box, Cylinder and Pipe automatically create a specific type of geometry in a single operation. However, these are basic shapes, and they have no real concept of what they are connecting to during creation.
To create more sophisticated geometry connecting multiple locations in space using these tools, you would need to perform numerous operations to get a similar result. In the end, you will only have created one design that is constrained to your design intuition.
Generative design may also sound similar, as its whole purpose is to create multiple design alternatives that connect multiple locations in space with very little restriction on complexity. However, it requires substantially more information to get started, like loads and constraints, desired manufacturing processes, and material selections to generate shapes. Beyond needing more information to get started, it takes more than a couple of minutes to get results.
After using Automated Modeling just once, you will see that it is quite different. With a simple setup, you can define multiple faces to connect and bodies to avoid. Within minutes, you will be presented with multiple design alternatives of various levels of complexity and style to consider as solutions to move forward with. Automated Modeling is going to change the way you approach and explore new ideas for your design challenges.
How does Automated Modeling work?
At this stage in the process, we are purely focused on creating a new shape (as a body or component) to form a connection between multiple existing bodies and (if desired) avoiding nearby bodies along the way. To get started, you will need to define Faces to Connect and, optionally, Bodies to Avoid. That’s it. Defining performance requirements, manufacturing process, and materials are not required to get started with Automated Modeling.

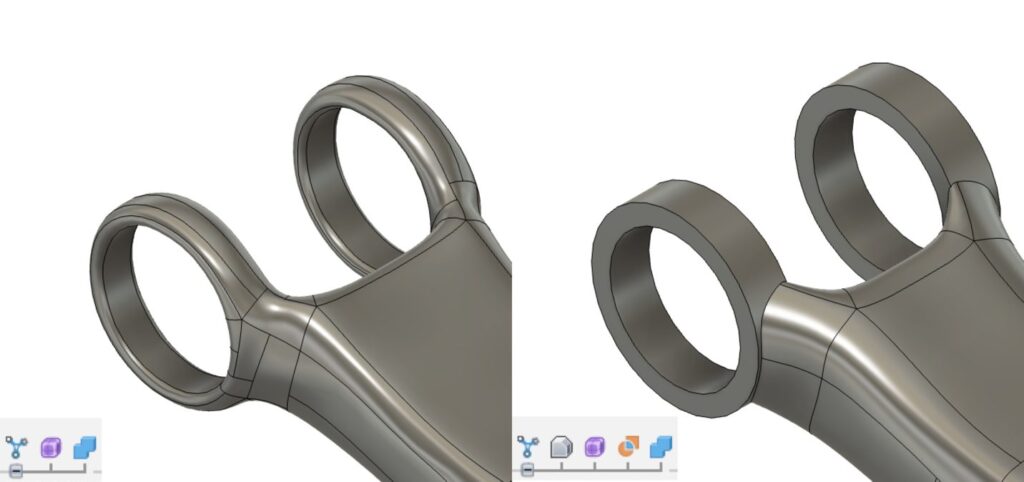
When you click Generate Shapes, you will start the process of generating multiple design ideas. You can pursue multiple design approaches simultaneously, resulting in up to three different connection types for the selected inputs and two interface types to the selected geometry.


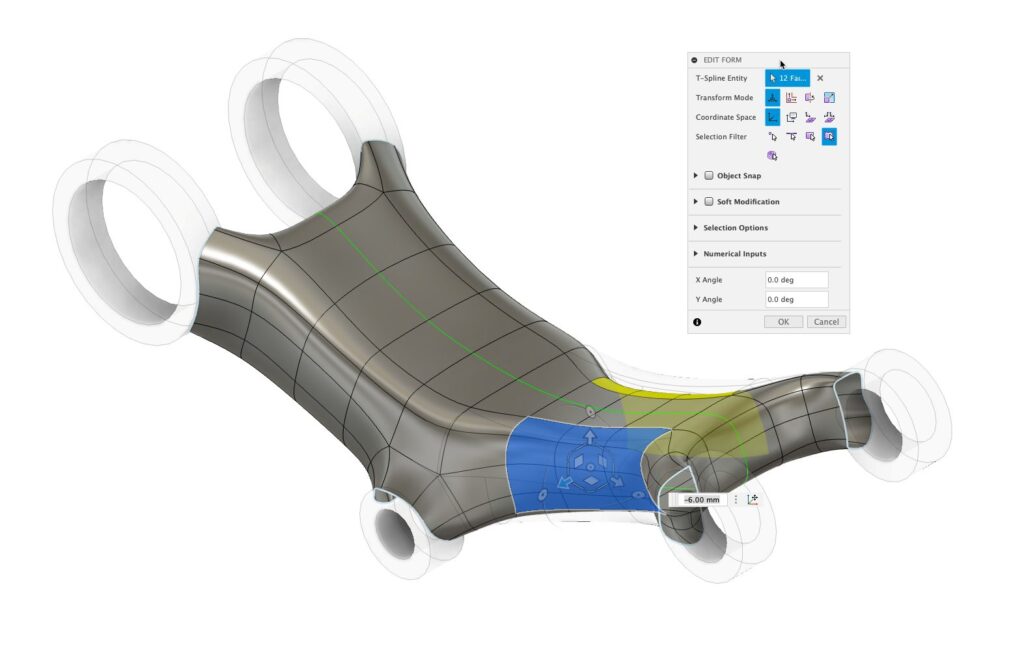
While the foundation of each result is a T-spline feature, the two interface types will result in unique feature sets being added to the timeline and will subtly change how the design is edited. Symmetry will automatically be identified from the inputs, enforced during the shape creation, and maintained for editability.

If you want to take a closer look at one of the other design alternatives, you can swap them in and out by editing the Automated Modeling feature in the timeline and selecting from one of the other design concepts.

Take a closer look at the Automated Modeling workflow in action in this video:
Tell us what you think
This is just the start of our public preview of Automated Modeling, rest assured that we have more improvements in development that we will release in future updates. In the meantime, please let us know how things are going in our feedback thread and consider joining the Insider Program to stay up to date with our ongoing developments.
