Get started with configurations in Autodesk Fusion! Learn how to create a configured design, add configurations, configure aspects of a design, and how version history works in Fusion.

Configurations are an invaluable tool, offering a streamlined approach to design optimization, risk mitigation, and cost efficiency. Let’s dive into how to create your first configured design in Fusion.
Table of Contents
- How to create configurations in Autodesk Fusion
- How to add configuration aspects
- How to exit configuration mode
- How to configure values and states
- How to activate configurations in Autodesk Fusion
- How to use theme tables
- How to handle local edits
- Configurations and design history
- Tips for creating a configured design strategy
- Get started with configurations in Autodesk Fusion today:
How to create configurations in Autodesk Fusion
Once you’ve opened a new design, on the toolbar, navigate to the configure panel and click “display configuration table”. This will display the configuration table dialog.
The top table is where you create, edit, and manage configurations. To add configurations, to your design, enter the number of configurations you want to create and then click “add configurations”.
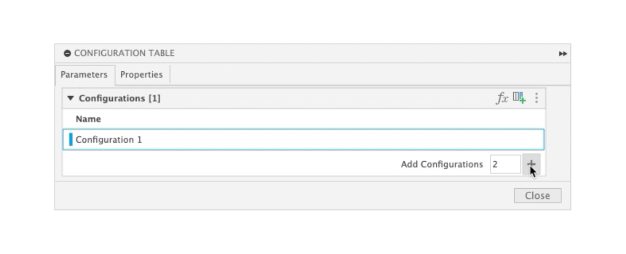
You’ll notice that each row represents a different configuration so you may want to give each configuration a memorable name to make it easy to identify and differentiate from other configurations. All you have to do is right-click a configuration and select “rename”. One you’re ready, close the configuration table and start to model your design.
How to add configuration aspects
Once you’ve created some model geometry, you can configure aspects of the design.
On the toolbar, navigate to the configure panel and click configure. This will activate configuration mode and display the table dialog.
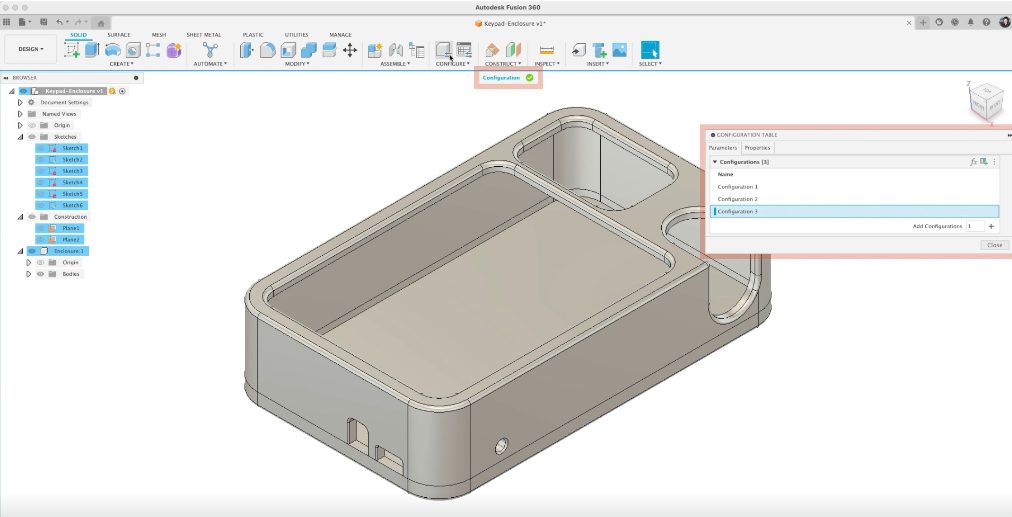
When configuration mode is active, you’ll notice configurable objects in the browser, and features timeline are highlighted. To display a list of configurable aspects, all you need to do is click an object or feature and then check an aspect to add it to the table as a column. The list of aspects will vary depending on the object or feature type.
By clicking an object in the browser or its creation feature in the timeline, you can configure aspects for that object.
How to exit configuration mode
To exit configuration mode, all you all to do is click the check mark at the top of the canvas. Outside of configuration mode, you can configure objects and features in the timeline or browser by right-clicking an object or feature and selecting “configure”.
This will activate configuration mode, open the configuration table, and display the configure dialog for the object or feature you selected.
While you can check aspects to add them to the configurations table, you can also add user parameters. In the configuration table dialog, click “add parameters” to display the parameters dialog in configuration mode.
In the parameters dialog, locate the user parameter that you want to configure, and in the configured column, check the box to add it to the table.
How to configure values and states
Once you’ve added a few aspects to the configuration table, edit the values or toggle the states in each column for each configuration.
If you edit a value or state for the active configuration and the configured aspect is actively in use, the design will update in the canvas and anywhere else it appears. For example, if you edit the radius value for this fillet feature the design updates in the canvas.
You can also edit the states for features and objects – i.e. you can change the suppression state for extruded features.
If you edit the value or state of a configured aspect for a non-active configuration, the change will take effect when you activate it.
How to activate configurations in Autodesk Fusion
There are a few ways to activate different configurations in Autodesk Fusion. Let’s walk through them.
In the configuration table, double-click a configuration name to activate it.
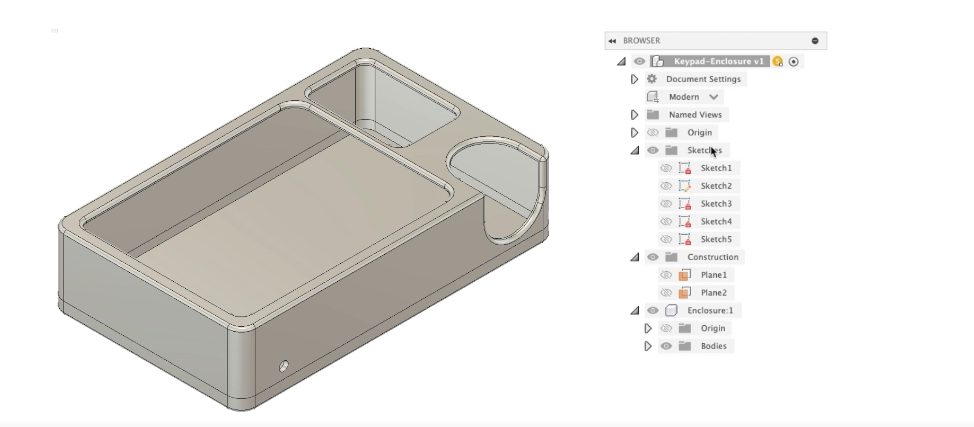
In the browser, click to expand the list of configurations, then select a configuration to activate.
You can also activate different configurations to resolve design details when you edit the configuration table.
How to use theme tables
While configuring your design, you can organize configured aspects in theme tables.
A theme table is a child table where you can manage and organize columns, allowing you to create consistent variations across configurations.
When you configure an appearance, physical material, sheet metal rule, or plastic rule, a theme table is automatically created.
You can also create custom theme tables. This is a flexible way to group similarly configured aspects and simplify the top table. In the theme table, a theme is represented as a row. You can customize them by editing the value or state in each column for each row.
In the top table, each theme table is represented by a column. For each configuration row, click to expand the list and select a theme to assign it to a Configuration. For example, you can create themes to represent different sizes of a design for a product line.
Once you’ve created configurations and themes, continue to edit values in the configuration table, configure aspects, and modify your design.
How to handle local edits
When you edit aspects of your design, the outcome will be different depending on if it’s configured or not.
If you edit a configured aspect, it affects a specific configuration. you can modify each configuration and define the differences between them.
When you edit a non-configured aspect, the change affects all configurations. This allows you to edit or modify all configurations at the same time. The differences between configurations are defined in the configuration table.
Configurations and design history
As you continue to modify your design, save your design to create versions.
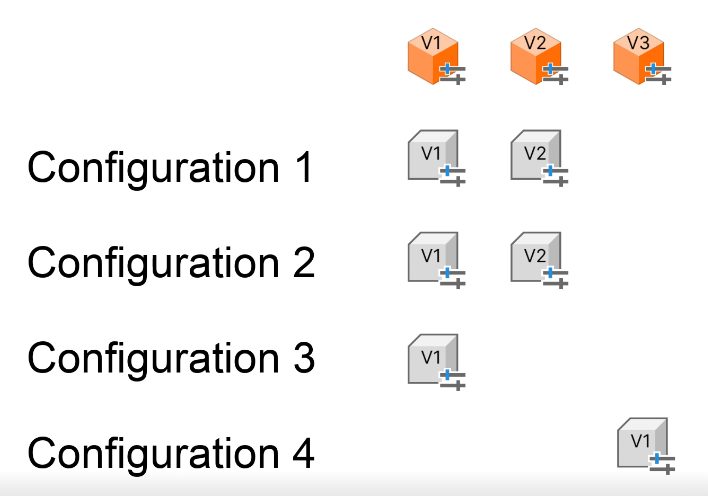
When you save your configured design, only configurations with edits are versioned. For example, the first time this configured design was saved there were 3 configurations. All three configurations are now at version one.
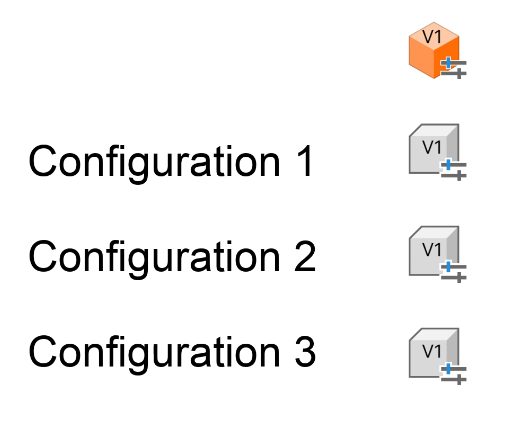
If you edit Configuration 1 and Configuration 2 and then save, those are saved as V2. Configuration 3 was not modified so it remains at V1. Now, let’s say you create a new configuration called Configuration 4 and then save the design. Configuration 4 is now saved as V1.
Tips for creating a configured design strategy
When you create configurations in a configured design, it’s best to:
- Plan your design strategy around features that Configurations will share
- Configure as you create your design
- Activate different configurations often to validate how changes affect each configuration
- Use theme tables to group similarly configured aspects and simplify the top table
- Create configurations of smaller assemblies, then insert them into a larger assembly.