Elevate your design and manufacturing processes with Autodesk Fusion
CAD Enthusiasts! Bryce here again talking more about my transition from SOLIDWORKS to Autodesk’s Fusion 360. In this post, I will focus on some of the features I have noticed in Assembly Modeling.
Time-dependent mates:
Who cares if mates are solved simultaneously or in a time dependent order? I didn’t until I really started getting into Fusion 360 assembly modeling. A combination of time dependent joints and a single modeling environment changes the game for creating assemblies in Fusion 360.
I liked to design in SOLIDWORKS with multiple references where one dimension could be changed and the entire assembly would update accordingly. Although, I disliked working in groups when making external references because Joe Shmoe would open up my assembly that was beautifully designed. Unfortunately, Joe would then go back and change sketches/features/mates without realizing the repercussions of the design change. I would then open the file to a “Christmas Tree” (Yellow Warnings and Red Errors) for a feature manager. Don’t even get me started when this workflow is attempted without a PDM that keeps track of references, check in/out functionality, and version control.
Let me explain: In SOLIDWORKS and most other CAD tools, the mates are all solved simultaneously. Primarily because there is no time dependency other than how and when components are inserted into the assembly. Originally, I thought this was a more flexible approach; however, this becomes an issue when you make external references to other components while designing, especially with moving assemblies.
As I mentioned in my last post, there is a timeline in Fusion 360 that keeps track of everything, even mates. I first didn’t realize how AWESOME this was.
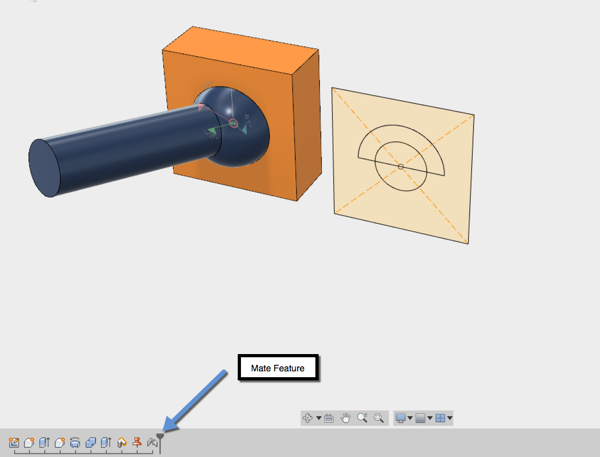
Let’s start with a simple example. First, I created a layout sketch with three profiles (shown in image 1). Two components were created and the outside square was used for the housing component. The half circle was used to revolve the ball and the smaller circle was used for the shaft.
Image 1
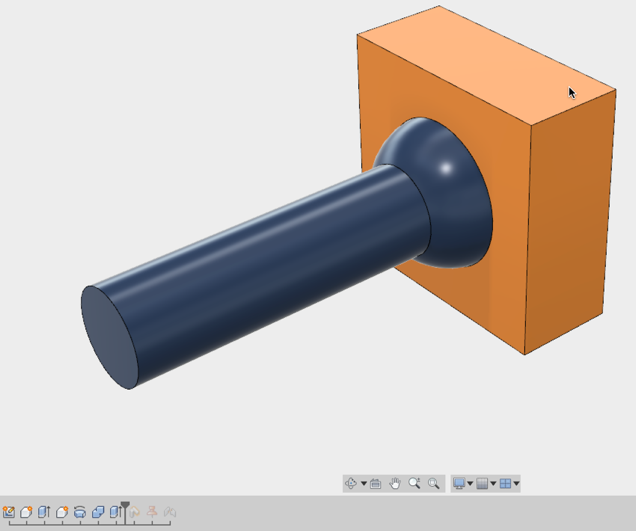
The output of an extrude, revolve, combine cut and another extrusion produced a static assembly with no external references to other files (shown in image 2).
Image 2
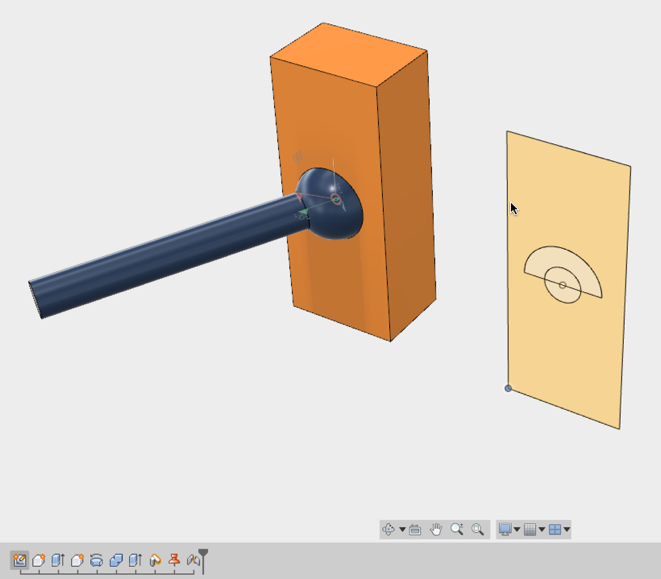
Next, I moved the components off the sketch (SOLIDWORKS would not have appreciated this move once I rebuilt) and grounded the base and added a joint (similar to a mate) to create the ball joint motion (shown in image 3).
Image 3
Finally, the cool part: As you may have noticed, I moved the ball component around and now I am going to attempt to make some design changes to the sketches (result shown in image 4). In traditional CAD tools, the issue arises because the software doesn’t know which direction to create the extrusions. It is trying to solve the state of the sketch, position of the components, and component references all at once. This occurs when you change the position of the component, especially out of the plane it was designed in.
Image 4
Ultimately, the nature of adding time dependency behind mates or a component’s position helps make top down design that much easier. In addition, it is less of a headache to manage changes in the design. The sketch is solved first, then features, then mates (or in any order that the design is created). Watch this video to see a great example of time dependent joints in action.
In SOLIDWORKS, I would start out in a part file with each component as a separate body, and then save out the bodies into different child-part files. I would then bring the child-part files back into an assembly and mate them together. If there are several components, this can cause many external references which are bound to break if not handled properly. Also, this causes a lot of jumping back and forth between the original “parent” part file and the assembly to make changes to the design. With Fusion 360, this is all housed in one environment and one file.
In traditional CAD tools, I would not use the Top-Down design approach for moving assemblies. Now, Fusion 360 gives the flexibility to use either the Bottom-Up or Top-Down design approach when convenient in the design process.
Hiding Components or Bodies?
As an ex-SOLIDWORKS user, I was used to the workflow of right clicking a component in the viewport and selecting the hide command (the block symbol with the glasses). However, most of the time I would click the command next to it which would make the body transparent. When I wanted to show the component again, I would have to look through the feature manager to find the component with the greyed out block. Finding the component can prove tricky when there are multiple sub-assemblies and a part is located deep in the feature manager tree. The implementation of the “show hidden” command was convenient when searching for hidden components.
In Fusion 360, we can follow a similar workflow. A component can be hidden from the graphics area by simply selecting the component, right clicking, and then selecting the “Show/Hide” command.
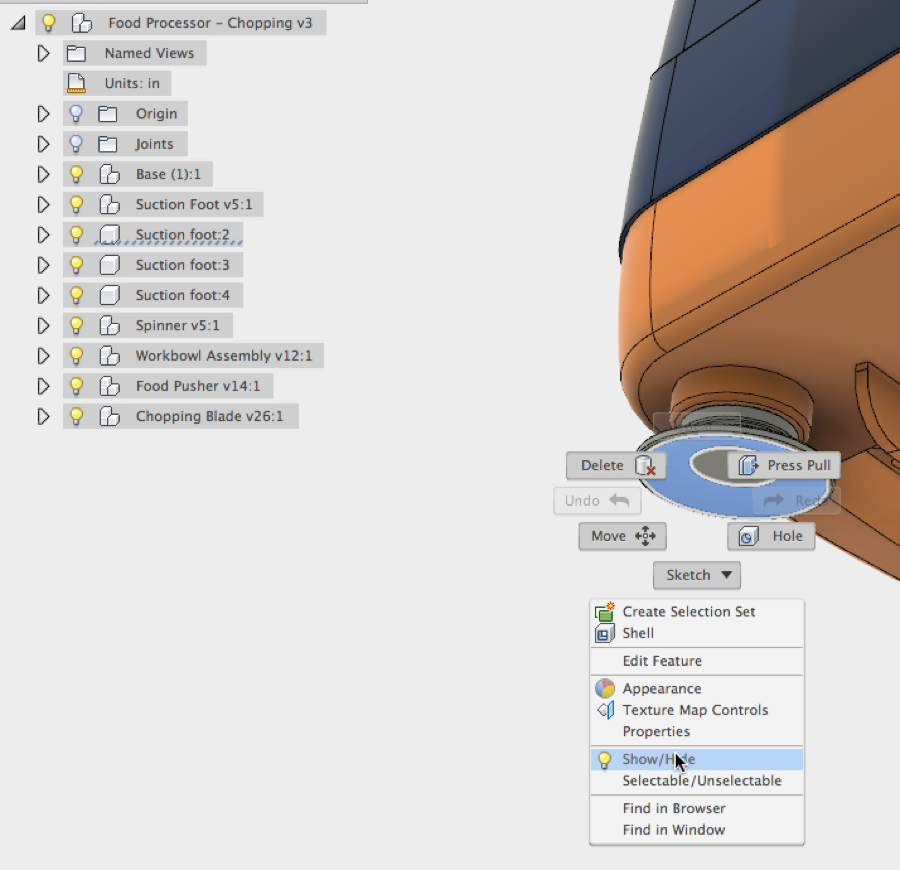
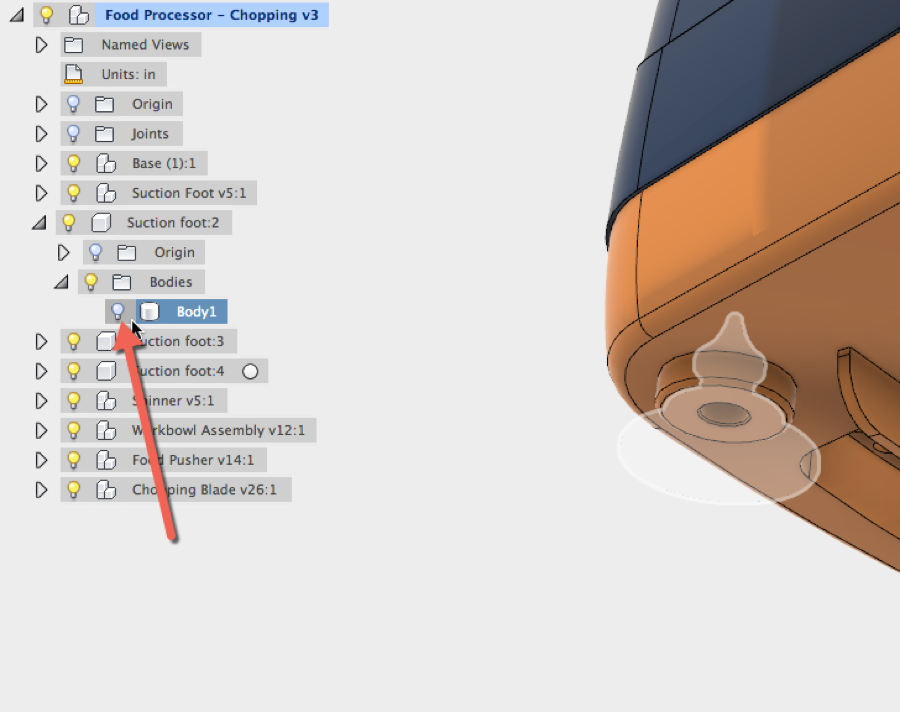
In order to show the component with this workflow, the component must be expanded in the browser to see the bodies folder. Also, the bodies folder must be expanded. Once the body is located you will have to hit the light bulb of the body (shown below) to show the component because hiding from the graphics area hides the body not the component.
As a result, I have adopted a new workflow. Select the component and this puts a striped underline under component in the browser. Then I select the light bulb next to the component, thus eliminating the need to dive down into the bodies folder. This also makes it easier to locate which component is hidden when I would like to show the component again.
What do you think?
As always, I would like to hear your stories about transitioning from SOLIDWORKS to Fusion 360. Hopefully, we can continue to help each other.
Learn More
As you look to become a Jedi master at Fusion 360, utilize the following resources to help make it easier to transition to Fusion 360:
Feature by Feature Fusion 360 Tutorials

