& Construction

Integrated BIM tools, including Revit, AutoCAD, and Civil 3D
& Manufacturing

Professional CAD/CAM tools built on Inventor and AutoCAD
2 min read
Let’s uncover common causes of modeling failures in Fusion 360 and learn how to avoid them—starting with high curvature and near tangency.
Have you ever tried to model a shape with Autodesk Fusion 360 and failed? I know I have. In our previous post series, ‘Get Smart with Fusion 360’ we learned how Fusion 360’s modeling kernel—Autodesk Shape Manager (ASM)—creates the 3D shapes we want to see on screen. In this series, we’ll discover the seven most common causes of modeling failures in Fusion 360 and learn techniques for avoiding (or fixing!) the problem.
Let’s start with the sins of high curvature and near tangency.
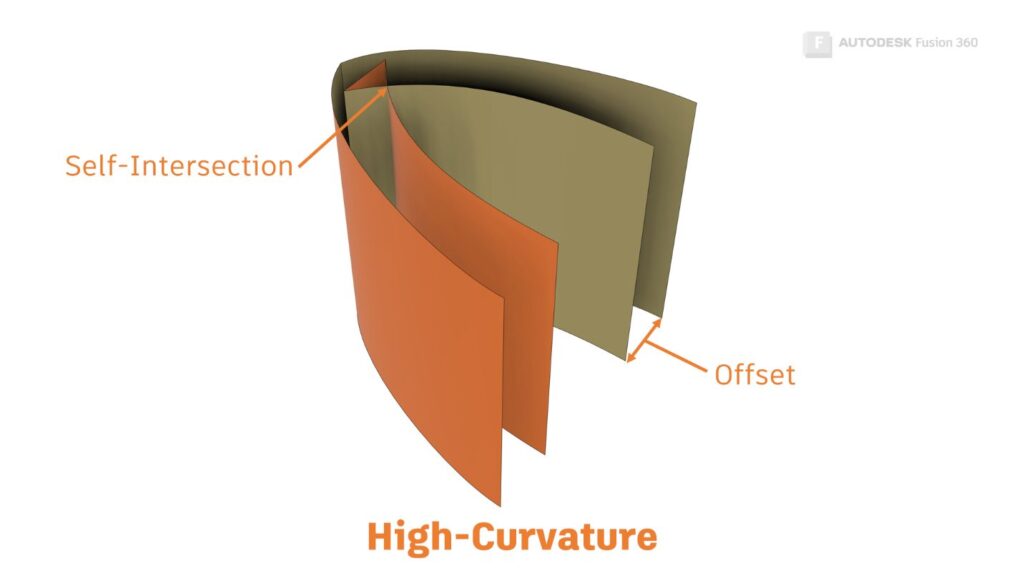
‘Curvature’ is a measure of how much geometry bends. A straight line has zero curvature. A tight radius has high curvature. Geometry with high curvature isn’t a problem, but it can cause problems downstream. For example, if we offset from a surface that has high curvature, our new surface may include self-intersections.

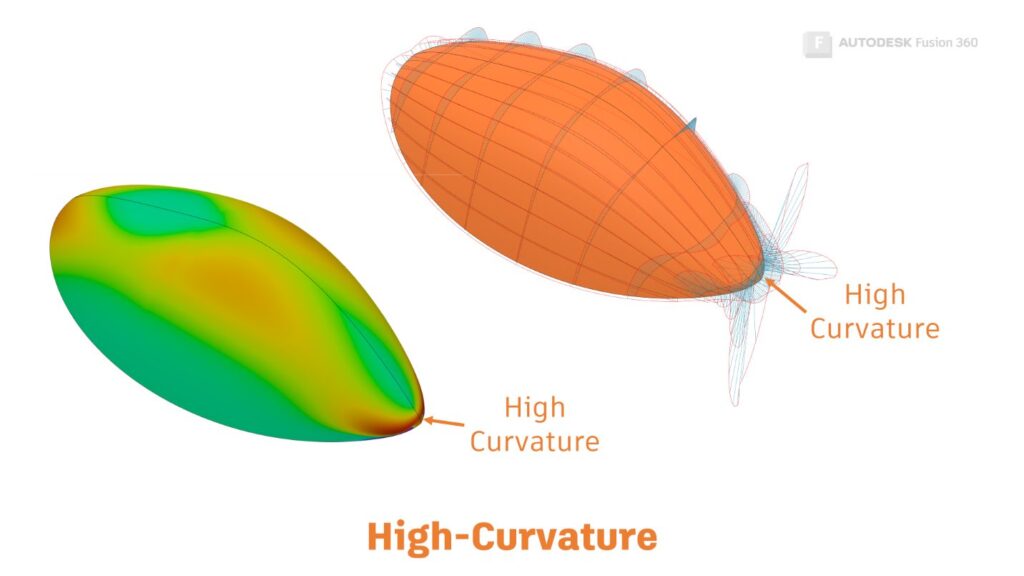
Some modeling operations cope well with self-intersections (e.g. Offset & Fillet), and some not so well (e.g. Sweep). High curvature areas of a surface can be found with the curvature analysis or Isocurve/Curvature comb analysis tools.

If you can’t edit the existing geometry to remove high curvature from the surface you are working with, you may need to work around the problem and approximate the self-intersecting area.
Tip: Temporarily cut away areas of high curvature, and test if the surface will thicken without them. This can help you prove that the high curvature area is the problem before you start unpicking your model.
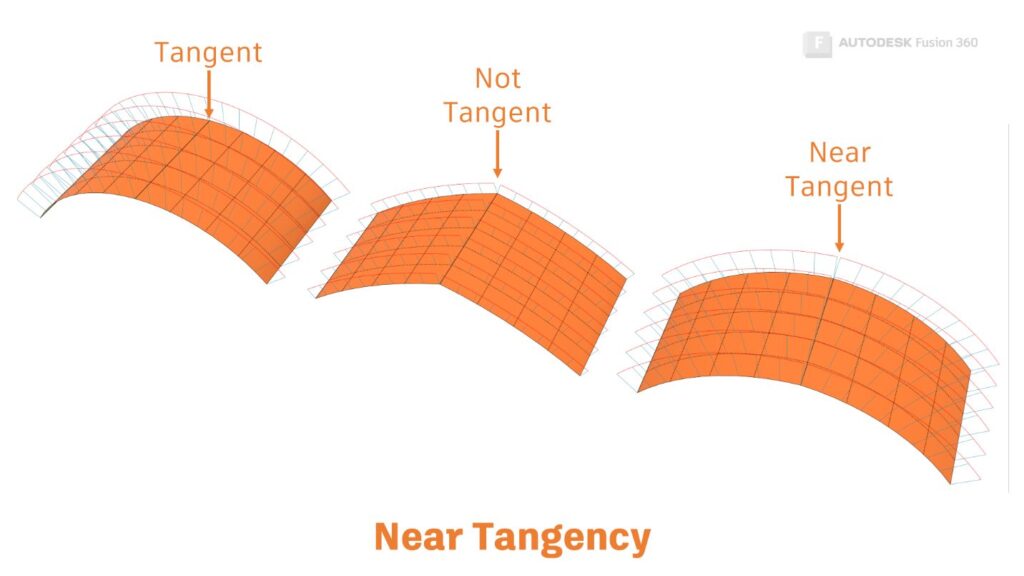
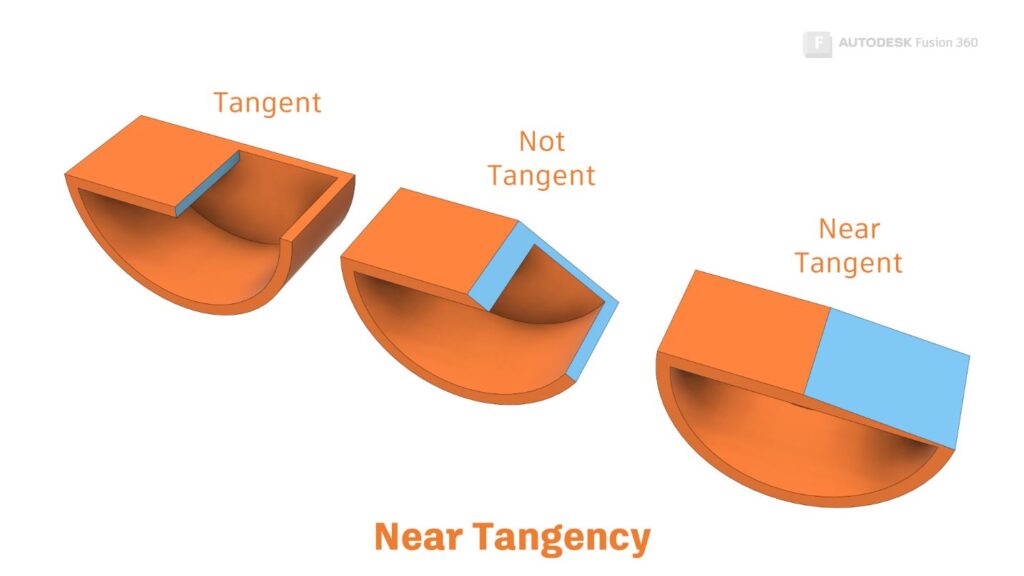
Two adjacent faces are tangent continuous when they meet and follow the same curvature. Mathematically, the normal directions at both edges match. (Click here for a more detailed description of curvature continuity).
If the normal directions don’t match, and the discrepancy is small, the relationship is ‘Near Tangent’.

This can cause a problem because Fusion 360 uses different algorithms for tangent and non-tangent surfaces. Near tangency can cause Fusion 360 to choose the wrong algorithm – or at least, not the one you expected.
Near Tangent problems are often built into the design at the sketch level. If you are suffering from near tangency, check that your sketch constraints are ‘Tangent’ or ‘Curvature. If you’ve been using Lofts or Patches, check that the edge conditions are set to ‘Tangent (G1)’ or ‘Curvature (G2)’.
Tip: Use Curvature Comb Analysis on edges, or Isocurve analysis on faces (with the Curvature comb option), to make tangency easier to visualize.

To fix a near tangency problem, correct the underlying geometry of you can. If you are working with an imported file, try to re-export the file with higher tolerances for tangency, or re-build the offending blends inside Fusion 360.
Stay tuned for the next post in this series, where we’ll learn why tiny overlaps and teeny faces can cause havoc with your models.
This blog post is based on an Autodesk University class. You can read the handout, download a dataset, and try out some exercises that illustrate the Seven Deadly Sins from the Autodesk University website here: 7 Deadly Sins of 3D Part Modeling in Fusion 360.
By clicking subscribe, I agree to receive the Fusion newsletter and acknowledge the Autodesk Privacy Statement.
Success!
May we collect and use your data?
Learn more about the Third Party Services we use and our Privacy Statement.May we collect and use your data to tailor your experience?
Explore the benefits of a customized experience by managing your privacy settings for this site or visit our Privacy Statement to learn more about your options.