How to Use the New Fusion 360 Interoperability in Autodesk EAGLE 8.3
We’ve all been there, whether you’re working for a giant company with thousands of engineers, or just a handful, you’ll always encounter the same ECAD/MCAD collaboration problems. Know what we’re talking about? That endless cycle of sending project files through email, or tracking changes through spreadsheets. Or maybe you’ve hacked together your own version control system. But at the end of the day, it’s all the same struggle. The fight to work together as electrical and mechanical engineers. So where does the solution to this process-driven problem begin? In our tools. With the release of Autodesk EAGLE 8.3, it’s time to bring ECAD and MCAD together, with Fusion 360 Interoperability.
ECAD/MCAD Problems of Today
Regardless of what tools you happen to be using for your design process, the underlying problems with ECAD/MCAD collaboration are the same. It doesn’t matter what kind of file formats you’re trying to juggle; the root issue is all about the data. Why the data? Because we don’t have tools that communicate with one another because they don’t have a common foundation of data. And so of course, it’s a natural byproduct that you need to rely on exchange file formats like STEP, IDF, IGES, etc.… to play the middleman.
But over at Autodesk, we took a look at this problem differently. While we could have made a better file format, we realized a more sustainable and long-term solution is to simply get your design tools talking to one another, directly. This is what Fusion 360 Interoperability in Autodesk EAGLE 8.3 is all about.
Need to streamline your electrical and mechanical design workflows together?
Yes! This is exactly what you need. With this feature, there aren’t any files being exchanged, just an underlying set of data and communication channels that bring ECAD and MCAD together. How does it work?
- Within Autodesk EAGLE you’ll have a new Fusion Sync dashboard that keeps you connected at all times to your mechanical designer in Fusion 360.

- When changes are made to your board in Fusion, to things like component placement, board shape or cutouts, you can quickly pull these changes into EAGLE.
- And when you make changes in EAGLE, to things like component placement, trace placement, etc. you can quickly push all of these changes to Fusion 360.
All of this is made possible with some heavy back-end work on our end. We’ve done the due diligence to make sure that Autodesk EAGLE and Fusion 360 can talk directly to each other, without any kind of middleman. What you’ll find as you start to use this feature is an entirely new way to approach your traditional ECAD/MCAD problems. Instead of tracking design changes in a spreadsheet, all of your version control needs are handled in Fusion Team Collaboration, included free with Fusion 360. And instead of wondering if your board will fit its enclosure at the end of a long project, you’ll know in advance about any issues as you and your mechanical designer work in tandem.
Two Roads to Initial Setup
We understand that not every engineering workflow is the same. You’ve got your means and methods for how to get your designs done, and we respect that. With this is mind, there are two ways that you can approach the initial setup for Fusion 360 integration, we’ll be covering both:
- You can import a new board file from Fusion 360 into EAGLE. This process begins by first creating a 3D PCB in Fusion, then linking that PCB to a new board file project in EAGLE. This is the best route to take if you plan to edit a PCB within a single Fusion design.
- You can create a new Fusion design based on a board from EAGLE. This process begins by first creating a board layout in EAGLE, and then pushing that board to either a new or existing project in Fusion. This is the best route to take if you want to use the same PCB in multiple Fusion designs, like for an Arduino reference design.
If you do not have Fusion 360 or EAGLE 8.3, you can download them here:
 |  |
Setup Option 1 – Importing a Board Outline From Fusion to EAGLE
This process will begin in Fusion 360, and end in EAGLE. If you’ve got a mechanical designer sitting nearby, now’s a great time to group up and put the pieces together for this project. Here’s what you need to do:
Set Up in Fusion 360
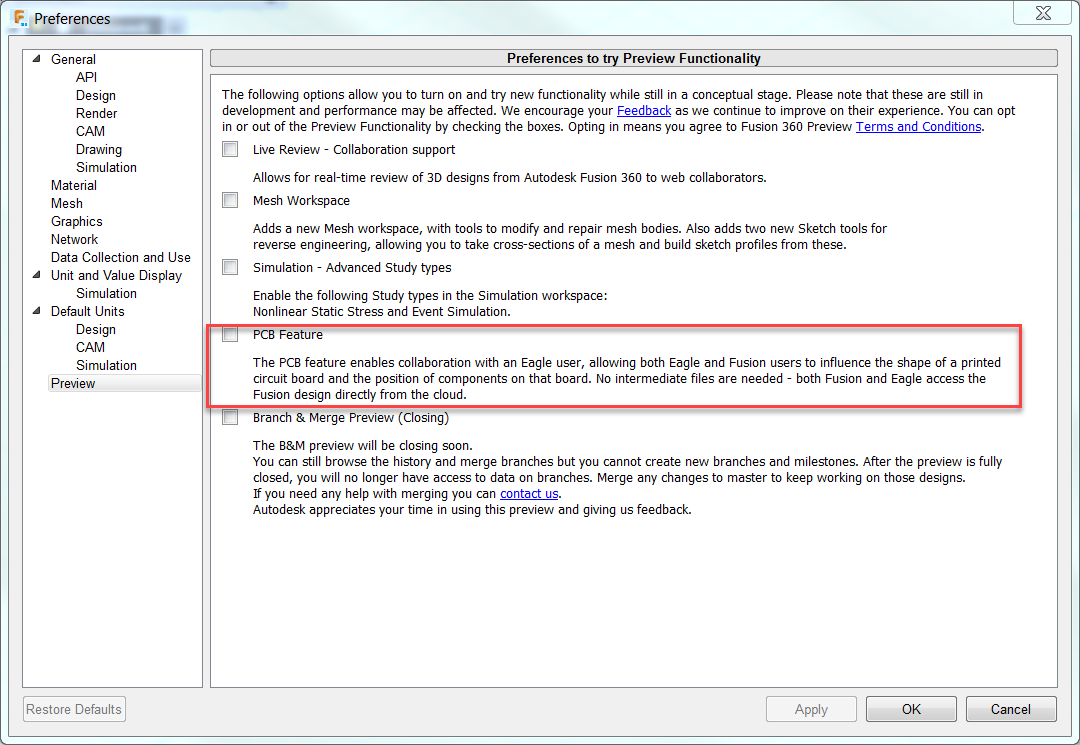
The PCB Feature within Fusion 360 is Preview Functionality. Preview allows users to try new functionality while it is still being perfected. To enable the PCB Feature:
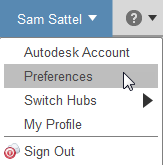
- In the Fusion 360 interface, click on “your name” in the right-hand corner and select Preferences.
- The Preferences dialog will appear, click Preview on the left-hand side and enable PCB Feature.
- Click OK.
Now we have Fusion 360 setup, let’s start our design.
In Fusion
- Create a new Fusion design via File » New Design.
- Sketch the outline for your PCB by selecting the Sketch menu, and choosing Rectangle. Be sure to make your sketch on the X/Y plane, not Z.
Important: When drawing your rectangle, make sure your first point starts at the (0,0) origin, and the entire rectangle is in the positive X/Y quadrant. This will ensure that the PCB shape you make in Fusion 360 matches the default origin in EAGLE. 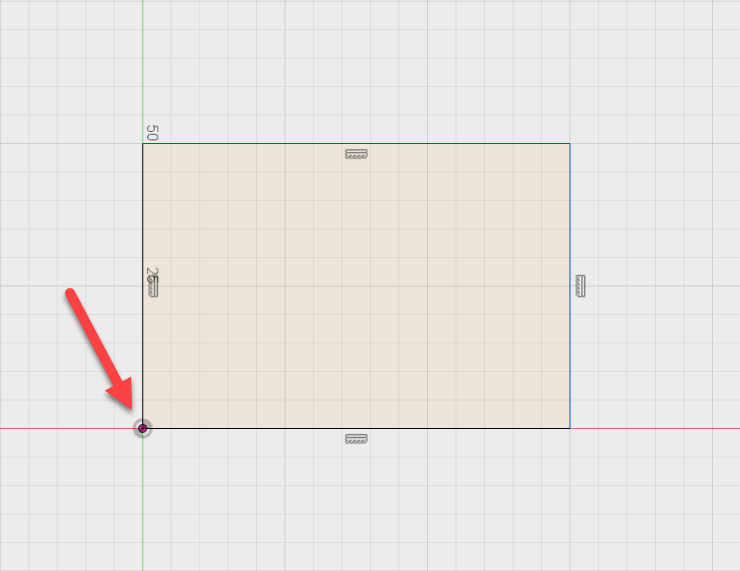
- Once your rectangle sketch is completed, select the Stop Sketch button.
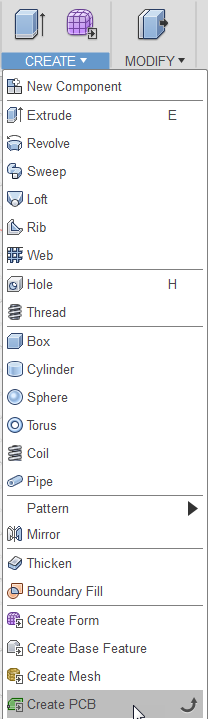
- Now select your rectangle sketch, open the Create menu, and select Create PCB.
- Your interface should change to the PCB space and select PCB Profile.

- In the PCB Profile dialog, click Origin Select, and then select the lower-left corner of your sketch (0,0 coordinates) to set the origin. You’ll know this was successful when a blue circle appears on the lower left corner of your rectangle and the Origin button changes to ‘1 selected’.
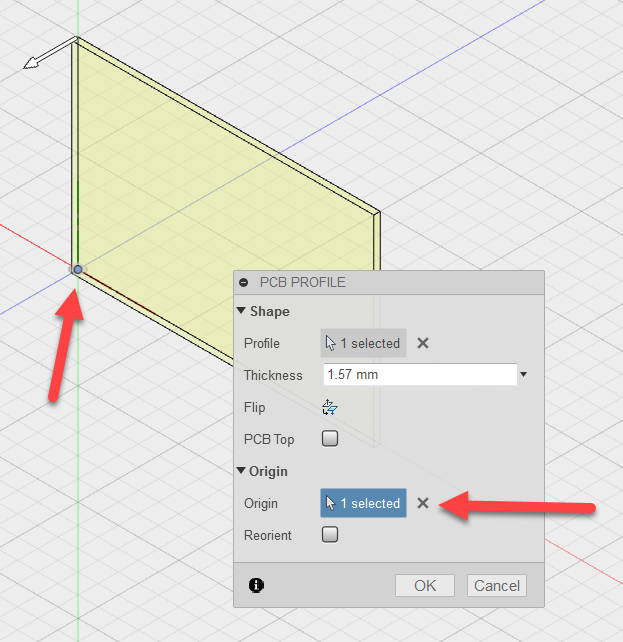
- After setting your origin, select OK to close the PCB profile dialog. Your Rectangle should now turn green.
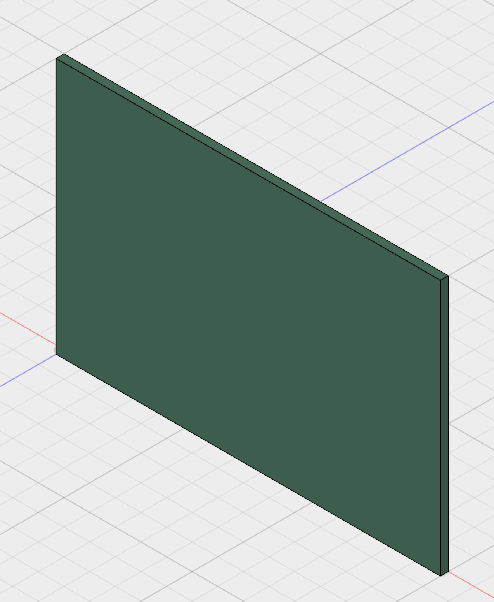

You should now see a green rectangle shape at the bottom of your interface in the Timeline. If you ever need to edit your PCB outline, simply select it in the timeline.
At this point, you’ve done all you need to do in Fusion. Let’s head into EAGLE to pull in the created outline.
In EAGLE
- Open EAGLE 8.3 and create a new board layout (.brd) project via File » New » Board.
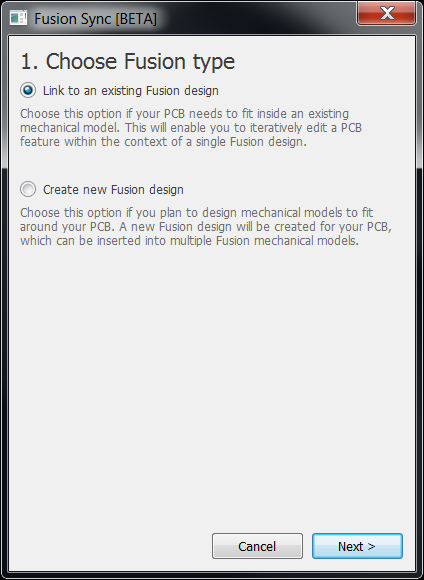
- In the Board Editor interface, select the new Fusion Sync button to open the Fusion Sync dialog.
- Select Link to an existing Fusion Design and click Next.
- Navigate to the Fusion PCB outline that you saved earlier in Fusion 360.

- Select the Pull from Fusion button to begin importing the Fusion PCB object into EAGLE.
Be sure to give the importing process a few moments to complete. Once done, you should now have the board outline and shape that you created in Fusion 360 in your EAGLE interface, ready for designing! That ends the initial setup process for Option 1. You can now skip down to the Making Changes/Syncing section to learn how to push and pull changes between EAGLE and Fusion.
Setup Option 2 – Create a New Fusion Design From EAGLE
This process will first begin in EAGLE and then end in Fusion. This is the preferred method of setup if you need to insert one EAGLE design into multiple Fusion mechanical models. Here’s what you need to do:
In EAGLE
- Open an existing board layout (.brd) file in Autodesk EAGLE.
- In the Board Editor interface, select the Fusion Sync button to open the Fusion Sync dialog.
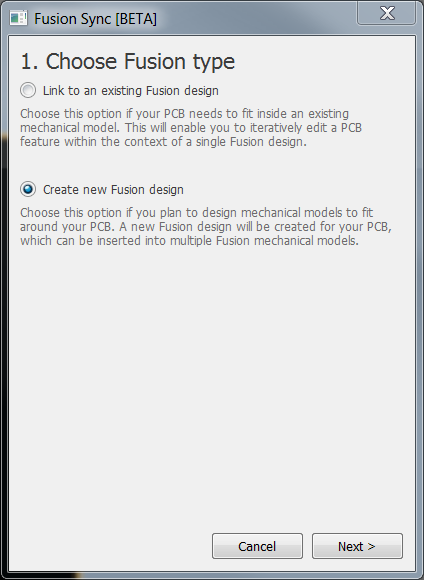
- Select Create a New Fusion Design and click Next.
- Navigate to the Fusion project or folder you want to add your 3D PCB to and select OK.
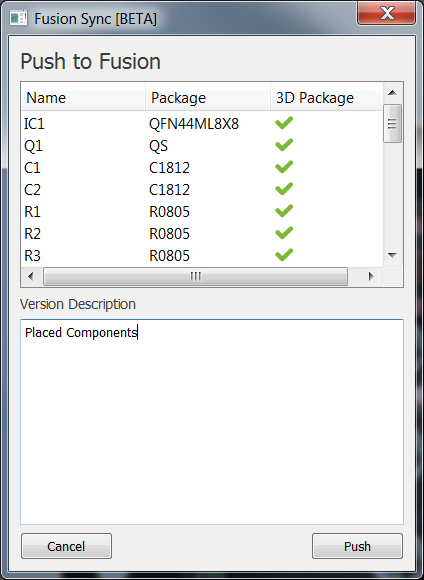
- You’ll now see a list of all the components on your PCB and whether they have included 3D packages. Select the OK button to push your design to Fusion.
This is all you have to do in EAGLE. Now it’s time for your mechanical designer to open Fusion and sync the changes that you just pushed their way.
In Fusion
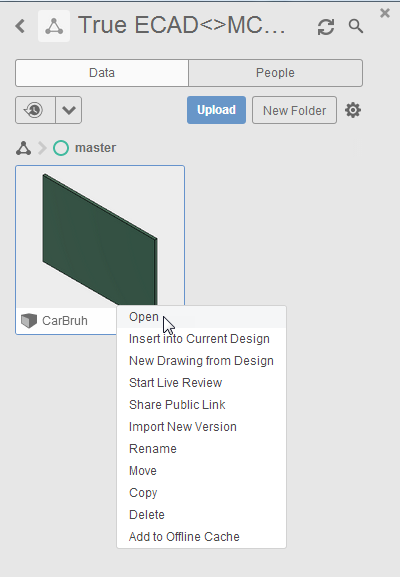
- Open your Fusion project that you selected in EAGLE, here you’ll notice a new version 3D PCB object in your Data panel.
- Close and open the new revision of the design.
You can repeat this process of inserting the 3D PCB file into any number of projects via the Data panel.
That does it for Setup Option 2, head on down to the making changes/syncing section below to learn how to push and pull changes between EAGLE and Fusion 360.
Making Changes/Syncing Between EAGLE and Fusion
The second part of this blog is going to focus on making changes/syncing from the ECAD point of view. This is because there are some manual processes in EAGLE that you need to take to push and pull changes. However, you and your mechanical designer can definitely follow along together, as you’ll be making changes to your PCB in both EAGLE and Fusion.
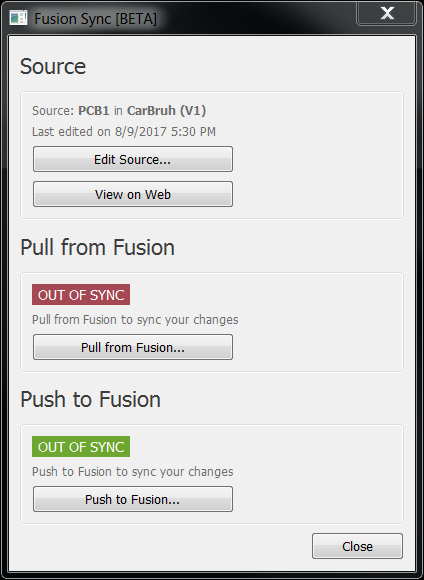
Before getting started, it’s important to make a note of the color scheme in the Fusion Sync dialog within EAGLE. There are two colors that you’ll find:
- Red. This means that the design you’re working on in EAGLE has been changed in Fusion 360. You’ll need to pull in those changes.

- Green. This means that you have made changes to your PCB in EAGLE, and you now need to push those changes to Fusion.

With this context in mind, we’re now going to walk through an example workflow where you’ll make a change to a board layout in EAGLE, push those changes to Fusion, and then push changes in Fusion back to EAGLE.
| Important: If you haven’t completed one of the initial setup processes above, now’s the time to do so. Otherwise, the steps below won’t work correctly. |
In EAGLE
- Open your board layout (.brd) file in Autodesk EAGLE.
- Add a new component to your board via the Add dialog on the left-hand side of your interface.
- Next, select the Fusion Sync button to open the Fusion Sync dialog.
- Select the Push to Fusion button and wait a few moments. You’ll get a confirmation dialog when your changes have been successfully pushed to Fusion.
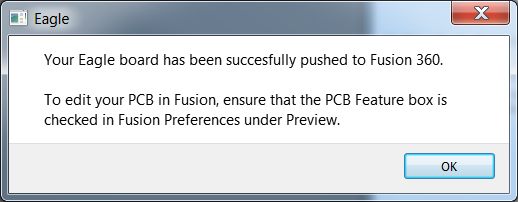
Now that these changes are being pushed let’s head into Fusion to see what happened.
In Fusion
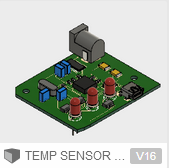
- Open the 3D PCB model in Fusion 360; you’ll notice that the version number has been updated and the board has a new component on it.
- Let’s now make a change to the placement of this component in Fusion. Right-click the green board icon in your Timeline and select Edit.
- Open the Modify menu, select Move PCB Components, and select the component you want to move
- Drag the component to a new location on the board outline, and then select OK to finalize your changes.
- Save your changes and add a description of what was changed in this version.
Once you’ve changed and saved your 3D PCB in Fusion, you don’t have to manually push those changes to EAGLE. Instead, you’ll go back into EAGLE and pull these changes in.
Back In Eagle
- Open your board layout (.brd) file in Autodesk EAGLE.
- Select the Fusion Sync button to open the Fusion Sync dialog.
- Select the Pull from Fusion button to begin pulling the new changes you just made. You’ll see a change description based on what your mechanical designer provided when he saved his project in Fusion.
- Once the pull completes, notice that your board is updated with the new component placement.
There you go, a complete ECAD/MCAD workflow between Autodesk EAGLE and Fusion 360! Take the time to experiment with syncing changes between EAGLE and Fusion, and you’ll be an expert in no time.
For those of you who are visual learners, head on over to our YouTube channel for our ECAD to MCAD Unification How-To series. The playlist is here:
ECAD/MCAD Lived Happily Ever After
It’s that easy, no more files to toss over the wall, no more emails to track design changes, and most importantly, no more frustration when trying to work together with your mechanical designer. The new Fusion 360 Integration lays down the foundation for an awesome ECAD/MCAD collaboration platform, and you can bet this is just the beginning of what we have planned. So what do you think so far? Maybe you’ve been doing the typical ECAD/MCAD dance for years, and it might be a bit challenging to get used to this new process. But stretch yourself beyond what you’ve known! You’re designing products now, not just PCBs. It’s time for something different.
Ready to experience frustration-free ECAD/MCAD collaboration in your next project? Try Autodesk EAGLE and try Fusion 360 for free today!