This post is also available in: Français (French) Italiano (Italian) Deutsch (German)
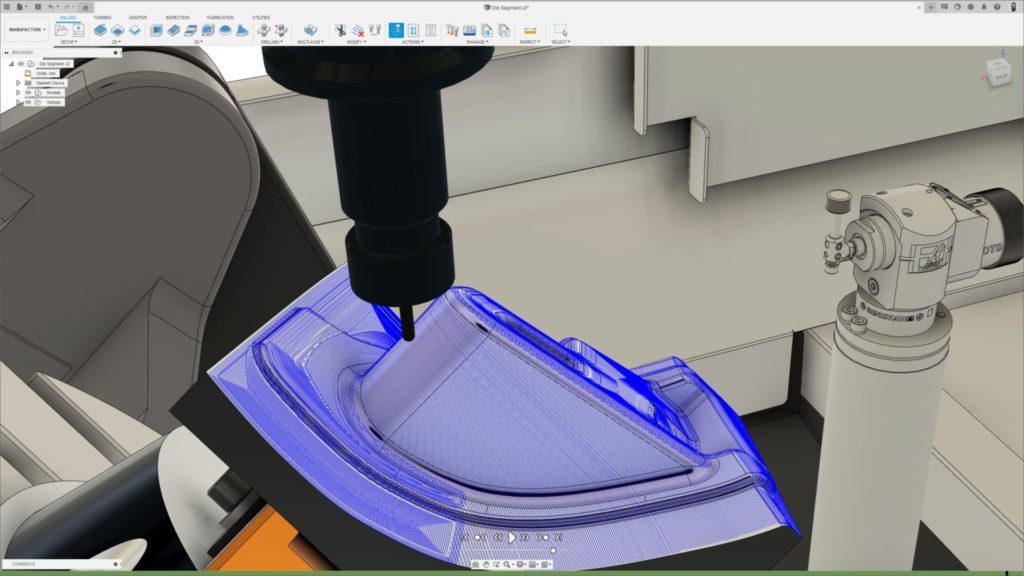
Unlock the power of simultaneous multi-axis machining, including automatic collision avoidance, with the Fusion 360 Machining Extension to minimize your programming time and create reliable, repeatable toolpaths for your complex parts.

This article will show you how to use the multi-axis functionality available within the Fusion 360 Machining Extension, enabling you to create advanced 5-axis strategies with an easy-to-use user interface. We’ll also cover how to use Automatic Collision Avoidance for 4 and 5 axis machining to automatically tilt your tool to avoid collisions.
Introducing the Multi Axis tab for Steep and Shallow
Let’s look at a few examples of how to use this functionality, starting with how to create a Steep and Shallow toolpath. Using the Multi-Axis tab in the toolpath dialog box, the first thing to do is select the Primary tool axis mode. You can then choose from several options:
- Vertical will align the tool with the specified tool orientation.
- Lead and Lean will tilt the tool axis based on two angles. The lean angle tilts the tool sideways from the direction of cut. The lead angle, instead, will tilt the tool in the direction of cut. Setting both of these angles to 0 will align to tool perpendicular to the underlying surface.
- From Curve will make your tool tip drive away from a sketched curve.
- To Curve, instead, will drive the tool tip towards a sketched curve. From and to curve are good options, for example, to machine cylindrical-like areas.
- From and To Point work similarly to the from and to curve options, this time with a sketched point. These are good options, for example, for spherical-like parts.
You can also set a smoothing distance in the same section of the interface. This is the distance over which any sudden axis tilting can be smoothed to provide a better surface finish. The larger the distance, the more gradual the transition. Finally, you can also set a smoothing angle, which sets the maximum that the tool axis can deviate from the primary modes described above while applying smoothing. We recommend using the default value to start with for both the smoothing distance and angle. These smoothing parameters obviously can’t be set if your primary tool axis mode is set to Vertical, as the tool is only moving in 3 axes.
Tool Axis Limits
Let’s now create a toolpath using From Point. First, you’ll need to sketch a point and set smoothing parameters. You can also set tool axis limits. These will have to be consistent with the axis limits your machine can reach. For example, Use these options to control the maximum limits of tool axis tilt. These settings can be used to ensure that the tool axis stays within the limits of your machine tool. A maximum tilt angle is used here to control this limit, which applies to the lean and lead directions. You also have the option to
Collision Avoidance functionality
Now let’s walk through the Collision Avoidance functionality within the Multi-Axis tab of Steep and Shallow. This feature lets you pick how the tool should tilt when automatically avoiding collisions. There are a few options:
- The Automatic option, will automatically select the most suitable direction in which to tilt the tool to avoid a collision. This option works great for feature-rich parts. Make sure to set your Tool axis prim
- ary mode to vertical, or this option won’t be available
- From & To Point will tilt the tool tip, respectively, away from and towards a sketched point
- Similarly, From & To Curve will tilt the tool tip, respectively, away from and towards a sketched curve
The last options are helpful for simpler geometry, while the Automatic option is the go-to choice for more complex parts.
Automatic Collision Avoidance for Rotary
The Fusion 360 Machining Extension also benefits from automatic collision avoidance in the rotary toolpath to avoid collisions while utilizing the 4th machining axis. This functionality will detect potential collisions between the tool shaft, holder, and component. It will then automatically select the most suitable direction to tilt the tool to avoid them.
A smoothing distance can be set to define the length of transition between tool axes. This can help avoid sudden axis tilting to provide a better surface finish. The larger the distance, the more gradual the transition.
Hopefully, this helps you start using the 5-axis functionality in the Fusion 360 Machining Extension. Ready to unlock even more Fusion 360 functionality? See how the Fusion 360 Machining Extension can enhance your process below:
