In this article, you’ll learn how to access the Fusion 360 sketch environment, locate the basic sketch tools, and edit your sketches. We’ve also included an accompanying video below that you can use to follow along. Please let us know if you find the video helpful by leaving feedback on our Self-Paced Learning site.
Creating a Sketch
Let’s take a look at how to create a Sketch in the Sketch environment.
First, if you’re creating a design that will contain multiple components, make sure you create and activate the component you want the sketch to appear within. This will ensure that any sketches you create will be contained within that active component, helping you keep your geometry organized.
Now, on the Solid tab in the Design workspace, select Create Sketch from the toolbar.
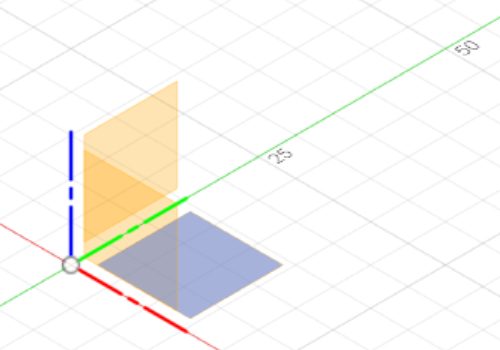
Fusion 360 asks you to define the sketch plane by selecting either a plane or planar face, based on the way you want to orient the object you’re designing in 3D space. You can select an origin plane, an existing construction plane, or a planar face on an existing body. For the first sketch in a new design, hover over one of the origin planes, like the XY plane, and click to select it.

Fusion 360 automatically rotates the view to look directly at the sketch plane, to make it easier for you to create orthogonal geometry. The Sketch Grid, Origin, and planar Axes appear on the sketch plane to make it easier to create accurate geometry.
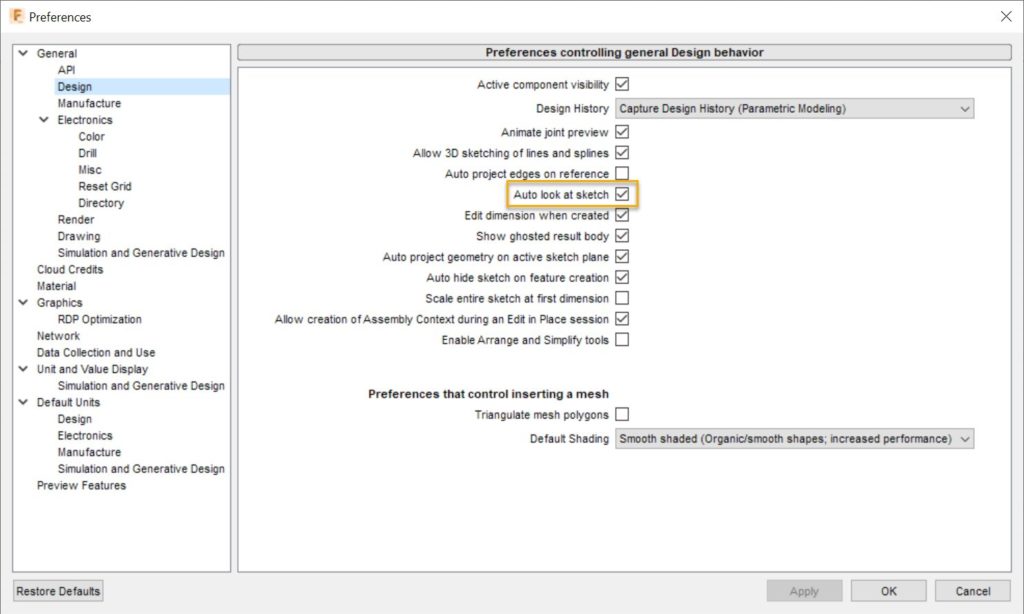
If you don’t want the view to rotate automatically when you create or edit sketches, navigate to Preferences, then in the Design section, uncheck Auto Look At Sketch.

Timeline and Browser Features
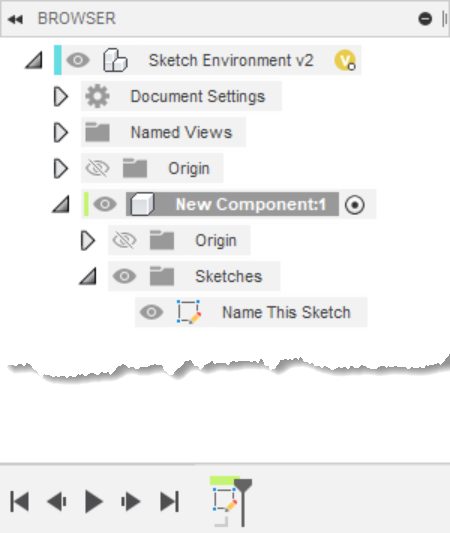
After you create your Sketch, the new Sketch feature displays in the Timeline and in the Browser, nested within the active component.

Select the Sketch in the Browser, click again to rename, and enter a clear and meaningful name for the sketch to make sure you and your project members can navigate the design easily as the assembly becomes more complex.
Sketch Contextual Tab
The Sketch contextual tab displays on the toolbar and remains there while you edit the sketch. It contains all the tools you need to create, modify, and constrain sketch geometry.

Tools in the Create menu let you:
- Add basic geometry like lines, rectangles, and text;
- Mirror or pattern basic geometry;
- And project reference geometry from outside the sketch onto the sketch plane.
The tools in the Modify menu let you:
- Offset geometry;
- Add details like fillets and chamfers;
- And adjust existing geometry as you build your sketch profile.
The tools in the Constraints menu let you:
- Control the relative positions of geometry to help you fully define the size and shape of the sketch profile.
- For example, you can constrain geometry to be coincident, equal, parallel, or tangent to other geometry in the sketch.
Sketch Palette
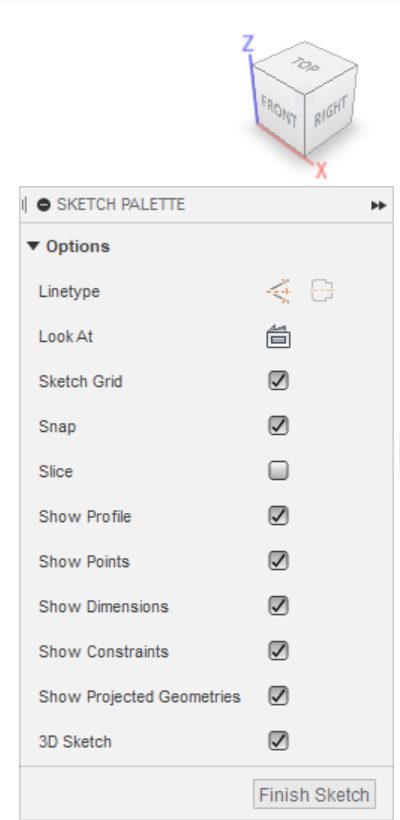
The Sketch Palette also displays while you edit the sketch. It contains options to control linetypes and visibility of objects like the Sketch Grid, Points, Dimensions, Constraints, and Projected Geometry on the fly while you sketch.

For more complex sketches, you may want to enable 3D Sketch, which lets you define sketch geometry that isn’t confined to the 2D sketch plane.
Finish Sketch
Once you finish defining a sketch, on the toolbar or in the Sketch Palette, click Finish Sketch.
The Sketch contextual tab disappears from the toolbar and you return to the 3D design environment. Now you can use the sketch profile to create 3D solid, surface, or T-Spline geometry in your design.
As you continue working, use the visibility icon in the Browser to show or hide the sketch.
You can also right-click the sketch to:
- Show or hide its Profile, Dimensions, or Projected Geometry;
- Find it in the canvas or the Timeline;
- Or Redefine the Sketch Plane.
Edit Sketch
There will be times when you need to come back and edit a sketch at a later date.
When you need to modify the sketch profile or its constraints, locate the Sketch feature in the Browser or the Timeline, right-click, then select Edit Sketch.
The Sketch contextual tab reappears, and you can make any changes you need to the sketch profile. When you click Finish Sketch and return to the 3D design environment, any parametric features that reference the sketch profile update to reflect the changes.
Now you know how to create a sketch, identify the key features of a sketch, and locate the basic tools in the Sketch environment in Fusion 360.
