Expand your knowledge of sketches in Fusion, including sketch profiles, constrained vs. unconstrained sketches, and more.
What is a sketch?
A sketch is a geometric profile that forms the foundation of 3D geometry in a design in Fusion.
Before creating 3D objects in your design, you need to create the underlying sketch profiles that drive the overall shapes of the parametric solid, surface, or T-spline bodies that make up your design.
A sketch is the backbone of any subsequent parametric modeling. If you create a robust sketch profile, you can improve your workflow and minimize potential downstream issues.
Elevate your design and manufacturing processes with Autodesk Fusion
Sketches in Fusion
In this article, you’ll learn about the sketches in Fusion, including sketch profiles, constrained vs. unconstrained sketches, and geometry types. We’ve also included an accompanying video below that you can use to follow along. Please let us know if you find the video helpful by leaving feedback on our Self-Paced Learning site.
Types of sketch profiles
Let’s look at the two types of sketch profiles; open and closed.
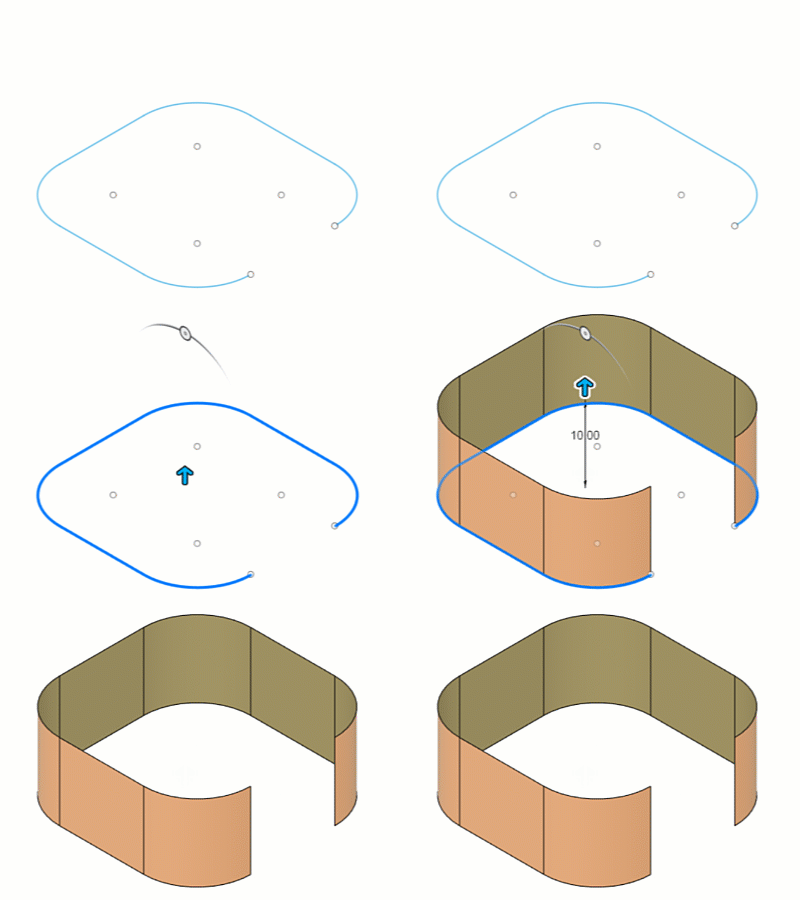
- An Open profile is a series of connected 2D geometry that does not form a closed boundary. You can use open profiles to create surface bodies to extrude thin solid features or to guide some modeling operations like Loft.
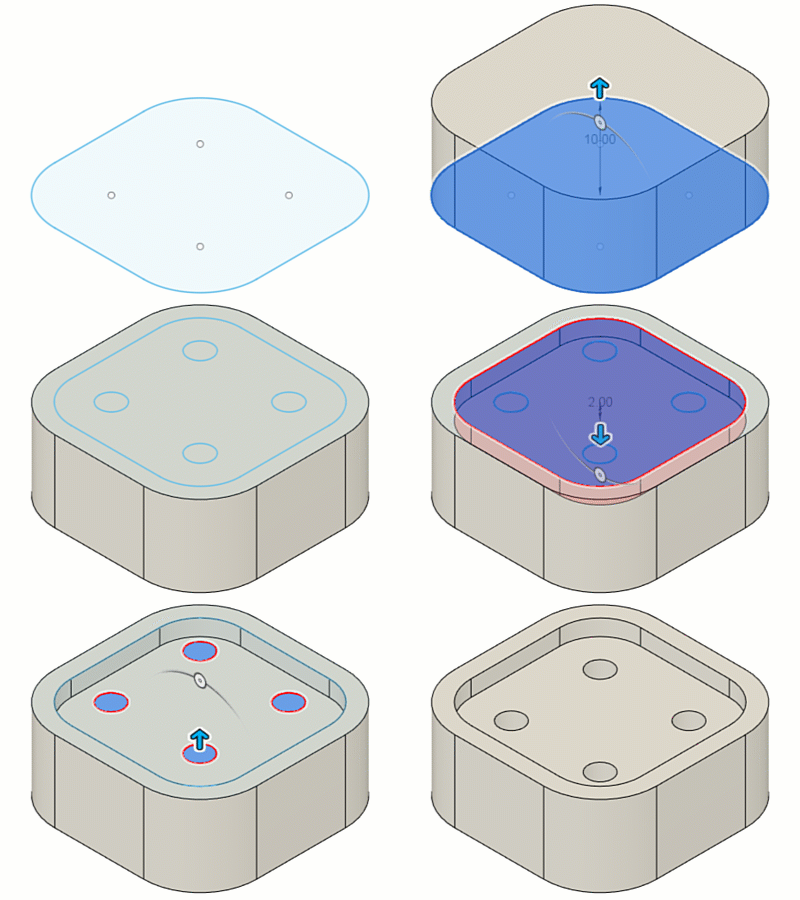
- A Closed profile is a series of connected 2D geometry that does form a closed boundary. A sketch profile is shaded blue when it is closed, and you can use them to extrude 3D shapes or perform 3D Boolean commands.
Unconstrained sketches vs. constrained sketches in Fusion
In the sketch environment, you can create either unconstrained or constrained sketches in Fusion:
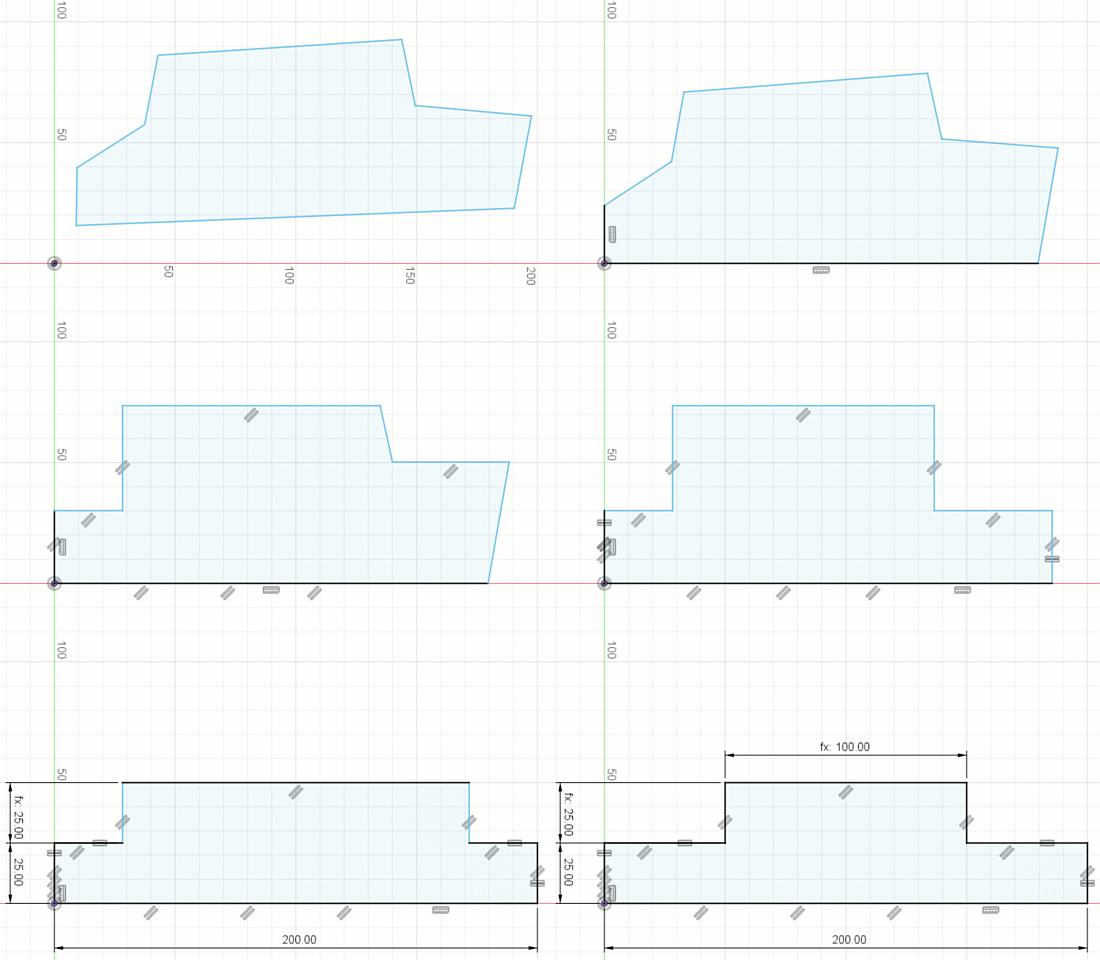
- An Unconstrained sketch contains some geometry that is still free to move in space — not locked down by constraints and dimensions. Unconstrained sketches are useful early in the design process. They’re ideal for when you’re experimenting and want flexibility before committing to your design. You also can lock things down gradually as you evolve your design. However, referencing unconstrained sketch geometry in downstream designs can cause unpredictable results in complex parametric assemblies.
- A Constrained sketch contains geometry locked down in place by constraints and dimensions. Constrained sketches cannot move when clicking and dragging with your mouse. They’re useful when you know the precise details of a design and are certain about your design intent. Their behavior in complex parametric designs is more predictable. However, be aware that constrained sketches can lock down features in your design more robustly than you might want early in the design process, so be cautious when adding too many details and constraints into a single sketch at this stage.
Types of sketch geometry
Sketches can contain several types of geometry, including:
- Sketch geometry
- Construction geometry
- Centerline geometry
- Projected geometry
- Fixed geometry
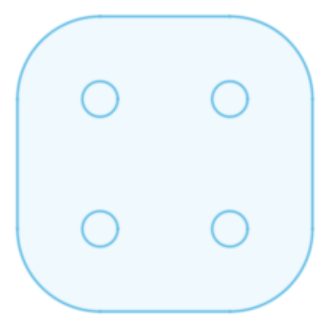
Sketch geometry is the default line type used to create 2D features in a sketch that contribute to the sketch profile, and displays as a solid blue line when unconstrained:
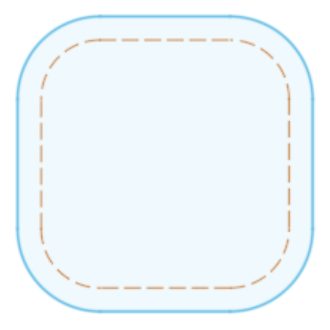
Construction geometry is a line type used as a reference for sketch geometry, constraints, and dimensions, and it does not contribute to the sketch profile. Construction Geometry displays as a dashed orange line when unconstrained:
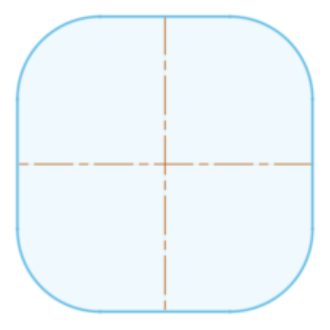
Centerline geometry is a line type used to revolve sketch profiles or define symmetry, and it contributes to the sketch profile. Centerline Geometry displays as a dashed orange centerline when unconstrained:
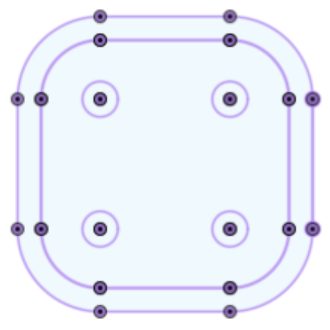
Projected geometry is an associative reference to profiles of 2D or 3D geometry from outside the sketch that are projected onto the sketch plane, and display as purple lines and points. If you update the referenced geometry, the projected geometry updates to reflect the change:
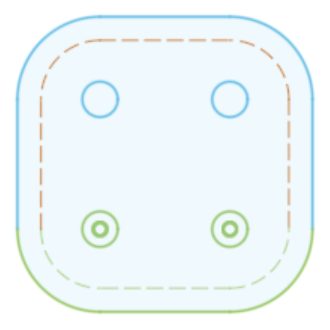
Fixed Geometry is any Sketch, Construction, or Centerline geometry that you have locked in place and displays as green. If you need to edit or move fixed geometry, you first need to Unfix it.
Get started with sketches in Fusion today!