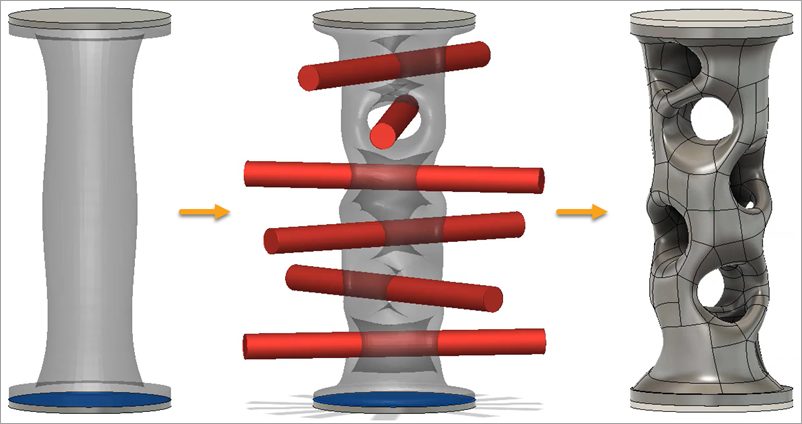
Automated Modeling in Fusion helps you rapidly explore new design concepts. Learn the basics here.
What is automated modeling?
Automated modeling in Fusion is a powerful design tool that quickly generates multiple design alternatives to connect existing geometries in a model based on simple inputs of what to connect and what to avoid.
Elevate your design and manufacturing processes with Autodesk Fusion
Unlike traditional tools, it creates complex, smooth or sharp transitional shapes between multiple solid bodies, automating the exploration of design options without needing detailed load constraints or manufacturing restrictions.
As you explore this tool, we’ve gathered some of our top tips and tricks to be successful.
Automated modeling in Fusion tips
Surfaces to connect
Automated modeling starts with the basic concept of selecting faces to connect. Choosing a face can be important, so ensure you select faces that are likely to give the best results.
Before using the tool, it’s usually best practice to take a bit of time to do some small preparation on the bodies you want to connect. Tools like split face can be handy to add faces in specific areas where you want them. For example, if you have a bolted connector and want something which connects to either side, using the split face to create two symmetric regions for the geometry to connect to, rather than connecting across the whole length of the surface, can ensure the outcome meets expectations.

Likewise, it’s usually best to ensure that you’re avoiding unnecessarily small faces or selecting too many faces. While there’s no limit to the number of faces you can select, in general, models should be simplified and use as few faces as possible. Faces that are very small relative to the size of the shape you’re creating can lead to non-optimal outcomes. Adding more faces can significantly impact the speed with which outcomes are generated.

Here it can be great to do some small preparation work to remove unnecessary detail from the bodies you’re connecting. If required, you can always add detail back in afterward.
Bodies to avoid
If you’re working on an assembly, the other components you connect the part to will typically be bodies to avoid. But there can also be times when it makes sense to model completely new geometry to act purely as a body to avoid for automated modeling purposes. For example, bodies to avoid might represent design requirements like a person interacting with the part or clearance space for a moving part.
As with the faces to connect, a small amount of preparation here can significantly affect the quality of outcomes you see from automated modeling.

You can also use bodies to avoid creatively. For example, you can add design intent or make your outcome more aesthetically interesting.

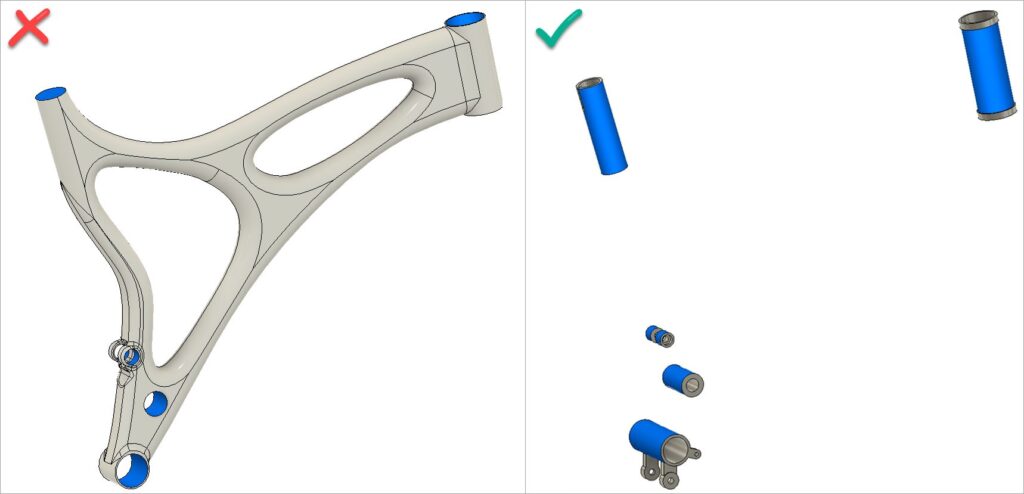
One important thing to note is that for bodies where you’ve selected one or more faces as faces to connect, the rest of the body automatically becomes a body to avoid. This is particularly important if you’re looking to use automated modeling to explore alternatives for a design you already have.
For example, selecting the internal faces of the bicycle frame (shown below) will automatically set the rest of the frame to be a body to avoid, preventing automated modeling from creating any material where the existing frame sits. Instead, selecting the outer faces of the connecting bodies will allow automated modeling to create a new design for the frame without having anything block it from doing so.

Symmetry in automated modeling
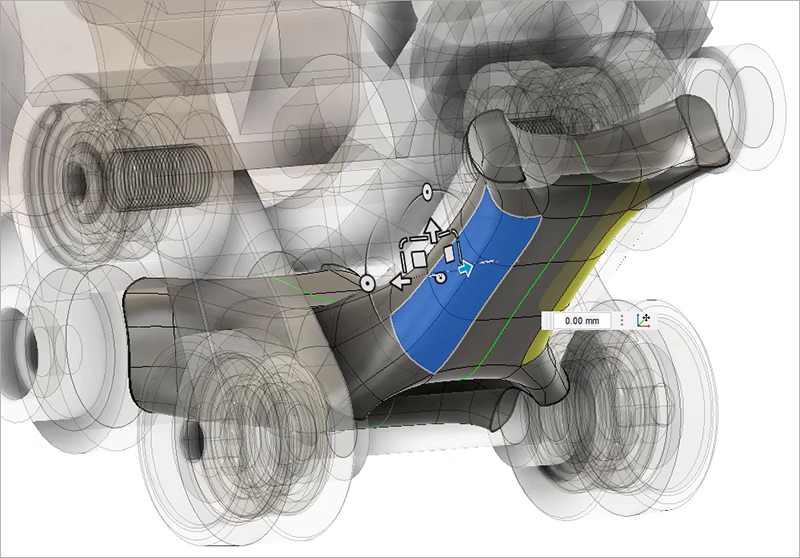
Creating symmetrical design outcomes is desirable in many cases from both a performance and aesthetic standpoint. When your setup has a recognizable plane of symmetry, automated modeling will automatically create outcomes that are also symmetric across this plane. What’s great is that this carries over into the editability too, so any outcome will also have a plane of symmetry automatically applied to it so that editing one side will affect the other side equally.

It’s important to note that symmetry is only applied this way when your setup is perfectly symmetrical. This applies to both the faces to connect and bodies to avoid. Suppose any of these have parts that cannot mirror perfectly across the symmetry plane. In that case, Automated Modeling will not recognize the setup as symmetric, and no symmetry plane will be applied. If you expected symmetry to be applied, it might require a small amount of editing to make your faces to connect and bodies to avoid perfect.
Get started with automated modeling in Fusion today.