From THT to SMT: Everything You Need to Know to Get Started with Solder Paste Stencils
Soldering is all about efficiency. If you’re spending hours soldering all of those SMD components on your latest prototype, then we feel your pain. Isn’t there a faster way to do this? Back in the day when through-hole components dominated electronics design, manual soldering was the way to go for hobbyist designers. With a soldering iron and flux in hand, it was easy to attach leads to your board. But these days, when devices can fit in your pocket or on your wrist, through-hole components are being pushed aside for their miniaturized counterparts, Surface Mount Devices (SMDs). These tiny components are more difficult to solder by hand, and if you find yourself with dozens of prototypes to assemble you need a more efficient way to get those components on your board. If you’re just getting started with your first prototype, or maybe you’re looking for a faster way to assemble all of your SMD components, then it’s time to consider solder paste stenciling.
What are Solder Paste Stencils?
Solder paste stenciling is the process of using a stencil made out of metal or a polymer to quickly apply solder paste to all of the pads on your bare board. This stencil contains a bunch of holes in it, which represents all of the SMD footprint pads on your board layout.

When you lay this stencil over your bare board, you can squeegee a layer of solder paste over it, leaving a nice, uniform layer of solder on all of your SMD pads. This makes it easy to assemble your next prototype, where the natural alternative is to apply solder one pad at a time with a syringe, then times that by 100, 200…1000!?
The core component of solder paste stenciling is, of course, the solder paste. If this is your first time working with this gray-colored goo, then it’s good to know what it does. Solder paste serves three primary functions:
- Binding. It helps to bind surface mount components to your circuit board during the assembly process.
- Connecting. It provides connectivity between every pad on your PCB and every pin on your components.
- Cleaning. When melting solder paste in a reflow or wave-soldering oven, the solder will clean the copper to help minimize any oxidation damage.
Without solder paste, you wouldn’t have a way to attach components to your bare board, and it’s the glue that holds your entire electronics project together.
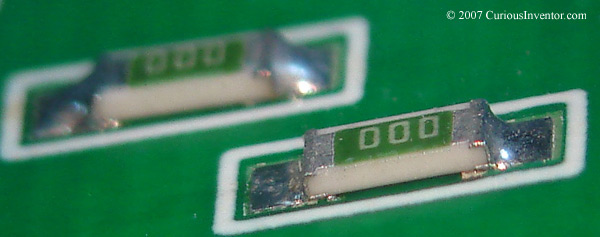
When purchasing solder paste, you’ll find it available in a tube, a syringe or a Jar form. Within these containers, you’ll find powdered solder, which is gray, suspended in another material called flux. Flux acts as a temporary glue when you first attach SMD components to your board, allowing parts to be held in place before the solder is melted. When it comes time to put your board through a reflow oven, the flux will give way to the solder, which melts to form a solder connection between every pad on your SMD components. Solder paste comes in a variety of compositions, including:
- Tin-lead or tin-silver-copper varieties for standard plastic component packages being assembled on an FR-4 epoxy circuit board.
- There’s also tin-antimony solder paste which is used on PCBs that require greater resistance to tension and strain.
- You’ll find lead-free solder as an alternative to traditional tin-lead. This requires a higher melting point and is harder to work with, but meets RoHS and REACH regulations for lead-free electronics.
When purchasing solder paste for stenciling, you’ll want to purchase it in a jar from a company like Kester. This will make it easy to apply a glob of solder paste on your plastic stencils. You’ll have two types to choose from, “no clean” or water-soluble.

“No clean” solder paste contains a rosin made from tree sap that makes it safe to leave solder residue on your PCB. If you get some of this paste on your board during the stenciling process, you won’t have to clean it off. However, if you need to clean any excess paste off of your board, then consider picking up a water soluble version, which can be removed by gently whipping it away with an IPA soaked kimwipe. This type is also known for its improved thermal stability, allowing higher soldering temperatures.
When you get your solder paste in the mail, you’ll want to be sure to keep it refrigerated between 0-10°C (32-50°F). Storing solder paste at this temperature will help to reduce any oxidation and degradation of the flux.
You’ll also want to keep an eye on the expiration date for your solder paste, as using solder beyond its shelf life will definitely increase the risk of defects. While it might not be a big deal if you use expired paste on a few prototype PCBs, you can imagine how the costs can mount up if you’re working with hundreds of PCBs and your paste ends up producing poor connections.
Why Solder Paste Stenciling?
Soldering with a stencil is all about saving time and staying efficient. It might be easy to whip out that iron to solder through-hole components, but working with SMD components presents an entirely new challenge for our clumsy hands with smaller contact pad connections. When using a solder paste stencil, you get the following benefits:
- Uniformity. You’ll ensure that you apply an even amount of solder paste across every SMD pad on your PCB.
- Efficiency. You can apply solder paste to your entire board all at once instead of one pad at a time.
- Reliability. You’ll get a reliably assembled board since each pad receives the same amount of solder paste.
Using a solder paste stencil is a rapid process and requires just a couple swipes of a credit card or a metal squeegee to apply a nice, even coating to all of the SMD pads on your PCB. But this method isn’t just used in hobbyist electronics projects at home. You’ll also find solder paste stenciling used by manufacturers all around the world.
After your board is fabricated by your manufacturer, they will then apply a layer of solder paste on all of your board’s SMD based using a stencil. Once the paste is applied, your board will then be placed in a pick-and-place machine where all of the SMD components are set. Here, the flux in the solder paste keeps all of the components in place until the board is cooked.
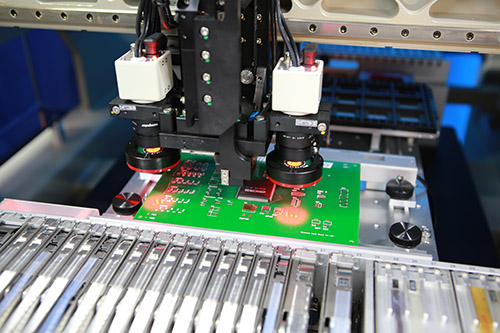
With all of the SMD components on your board, it will then go through either a reflow soldering or wave soldering oven. In a wave soldering process, your PCB passes over a wave of molten solder which melts all of the solder on your board. This Is the ideal manufacturing process when you have both through-hole and SMD components on your PCB. The alternative is reflow soldering, where your board is sent through a large industrial oven with reflow heat applied to the top of your board, which melts the solder on your SMD pads.
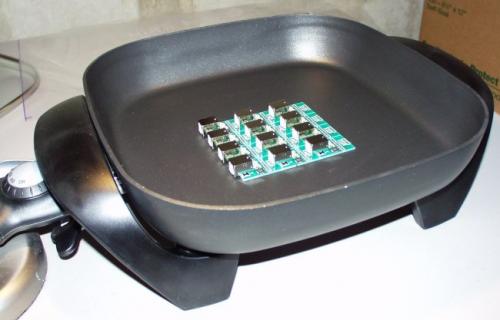
At home, you’ll typically go through this entire manufacturing process with some slight modifications. Instead of an industrial soldering oven, many hobbyist designers use a smaller hot-solder oven or a hot-air rework station and some even get the job done with an electric skillet or modified toaster oven. Instead of a pick-and-place machine, you’ll likely be leveraging your manual dexterity skills with the help of tweezers to place all of your components.
Choosing a Solder Paste Stencil
When you’re ready to order your first solder paste stencil, you have to decide what material you want it made it out of, metal or polyimide.
Metal Stencil
We recommend getting a stencil made out of some kind of metal, generally, stainless steel, if you know you’ll be using it for hundreds of prototypes. This material tends to be overkill for many hobbyist designers who need only to assemble a few prototypes, but it’s a good option to keep in mind if you’re not on a budget.
Polyimide Stencil
For hobbyist designers just working with a handful of prototypes we recommend getting a stencil made out of polyimide, which is a synthetic polymer. These laser cut stencils provide a low cost alternative to metal stencils.
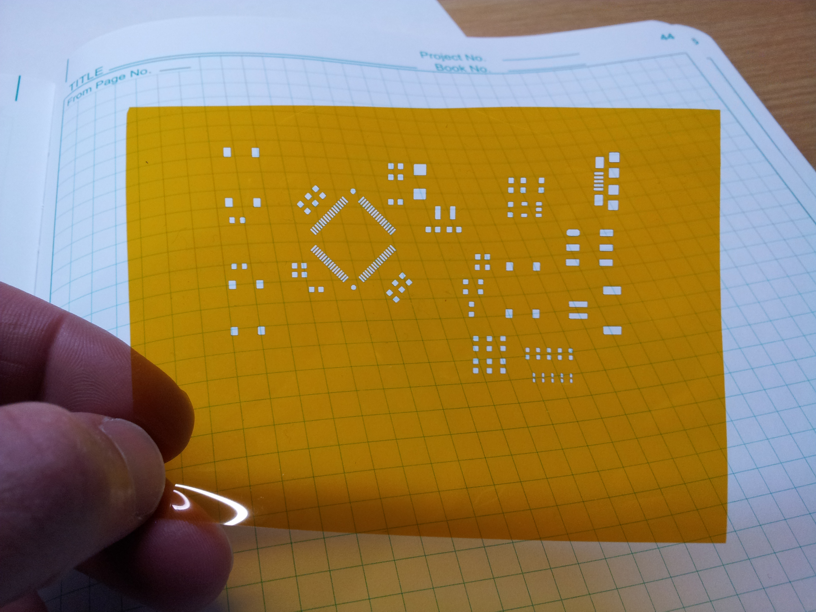
You can purchase polyimide and stainless steel stencils from a provider like OSH Stencils for around $5 – $10. This company has been serving the electronics community for years and offers a low-cost alternative for designers that need low volume PCB stencils. They have a simple process of uploading your design on their website, which lets you see how your stencil will look before it’s produced. You can also add custom engraving to your stencil for things like filenames, board revisions, dates, or project names.

How to View Your Solder Paste Layer in EAGLE
Before getting your solder paste stencil made from OSH Stencils, it’s good to know where to find your Solder Paste layer in your PCB design tool. In Autodesk EAGLE, your solder paste stencil will be made from Layer 31 tCream and/or Layer 32 bCream. To view your cream layer in EAGLE, do the following:
- Open your PCB layout (.brd) file in Autodesk EAGLE.
- Select the Layer Settings
 icon on the left-hand side of your interface.
 - In the Visible Layers dialog, choose the Select None button to deselect all of your active layers.
- Next, select Layer 31 tCream and Layer 32 bCream and select the Apply button.
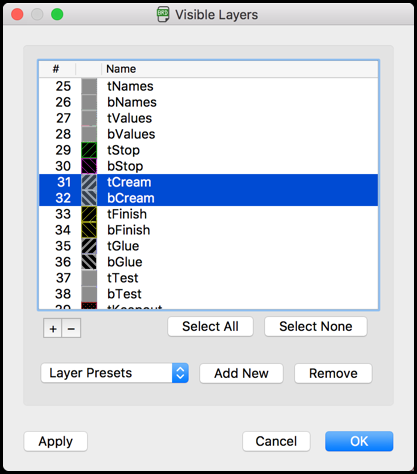
Your view should now change to a bunch of gray colored shapes as shown in the image below. This is what your stencil will look like when produced in its physical form! Each of these boxes is a pad for all of your SMD component footprints, and when cut into a stencil they will align correctly with the pads on your bare board.

How to Export Your Cream Layers from EAGLE
Ready to order your solder paste stencil? Most stencil distributors will require you to upload a set of Gerbers for your top and bottom paste layers. However, if you use OSH Stencils you can directly upload your .brd file, and their online tool will isolate the paste layers for you. Here are the steps to take if you need to generate a set of Gerbers for your paste layers in EAGLE:
- Open your PCB layout file (.brd) in Autodesk EAGLE.
- Select the CAM Processor
 icon at the top of your interface.
 - In the Cam Processor dialog, deselect all of the default layers and then select Layer 31 tCream.
- In the Output field, select the Device dropdown and choose Gerber_RS274X.
- In the File field, enter a name for your stencil file. In our example, we’ll call ours stencil.gtp.
- Lastly, select the Process Job button to generate your Gerber file.
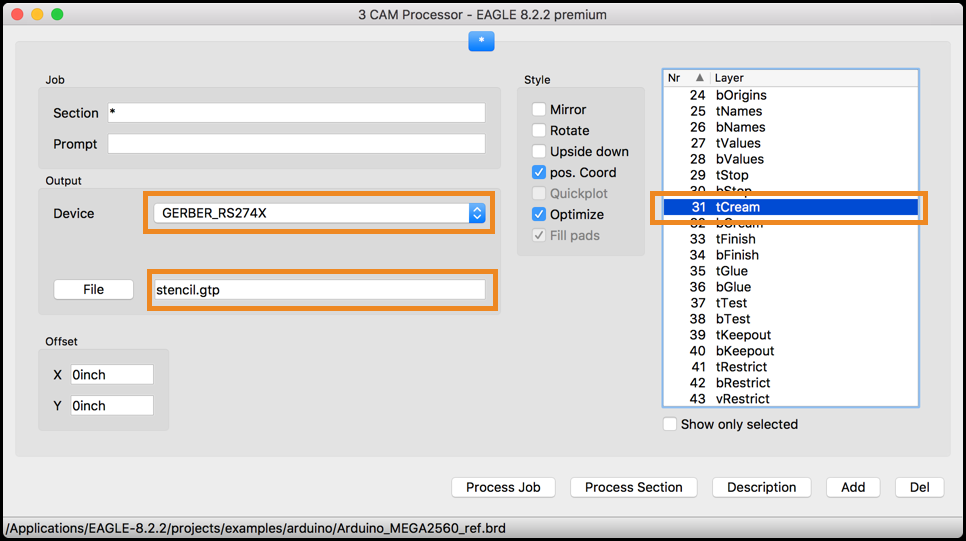
If you also have SMD components placed on the bottom of your board, then you can repeat the same process above, this time selecting Layer 32 bCream. After generating your Gerber file, you’ll find it in the project folder of the design.
The Next Step – Solder Paste Stenciling
Once your solder paste stencil is ordered and delivered, it’s time to get your stenciling on! Be sure to check out the video below from Sparkfun on detailed instructions. Here’s a general overview of the steps you’ll be taking during the solder stenciling process:
- Secure. You’ll first secure your PCB in your work area, so it doesn’t move around when you apply solder paste.
- Align. Next, you’ll align your stencil over your PCB, so each hole lines up with each pad on your bare board. Fiducials help with this process.
- Apply. You’ll then apply a layer of solder paste at a 45-degree angle over your stencil with a plastic card. After your first application, you’ll slide your plastic code over your stencil again to remove any excess paste.
- Inspect. You’ll then remove the stencil from your PCB and inspect it to make sure every pad has solder paste deposited.
- Attach. If everything looks good, you can move onto the process of attaching all of your SMD components. Get your tweezers handy!
- Heat. Lastly, you’ll reflow solder your board with the help of a reflow oven of your choice, whether that’s an electric skillet or a modified toaster.
Stencil On
There you go, everything you need to get started with solder paste stenciling. Stenciling is a great way to evenly apply solder paste across all of the SMD pads on your PCB and makes quick and easy work of assembling your components by hand. This is the method of choice for many hobbyist electronics designers that need to work with dozens of prototypes, but it’s not just made for use at home. You’ll also find stencils being used by PCB manufacturers to apply solder paste on your board, and then use high-tech machinery like pick-and-place machines and reflow ovens to glue everything together. Whether you’re solder paste stenciling at home or letting your manufacturer handle it, give thanks to this gray goo!
Ready to get your own solder paste stencil? Head on over to OSH Stencils and have one made for as little as $5!