This post is also available in: Italiano (Italienisch) English (Englisch)
Sind Sie neugierig auf die Erstellung von Gewinden mit Autodesk Fusion 360? In dieser Anleitung erfahren Sie, wie Sie benutzerdefinierte Gewinde erstellen, Ihre Einstellungen speichern und Innengewinde mit dem Bohrbefehl erstellen können.
Gewinden in Fusion 360
Erstellen von externen Gewinden in Fusion 360:
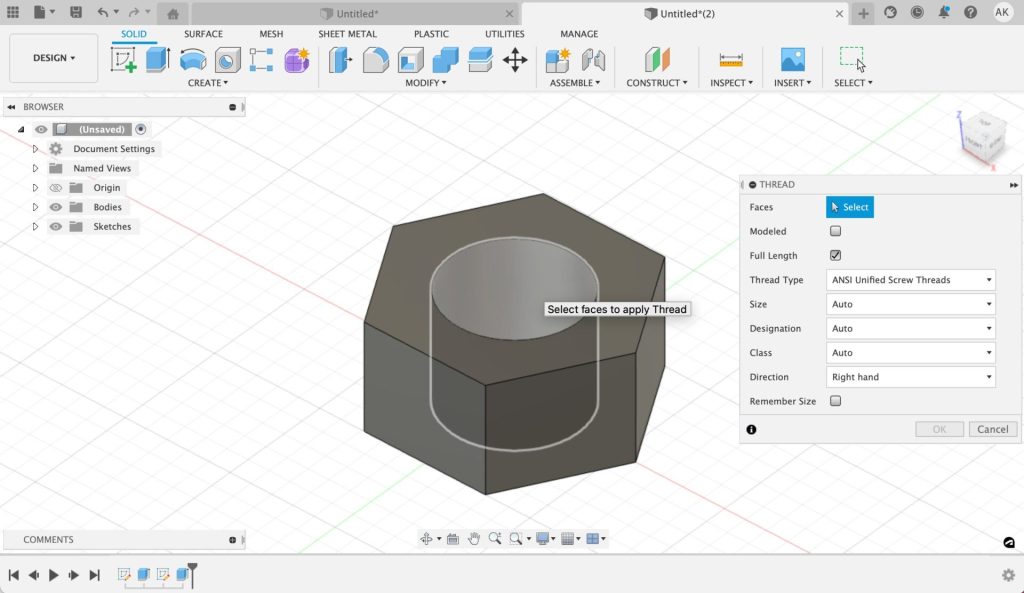
1. Öffnen Sie den Gewindebefehl unter der Option “Erstellen” in der Werkzeugleiste.
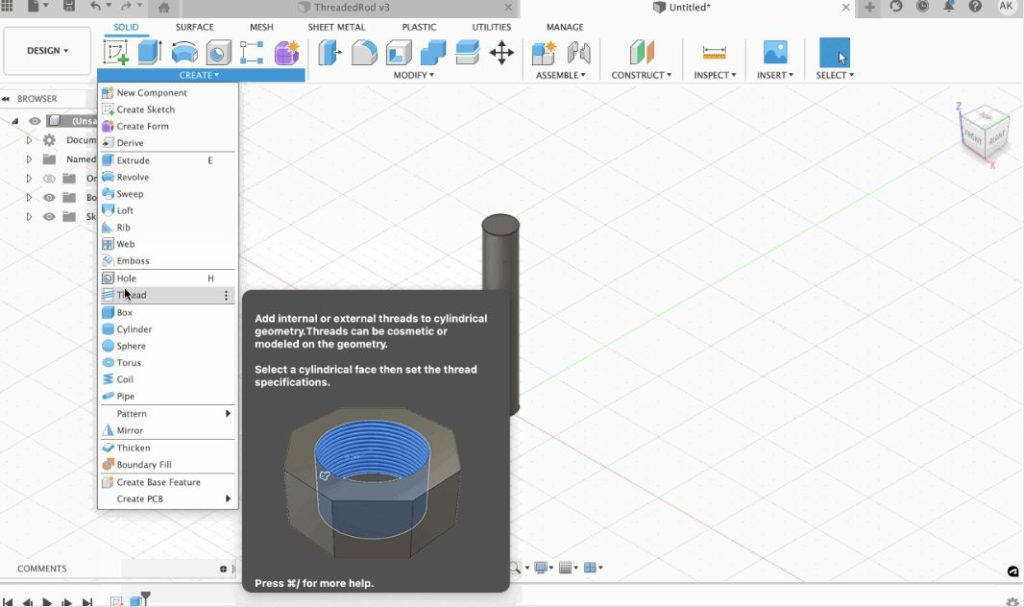
2. Wählen Sie die Fläche, die Sie mit einem Gewinde versehen möchten.

3. Aktivieren Sie die Option „Modelliert“, um physische Gewinde anstelle einer visuellen Darstellung zu erstellen.

Optionaler Schritt 4: Passen Sie Ihre Gewinde an.

Volle Länge: Deaktivieren Sie den Befehl „Volle Länge“, um die Position Ihrer Gewinde anzupassen; dadurch haben Sie die Möglichkeit, die Länge und den Versatz Ihrer Gewinde zu bearbeiten.
Gewindetyp: Fusion 360 füllt automatisch einen Gewindetyp aus, der zu Ihrem Modell und Ihrer Maßeinheit passt. Wenn Sie Ihren Gewindetyp ändern möchten, klicken Sie auf das Dropdown-Menü, um eine große Auswahl an alternativen Optionen zu erhalten.
Größe: Die Zahl, die automatisch in die Größenfunktion eingegeben wird, ist die nächstliegende, herstellbare Gewindegröße. Wenn Sie zu einer anderen herstellbaren Gewindegröße wechseln möchten, wird das Modell automatisch aktualisiert und an Ihre Wahl angepasst.
Bezeichnung: Die Gewindebezeichnung ist der größte Durchmesser des Gewindes, gefolgt von der Steigung. Dies bestimmt, wie Ihre Gewinde bestückt werden. Wechseln Sie zwischen den Bezeichnungen, um sofort zu sehen, wie diese Bezeichnung in Ihrem Modell aussehen würde.
Klasse: Die Gewindeklasse bestimmt die in der Fertigung zulässige Toleranz. Dadurch entsteht entweder eine engere oder eine lockere Passung.
Richtung: Ändern Sie die Richtung des Gewindes von Rechts- auf Linksgewinde.
Größe merken: Wählen Sie diese Option, um die angegebenen Einstellungen bei der nächsten Verwendung des Gewindebefehls zu speichern.
Erstellen von Innengewinden in Fusion 360:
Option 1: Gewindebohrung
1. Erstellen Sie eine Bohrung. Um eine Bohrung zu erstellen, wählen Sie entweder den Befehl „Bohrung“ in der Werkzeugleiste oder verwenden Sie das Tastenkürzel „h“.
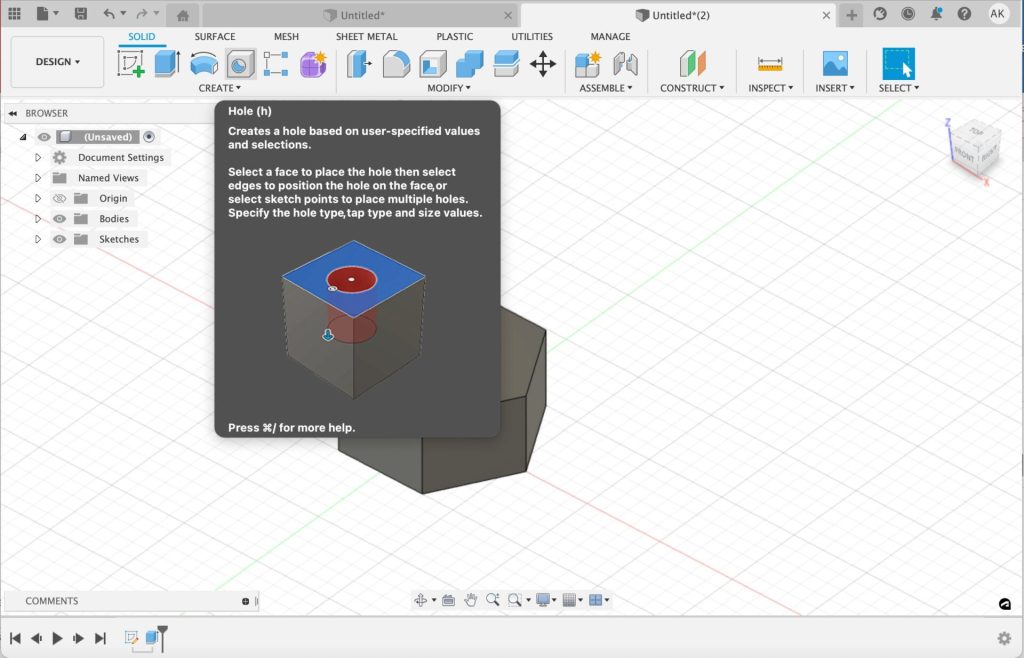
2. Wählen Sie eine Fläche aus, um die Bohrung zu platzieren, wählen Sie dann Kanten aus, um die Bohrung auf der Fläche zu positionieren, oder wählen Sie Skizzenpunkte aus, um mehrere Bohrungen zu platzieren.

3. Wählen Sie unter „Gewindebohrer-Typ“ die Option „Gewindebohrer“.
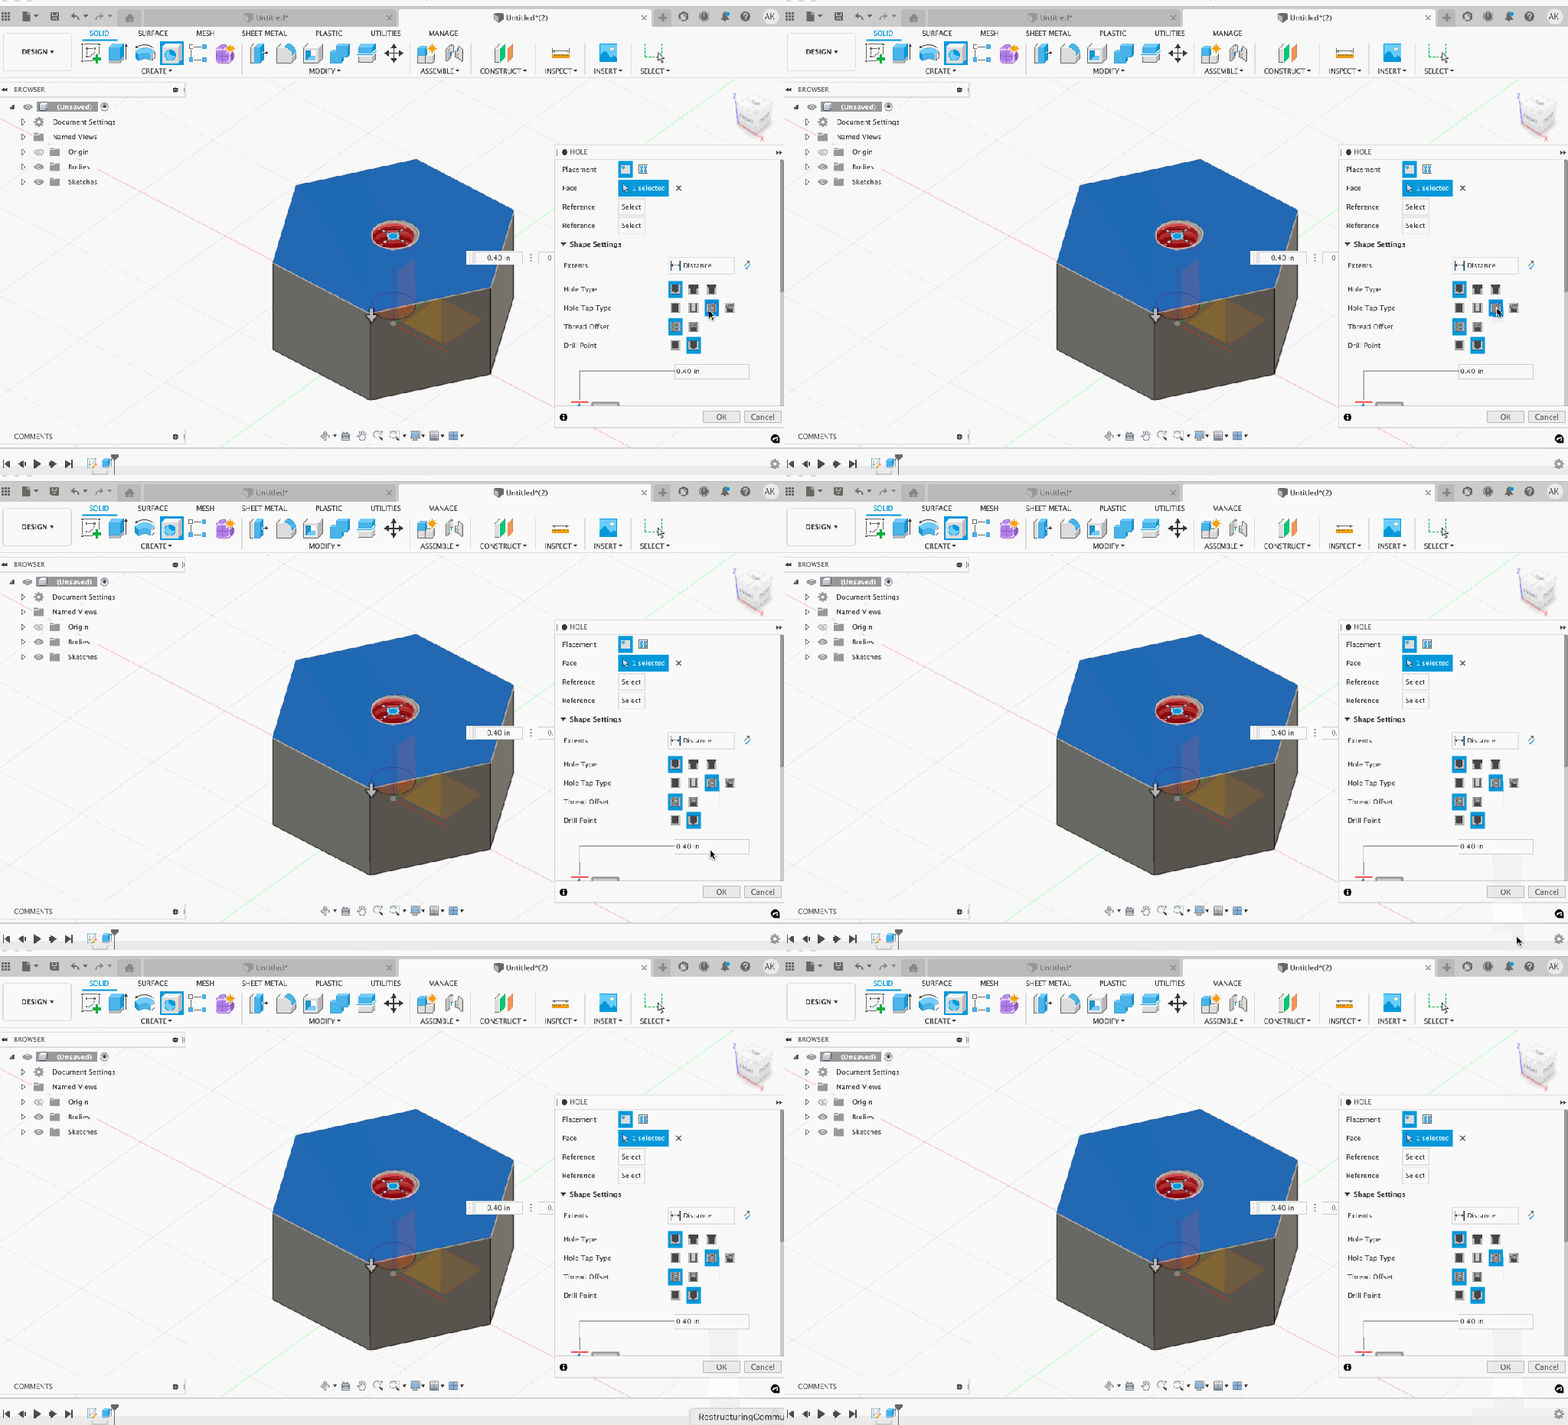
Optionaler Schritt 4: Passen Sie Ihre Formeinstellung an. Hier können Sie Ihren Bohrungstyp festlegen, Ihre Bohrmaße eingeben und Ihre Gewinde feinabstimmen.
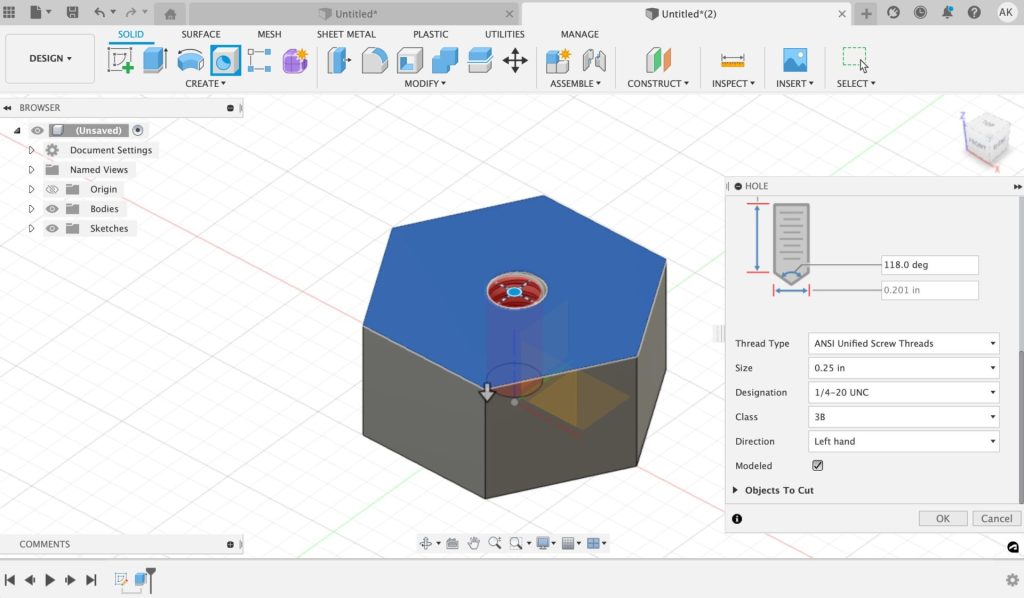
Bohrungstyp: Entscheiden Sie sich zwischen einer einfachen, einer Senkbohrung oder einem Senkungsbohrungstyp.
Bohrungstyp: Wählen Sie zwischen Einfach, Spiel, Gewindebohrung und Kegel-Gewindebohrung.
Gewindeversatz: Wählen Sie die Distanz, die das Gewinde zurücklegen soll.
Bohrspitze: Wählen Sie, ob Sie eine flache oder abgewinkelte Bohrspitze wünschen und ändern Sie die Abmessungen Ihrer Bohrspitze.
Option 2: Hinzufügen eines Gewindes in ein bereits vorhandenes Loch.
Um einer bereits vorhandenen Bohrung ein Gewinde hinzuzufügen, befolgen Sie einfach die gleichen Verfahren wie bei der Erstellung von Außengewinden, mit der einzigen Ausnahme, dass Sie dieses Mal eine Innenfläche auswählen.
Wie geht es weiter?
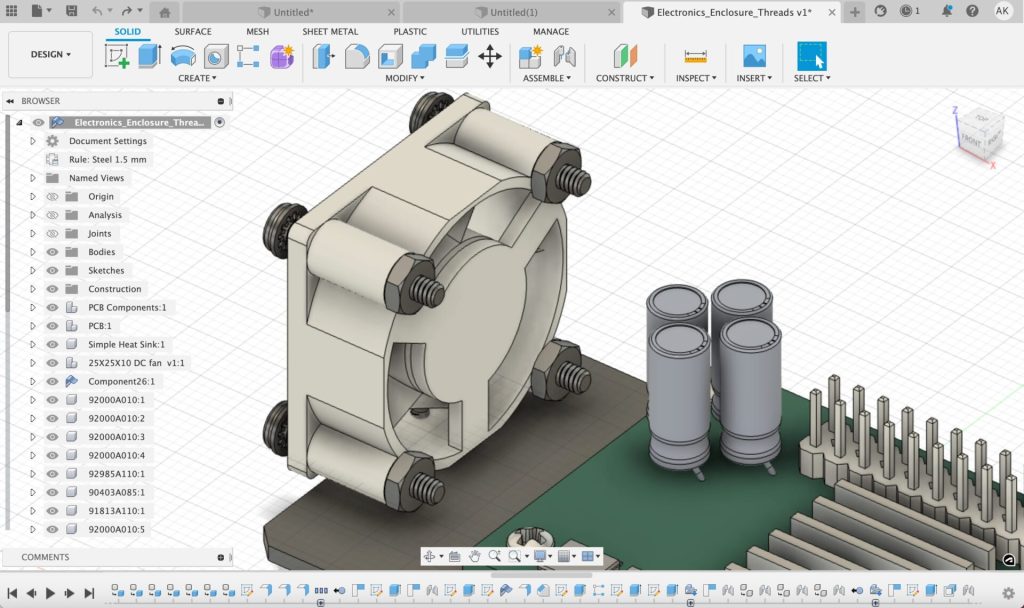
Wenn Sie mit dem Erstellen der Gewinde fertig sind, können Sie Ihre Komponenten in eine breitere Baugruppe einbauen, um einen komplexeren, umfassenden Entwurf zu erstellen.
Sie möchten mehr über Fusion 360 erfahren? Laden Sie noch heute eine kostenlose 30-Tage-Testversion herunter.