Welcome back to the Fusion Mastery series! In our previous installment, Bryce dug into the details of version control in Fusion 360. You might know how to track changes made to a project now, but there’s still one detail missing. How will you decide what changes to make in the first place? You probably had to meet with your team members to do some good ol’ fashioned collaborating. In this article, we’ll be talking about how you can now collaborate on your Fusion projects with anyone, anywhere.
What is Fusion Team?
You can think of Fusion Team as a centralized source for all of your project collaboration needs. When we say collaboration, that includes processes like:
- Creating and managing projects
- Sharing project data
- Reviewing and discussing designs
- Tracking project updates
- Commenting and marking up projects
All of this can happen with a fellow designer, a team member in a different department, or even with a third-party specialist like a manufacturer. Overall, Fusion Team acts as the campfire that brings together all of the people and processes associated with your project.

https://help.autodesk.com/cloudhelp/ENU/FSNT-LearningCenter/images/GUID-FA8C0A0E-EA66-49DB-A167-8288513EF529.png
Is this your first time working with a cloud-based collaboration platform like Fusion Team? Here’s what you can do with it:
- Connect teams and suppliers together. Your Fusion project can be securely shared with anyone in or outside your company. This makes it simple for stakeholders to review your design as needed.
- Communicate in real-time. There’s a ton of markup, commenting, and real-time messaging features baked into Fusion Team that makes communication easy. Chat back and forth about your design without ever sending a single email.
- Centralize project activity. Fusion team wraps together your project’s entire version history and communications in one central location. This makes it easy to see how your design is progressing.
Best of all, Fusion Team gives collaborators access to your project from virtually anywhere. Whether someone is using a smartphone, tablet, or computer, as long as they have a web browser, they can view your design without needing Fusion 360 installed!
How to Use Fusion Team
Before getting started, we’d like to mention that this is only designed to be an introduction to Fusion Team. Covering all the details in one article would be nearly impossible. Our goal here is to walk through a simple workflow between Fusion 360 and Fusion Team to get you started on your journey. If you want more details after reading this article, check out the Fusion Team Wiki.
We’ll begin our journey in Fusion 360. Say you’re the lead designer and need to share your project with some team members and your manufacturer. To access Fusion Team in Fusion 360, first open your Data Panel, and then expand the version history for your project. Select the Open Details on Web link to open your project in Fusion Team.

You should now be looking at the exact same design you saw in Fusion 360 within your web browser. This view is where all of your collaboration will be taking place. Let’s cover some of the basics before sharing your project with other people.

Viewing a design
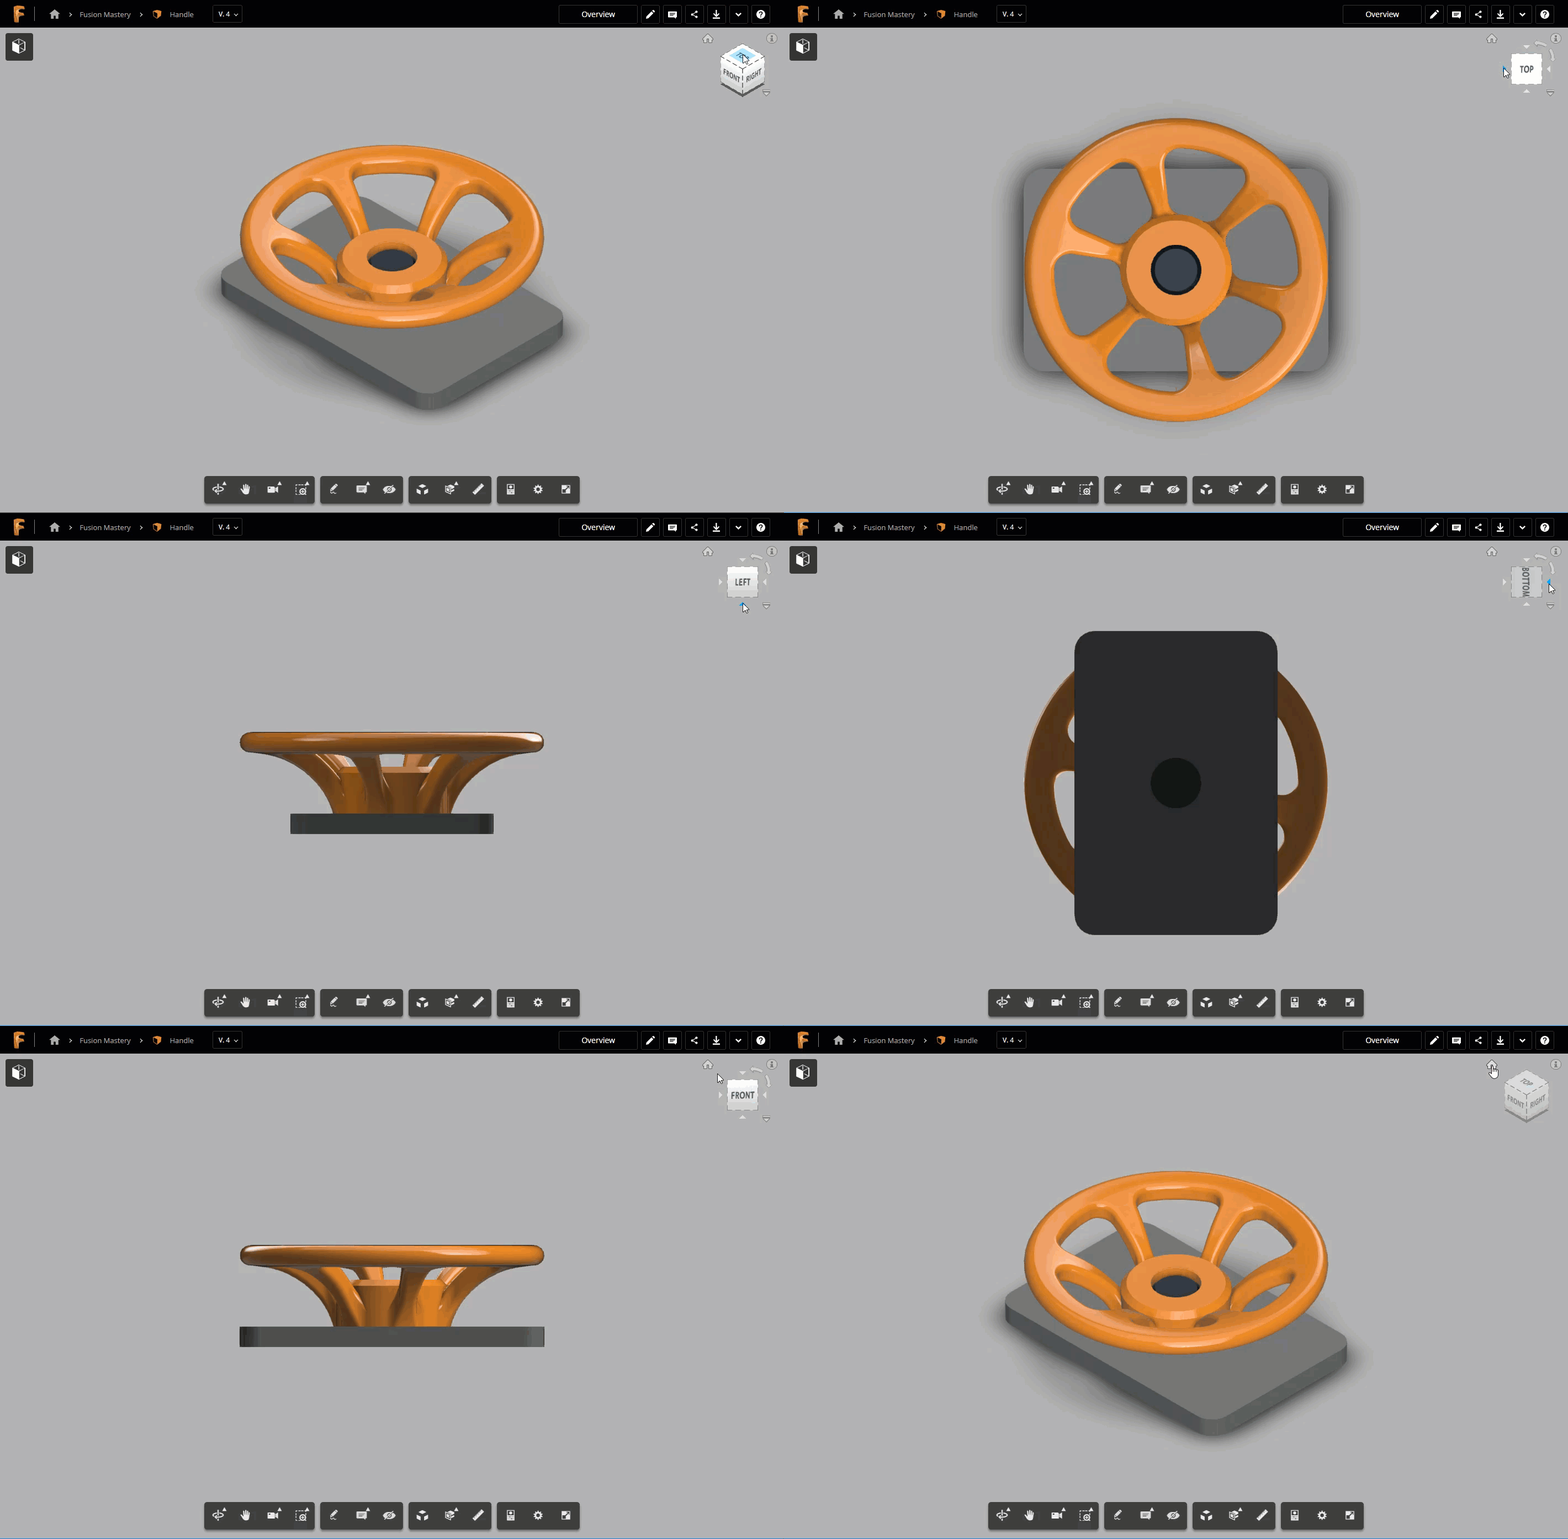
There are several ways to view your design in Fusion Team. The view cube in the top right corner will let you orient your design in several perspectives.
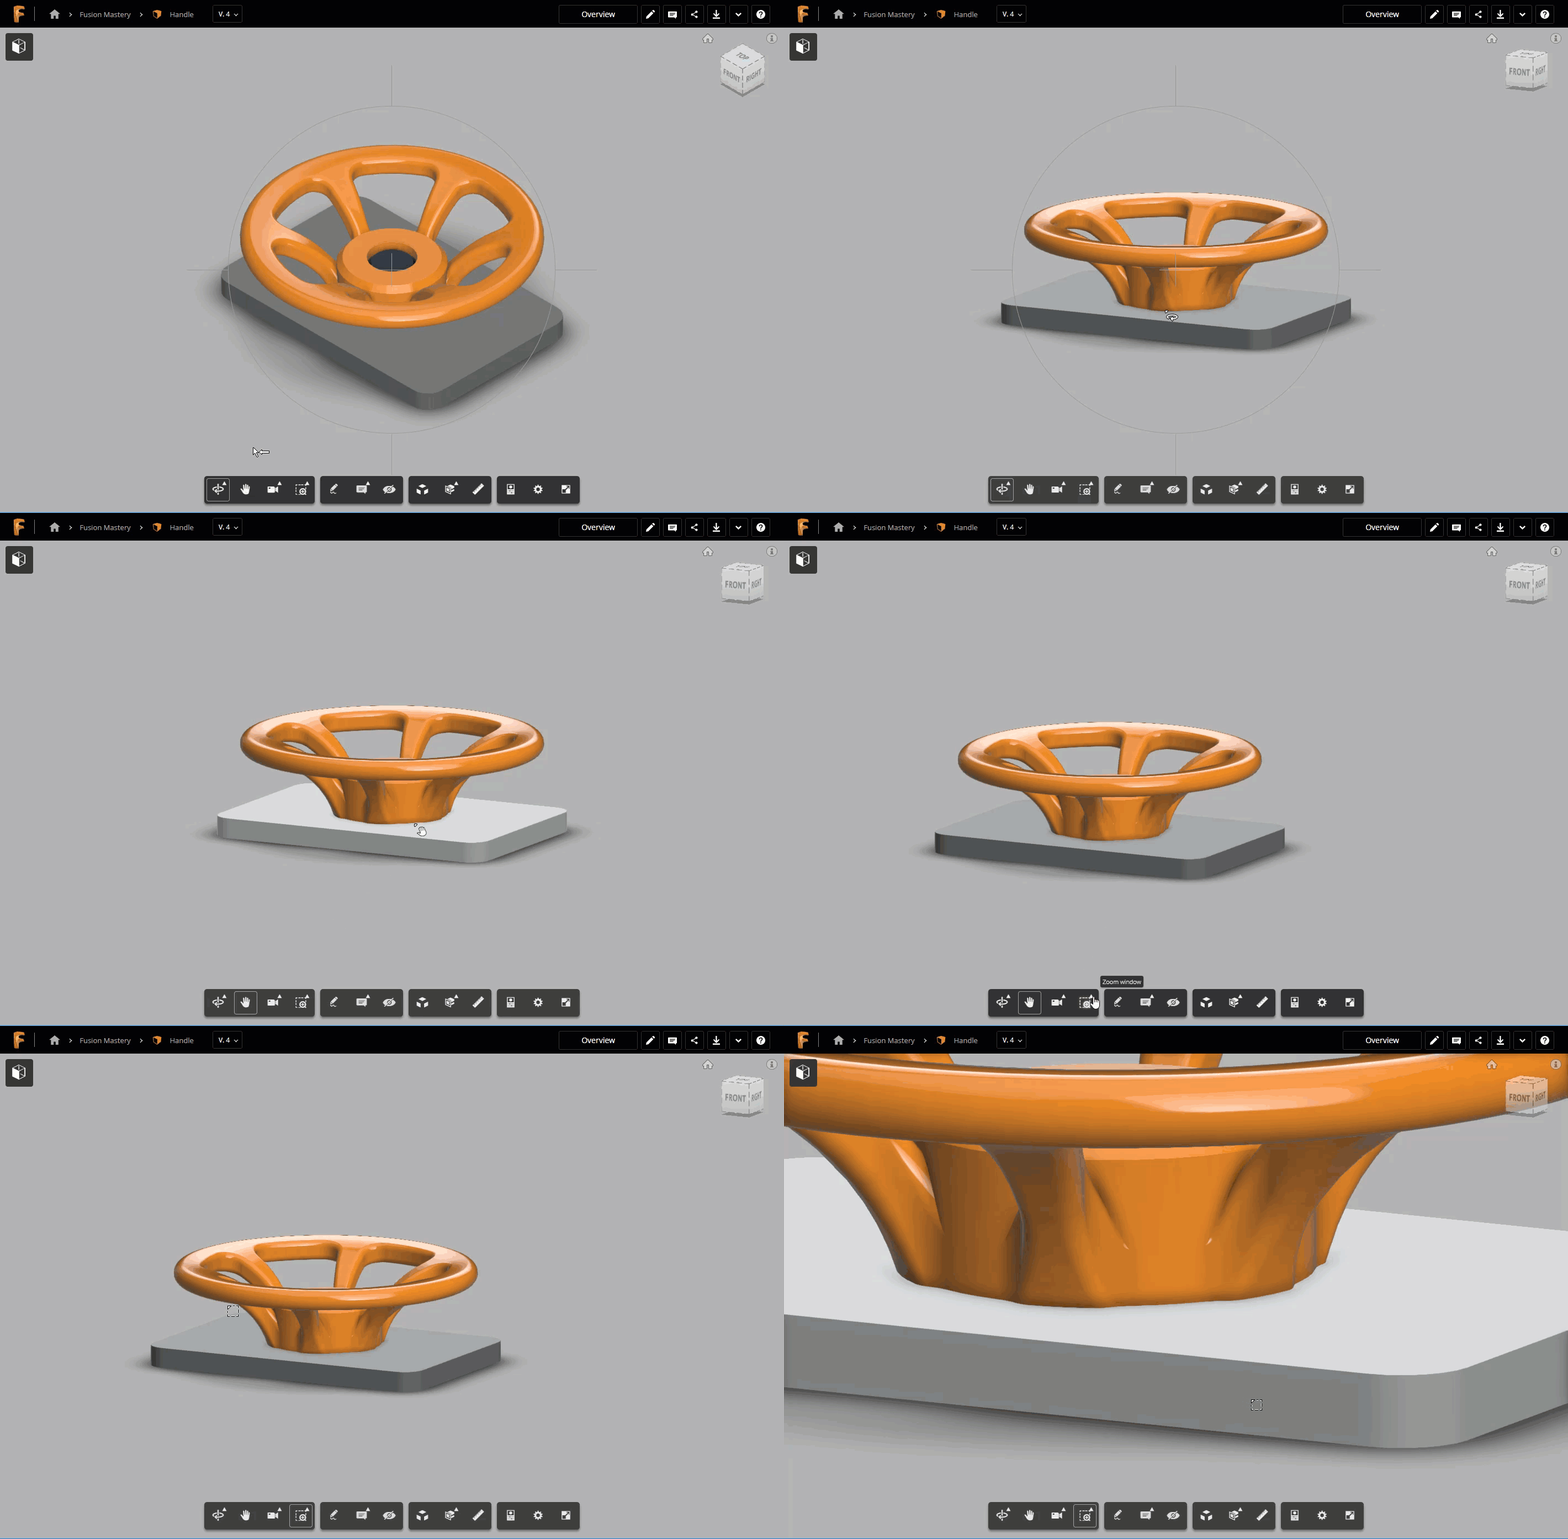
You can also use the Orbit, Pan, and Zoom options in the toolbar at the bottom to shift your perspective.
Lastly, if you select the cube in the top left corner this will open your Design panel. This panel allows you to view your design in several preconfigured perspectives. You can also use this panel to view individual component bodies in your model.

If your view ever gets wonky and you need to reset it just select the Home icon in the top right corner.

Manipulating a design
There are several ways to manipulate the display of your design in Fusion Team. These can be incredibly useful when communicating with your manufacturer.
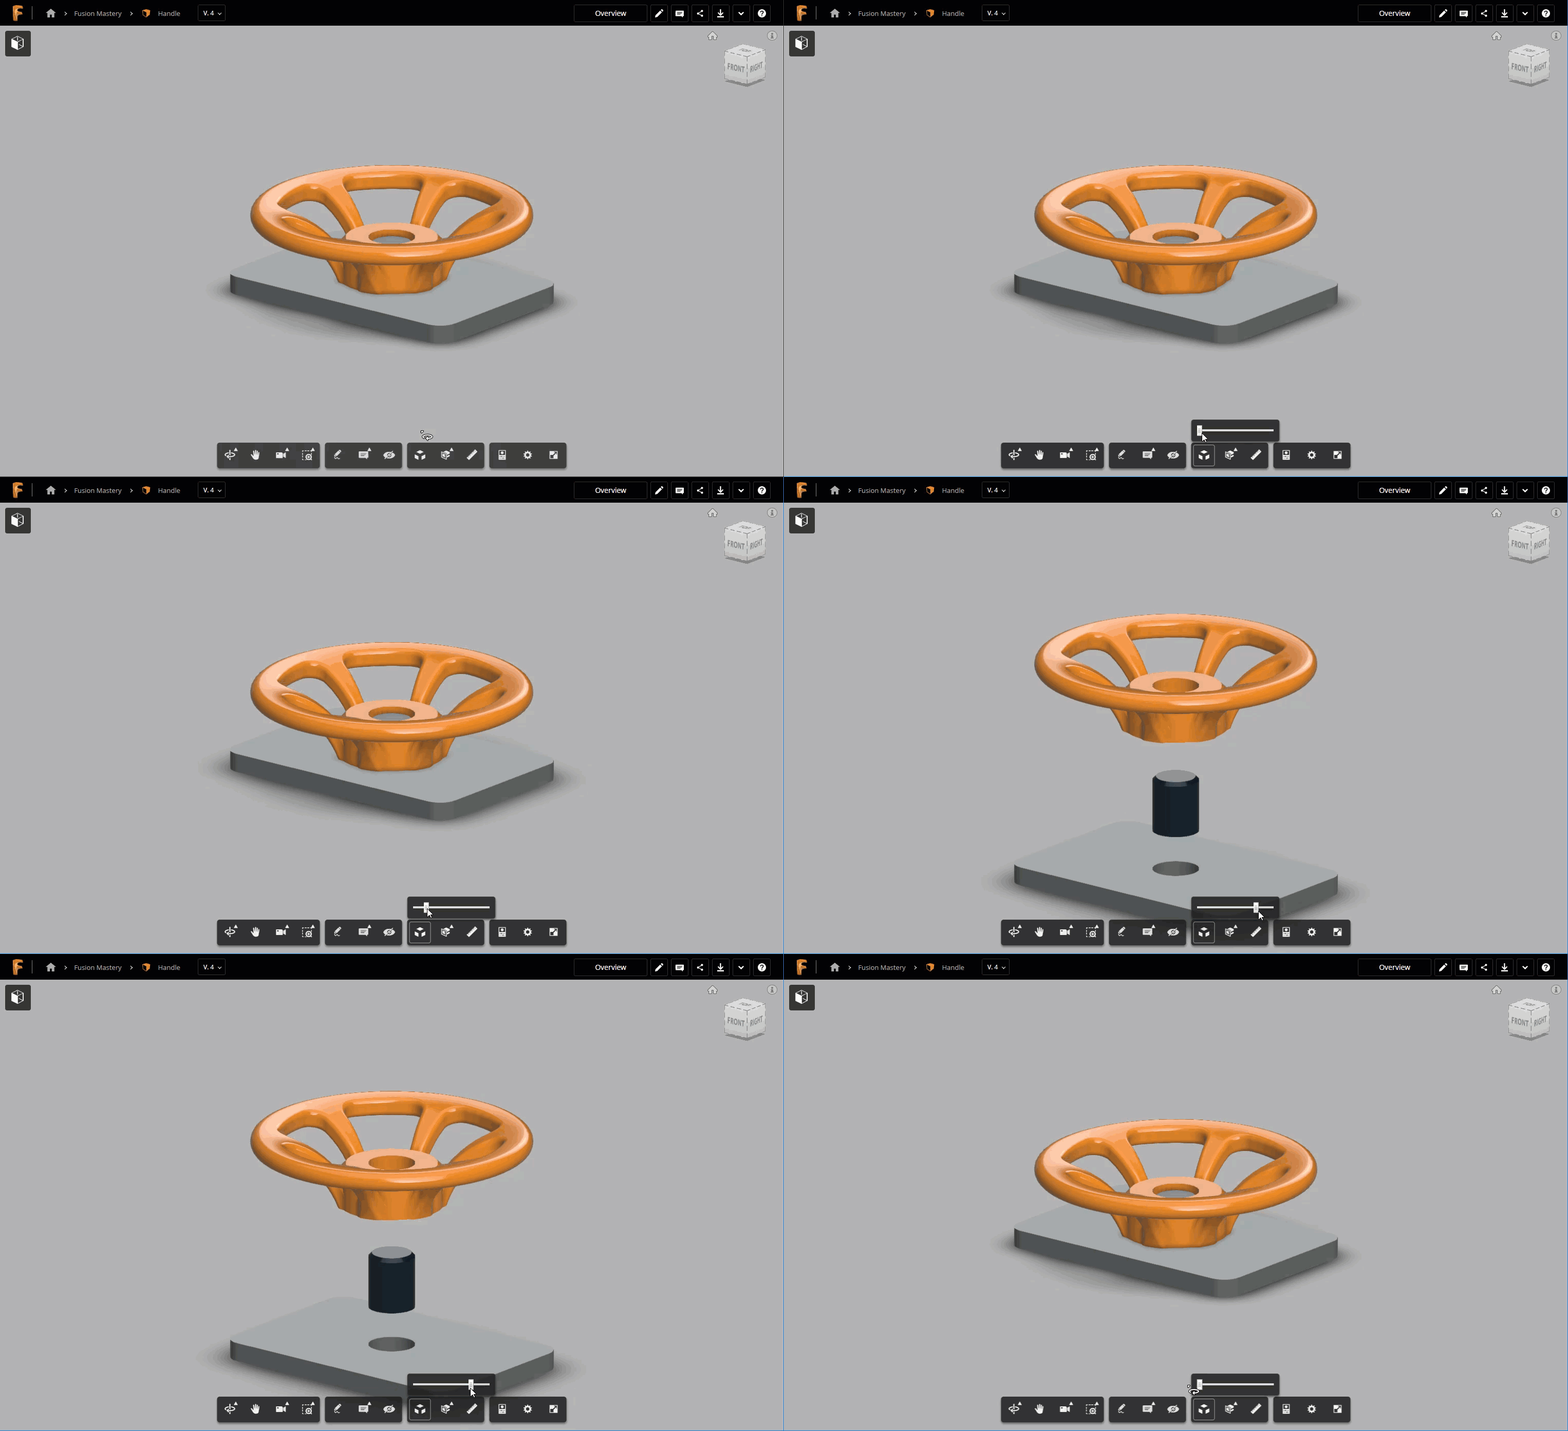
First there’s the Explode Model option, which will explode your design into its individual parts. This is a great option if your manufacturer needs to see how individual components will be assembled together.
There’s also the ability to add sectional planes to your design in the X, Y, and Z axis. Select one of these options to provide a quick crossview of your model.

Lastly, there’s a great set of measurement tools that can help you to measure distance and angles between any points on your model.

Talking about a design
The focus of Fusion Team is all about communication. The Markup tool will give you a variety of features for commenting on a design like arrows, shapes, and callouts.

There’s also a commenting system for team members invited to your project (more on this later). Select the Comment icon in the toolbar and you’ll see options for adding comments for specific points or objects.

Sharing your design
Now that you have the basics down, let’s get some people involved in your project. There are two ways to go about doing this:
- Sharing with people inside your project. This is ideal for internal team members that need to actively collaborate on your project. When someone is a member of your project they can add comments and markups that are viewable by other members.
- Sharing with people outside your project. This is ideal for people that just need to view your project, like a customer or vendor. These people won’t be able to view any internal team member’s comments, but they can add their own markup.
Each project within Fusion Team has its own unique list of project members. To add a new person to a project, first select the Home icon in the top left corner of Fusion Team. This will take you to a list of all your available Fusion Team projects.

Next, select a project you want to invite someone to and you’ll see a Details panel on the right. Select the Invite button and you’ll be able to invite them to your project. Keep in mind, whoever you invite will be able to see all of the files within your project!

Once someone is invited to your project, they can open your design in their browser and see a view similar to yours. Now the collaboration magic can happen. If a team member adds a comment or markup it will be visible by all other team members like this:

To share outside of your project, select the Share icon at the top of the Fusion Team interface and choose Share. This will open the Share dialog, which allows you to share your design via a direct link, email, or embed code.

Make note of the privacy settings! Here you can decide if you want to allow people to download your project file to their computer, or if they’ll need a password to enter.
Let’s say you send the share link to a third party vendor, this is the view they’ll see in Fusion Team:

As you can see there are some features absent. Specifically all of the share and editing options in the top right.
Markup options can be added in this view, but they can only be saved as a png file and won’t be seen by the rest of your project’s internal collaborators.

Connecting Fusion 360 and Fusion Team
Let’s say you shared your project with another team member, did some back-and-forth commenting, and now you have changes to make in Fusion 360. How is this going to work?
Back in Fusion 360, select the + icon next to the Comments panel in the bottom left corner of your interface. As you can see in the image below, all the comments that our team members made in Fusion Team show up in Fusion 360! The workflow between Fusion Team and Fusion 360 is instantaneous.

Selecting the link icon next to a comment will position your model in the exact orientation the commenter added it.
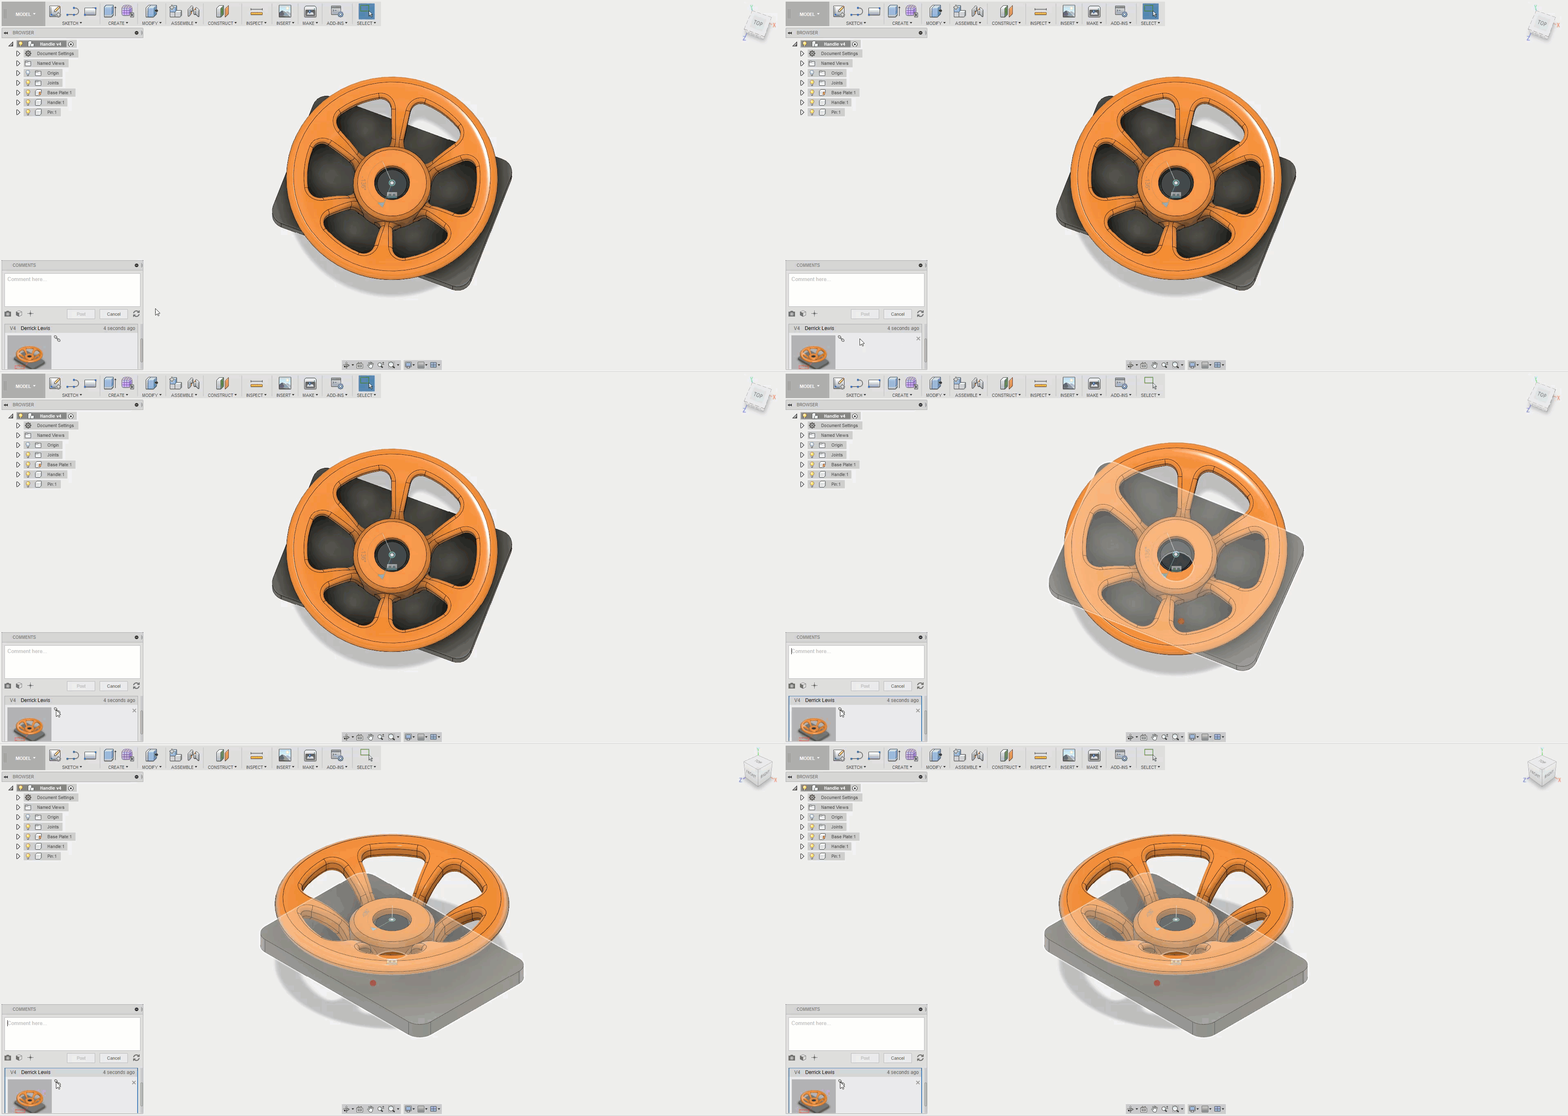
You can then select the image thumbnail to view the markup comments in detail.

Want to reply to a comment or add your own? You don’t need to leave Fusion 360. Like Fusion Team, there are several options to comment on a point, comment on an object, or capture an image of your design.

When you post your comment within Fusion 360, it will show up automatically in Fusion Team for anyone to view.
Some Finishing Touches
You’ve learned the basics of Fusion Team so far, congrats! To finish up, let’s cover some extra features that will make your life easier:
Reviewing comment history
Within Fusion Team, select the Comments icon in the top right corner to open the Comments panel. This section features a complete history of every communication made between team members. Selecting a specific comment will highlight it on your design.

Switching from Fusion Team to Fusion 360
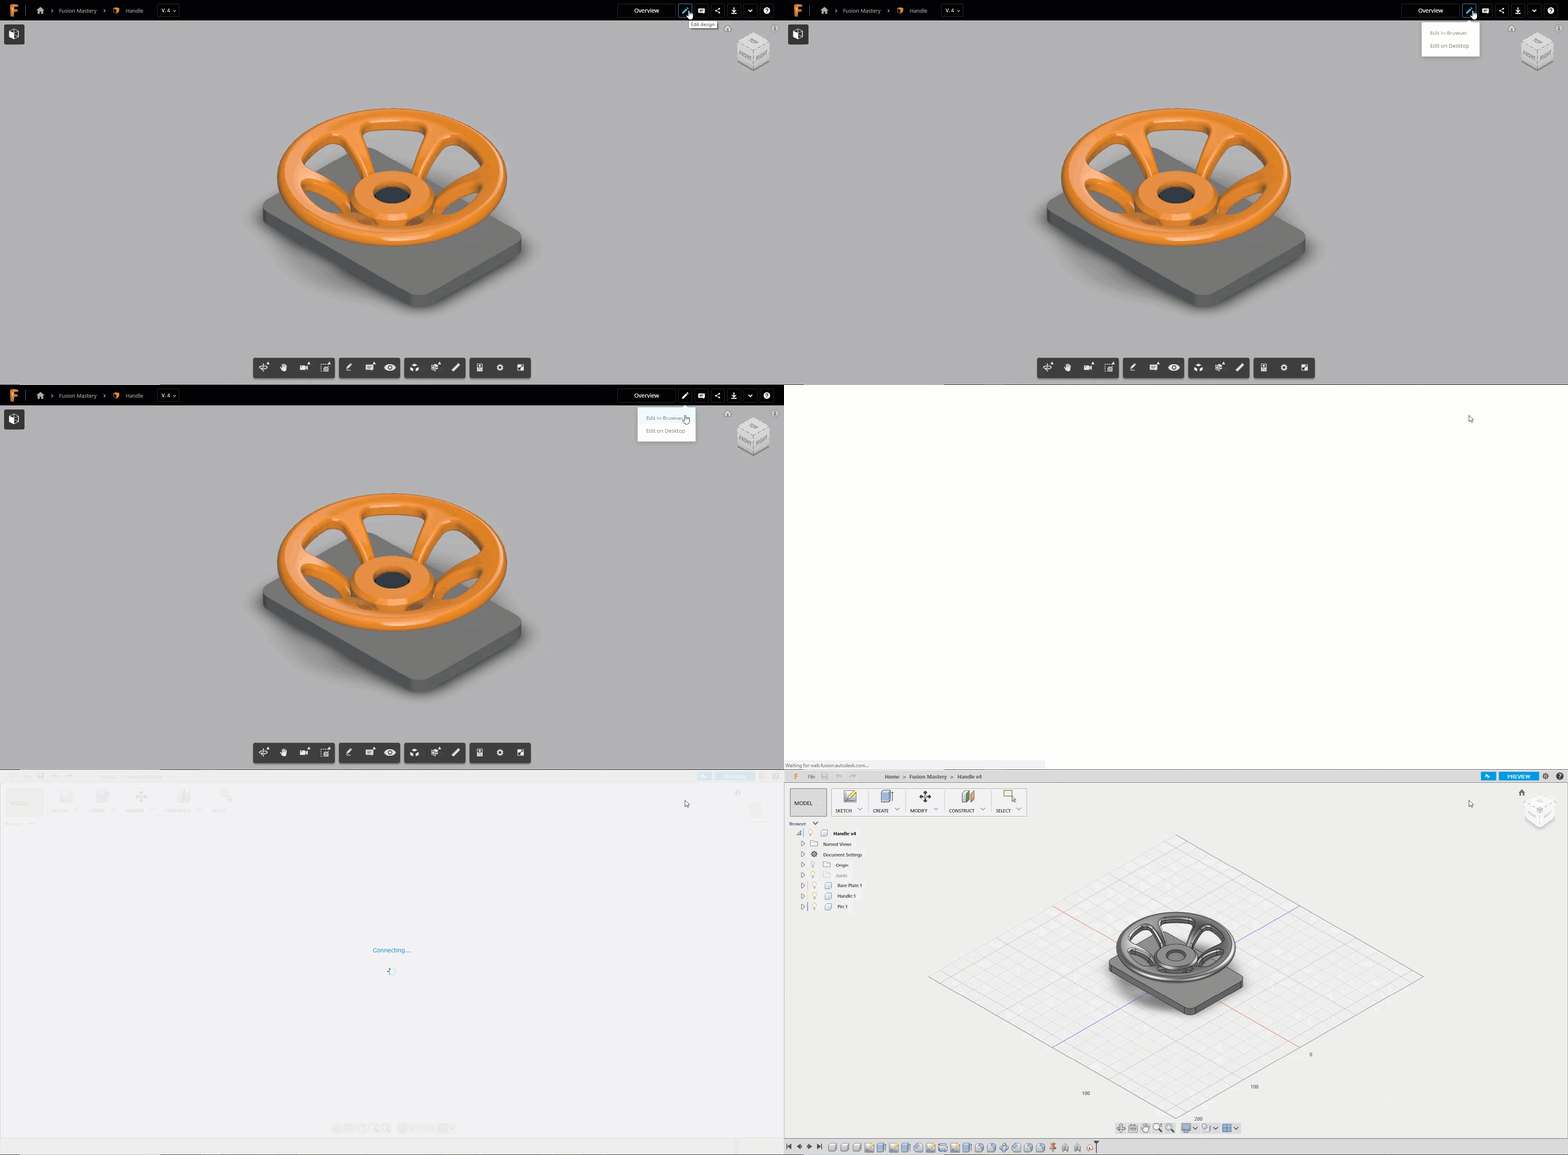
Need to quickly get back into Fusion 360 from Fusion Team? Select the Edit design icon in the top right corner of Fusion Team and choose either Edit in Browser or Edit on Desktop. Either choice will open the project in your familiar design workspace.
Exporting in a different CAD format
There are a ton of options for exporting your design in a different CAD file format. Select the Export icon, choose a file format, and Fusion Team will send you an email with the exported file.

Viewing design details
Select the Overview button in Fusion Team and you’ll be taken to a dedicated landing page for your file. This page is like a hub that consolidates all related activity and data into one view.

Switching versions
Just like in Fusion 360, collaborators in Fusion Team have access to every version of your design. Select the Version button at the top of Fusion Team to expand a complete version history.

Each version be opened directly in Fusion Team. You can also promote an existing version to the current version, or view the Overview page for each version by hovering your mouse over each listing.
Collaboration Ninja
That’s that, you are now an official collaboration ninja with Fusion Team! This is an invaluable tool in today’s world of distributed design teams. Collaboration is no longer a chore of boxing up design files and working with endless email threads. Every piece of communication related to your design project can now be handled in one centralized location in Fusion Team.
Ready to put your collaboration skills to the test? Try Fusion 360 for free today!