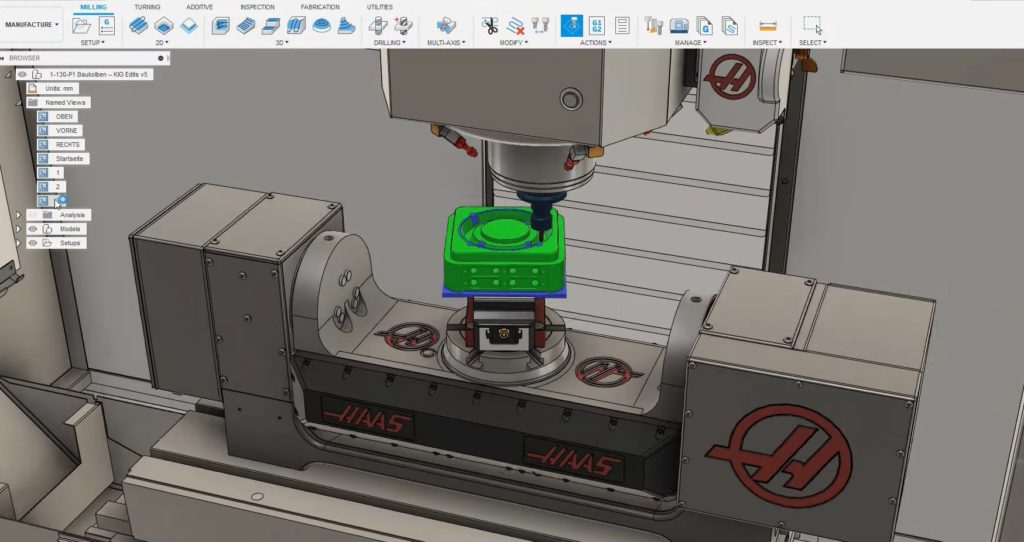
Machine simulation features in Autodesk Fusion 360 are officially out of preview! This article will delve into how to use the new Machine Builder feature, which allows you to build your own machine for machine simulation if yours isn’t in our online Machine Library.

We recently posted about machine simulation coming out of preview, showing you how to access and utilize basic features you now have access to. Machine Tools come in all shapes, sizes, and variants, though. We’ve introduced the Machine Builder functionality for when you just can’t find your exact machine within the Fusion 360 online Machine Library. In this article, we covered machine simulation basics in Fusion 360. Now, let’s walk through how to build your own simulation-ready machine using the Machine Builder functionality.
Understanding the 3 Types of Multi-Axis Machines
Before we get started, it’s important to understand that there are three main types of multi-axis machines. Each has its own advantages and disadvantages.
- A Head-Table machine consists of the three-main orthogonal axis, with two additional rotational components. One on the spindle and one on the table
- A Head-Head machine consists of the three-main orthogonal axis but in this case both rotational components are situated on the spindle.
- A Table-Table machine whereby both rotational components are situated on the table, hence the phrase table-table.
How to Access the Machine Builder in Fusion 360
Start by enabling the Machine Builder feature flag by clicking on the Preferences tab in your profile and selecting the Machine Builder from the Preview Features list.
To access the Machine Builder, make sure you’re in the Manufacture Workspace. Select the Utilities tab and then click on the Machine Builder button. Every machine needs an associated machine kinematics file. To create a kinematics file, click on the Create New button within the Local directory and specify your machine type.
Understanding Kinematics
The kinematics section is the most important section, as it defines how the machine axis will move within its individual axis limits. You need to set your machine up for success so that it’s easy to spot potential errors during simulation. Check out the video above for an example of what kinematics factors you should consider while building your machine.
Enable Post Processing
After you make all necessary adjustments, navigate down to the Post Processing tab. The toolpath Information is first passed through the post processor before being displayed in machine simulation. So, we need to allocate a machine simulation-enabled post processor to our machine kinematics file to get the most accurate results. For more information about how to get your post processor machine simulation ready, visit the Autodesk Services Marketplace to get help with modifying your post processor.
Link Kinematics and CAD File
Once you assign the post, click OK to create the file. Clicking OK allows us to select the machine kinematics file. We now need to link the associated kinematics file with our CAD model on the screen. If you notice that your machine isn’t in the correct orientation, use the Move Components button to rotate and reposition
Clicking on the Set Up Machine Model, we can begin to define the tool and part attach points, as well as the individual static and moving components. We can begin to select the components from the explorer tree. For the rotary components, make sure to define the point around which the component rotates. Clicking OK confirms the selections.
Next, click Preview Machine Movements to check that the machine movements are as intended. Finally, click the green tick to save the new machine simulation file. You can now close the model.
Now you know the basics of using the Machine Builder in Fusion 360! Check out this article to learn more about how you can use machine simulation to your advantage.

