This post is also available in: Italiano (イタリア語) Deutsch (ドイツ語) English (英語)
Autodesk Fusion 360 electronics is the future of modern product design. Learn about the steps to take when migrating your design and library files from Autodesk EAGLE to Fusion 360 Electronics.
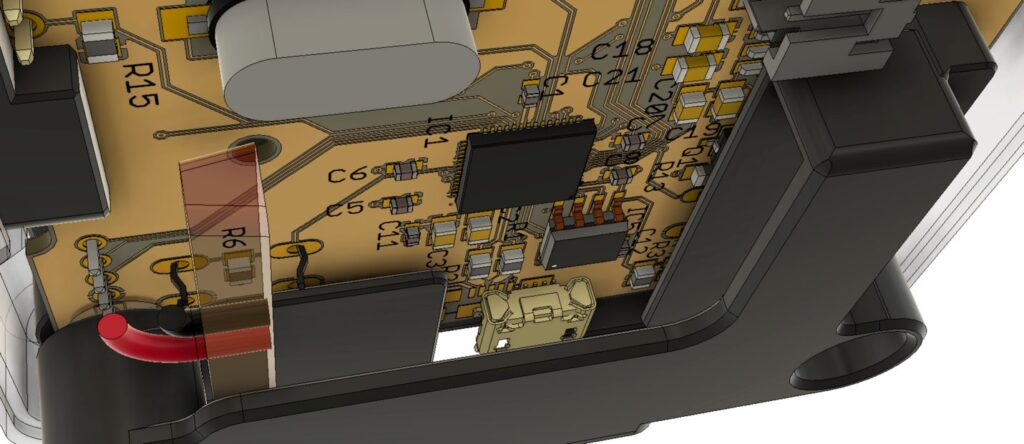
Fusion 360 Electronics
Fusion 360 marks the end of the electronics point solution. It’s the introduction of a new era of end-to-end multi-directional product design and manufacturing from Autodesk. Building on the schematic capture and PCB layout capabilities of EAGLE, the Autodesk team has integrated and extended the capabilities of PCB design & manufacturing into Fusion 360. We’ve paired this with mechanical design & simulation, industrial design, surface modeling, CNC machining, injection molding, sheet metal nesting, laser cutting, 3D printing, water jet, and more! Here are all the tools you need in one place to design, manufacture, and collaborate intelligently. The end objective – making you more productive than ever before possible!
With Fusion 360 electronics, you can easily integrate your PCB designs into your mechanical assemblies. This allows for better collaboration between electrical and mechanical engineers. You can design and even 3D print a clamshell tester or programming jig. You can create custom holders to hand-solder prototypes. Even further, you can rapidly prototype the finished enclosure to perform a test fit or share it with your customers. This integration ensures your PCB fits within the enclosure, but enables you to truly experience your design earlier. Allowing you to interact with, expose problems, and iterate on solutions like never before.
Check out this video to see how Fusion 360 is the solution for the future of intelligent product design.
If you’re familiar with EAGLE, you will find the transition to Fusion 360 electronics simple and straightforward. All of the commands you used in EAGLE are available in Fusion’s modern user interface. Whether you’re designing a PCB or building your enclosure the experience in Fusion 360 is consistent throughout the design & manufacturing workflow. The high cost of context switching between point solutions is a thing of the past! We offer a migration guide, comprehensive tutorials, documentation, and a supportive online community to help you get up to speed quickly.
Here we’ll outline four steps to help you migrate your data and workflow to Fusion 360 electronics successfully.
Step 1: Set up and import design files
In EAGLE, when both the board and schematic files are located in the same folder and have the same name (e.g., *.brd and *.sch), the software understands these to be the two primary views of the same design. Automatic synchronization of changes ensured consistency between the board layout and schematic design. In Fusion 360, we’ve made changes to enable better reuse and greater efficiency.
With the addition of the electronic design document, the schematic and PCB documents now explicitly link together. This allows you to associate the same schematic to a completely different board layout and even a different enclosure. For example, if you were to create a schematic with a display and display controller, perhaps even a microprocessor; you can reuse that schematic with different form factors linked to different downstream machining processes to make variations of the design and achieve new levels of purchasing power while increasing engineering efficiency.
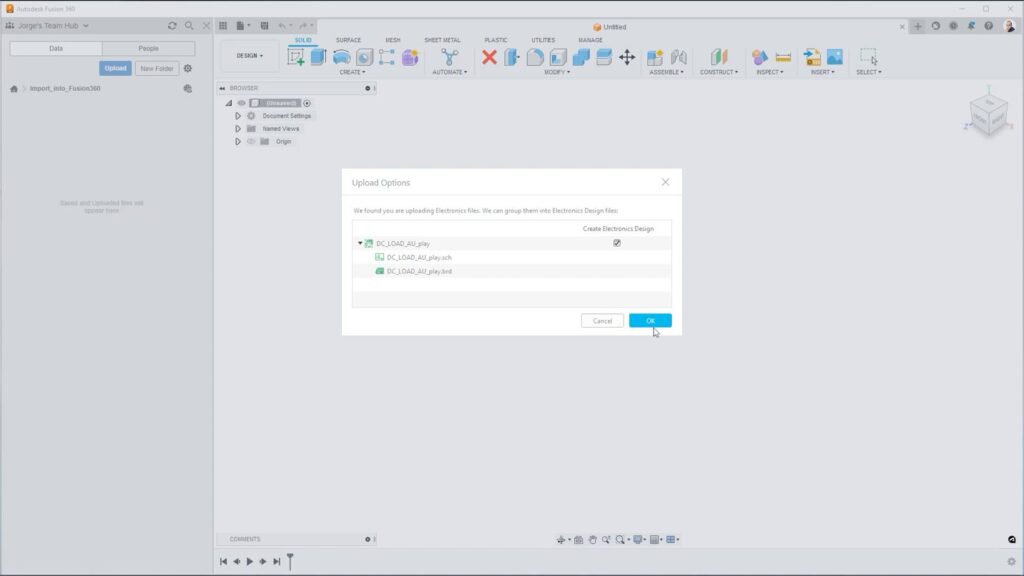
Begin by simply uploading an EAGLE schematic and board file or of course, you can create a new schematic and PCB document when starting a new design.
Pro Tip: We recommend keeping each design in a separate Folder in Fusion 360 which makes it easier to search, locate, manage, and share specific groups of assets with permissions set at the folder level.
The action of uploading the file will automatically prompt you to create an electronic design document, linking any schematic-board pair in Fusion 360 which originated with the same name in EAGLE. The electronic design document continues, like EAGLE, to manage the association and synchronization between the board and the schematic.
Step 2: Place Parts Panel and Library Manager
Before we begin uploading libraries, it’s important to understand that managed libraries in EAGLE are tied to your Autodesk account. They are available to Fusion 360 via your user login with the same permissions you had in EAGLE. You will need to upload libraries on your local computer to Fusion 360. You can do this in batch or on-demand via the place part panel in Fusion 360.
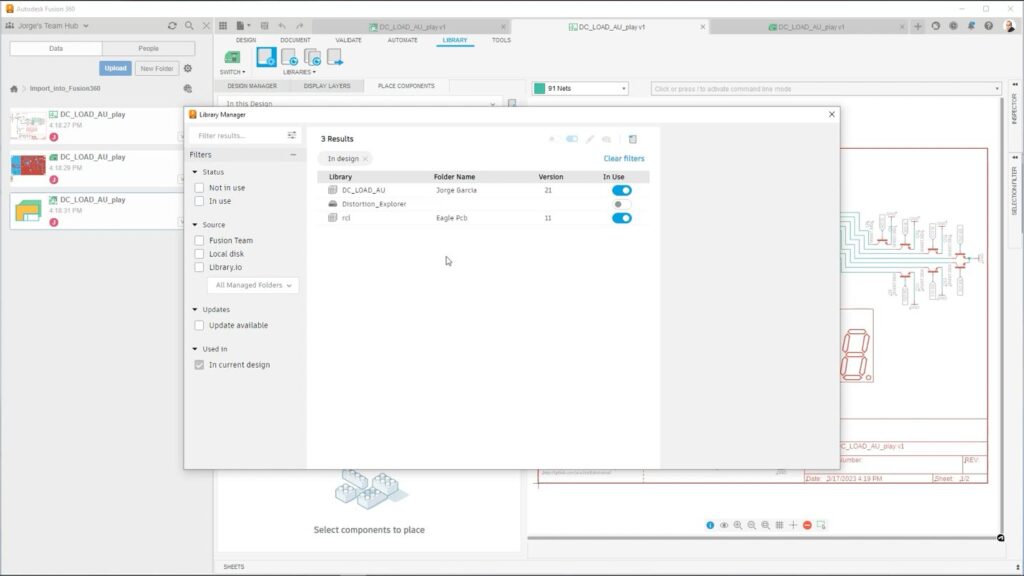
After uploading your design files, the board and schematic will continue referencing the original libraries. To have your local libraries reference the more powerful, versioned managed libraries in Fusion 360, you’ll want to upload those. Again, it would be good to create a dedicated folder with folder permissions intended to make sharing the libraries easier.
Pro-tip: You only need to upload your libraries to Fusion 360 which are local to your computer. Managed libraries in EAGLE are tied to your Autodesk account. They will appear in Fusion 360 without the need to migrate them.
If you upload your local libraries, you will want to replace the parts in the design, so they reference the uploaded libraries. To do this, go to the library manager and select the option Only to show libraries used in the design.
Step 3: Importing data into Fusion 360 electronics
Go to the home panel and create a project where you intend to save all your libraries (unless you already have one). We recommend having your libraries in a single project, within a single folder to make sharing and keeping track of your library content easier.
When uploading your local libraries they are converted to a Fusion Team library. They will then begin to be versioned within Fusion 360. Notice that the local library and the Fusion Team Library co-exist. The icon and hover text over the icon indicate the type of library, next to the library name.
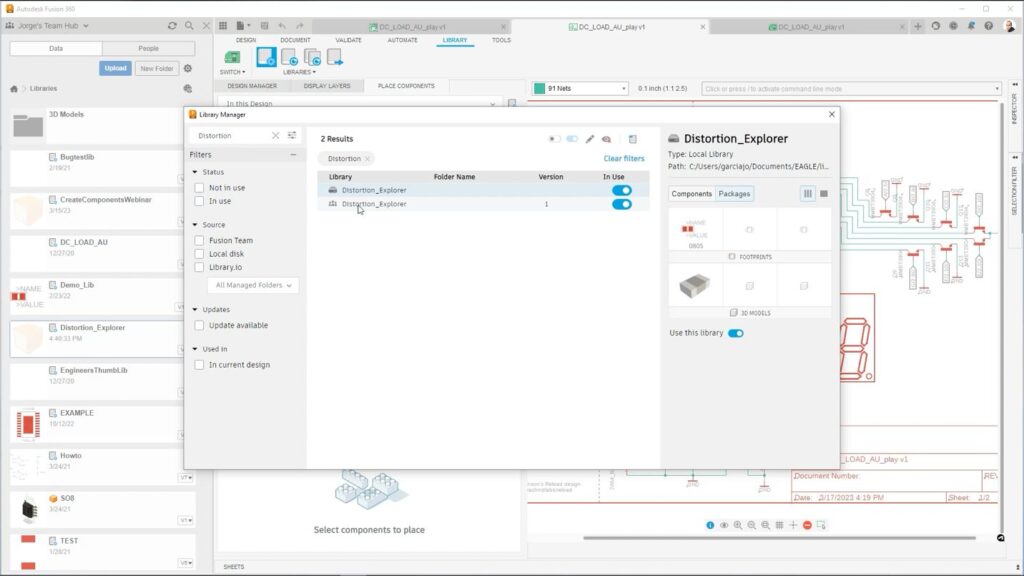
With the local library uploaded, return to the schematic design. From the Library tab, select Update Design from the selected library. Choose the library you uploaded located in the Team folder. Repeat this action for every library that pertains to the uploaded design.
Step 4: Handling managed libraries
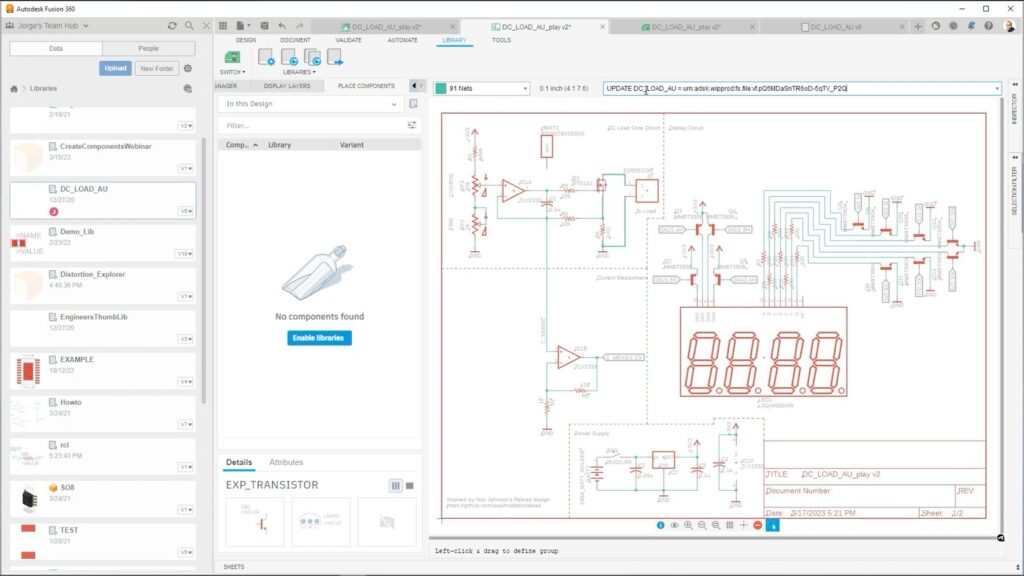
Managed libraries from EAGLE migrate automatically when you edit them. If you edit a managed library, the library will open and save to Fusion Team where the assets are stored. You can then remove the managed library from the library manager as you will want to reference the Fusion library you have opened and edited.
There is no need to migrate a managed library to Fusion 360 if you don’t intend to edit the parts. It will migrate automatically if and when you decide to make changes to that library. You will want to then update the design to reference the new Fusion 360 library as we discussed in the previous step.
Migrating your existing designs to Fusion 360 electronics is simple. It’s even easier if you know what to expect, and the benefits of migrating to Fusion 360 Electronics are undeniable. Follow this link to a detailed guide for EAGLE users moving to Fusion 360 Electronics.
Haven’t tried Fusion 360 yet? Get started today with unified electronics design.