V.2.0.4358
Fixed an issue that was causing Fusion 360 to crash when selecting edges with Plane at Angle active and holding down the CTRL key.
Fixed an issue where the sketch palette was appearing blank after making a sketch, closing it without saving, and restarting Fusion 360.
July 26, 2018 Product Update – What’s New
V.2.0.4343
[toc]
If you are using a Windows 7 computer make sure to check out this forum post!
Usability
🎁 New! Custom Keyboard Shortcuts are here.

In our last update, we introduced the “more options” button next to each command in the toolbar drop-down menus. Now when you access it for a specific command, you’ll see an option to assign custom keyboard shortcuts (CKS). This project has been years in the making, and it has finally dropped as a first iteration! Oh man. This is where the fun begins.
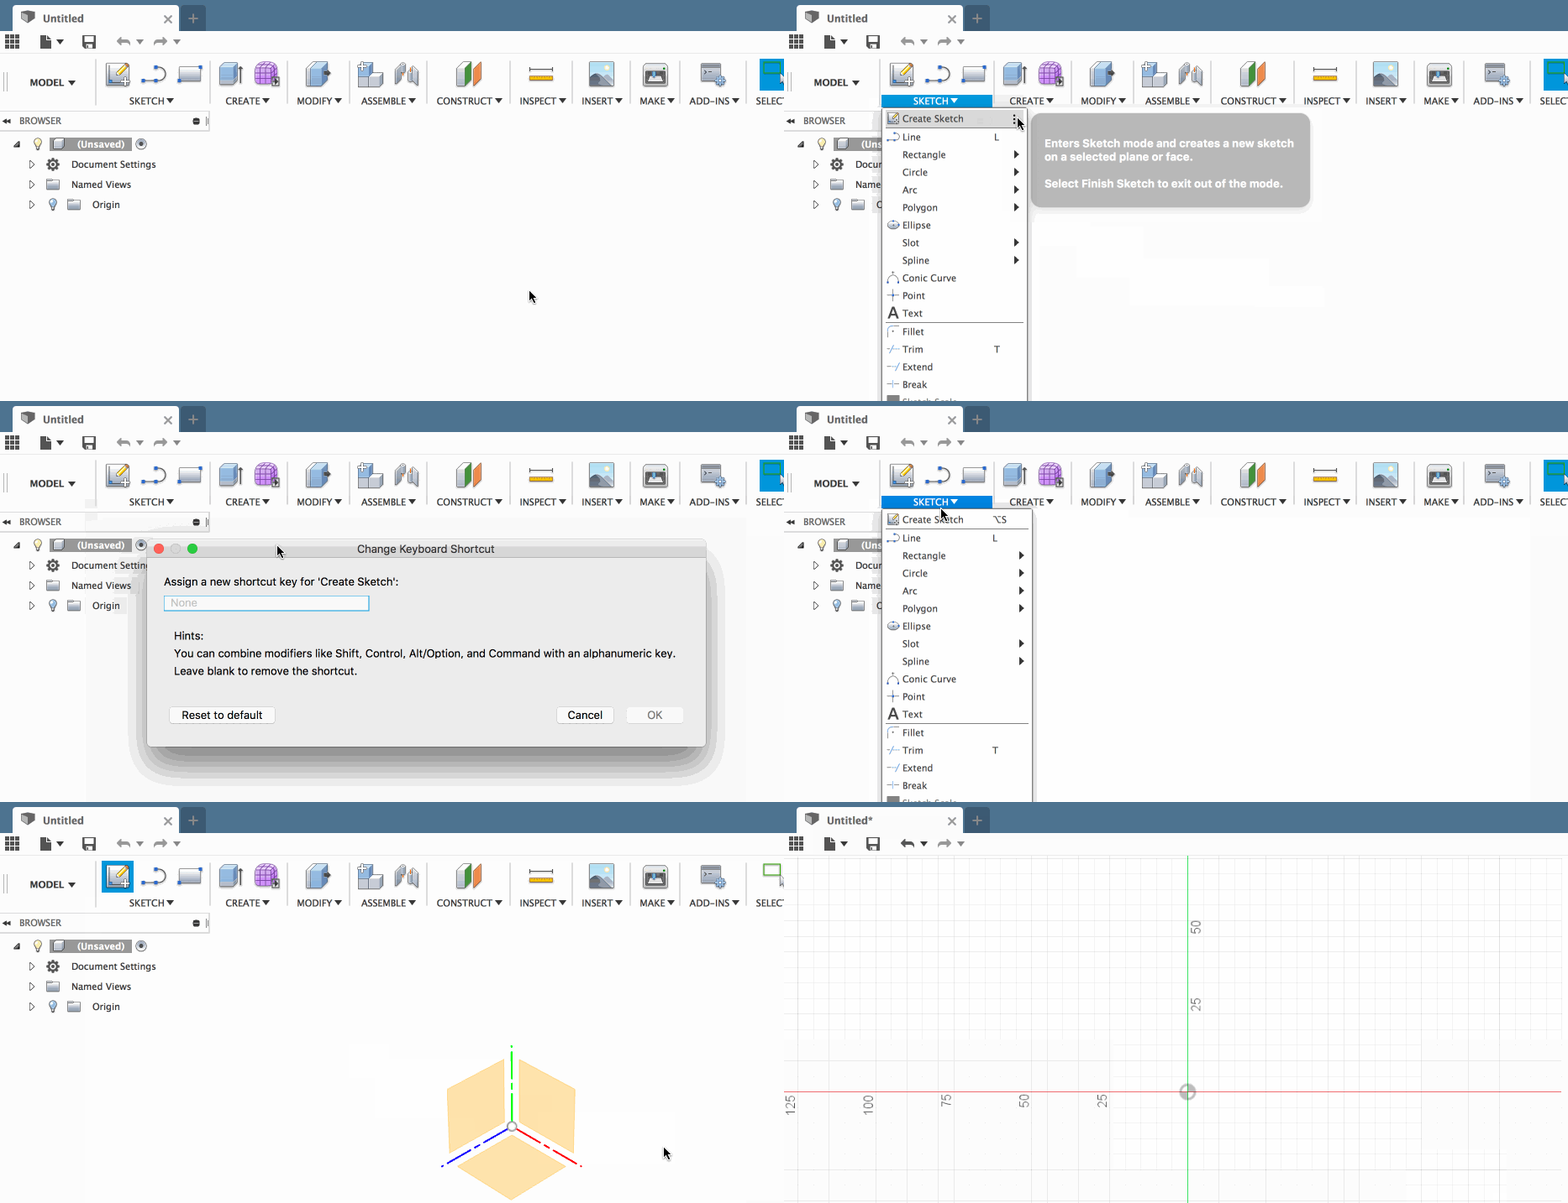
- Accepts Alphanumeric keys
Pressing an alphanumeric key in CKS will set that command with that key. Then use that key to launch the associated command. Press another alpha key, and the new one will replace the existing alpha key.
- Accepts Modifier key combos
You can also use modifier keys such as Shift, Control, Alt/Option, and Command to add on to your alpha key. You can also combine modifiers to generate even more keyboard shortcut combos. Press Delete or Backspace, and it’ll clear the entry. Leaving it blank will get rid of the key for that command. As a heads-up – Numpad keys on their own are also reserved, but you can use modifiers with the top-row (R1) numbers (except for SHIFT + number, they don’t work so well).
- Shows what is already assigned
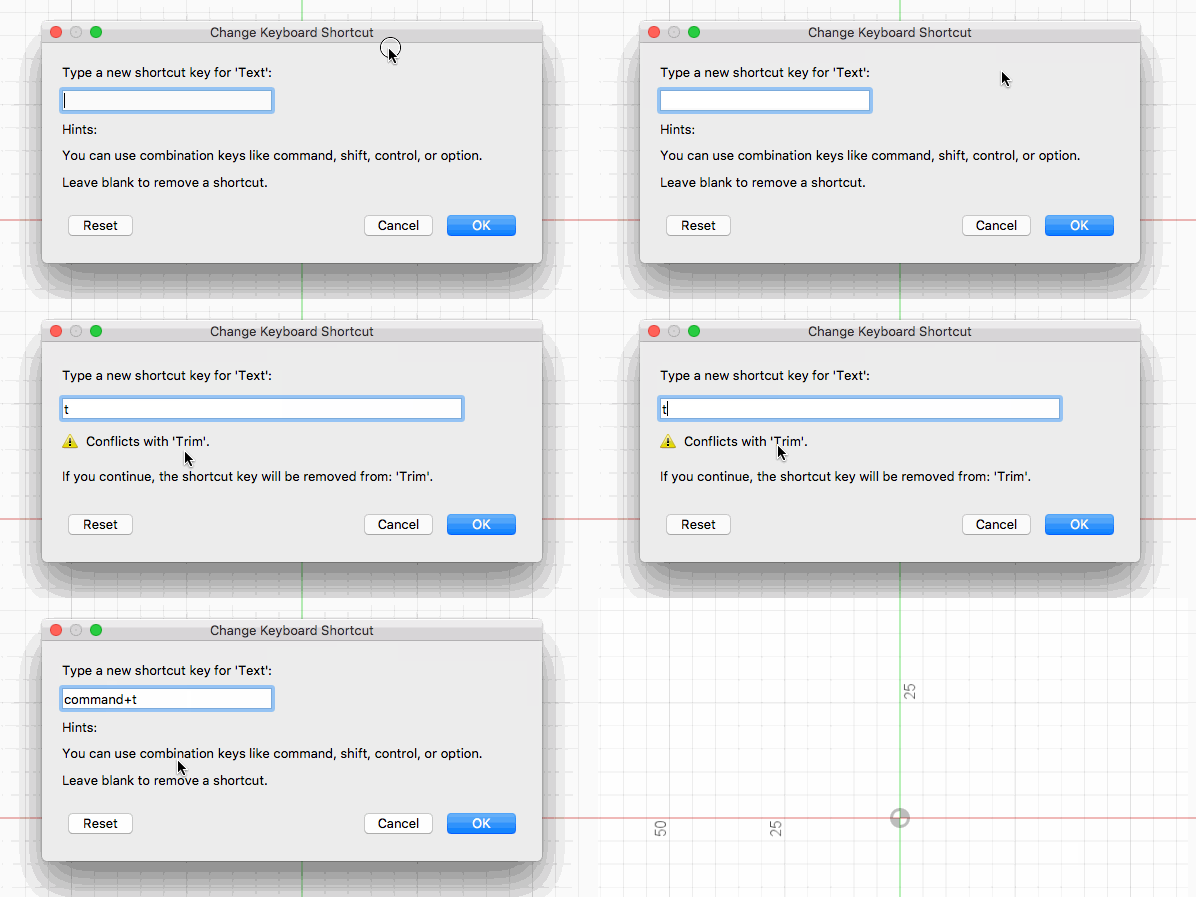
If you enter a key that is already used by another command, CKS will let you know which command is using that key. You can decide whether you want to use a different key or override it. If you override it, the affected command will no longer have a key set.
- Saves to your Fusion 360 account
We’ve also instrumented CKS in a way that it will be saved in your Fusion 360 account, so they go wherever you go. Log into a different machine with Fusion 360 and voila, launch commands like a boss.
Here are a few FAQs and answers we think you’ll find useful:
Can I use more than 1 alpha key?
- No. CKS will take any combination of modifier keys but will only take 1 alphanumeric key.
Can Finish Sketch have a key combo?
- Yes!
Can I assign keys to Stop Sketch?
- Yes!
Why can’t I use Command + S as a custom key combo? What’s up with that?
- Some key combos are off limits to CKS since they have system level priority. These key combos are:
- Undo: ctrl+Z (Windows), command+Z (Mac)
- save: ctrl+S (Windows), command+S (Mac)
- copy: ctrl+C (Windows), command+C (Mac)
- paste: ctrl+V (Windows), command+V (Mac)
- cut: ctrl+X (Windows), command+X (Mac)
- redo: ctrl+Y (Windows), command+shift+Z (Mac)
- open: ctrl+O (Windows), command+O (Mac) (currently work-in-progress)
Is there a way to see all the custom keys I have set instead of individual ones?
- Not yet, but we’re working on it as phase 2 of this project.
What else are you doing for Phase 2?
- We’re working on giving you keys for display setting > visual style, keys for view-cube views, and better ways to share your custom keys with your team.
👍 Improved! Toolbar Drop-down menus no longer stretch with the panel size.
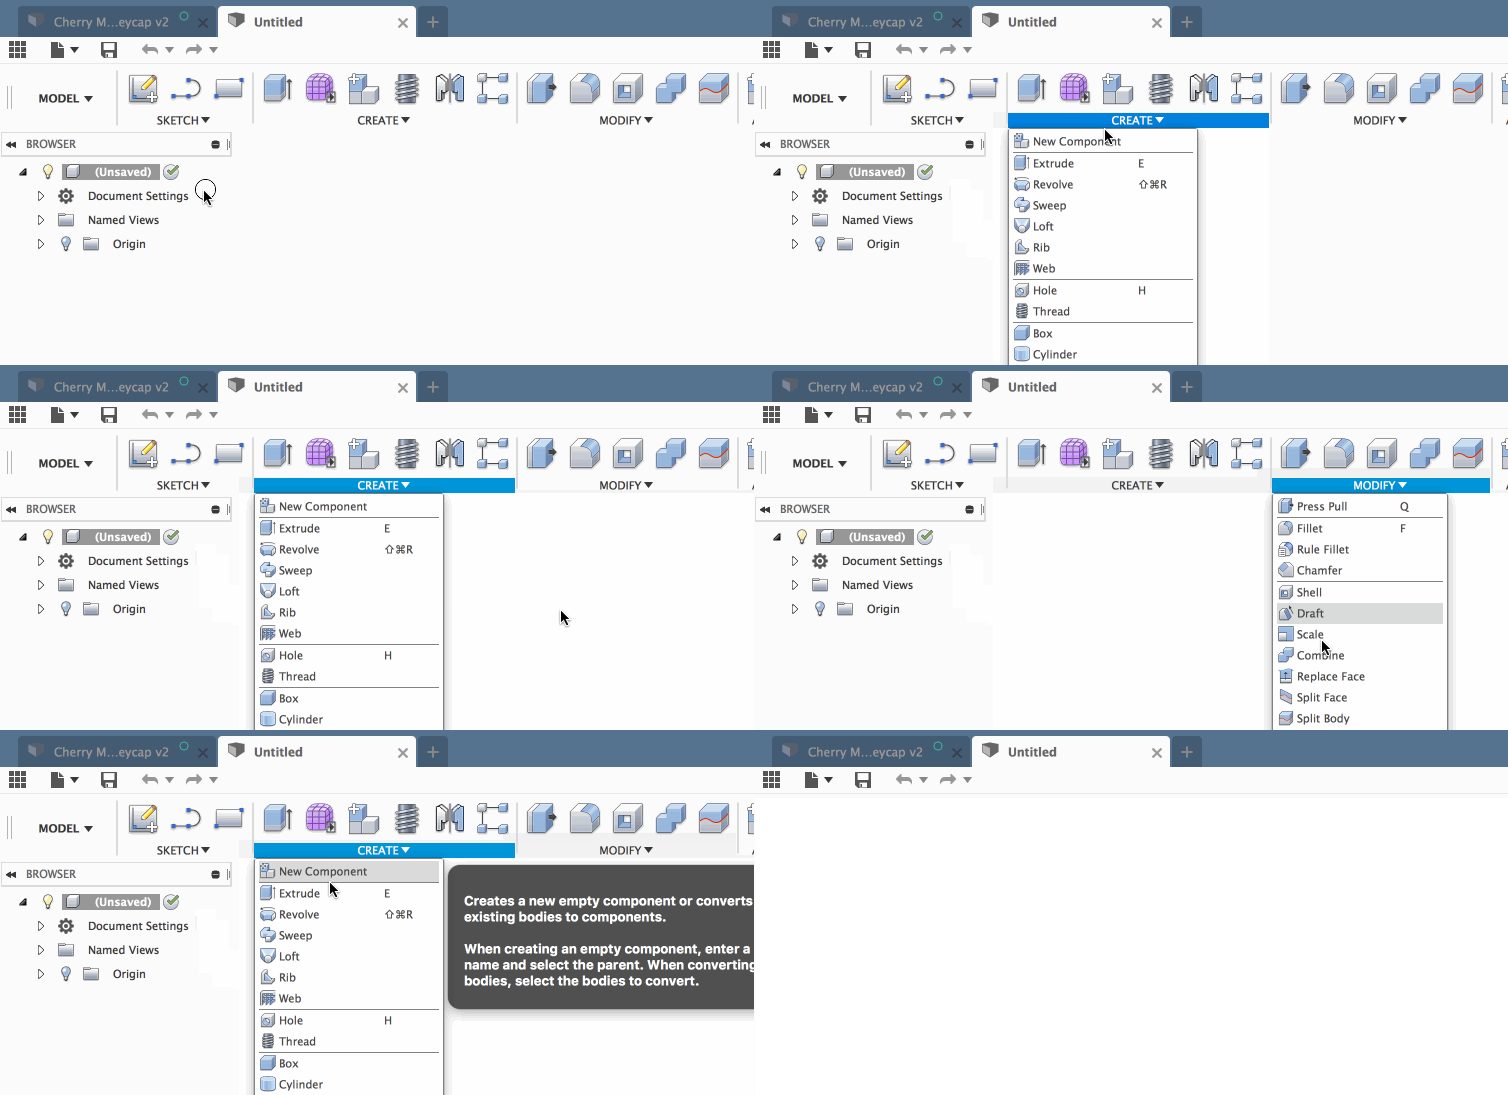
Previously when you added more tools into a section of the toolbar, the drop down menu stretched the whole length of that panel, making the menus excessively big. Now we’ve aligned the drop-down menu to the left so that it feels more natural and you no longer have really wide menus.
💪 Command dialog fixes
Due to our recent color changes, there were a number of areas in the command dialog that felt a bit funky. Some dialogs were using their own code, so we had to wrangle them all in for them to look and feel the same across Fusion 360.
- Some of our command dialogs have multiple tabs (especially in the CAM workspace), and some of them started to show incorrect heights, encroaching in the space below. This tab height wonkiness is fixed.
- Some drop down arrows were not behaving properly with drop down borders on Macs. They were encroaching outside of their allotted space, which was a no-no. Now they are properly contained.
- Icons in the active selection of a drop-down menu disappeared every time you went to make a selection. The icon should have been visible at all times, so now it is.
- Apparently, label texts in command dialogs reacted to your clicks, turned red, but did nothing. Now they are static text, the way they should be.
- Disassociated features in the timeline (yellow) turned green when you select over them, which was kind of cute but was overall confusing. This wasn’t the time to teach you red-yellow-blue color model. Now when you choose a yellow feature, the selections create a blue outline around the feature.
- We tidied up some code that addresses the issue of the weird viewcube behavior reported by David_Ewen. We think we patched this up, but to double-check, please let us know if it got better David!
Modeling & Sketching
🎁 New! Control Point Spline tool.
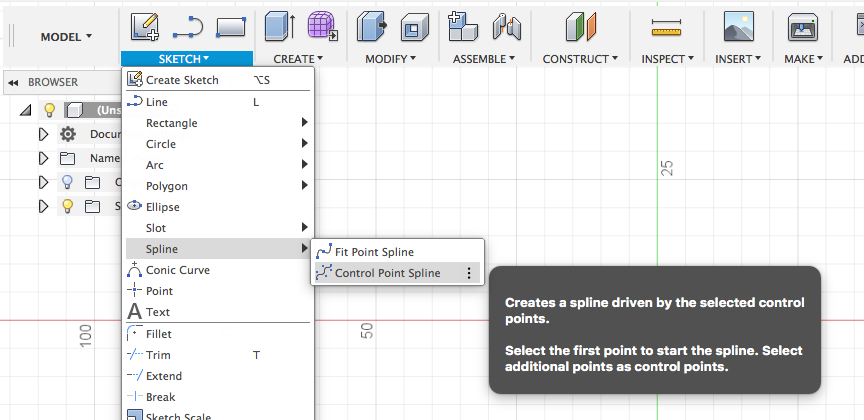
We talked about this in past roadmap updates and blog posts, and now it’s here. When you’re in Sketch mode, you’ll now be able to create splines with control points. Yes, it does exactly what you think it does! It gives you a new way to control the curvature of your spline. When you’re in the command, a point is created every time you click on the sketch plane.
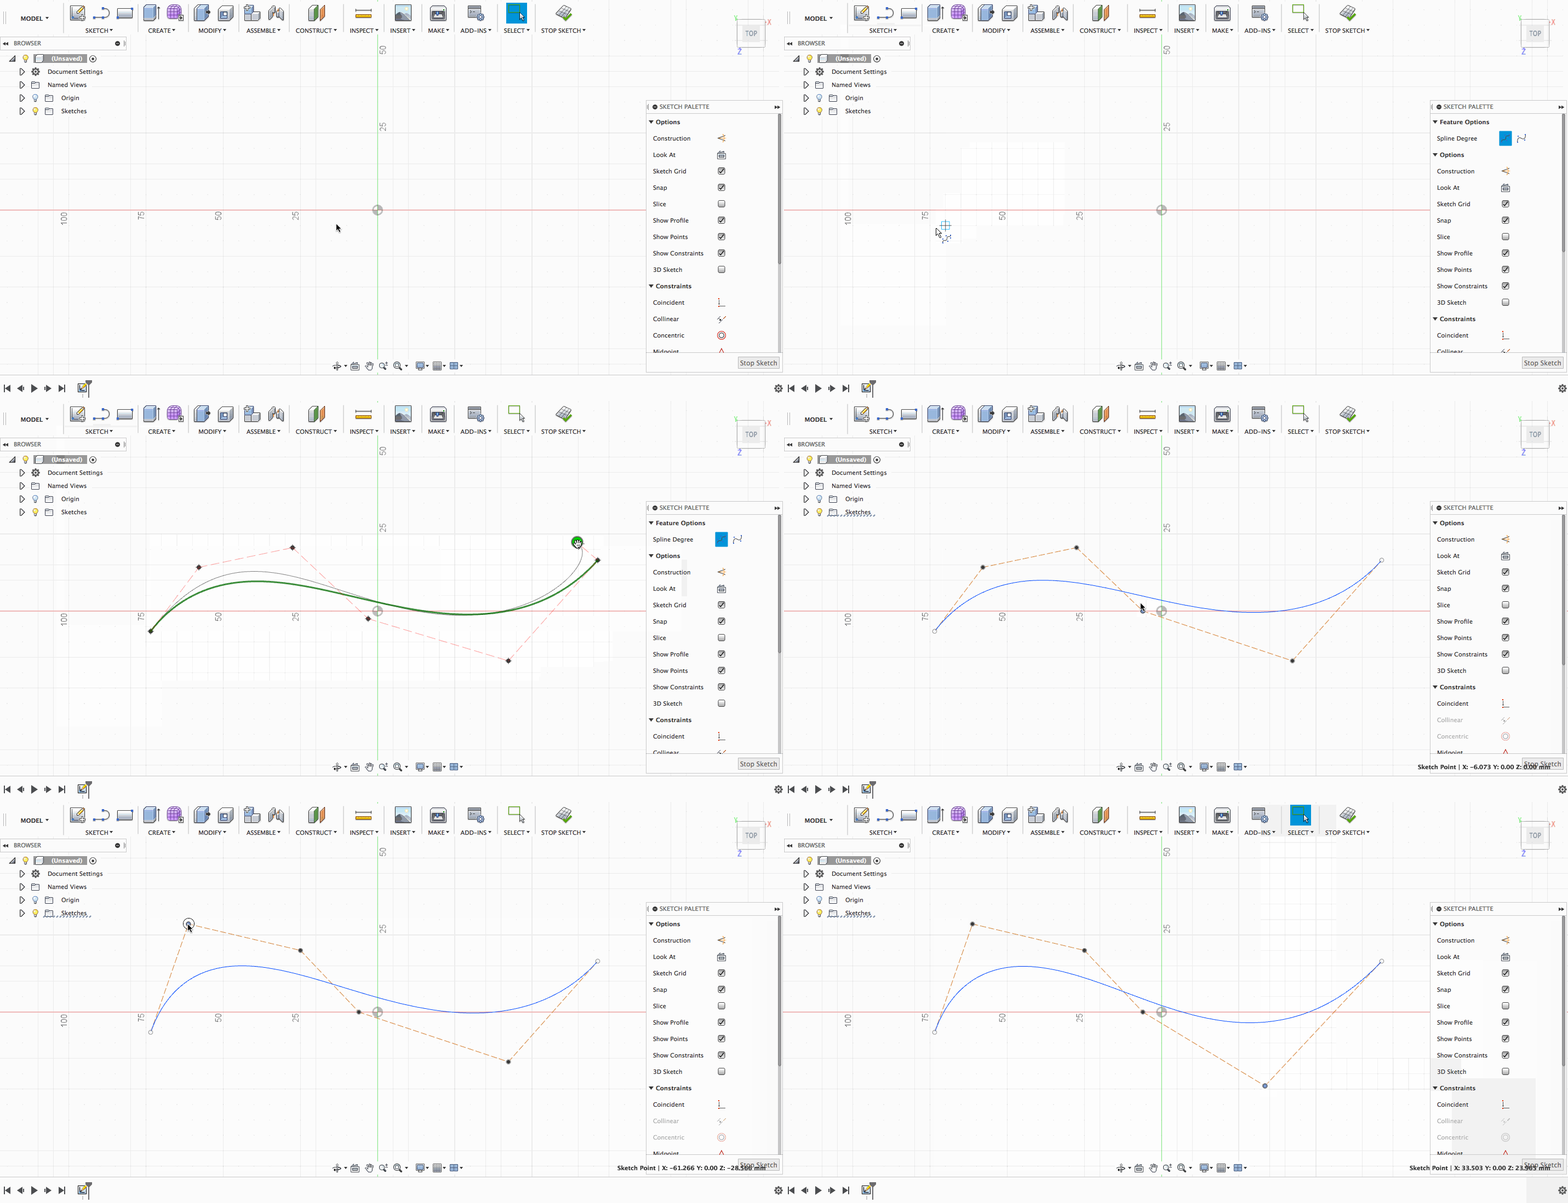
We’ve also made it context-aware, so it’ll default to the appropriate type of control point spline depending on what you’re using it for. After the spline is created, clicking on it will give you access to the curvature comb analysis of the spline, where you can tweak the density of the comb to better see the accuracy of the curvature.
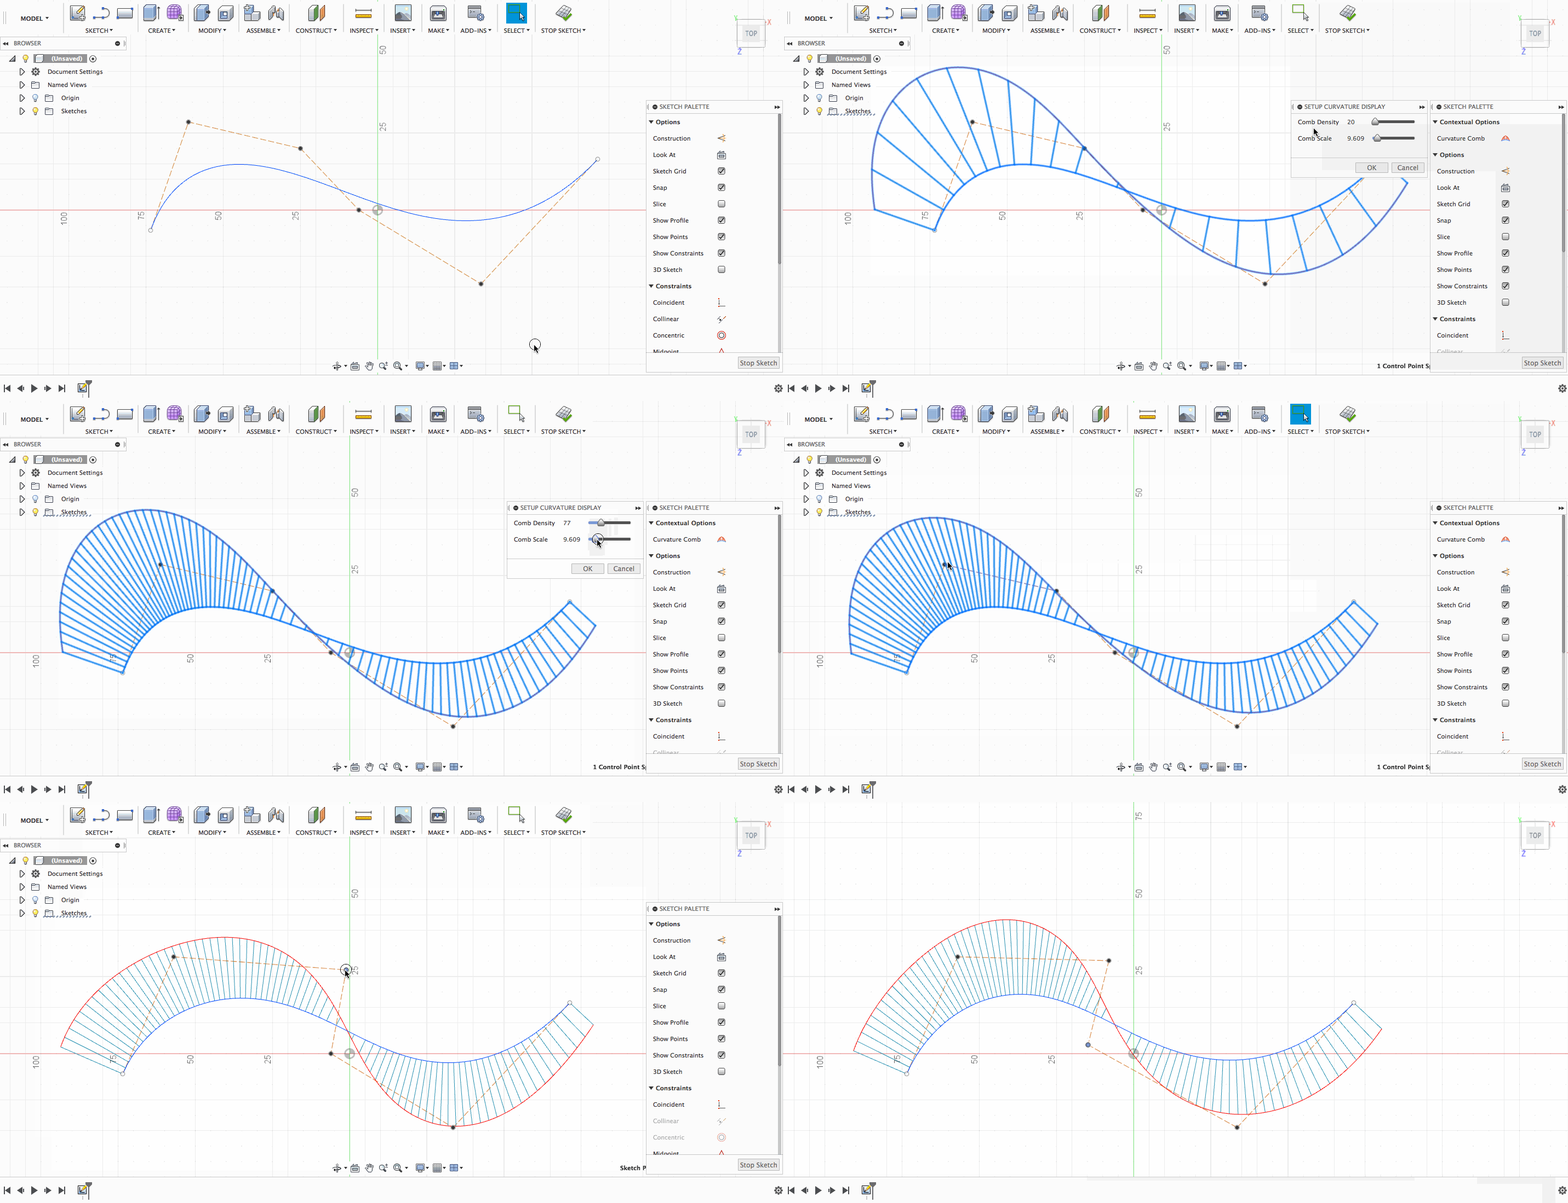
The eagle-eye in some of you may have noticed that when you start the Control Point Spline tool, a Spline Degree control is available in the Sketch Palette: this lets you choose between creating Degree 5 and Degree 3 splines. The default is degree 5, which is recommended in most cases. However, in the Sculpt environment, this will default to degree 3, since degree 3 splines can provide improved behavior when modeling with T-Splines bodies.
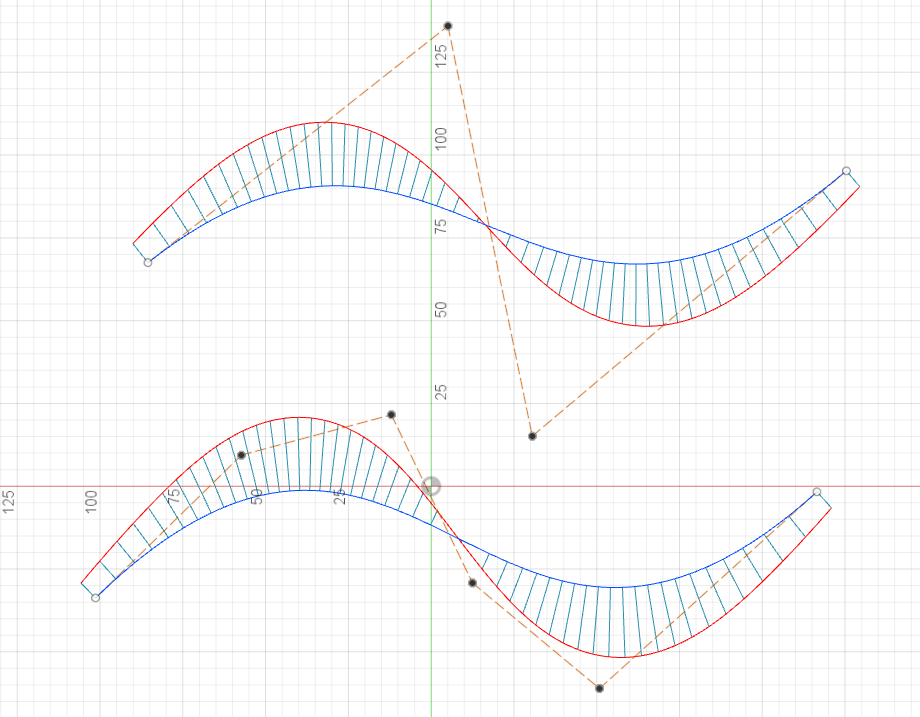
If you want to dive deeper and learn more about the value of control point splines, check out our Fusion 360 UX designer extraordinaire, Jake Fowler’s Control Point Spline FAQ blog post.
👍 Improved! Constraint descriptions are now more…descriptive.
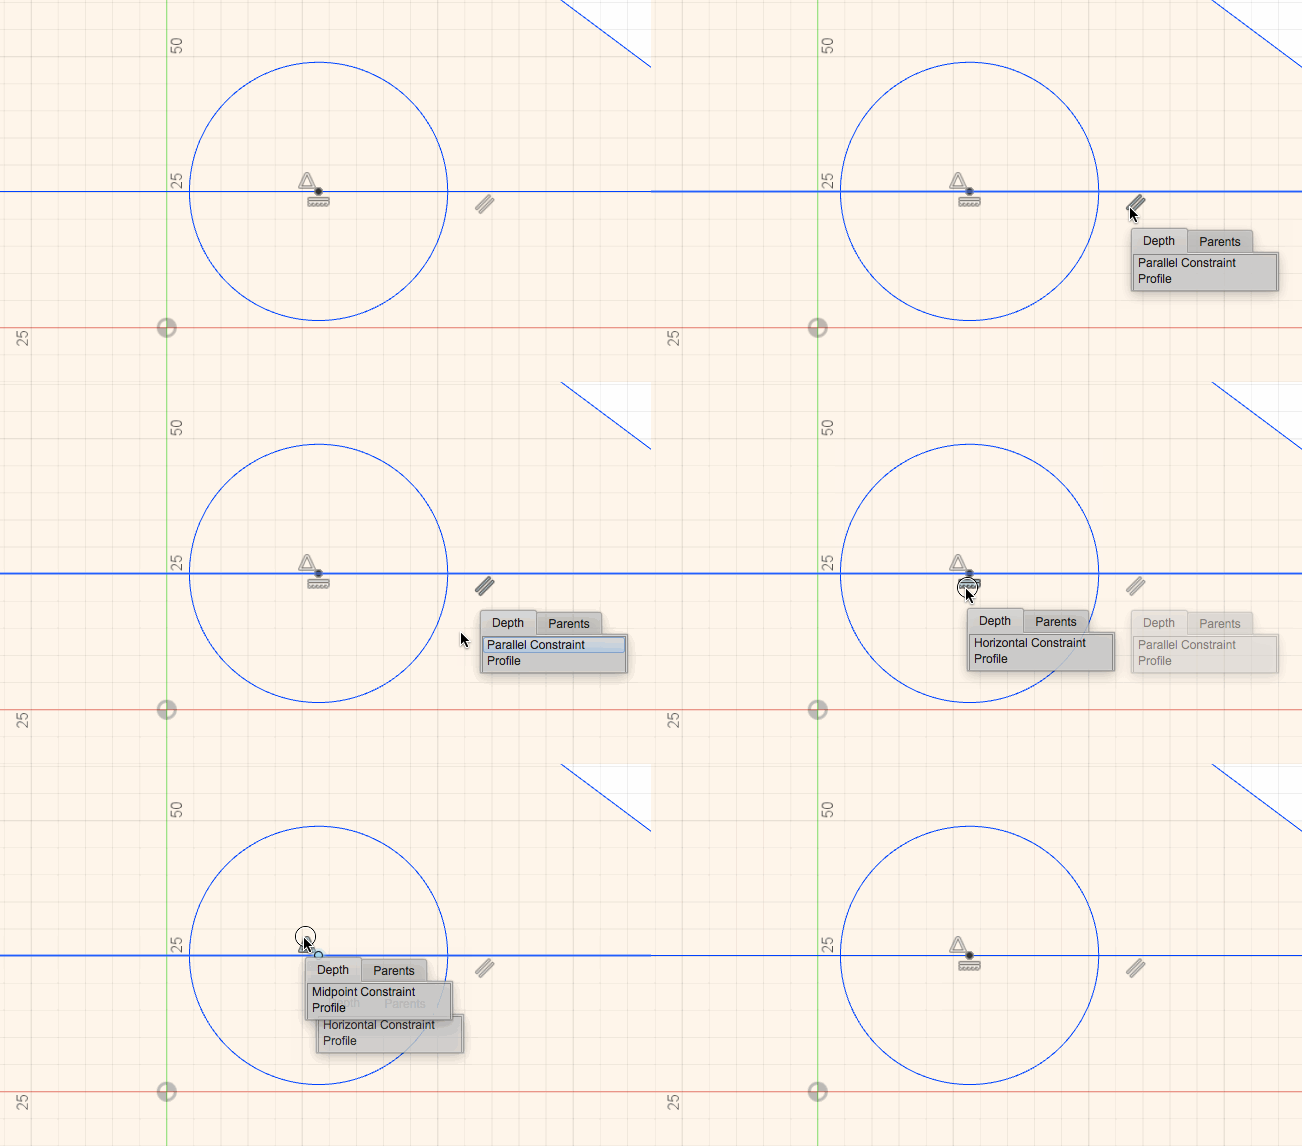
Previously when you clicked and held you click on a sketch constraint, you’d get a generic “sketch geometry constraint” description. We knew that you knew that, but Fusion 360 didn’t. Now when you do the long click, the description shows what that specific constraint is, as it’s intended to do.
👍 Improved! Editing a Rectangular Pattern now gives you options to re-select object and direction.
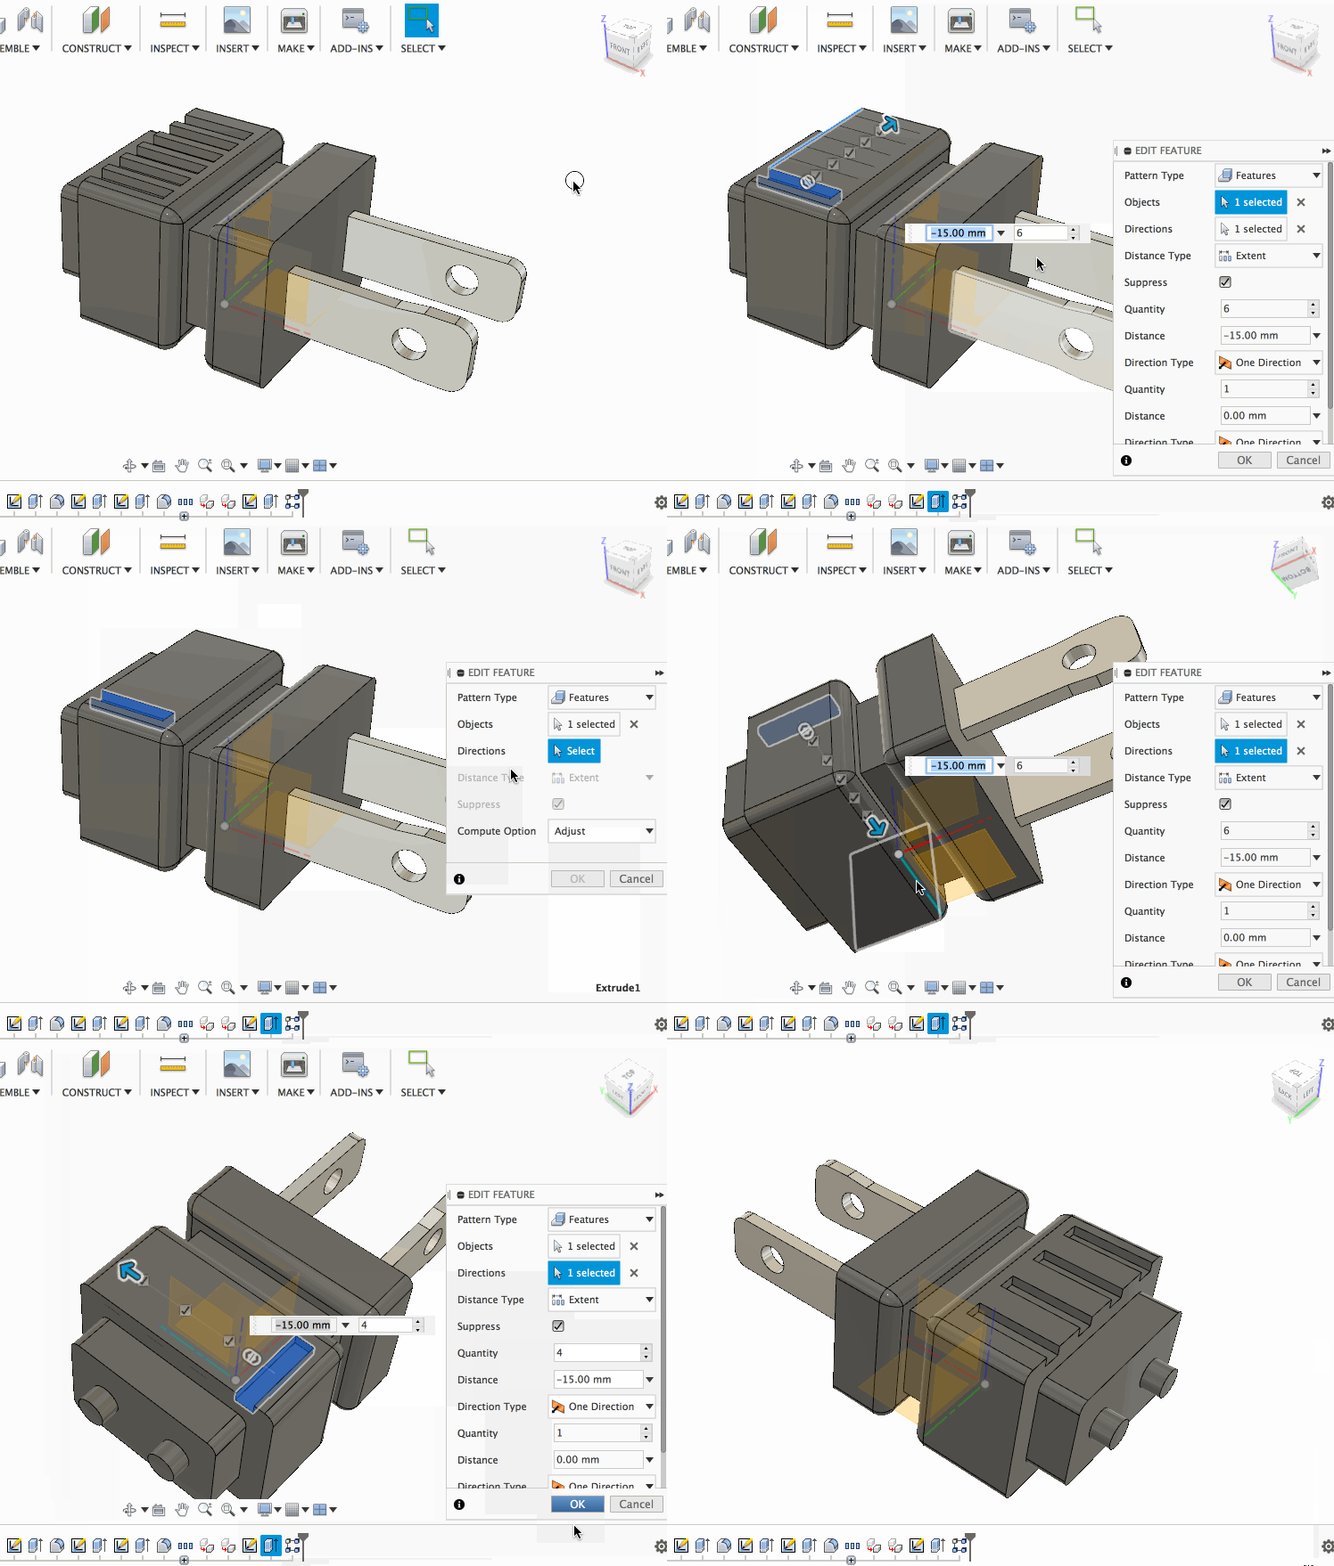
Aely.aro raised a subtle yet important inconsistency in the Edit Pattern Feature dialog. Now when you go back and edit a rectangular pattern feature, you’ll be able to re-select the Objects as well as the direction you want the pattern to go. Previously these 2 options were missing, making it pretty frustrating to tweak.
👍 Improved! Modeling Kernel and Loft robustness
Have you ever ran into the Loft error “The rails do not intersect all profiles” even though the rails should intersect all profiles? Yeah, me too. And so has michael55SE4, thing.thing, geboyesen, bwaslo and pretty much anyone else who has tried using complex splines as rails. Fortunately, we made some significant improvements to the modeling kernel and increased the tolerance range that determines whether rails actually intersect profiles or not.
👍 Improved! More reliable Sketch projections
If you’re anything like me, the majority of your sketches end up having projected geometry inside of them. However, in the past, we were a bit messy about how to handle situations when users had the “Auto project geometry on active sketch plane” box checked in their Design Preferences. The biggest issue was that if a user created a sketch on a face with this preference on, and then manually projected that face into the sketch, we would end up with two sets of overlapping projections. Alas, we have fixed this behavior, such that only one set of projected entities appear.
Another weird issue was if you had the “Auto project edges on reference” box checked, Fusion 360 would often project superfluous geometry. Now we only auto-project geometry into the sketch if a constraint is being added to the newly-created sketch entity.
These enhancements should make your sketches more manageable, more reliable, and perhaps even a bit faster!
💪 Notable Modeling and Sketch fixes:
- We noticed a decrease in performance speed when sculpting with T-Spline bodies in the Sculpt environment. Apparently, there were some optimizations we needed to do around the modeling engine – now the performance is back to where it should be.
- When we saw this post from inspectionsCMYEB, we decided that we needed to solve the mystery around the Move/Copy > Create Copy mystery once and for all. It was true that in the case of being in an active sketch the Create Copy option was there but was unselectable. Now when you invoke the Move/Copy tool (staying within an active sketch), you can check the Create Copy option duplicate your selection to a different location.
- khatton9KDD5 reported an issue where moving the fit point of a 3D Spline caused his sketch solve to break a coincident constraint. Apparently, our constraints could hit the gym and use some strength building. Now they are stronger and should hold a stronger bond.
- We’ve been tracking this issue for a while, and we think we’ve finally resolved it. Many of you have told us that there were times where Fusion 360 would come to a screeching halt when doing a Compute All. And no, it was not caused by broken references or unplanned design intent.
- HughesTooling noted back in April that when he added a circle or arc tangent dimension to his sketch, it weirdly made some sketch geometry disappear. No matter how many times we tell Fusion 360 that it shouldn’t perform magic tricks in front of users, it can’t help but slip in a few. Sorry about that. We’ve got it sorted.
- We fixed a bunch of solve issues when you tried to drag a sketch, especially a sketch offset. It did not have it with our test designs. Now it has learned to play nice.
- As part of a sketch projection issue, the center-point of a Center Two Point Arc Slot was being left out in the projection. This is now fixed!
- There was a weird case where if you had a sheet metal part and rolled the timeline marker back to when you created that sketch that the flange made from, you weren’t given the option to refold the sheet metal part. Now a Refold option appears in the toolbar.
- Last year we changed the naming conventions of our G1 and G2 options throughout Fusion, however, we missed one area. In sketches, when you would select two curves and then right click and attempt to apply a G2 constraint, the name was still “Smooth” rather than the “Curvature” name given elsewhere. Fixed!
Generative Technology
We introduced Generative Design Technology for Fusion 360 back in April, and have been hard at work deepening the integration, introducing new functionality, and a variety of other improvements. Here are some things you should know about.
🎁 New! Deleting multiple projects
Now you can delete multiple projects at the same time by going to the Data panel icon, multi-selecting the projects you want to remove, and then right-clicking to delete.
🎁 New! Pinned constraint in Define workspace
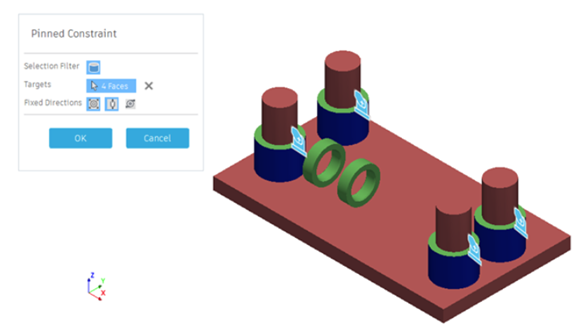
This new constraint type will allow you to prevent the target cylindrical face from moving or deforming in the radial, axial, or tangential direction. Apply it to the selected cylindrical face, based on a cylindrical coordinate system. If you apply the Radial pinned constraint, nodes along the cylindrical face can’t move or deform radially.
🎁 New! Bearing load in Define workspace
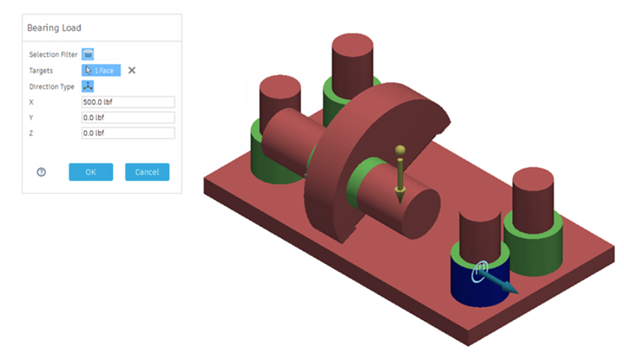
Assign a bearing load as a force of the specified magnitude applied to the selected cylindrical face or faces using a parabolic distribution. You’ll need to specify the magnitude of the load for the appropriate vector components. Note that the bearing load vector can’t be coaxial to the cylinder axis.
👍 Improved! Materials are now in the browser.
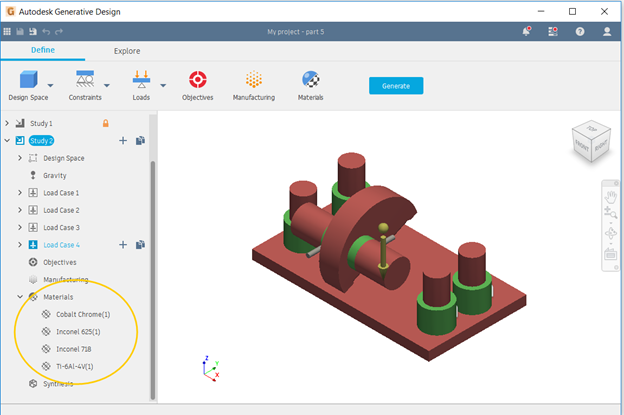
The list of materials selected in a study is available in the Browser. You can open the Materials dialog from the Browser by clicking the icon next to material name.
👍 Improved! Materials dialog now has search.
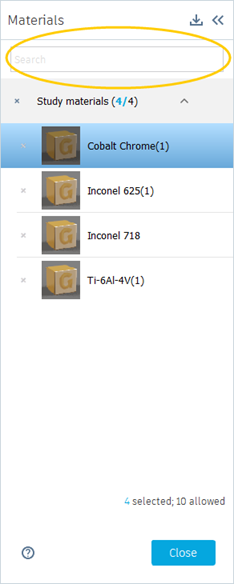
You can search the list of materials in the Materials dialog. Keep in mind that the Materials dialog only shows the materials used in the study.
👍 Improved! Better export experience in Explore Workspace
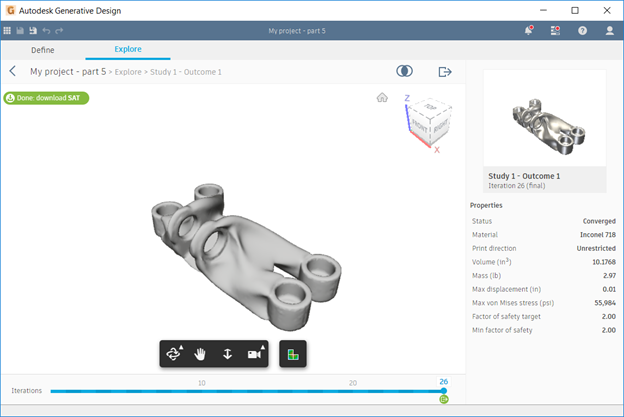
Now the Outcome export filters display only when a project includes at least one exported outcome. Also, we’ve made the status of your export more clear, changing “Buy SAT file/STL file” to “Export SAT file/STL file”, letting you know when something is exporting and when it’s done, giving you the option to download via the same UI in the top-left corner.
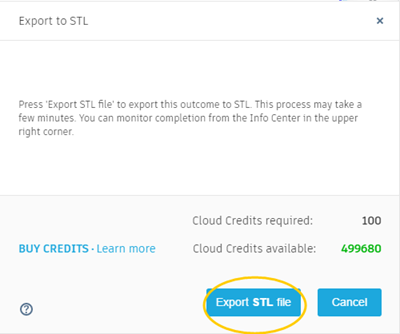
For more details on Generative Technology, check out the help page.
Previews
🎁 New! Tabbed Toolbars UI Preview
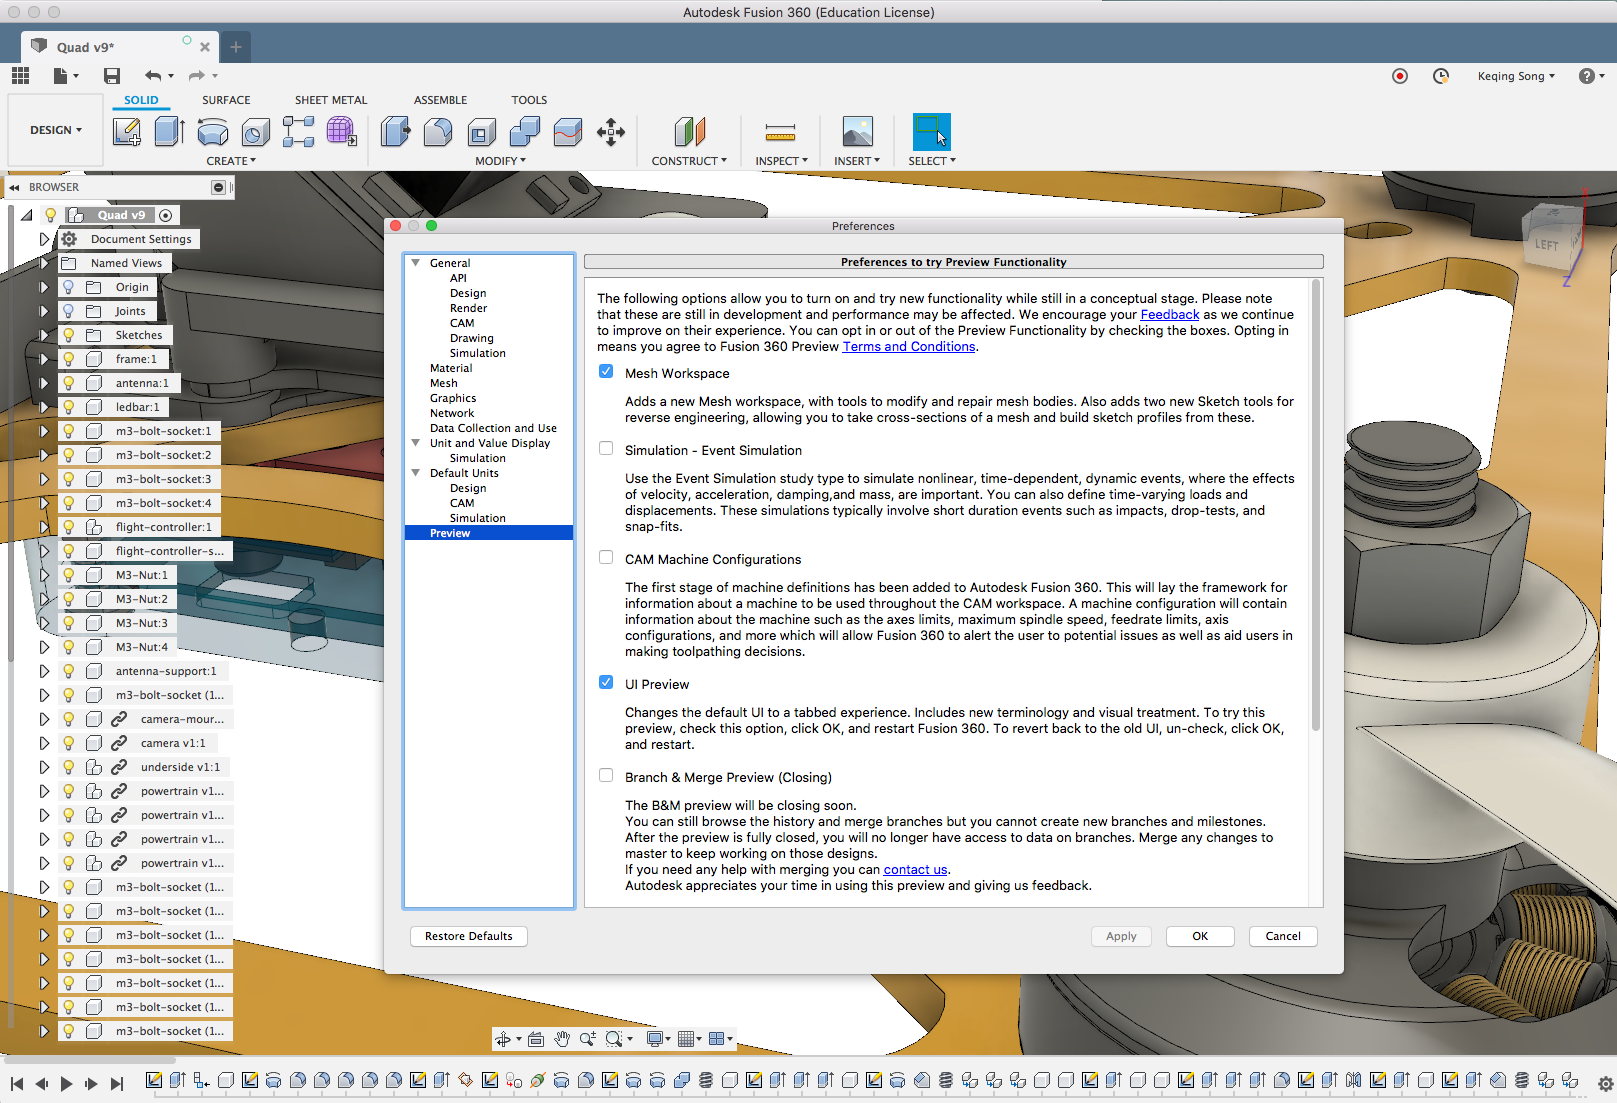
Back in June, we shared our thinking around where we’d like to take our UI and UX, and how we’d like to improve the experience so that it is more scalable, usable, and more stable. Now is your chance to try out a new toolbar experience called tabbed toolbars.
If you haven’t read through that post, I highly recommend that you do so! It’ll help you better understand on how to take advantage of the new tech preview and the benefits it has to offer. Keep in mind that this is still a tech preview – we are still developing and evolving the functionality. Some areas of the tech preview are still a bit rough around the edges and may not work the way we intend it to, and that just means we haven’t finished development on it yet.
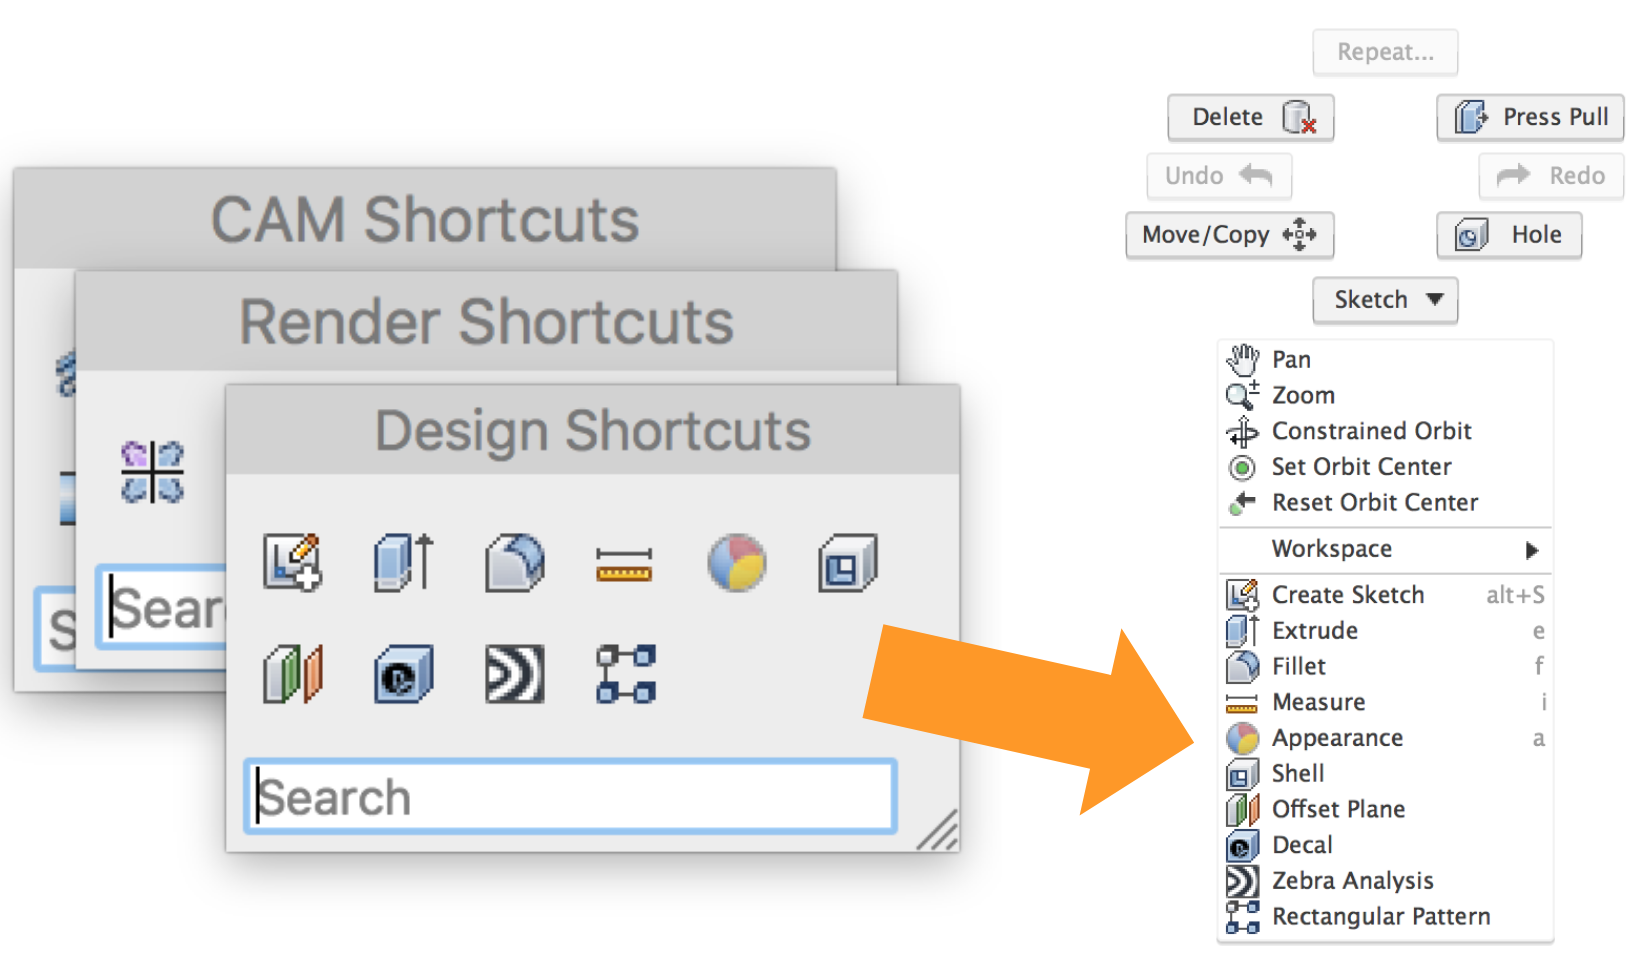
🎁 New! S-Key shortcuts and Right-click menu
In the new UI preview, you’ll also find that when you add tools to your S-key Shortcuts (previously known as S-key Toolbox), you get easier access to the tools you use the most. The list will collapse into a fly-out menu once you have more than 10 tools. You will also be able to access them via the right-click menu.
Your design real-estate is precious.
As a follow-up to all the UI feedback you’ve given us since the last update – we appreciate your honesty and support. One common thread we saw throughout all the forum posts and comments was the better use of horizontal space, specifically around the data panel bar, document tab bar, and app frame bar. We are very mindful of the UI not encroaching on your design space as we continue to evolve it, and are working towards a solution that will reduce the overall toolbar height, especially in a tabbed toolbar experience. Keep an eye out on the forums as well as social media for some concepts so that we can get your feedback!
Live Review preview has ended.
As mentioned on our last major update what’s new, we are ending Live Review preview technology. It had a good run, but the lack of usage and the overhead on us to maintain its on-going service suggested that we should focus on higher priority projects. Thank you for sharing your experience with us, we highly appreciate your input!
-Keqing and the Fusion 360 team