
Elevate your design and manufacturing processes with Autodesk Fusion
2.0.2139
Before an update goes live, our development teams always make sure to iron out any bugs that are lurking under the carpet, and we’ve made a lot of improvements that may not seem very apparent at first, but I assure you, there are A LOT. There were so many improvements in this update that listing every single fix would be information overload and would even make my own eyes glaze over. So without further ado, here is a summary of the more notable new features, improvements and fixes included in the update. Let’s do this.
2D Drawings
Summer is in full swing, which means the 2D drawings water sprinkler is on and sprinkling water all over the drawings workspace for new features to grow. Here’s a run-down on what made it for this update.
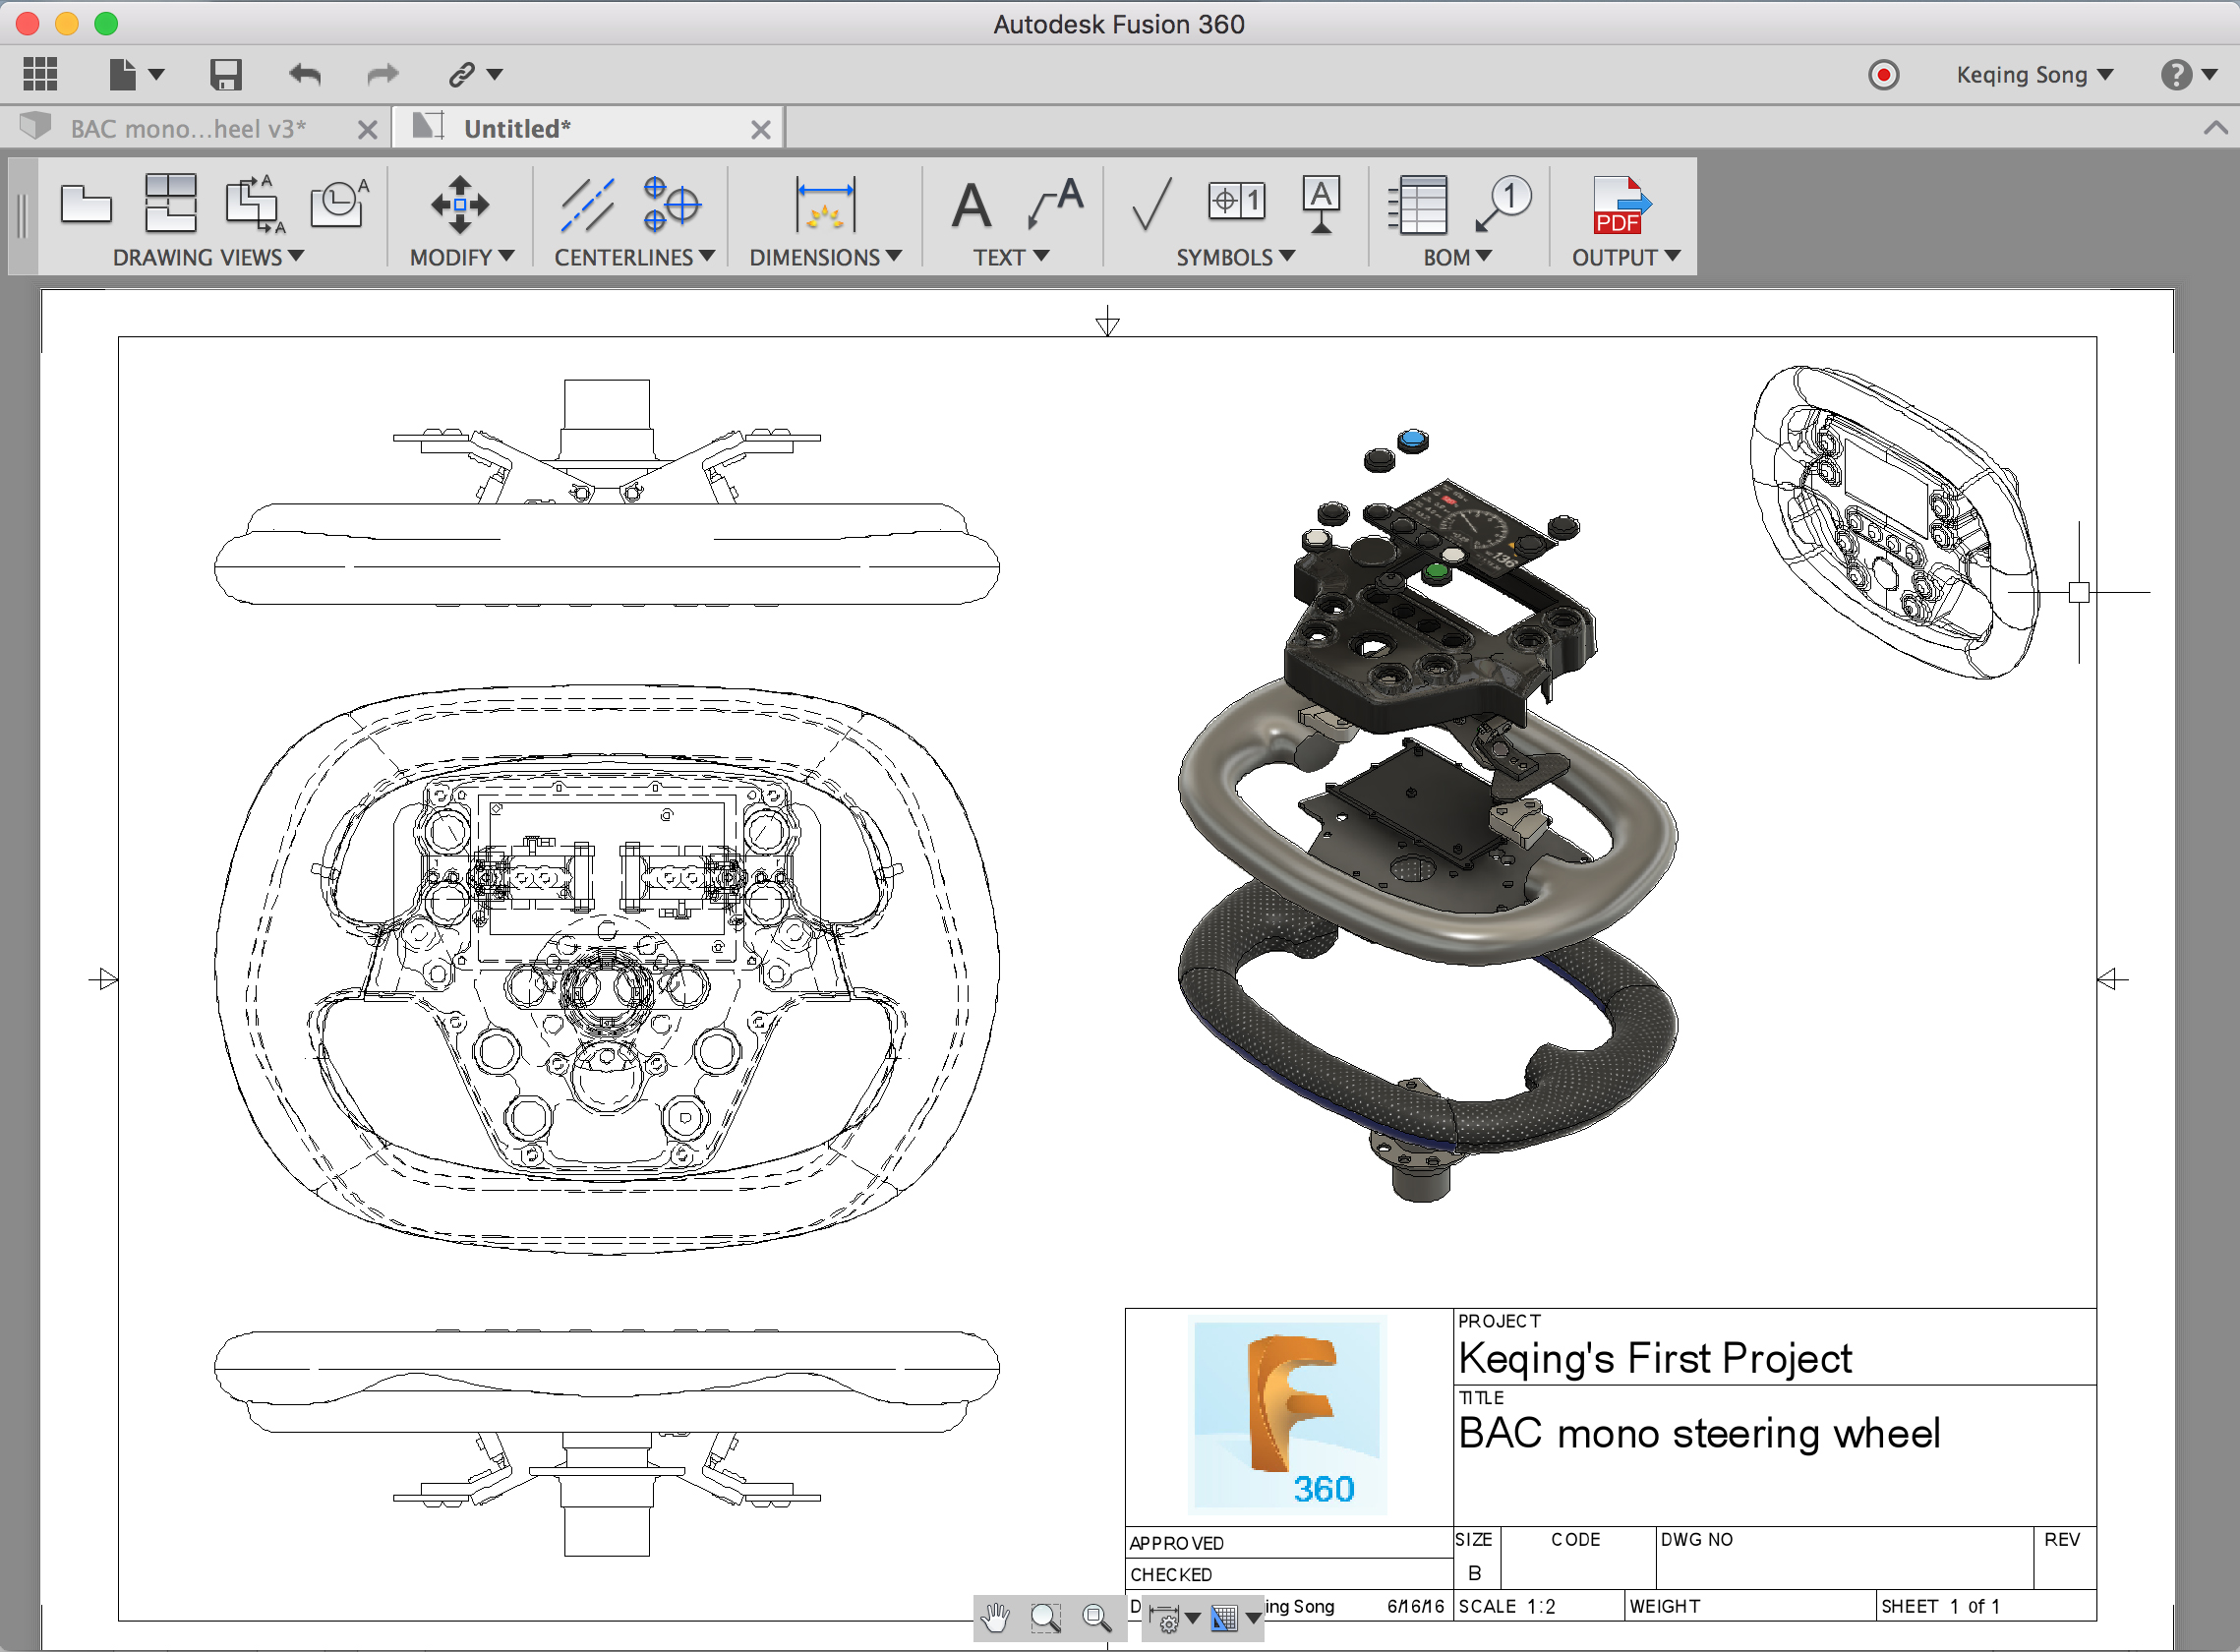
Title Block Auto-populate 
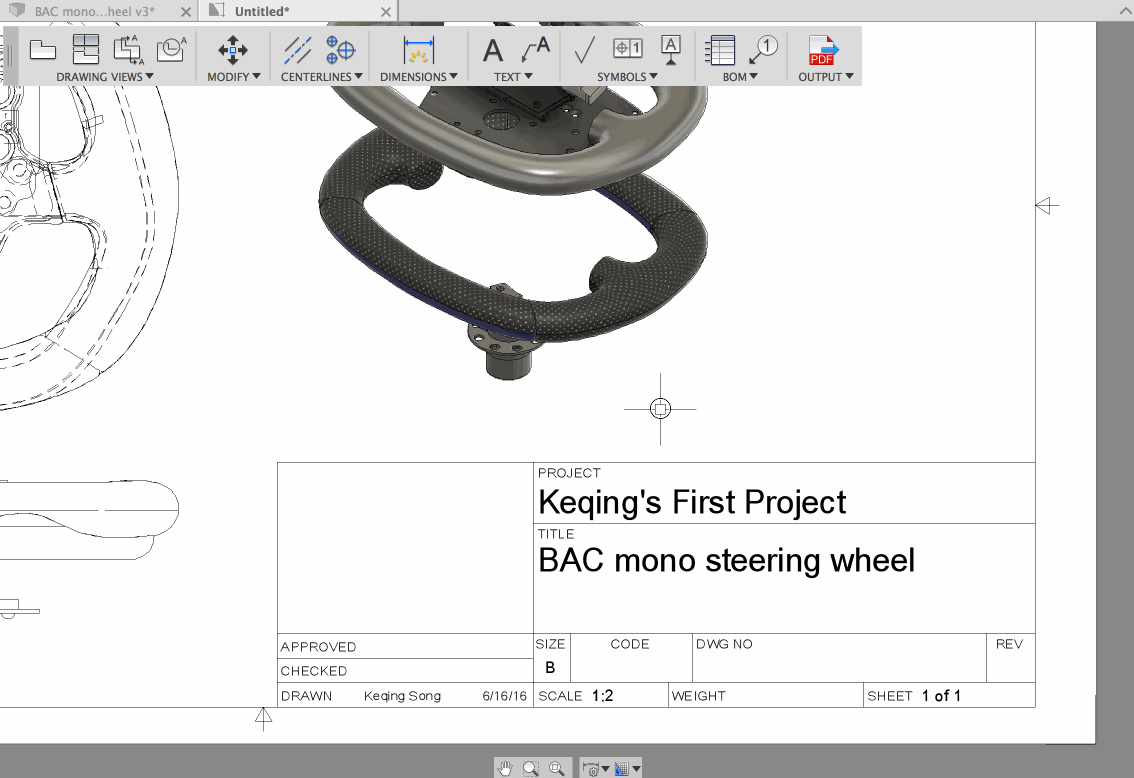
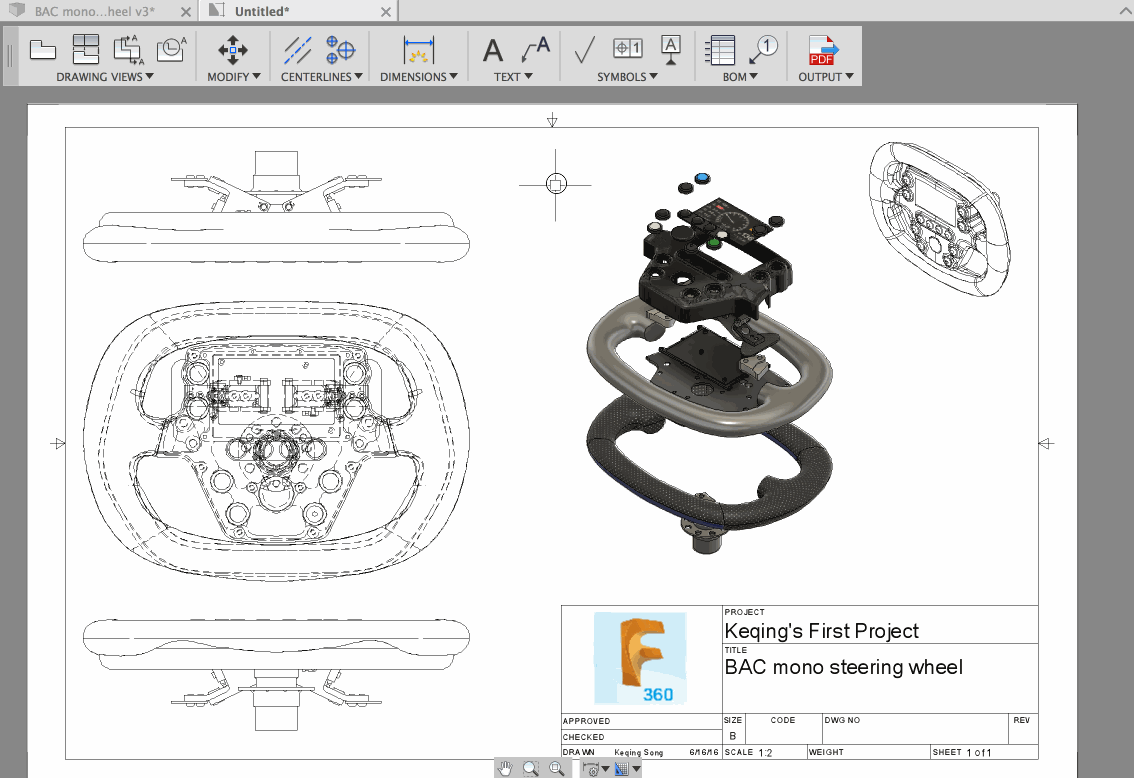
“I like busy work”…said no one. Now when you create a drawing based on a design you’ve created in Fusion 360, the title block of that drawing will automatically include the name of the design, the project it is saved in, the date it was created, your name as the creator, and scale. It’s about time you no longer have to enter them yourself. Want to make changes to the title block? No problem – double-click the title block, enter your own text in the various fields and it’ll update. Works for both ASME and ISO standards.

Title Block Insert Image
You probably noticed just now that the Fusion 360 logo in the title block. Yes – you can now insert your own custom company logo into the title block. In the title block editing dialog, there is an Insert Image option under Logo. Grab the image you want to insert, and then snap it to a corner of the logo area border. You can scale, move, and rotate it by using the options in the command dialog. Supports standard image formats such as jpeg, PNG, and tiff.
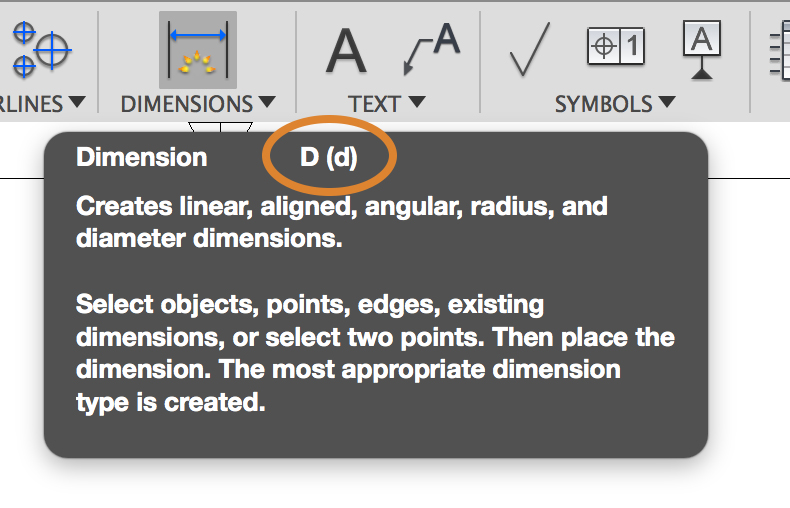
Keyboard Shortcuts
As we continue to expand our keyboard shortcut functionality across Fusion 360, we are introducing some handy ones for the drawings workspace. Now you can press the following keys to bring up drawing-specific tools quicker.
- P = Projected View
- M = Move
- C = Center mark
- D = Dimension
- T = Text
- B = Balloon
- Delete or Backspace = Delete
Don’t worry about trying to memorize them – if you hover over the tools that have shortcut keys associated to them, you’ll see it in the tooltip.
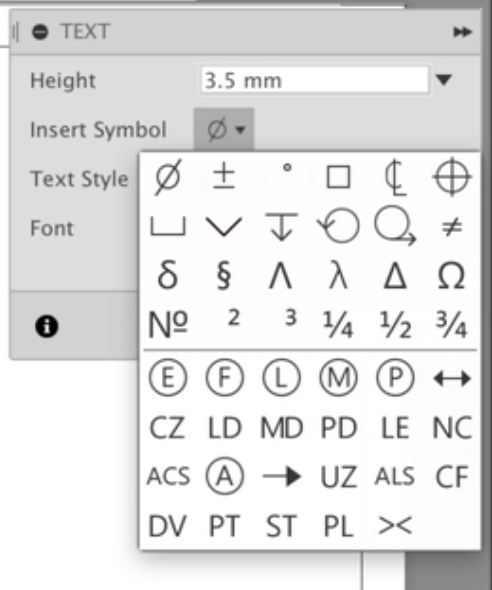
Symbols in Text, Dimension, and Leader Text
Speaking of text and dimensions, now when you’ve got these tools up, you’ll also have access to symbols right within the tool via a standard symbols palette.
Move Command Enhancements
Previously when you clicked on the Move command, the only feedback you got was the fact that you clicked on the command (highlighted in blue). It could be somewhat confusing since it didn’t give you any feedback on how many views you’ve selected, or how to move an object. Now we’ve added a dialog box that shows the number of selections you have, as well as a move point-to-point command, making it easier to use and more consistent with Fusion’s overall UI.
Multi-Asset Support
Ever wanted to show an isometric view as well as an exploded view of your design side by side on the same drawing? Now you can. The reason why this functionality is called multi-asset support is because an isometric view comes from the model asset whereas an exploded view comes from the Animations asset, hence multiple assets on one drawing.

Pre-assigned Layers & Migration of Old Drawings
Previously when you wanted to make touch-ups to a Fusion drawing, you exported and opened it up in another CAD software, only to find out that everything is flattened on one layer. Now we have layers for views, annotations, title block, border, etc. The second phase of layer improvements will allow you to see and manage layer properties within Fusion itself.
We also made a few notable fixes to the 2D drawings workspace.
- We found a bug where if you moved the title-block using the move command within a 2D drawing, it would sometimes crash Fusion. Not good – now it’s fixed.
- Previously when you created a drawing and placed a shaded view and a non-shaded view on the drawing, saved the drawing, re-opened it and tried to change the style settings, you weren’t able to change them. Also, if you changed the scale of the shaded view, the shading would disappear. This is now fixed.
- There have been some weird non-english tooltip-on-hover behaviors where the tooltip would show a bunch of 0s (as well as a 1). We got this sorted out.
Design & Modeling
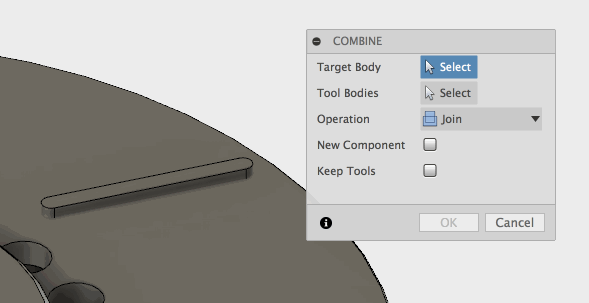
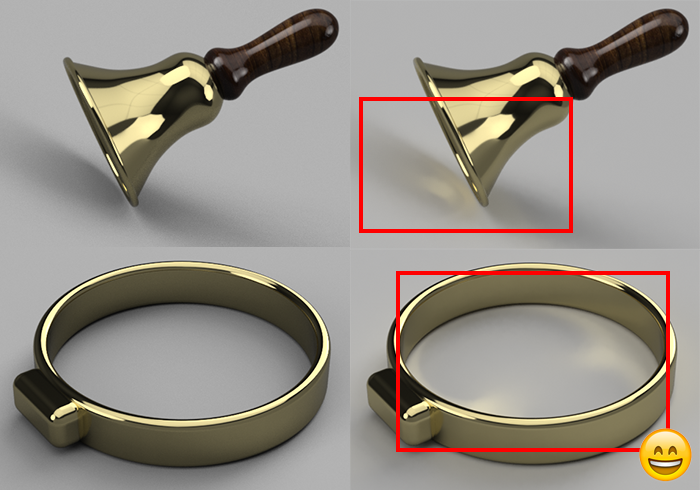
Improved Combine Tool
Previously when you did a Combine operation, it was visually confusing to tell whether you’re about to do a join, cut, or intersect since the bodies all showed the same color. Now they will show join as blue, cut as red, and intersect as yellow. We’re glad to see these IdeaStation submissions from maruska and gabriele as implemented!
Faster Timeline Re-ordering
When you tried to reorder features in your timeline, there were times where the history marker would lag behind the cursor. We found that if you wiggled the cursor back and forth, the marker would eventually catch up. Laziness fuels more laziness. We put an end to that, and it is a lot more responsive now.
Here are the notable fixes in design and modeling.
- Sinuswave reported an issue where the Extrude tool would make an extrusion in the opposite direction of what the preview was showing. Turns out there was something wrong with how our process tracking code worked behind the scenes. This is now fixed.
- We fixed an issue where if you saved a component containing a shared hole feature as a copy, it would crash Fusion. Sharing is caring. Don’t be selfish.
- Sometimes the parameters dialog would generate a new parameter called countU for no reason when you used the mirror command and created a mirror feature against an origin plane. Now it doesn’t generate that parameter anymore.
We found a bug where if you opened a design that had yellow or red features in its timeline, the feature would not show that it’s yellow or red until you hovered over it. What is this, a blood test from The Thing? We fixed this so that yellow and red features are displayed correctly.
- There was a memory leak issue where if you had a long timeline with groups within groups of features and you kept expanding a group of features within an expanded group (try saying that 10 times fast), you’ll start to see your memory usage increase over time. We were able to catch this before it got out of hand.
- We fixed a navigation bug where if you changed your orbit behavior (free orbit vs. constrained orbit) in the preferences dialog, the orbit icon in the navigation bar didn’t update to the one you just set – now it does.
Sketching
Scale and Move for Sketches
Claas’ IdeaStation post (at 114 votes) of adding the ability to scale and move sketches is now part of Fusion. You can do it with the scale command under the Modify drop-down, and a dedicated scale command will also be available in the Sketch drop-down menu as well.
Double Click to Chain-select
Another nice feature suggested by the community. You know how you can double click a continuous edge on a T-Spline body to n select the entire edge without clicking on each individual edge? Well now you can do this with sketches as well. Hat tip to TrippyLighting’s idea submission.
Offset Tool Improvements
We’ve made a number of improvements to the Offset command. We got some feedback about how the tool is grayed out if you’re not in an active sketch environment. This makes it hard to offset a projected edge outside of sketch. Now it’s available to you at all times if you have projected sketch geometry that you want to offset, without having to the need to explicitly be in the sketch environment.

Previously when you offset a sketch, the arrow manipulator didn’t move with the new profile that you were dragging, but rather stayed on the original profile, which didn’t feel natural. Now it moves with the new profile as you drag. We also fixed some nasty crash issues related to Offset – it should be more stable now.
Other fixes in the sketching environment include:
- Rshouker reported this weird issue where editing a sketch in the timeline made his component disappear. Jeff Strater and our rockstar developers found that if you reordered features in the timeline after the end-of-design marker, Fusion allowed you to violate the order dependencies, and then weird things happened. This is now fixed.
- About two weeks ago Ruge2 posted this bug where Fusion wasn’t letting him trim the exact sketch lines he wanted gone. We’re glad to report that this has been fixed. Talk about a fast turn-around!
- There was line sketch issue where if you sketched a line and then started on a second one, the dimensions input field would get in front of the second line you’re creating, trying to get your attention. We had a stern talk with it, making sure it knew to wait it’s turn. Now it works as expected.
- We found a weird issue with certain SVGs where if you inserted them into Fusion, their circular arcs came in inverted (again, with the inversion issues…weird). There was another one reported by tonyallen28 where the SVG he imported came in with brakes in the profile, preventing him for creating any sort of 3D geometry. So yeah, we got this all sorted out.
- We received a report where when a construction line was deleted in a sketch, coming out of the sketch environment resulted into downstream bodies moving for no reason. Our developers dug into this and found that an update request was getting confused between direct and parametric modeling. This is now fixed.
- When you were in the Fillet, Trim, Extend, Break, or Project command, selecting a face of a body will take you into the sketch environment with those tools ready to go, yet we found a bug where sometimes, the selection doesn’t go away. Now it does, and all’s right with the world.
- Previously when you tried to select the midpoint of a curve so that you can add a dimension from it, you probably had to do it slowly since it wasn’t very precise. We’ve improved the selection behavior so it’s a lot better now.
Graphics and Visualization
New Cloud Rendering Kernel
The updated kernel will now make your cloud renderings look better than ever. It offers improved rendering speed, better noise reduction, and better realism.
Glass materials look nice and clean.
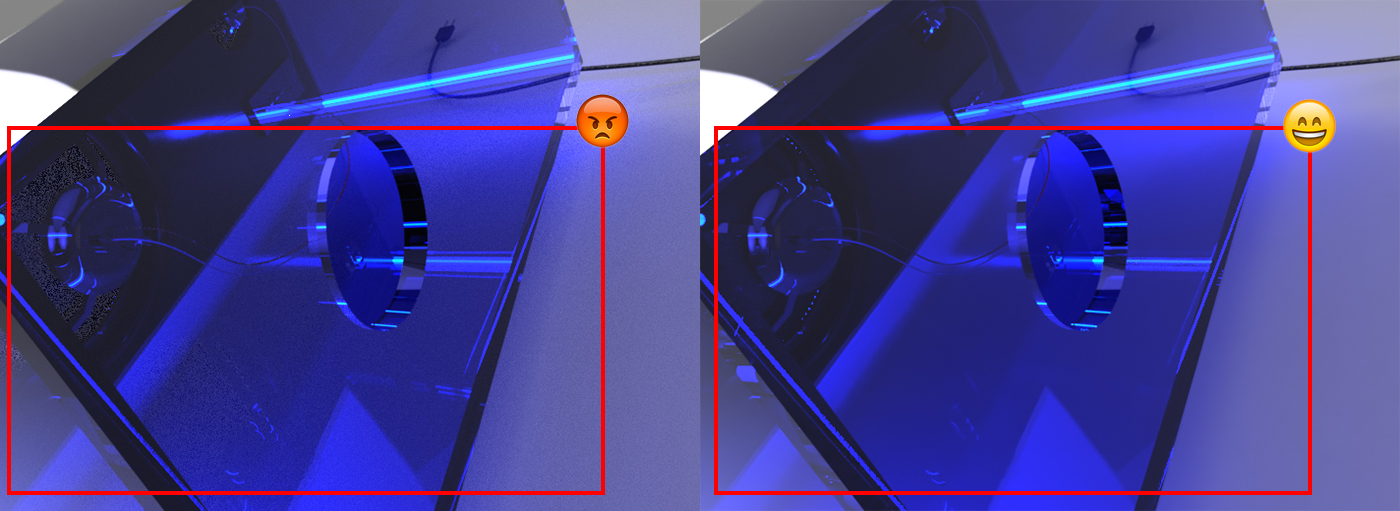
Translucent materials have much less noise now.
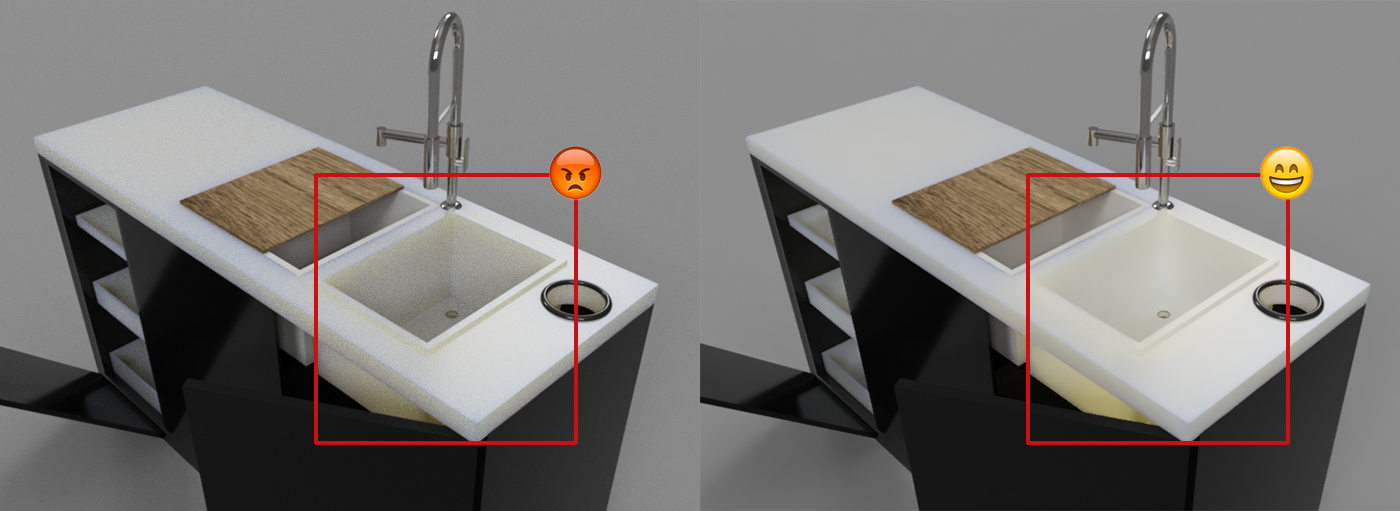
Emissive materials now also render without noise and annoying artifacts.
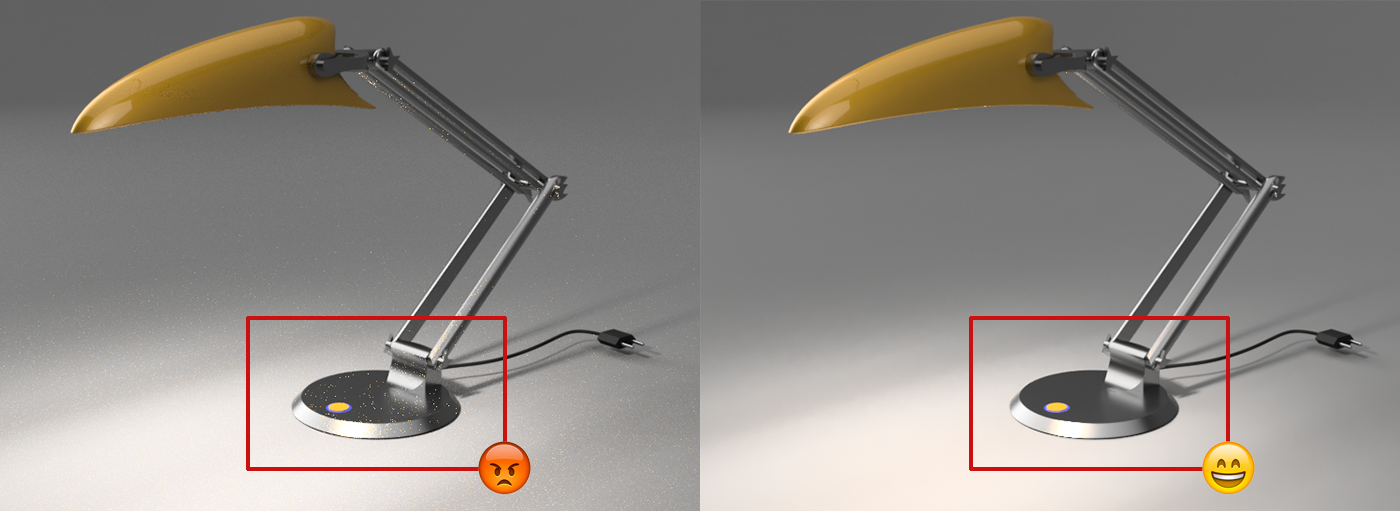
Shadows are more realistic with greater depth and color bleed.

Reflective materials reflect their true colors through better caustics.
Better Material Alignment
Previously the tree transform of 3D wood texture mapping was correctly aligned with Z to the longest axis, but the X and Y axes were not consistently aligned to the smallest and middle dimensions of the bounding box. Now we updated it so that the X and Y axes are consistently aligned to the smallest and middle dimensions of the bounding box.
Graphics Performance Boost
A common complaint we’ve been hearing was that rendering performance was poor when you window-select a lot of T-Spline faces and edges at the time on a design. Based on this feedback, our graphics team did their magic and now you should be seeing a 2X-3X faster frame rate on average. Sweet.

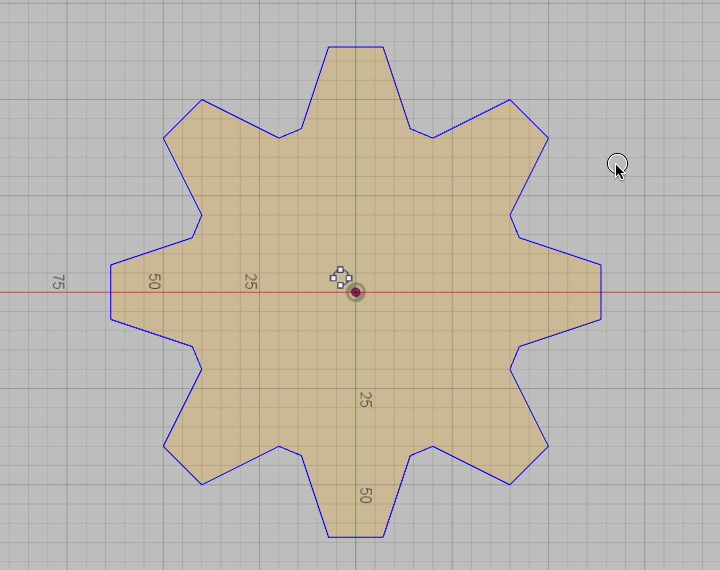
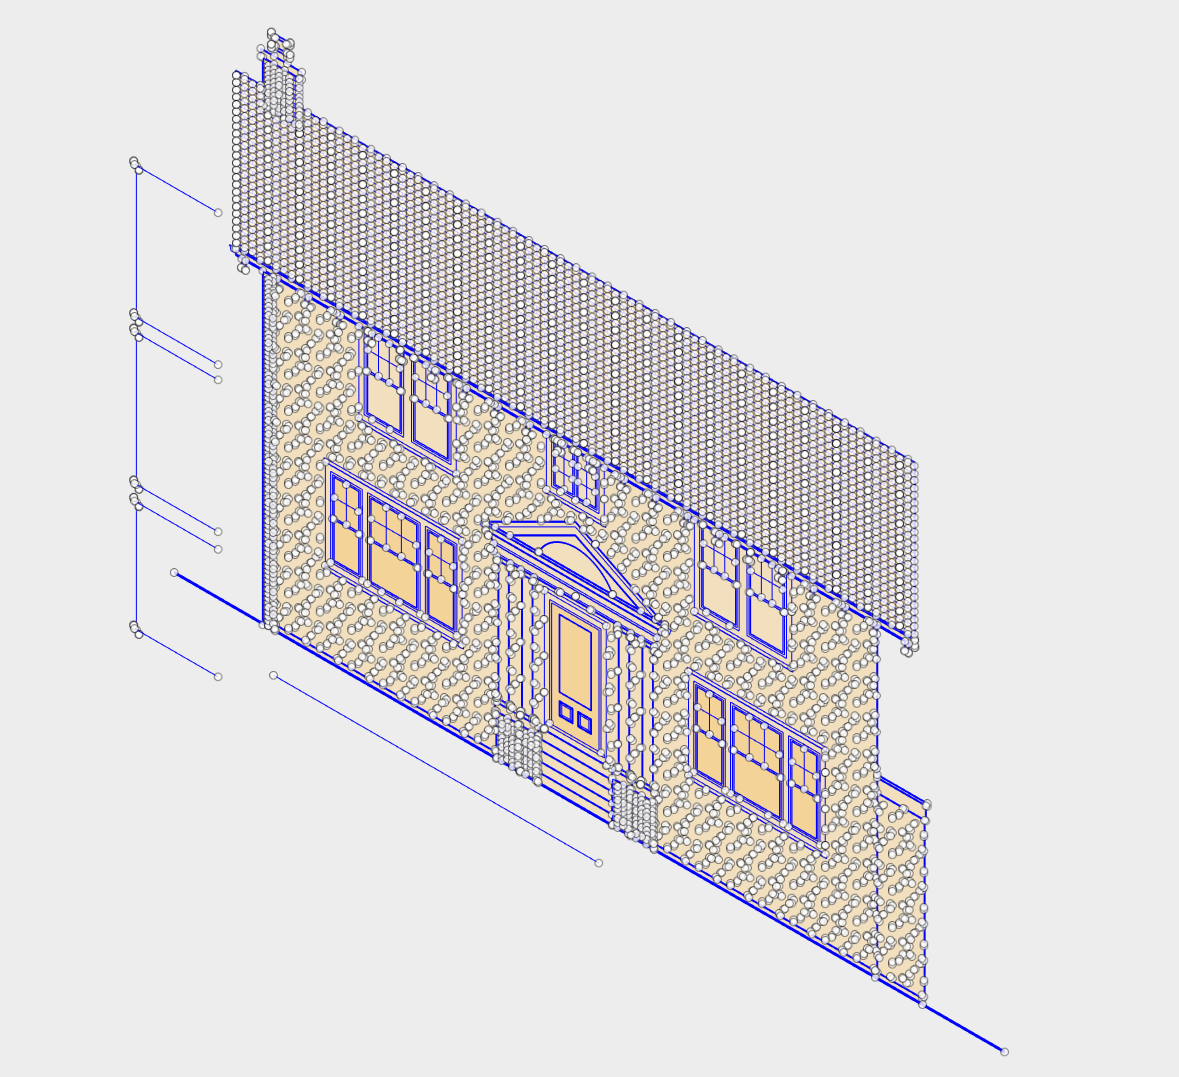
FPS Increase With Complex Sketches and Sculpting
As you master Fusion 360 and hone on your skills, your designs will get more and more complex. In previous version of Fusion, you experienced a considerable frame-rate drop when you had a complex sketch that displayed multiple end point as in the image below. This also happened when you selected a T-Spline object with all of its vertices highlighted. This update should improvement the FPS by 20-50% in sketching, and testing has shown where previous T-Spline files that brought Fusion to a painful 2.5 FPS now runs at a more usable 20 FPS.
HSM
Unified Tool Library
We updated our tool libraries so that they have a more consistent experience across Mac and PC versions of Fusion. It now shows multiple tool-types at the same time, and allows you to better filter and search for the right tool.

Updated CAM Kernel
We’ve also updated our CAM kernel to a new version, which fixes a whole bunch of other issues worth mentioning:
- Fixed an issue where in very rare cases a wrong arc could be output for toolpath generation.
- Fixed wrong linking issue for 2D Chamfer.
- Fixed wrong retract motion for Adaptive Clearing.
- Fixed wrong toolpath issue when minimum cutting radius for 2D Contour for 180 degree arcs.
- Fixed wrong retract motion issue for Turning when moving to home position.
- Fixed potential generation failure when doing undercut milling for Contour.
- CHG Improved stay down linking for Contour.
- Fixed an issue where linking moves for 3D strategies in very rare cases could gouge the part with less than 2 times the tolerance.
- CHG 3215 Improved progress support for Adaptive Clearing.
- Fixed potential generation failure for Adaptive Clearing.
- Fixed potential shaft or holder collision for Contour.
- Fixed a rare gouge when using smooth transition linking.
- Fixed gouge on the rotary axis for ID profile turning.
- Fixed potential linking gouge when using tapered tool.
- Fixed potential gouge when ramping for Contour.
- Fixed wrong tool-path issue for Slot.
Other notable fixes in the CAM workspace include the following:
- Autumn.S found a bug where if you created a tool-path, added a pattern, then deleted the pattern, the tool-path still remained on-screen, but was no longer selectable. We fixed it so that it goes away when it is deleted.
- Lonniecady also found 2D contour kernel bug where the arc center of a sketch arc is not displayed correctly within HSMWorks. We dug into this and improved the code, and now it should be on point. This is a good example of how all HSM users can benefit from the same codebase. Everyone’s a winner!
- We got some user feedback around the simulation in HSM being all wonky and showing false alarm on a holder crash on mill turn, where it is actually not crashing. Our bad – this has been corrected.
- We found an issue where the helical ramping tool on a 3D pocket was cutting through the part, which is not suppose to happen. Apparently this happened when you edit the Helical Ramp Angle, Diameter and Minimum Diameter settings, causing it to do a linked move and crashing. We fixed this behavior so it doesn’t crash anymore.
- There was a nasty bug where Adaptive tool paths were plunging the tool into the stock in such a way that it would break the CNC spindle. Lolwut. We dug into this and found that the paths were somehow “lost” in the path reordering process. Apparently this issue stemmed from another fix we did where we prevented the tool from stepping down too far in cases where a ramp helix could not be found. We’re glad to report that this has been properly sorted out.
There were a number of annoying crash issues related to Face mill and selecting the tool type filter to default, as well as double-clicking an operation browser node that we also got fixed.
Data & Collaboration
OBJ Export via A360
Good news! You can now export your Fusion designs as OBJs directly in A360. Punch out to the design details page of any design, click on the download button, and you’ll see the OBJ option. No longer do you have to do this. Kudos to Linus Zoll for the tutorial though, but this should make exporting to OBJ a bit easier.
- There was an issue where if the name of your design contained special characters, moving the design to another folder in A360 would not work. Fixed. Moving on.
- There was a case where if you created a new Fusion account, signed in, and wanted to upload an existing design via the data panel, clicking the upload button did nothing. Turns out this was a regression issue, not a troll button. Upload on fresh account should now work properly.
API Improvements
Oh yeah, to whoever spotted our typo in our Create “Supr” Gear script: thank you. We’ve corrected it now to the right spelling, but let’s all agree that spur gears are pretty super.
Eightdeltacharlie found an issue where the IntersectWithCurve API call was not working properly. I’m not gonna pretend like I understand what’s going on, but now it is fixed.
We fixed an issue reported by nnamfoh where when he ran an API script that was filtering for planes to select, but instead “magically” selected the body. We were able to trace the issue back to a bad “body.copyToComponent” call. Boom. Fixed.
With this update out the door, we are working on landing some hot new features in the next couple of updates. Things deep update, mesh workspace preview, cloud simulation, and of course, branching and merging are all in the pipeline this summer. Stay tuned, the fun has just begun.
Keqing and the Fusion Team


