Elevate your design and manufacturing processes with Autodesk Fusion
STEP Render Solution
The market has proven that the existing gap between Electronic Design Software and Mechanical Design applications needs to be closed. We are not referring to a basic 3D view of your circuit board, but rather the capabilities to render a file that can be imported into the mechanical designer’s preferred mechanical design tool. This allows the designer to save time in designing the housing unit of the circuit board. Recently we had the opportunity to try out a cloud based application that proved worthy enough to mention.

ecad.io is a free cloud based application that allows you to upload your design file and render mechanical files in STEP (Standard for The Exchange of Product Data) format. This format has been widely adapted by most application that offer mechanical design benefits. Ecad.io can accept IDF 2.0, IDF 3.0, IPC2581 and lucky for us EAGLE design files, EAGLE v6 or later.
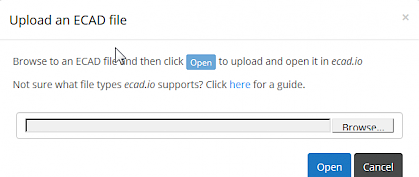
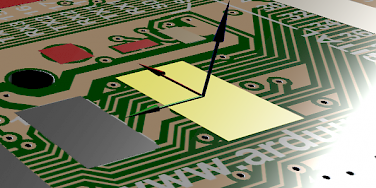
The process is fairly simple to use, but we will mention some feature that are not obvious. Follow our link to ecad.io, and create your account, only basic information will be required for the account. After verifying your account and login in to the site, click on File/Upload ECAD file option. After a few moments, the image of the designed file will appear on the ecad.io canvas. Some of the components might appear already mapped to their corresponding 3D model. The components that are not recognized will appear on the drawing area as blocks. Block representations are defined by the component outline in the circuit design application.

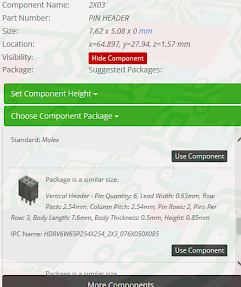
Components can be selected within the drawing area of the application. The menu will provide various options such as assigning a height to the block or replace the block with the 3D model of the component. Ecad.io does host many 3D models of components for your circuit board. But if the one you need to use doesn’t exist, no worries, the application allows you to upload your own models. The models uploaded can be made public for the rest of the ecad.io community or for private use.
After selecting or uploading the component, there is a really good chance you will need to be fine tune placement and rotation of the component. We will be addressing these options in our upcoming video blog.

Saving the mapped imaged the application will automatically take you to My ecad.io, this is the location where are your designs you have worked on are stored. This portion is rather important, this is where the user is going to render the mechanical file and have the option to send the file directly to Autodesk Fusion360.
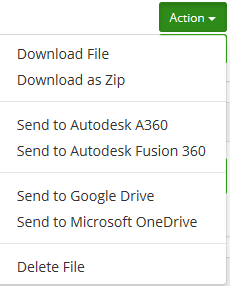
Next to your file you can see an Action button with a few options to consider. For this instance we will select “Create and MCAD File. Depending of the complexity of the file the process can take from a few seconds to a few minutes. The rendered file will appear below your saved file with another Action option next to it. At this time we have multiple options to download the file, send to a cloud based storage service or directly to Autodesk applications. For our example, we send it directly to Autodesk Fusion 360.

Please remember that the export or download options will not appear until you have used the “Create and MCAD File” action.
Click here to view overview Video
CadSoft Support Team