Have you ever wondered how to manufacture a chamfer along a 3D edge? Creating the geometry while designing is easy, but machining it is a little trickier. The trick is to use a Scallop operation and a ball endmill, surprising as that may be! You can use 2D chamfer to create intelligent toolpaths, but it doesn’t apply to 3D chamfers. Trace may seem like a tempting option, but often it can result in significant gouges in your part.
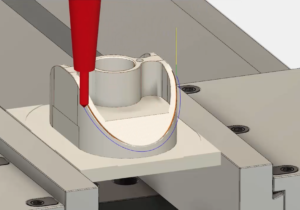
In today’s QUICK TIP, we’ll go through the steps to generate a 3D chamfer, so next time one pops up, you can actually machine it!
Follow the steps outlined in this QUICK TIP, and you’ll be cutting 3D chamfers in no time.
- Create a Scallop operation.
- Select a ball endmill as the tool.
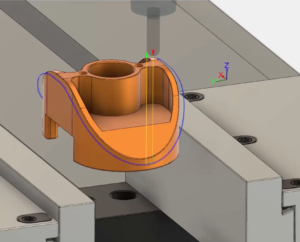
- In the Passes tab, select the outside edges of the chamfer as the Machining Boundary and set the Additional Offset to -0.0003 inches.
- Enable Contact Point Boundary, set the Boundary Overlap to 0 inches.
- In the Passes tab, set the Tolerance to 0.0001 inches.
- Set the Stepover to 3 times the width of the chamfer.
- Click OK to generate the toolpath!