Now make sure you have your “SHIFT” key ready, because that is the magic button for this week’s quick tip. I know you have heard me blabber on about design intent in previous quick tips (tangent dimensions, parametric flange, & more). But if you are as stubborn as myself, you have to hear something 3 times before you finally start to listen. Well here it goes again…One of my favorite ways to drive my design intent is to use sketch constraints (aka sketch relationships in other CAD tools). I will tend to use sketch constraints over sketch dimensions (where it makes sense) because they tend to behave more predictably when design changes occur. This quick tip answers the following questions:
- How do I center that?
- How do I keep that in the center of my part?
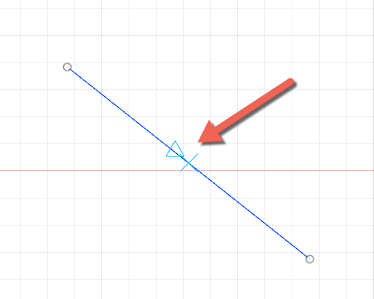
The answer: The Midpoint Shortcut. Hold down the “SHIFT” key on your keyboard and hover near the center of a line. You have hit the “Bullseye” when you notice a triangle with an X (shown below).

There are many uses for the midpoint shortcut, but my primary use case is to make sure my sketch geometry stays in the center of my part. But when you want to step up to a Fusion 360 sketching black belt, try to use the midpoint shortcut with dimensions too. Make sure to watch this quick tip to see this shortcut in action.