Have you used the Pipe command in Design/Solids (Not in Surface)? If not, do yourself a favor and give it a go. The pipe command will take any sketch item or edge of solid/surface as a starting “point”. The command is in the Create Drop Down menu. I have built a simple sketch and body as well.
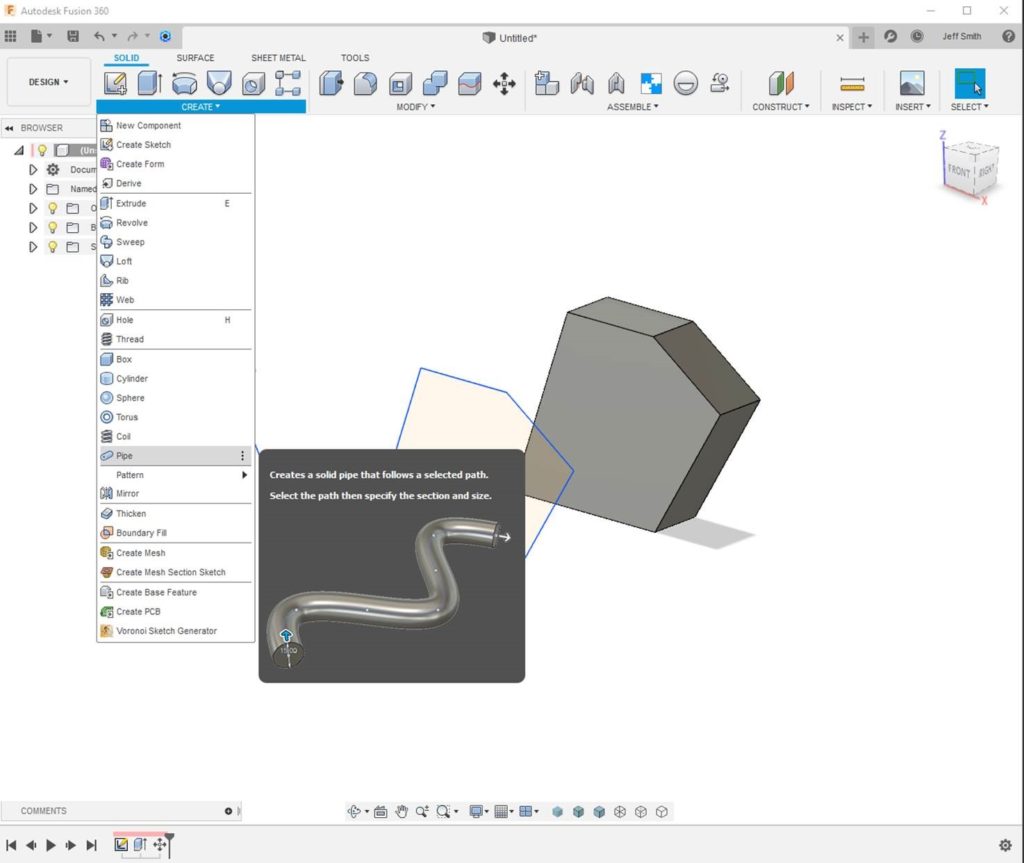
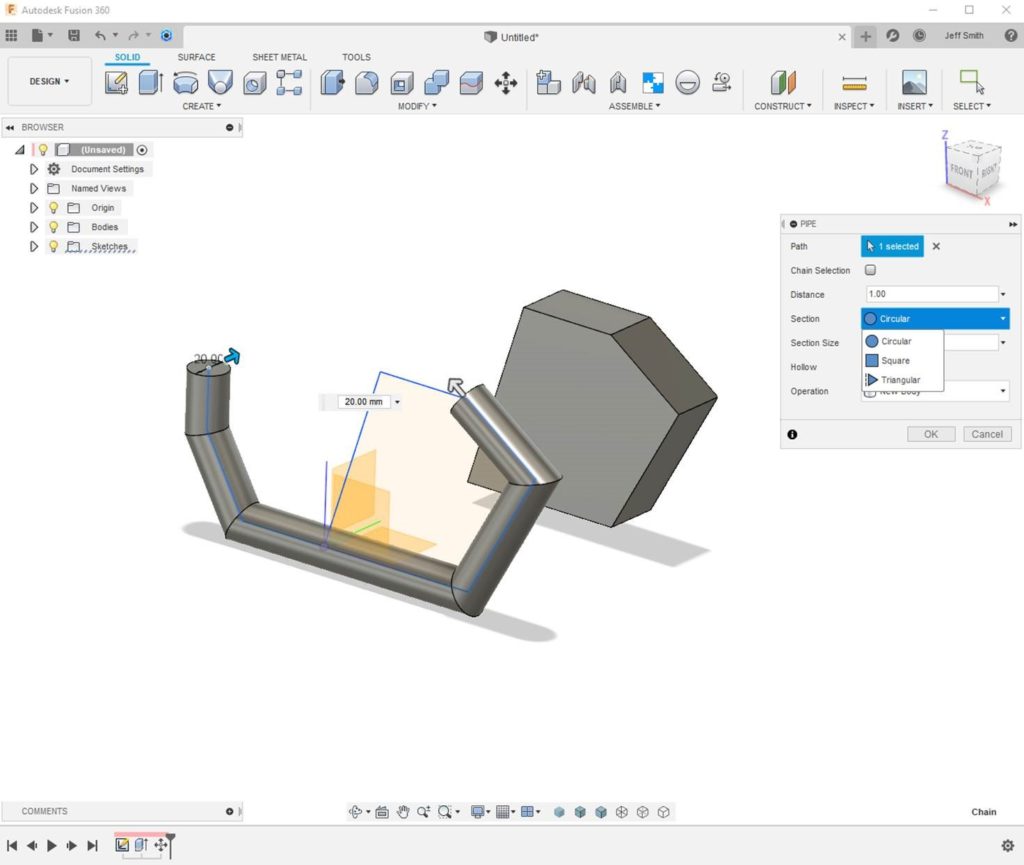
With the pipe command open, I select a few lines from the sketch (using the control key to select multiple items). There is a Chain Selection option as well. More important, there is a drop down menu for the section profile. I will leave this as a circle.
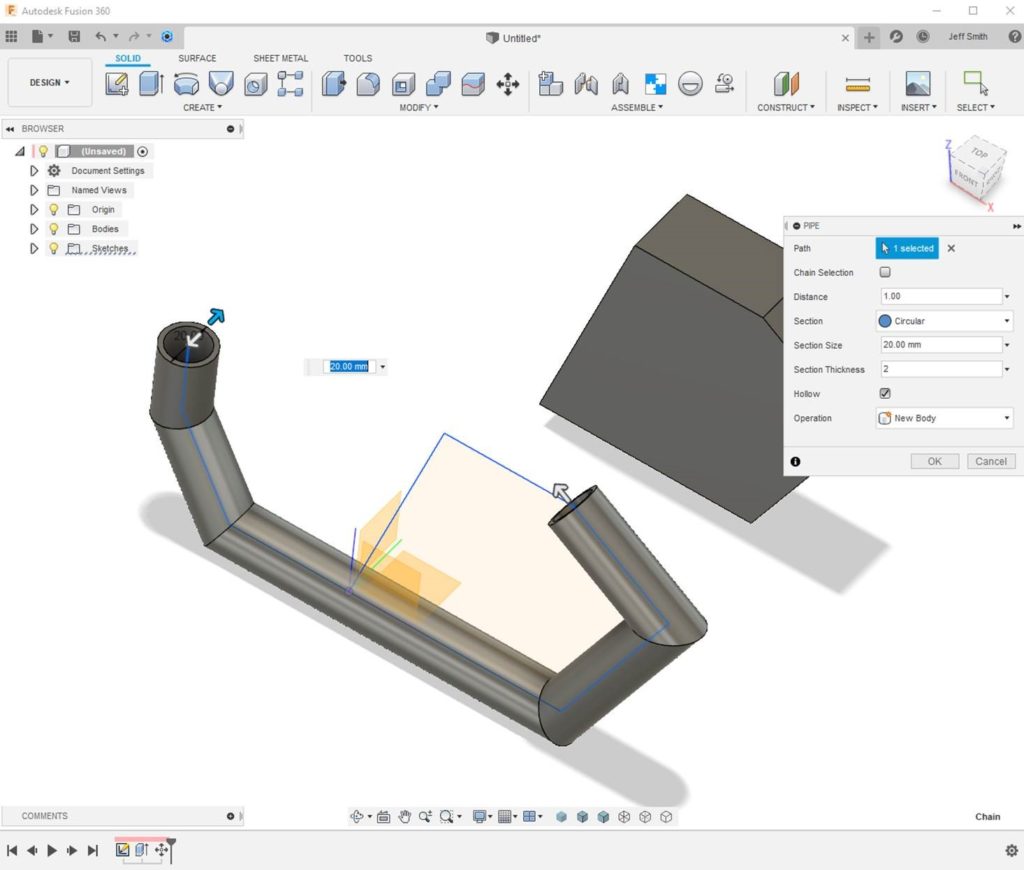
A great option in the Pipe tool is the Hollow check box. I will make this a nominal thickness of 2mm. Lastly, leave the Operation drop down and New Body. I said OK and created the Pipe.
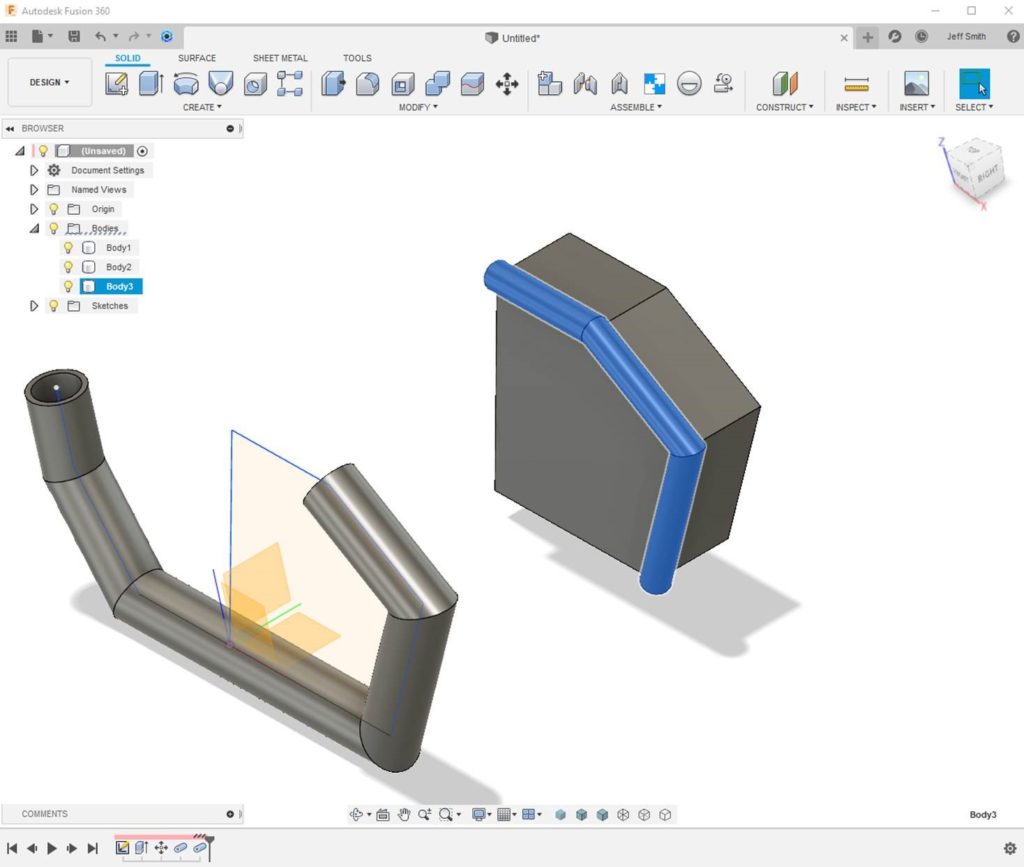
Here I have selected three edges of the solid. As the pipe command used the edge, the resultant pipe is violating the existing Solid. Fusion, takes its’” best educated guess” at my goal and pre-selects Cut form the operation drop down.

I am going to change this to New Body, as I would like to create another Solid.
So, please keep the Solid pipe tool in your toolbox if it is not already. It can save a lot of time. For example, adding piping to a seating detail or tube frame.
Now that the foundation is set, come with me to the Form/Sculpt environment. The pipe tool is also there and it grows in power and flexibility.
In the Solid tool set, open the create drop down, select Create Form. Notice, I have a basic sketch created.

In the Form Environment, select Pipe from the Create drop down menu.
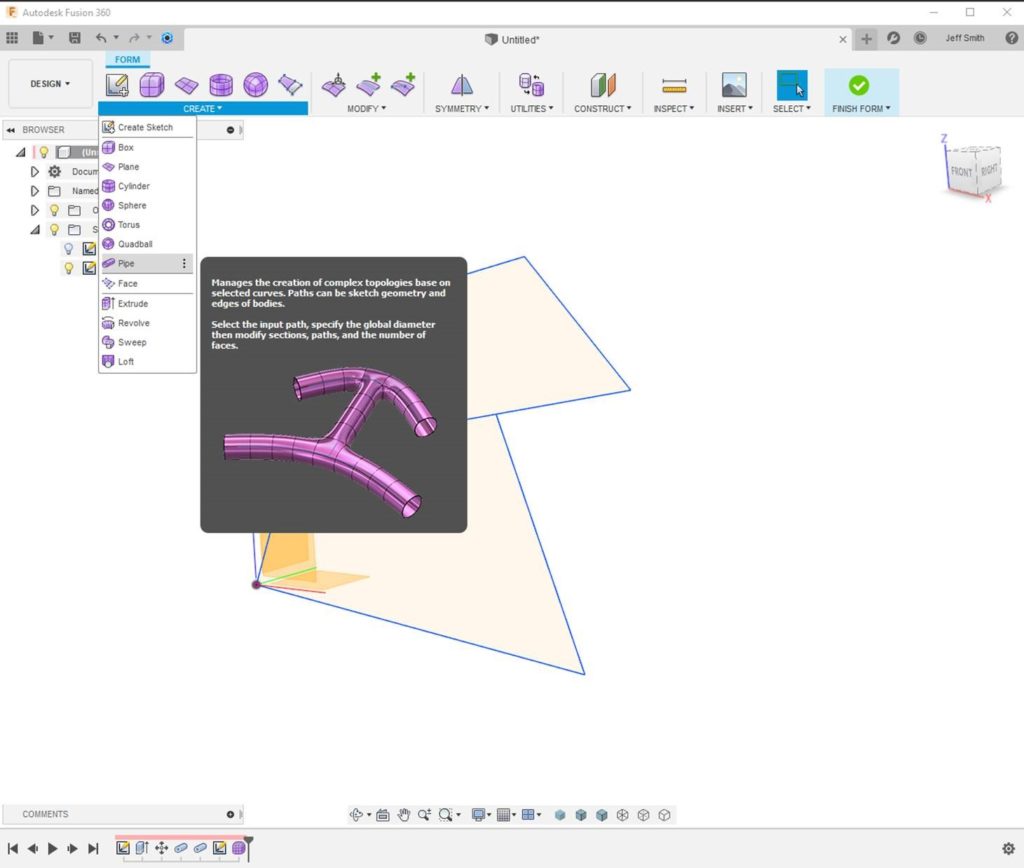
In the pipe command, I have Chain Selection checked and I mouse clicked the sketch. Notice I have highlighted that the default is box mode. I will select smooth mode right next to that and adjust the Global Diameter from 20 to 15 mm.
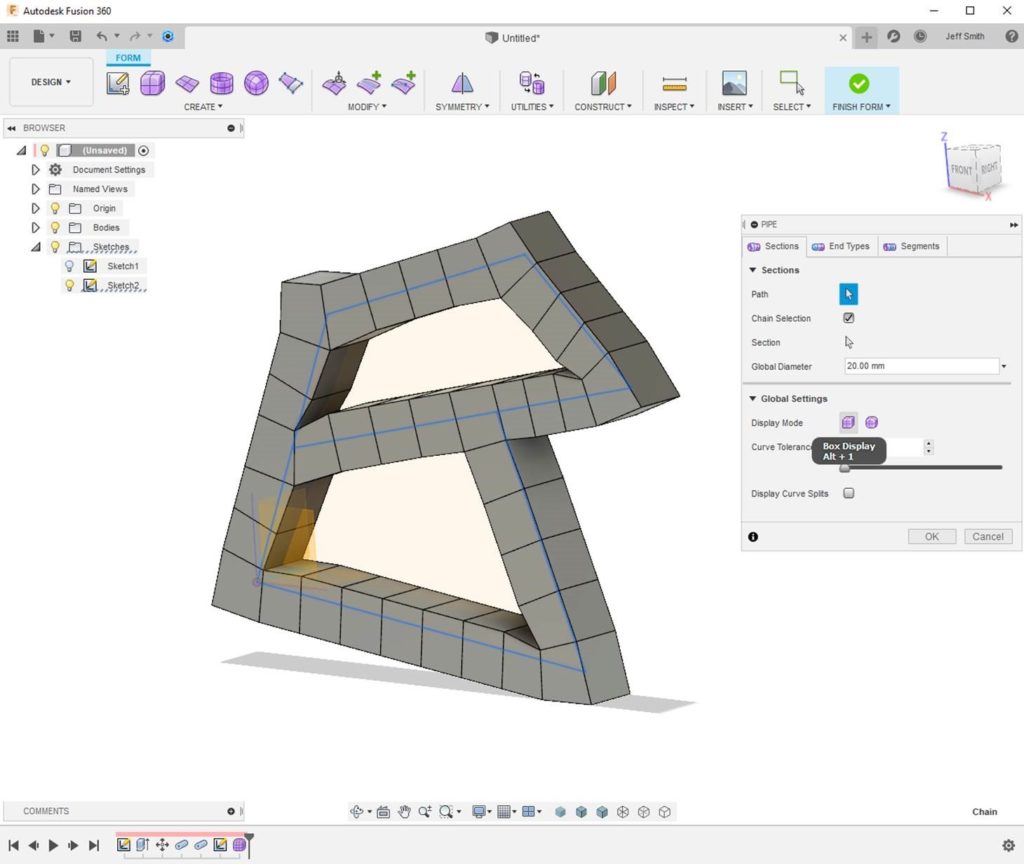
I pressed OK on the pipe command and I now have a T spline closed body (not solid yet). Next I will adjust the form slightly with Edit Form. This is in the Modify drop down.

For this example, I pulled the lower edge away and made it a little smaller.
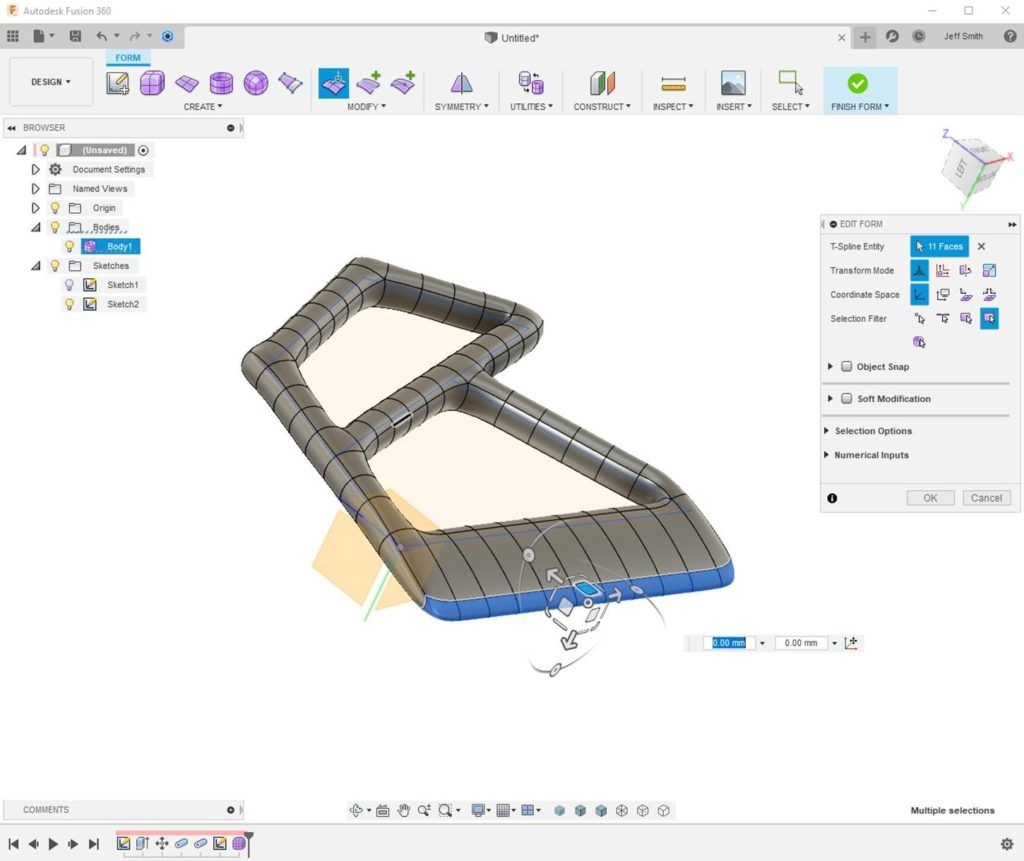
After selecting OK from the Edit form tool, I pressed the Finish Form button to send the Form Session. As my Form Body was an air tight body, Fusion created a Solid, based on the form.

As the Result is a solid body, I can modify this as I would any other Solid Body. It can be cut, joined added on to and so on. Just remember, to edit the Form session if you would like to adjust the original shape. Keep in mind, Form is a leader, not a follower.
Hope you enjoyed this set of tips and experiment with Pipe in the Form Environment. I will be posting more tips, keep an eye out.
If you would like to see some of my work, follow me in Instagram. https://www.instagram.com/blaster701/