& Construction

Integrated BIM tools, including Revit, AutoCAD, and Civil 3D
& Manufacturing

Professional CAD/CAM tools built on Inventor and AutoCAD
2 min read
So, if you have been following my last few posts (How to Quickly Customize Orbit/Pan Settings in Fusion 360, Using the Pipe Command in Designs/Solids), you might have seen a theme starting. That focuses on understanding the difference between solid, Surface and t-spline geometry construction. More importantly, how they can be used together. Today, I am focusing on the Thicken command. First in Surfaces, then in Form/Sculpt.
Surface tools are a powerful partner to solid geometry. First, surfaces can modify solids and can ultimately create solid geometry. They are parametric in nature and tool controls are very similar to solid construction. This is a set of tools that are a great first step towards Sculpt tools. With that in mind, let’s talk about “Thicken” in the Surface tools.
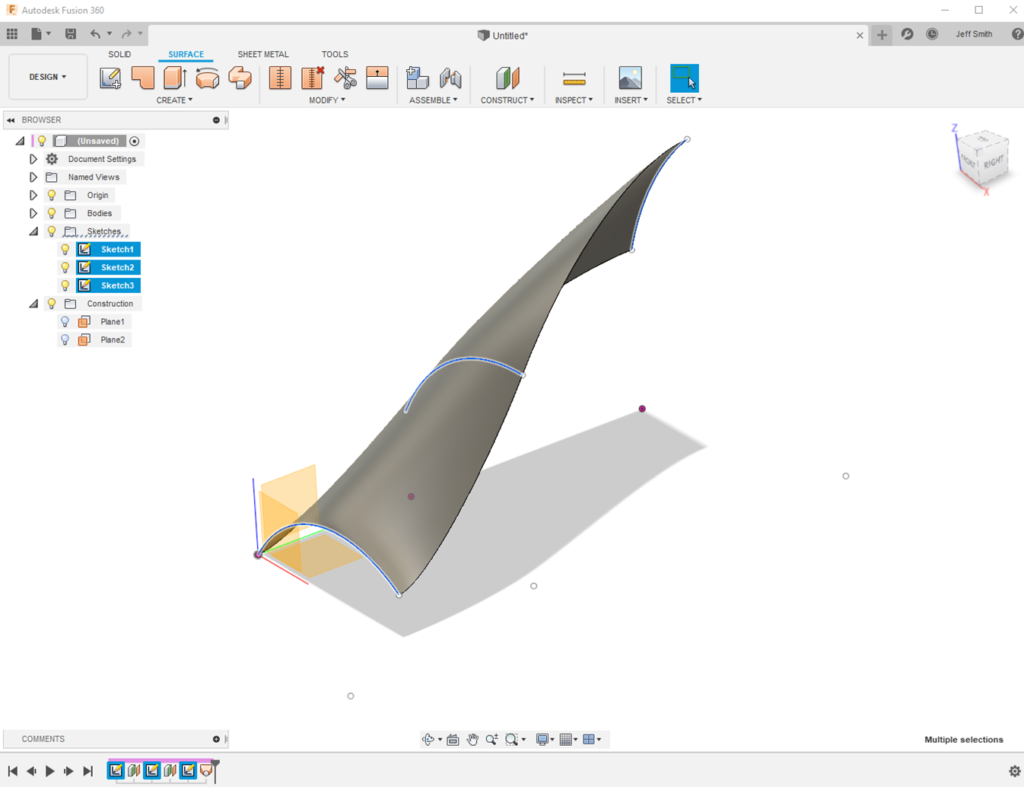
Here is a quick surface loft that I built consisting of three sketch profiles. This surface body could split solid bodies or act as a termination for a solid extrude.
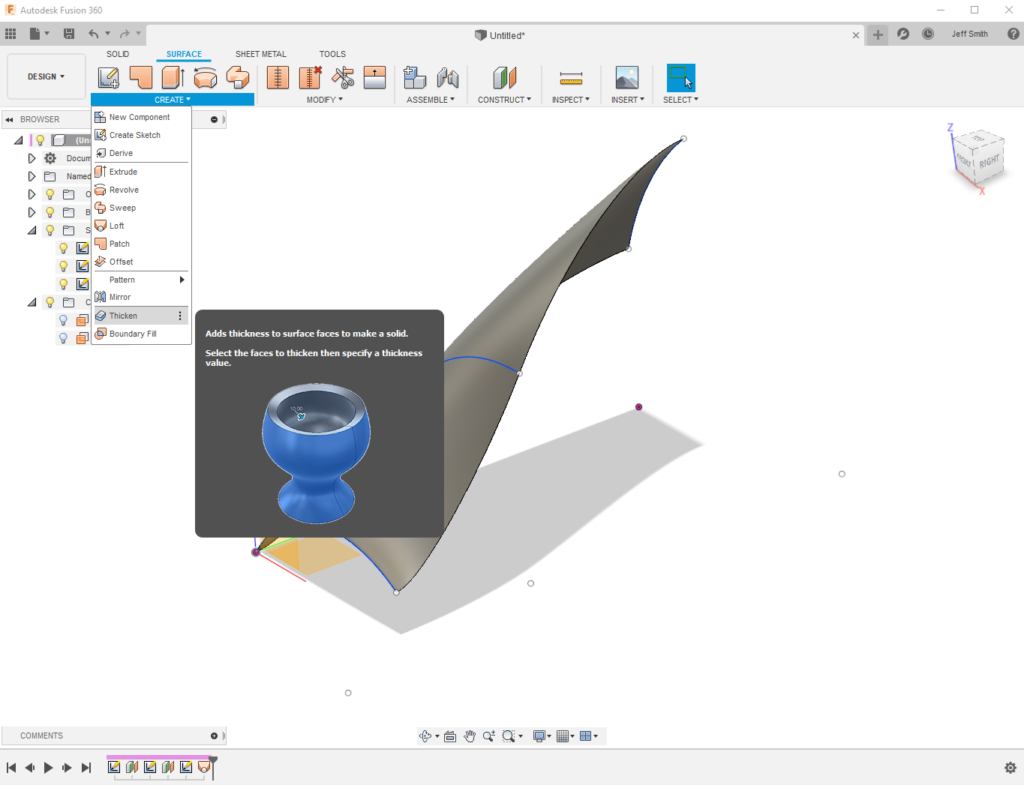
The thicken command is in the create drop down menu. This tool takes the surface geometry and grows it to the solid body based on the thickness specified.
While in the tool, you can select the direction and distance of the thicken. In addition, one sided or symmetric. Operation controls are similar to Solid Feature creation (so you cold technically cut a solid with this tool as well).
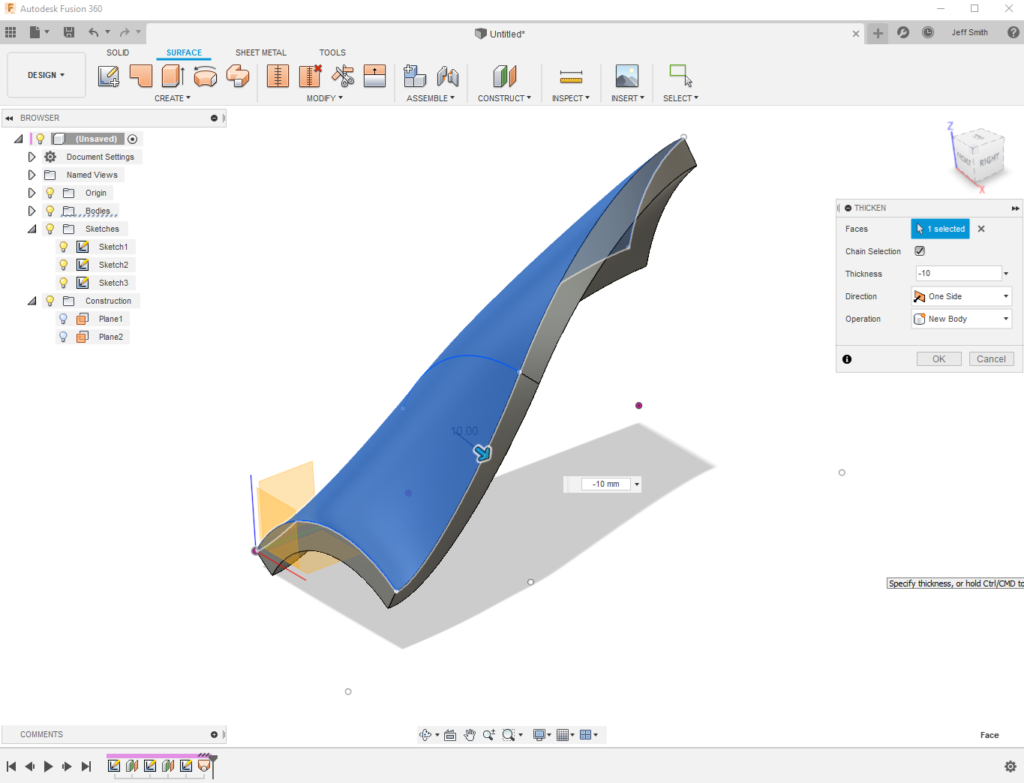
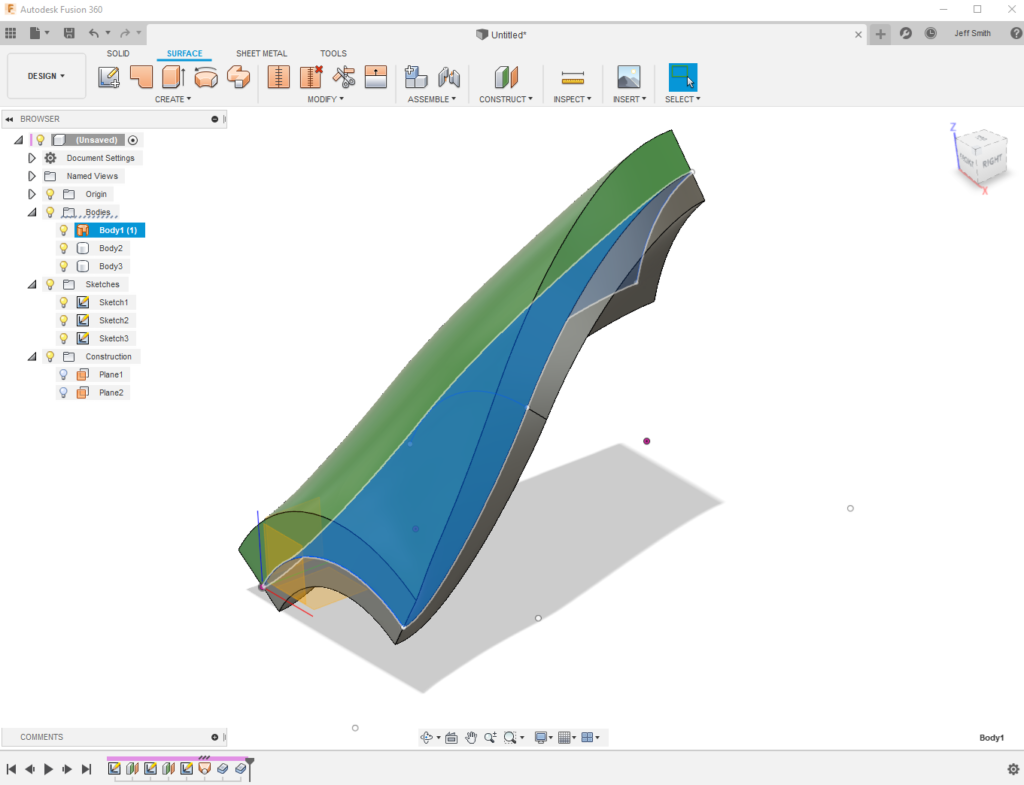
Please note that the resultant thicken is relative to the curvature of the main form as it moves away. I thickened a second body in the opposite direction to highlight how the solid extends away from the original surface (highlighted). In addition, please note the Surface body is retained in the bodies folder. Fusion might have auto turned off visibility for you.
Now, please join me in the Sculpt/Form environment. I constructed a complex “surface” based on a cylinder primitive with two creases. Edited the form slightly to get this form. It is not airtight, and if I “Finished Form” now, it would yield a Surface Body. Valuable, but it might not be my goal.
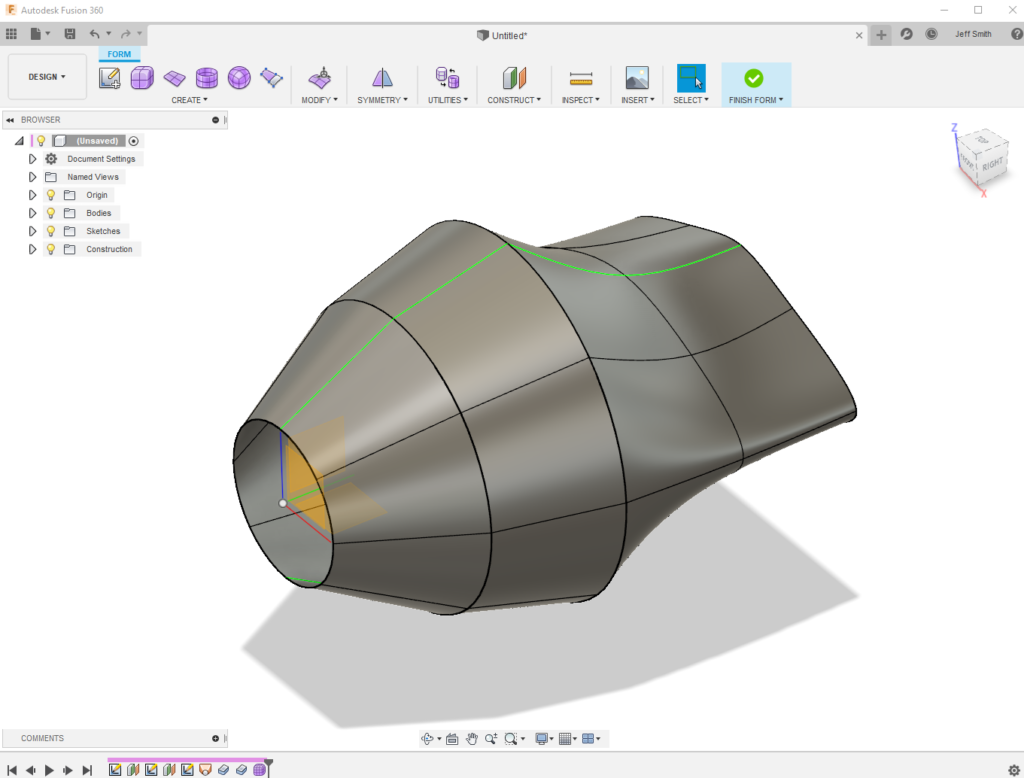
I could always thicken this form as a Surface within the Surface tools. That would yield a nominal thickness. If that is not the goal, try the Thicken tool in Sculpt/Form. That tool is found in the Modify drop down menu.
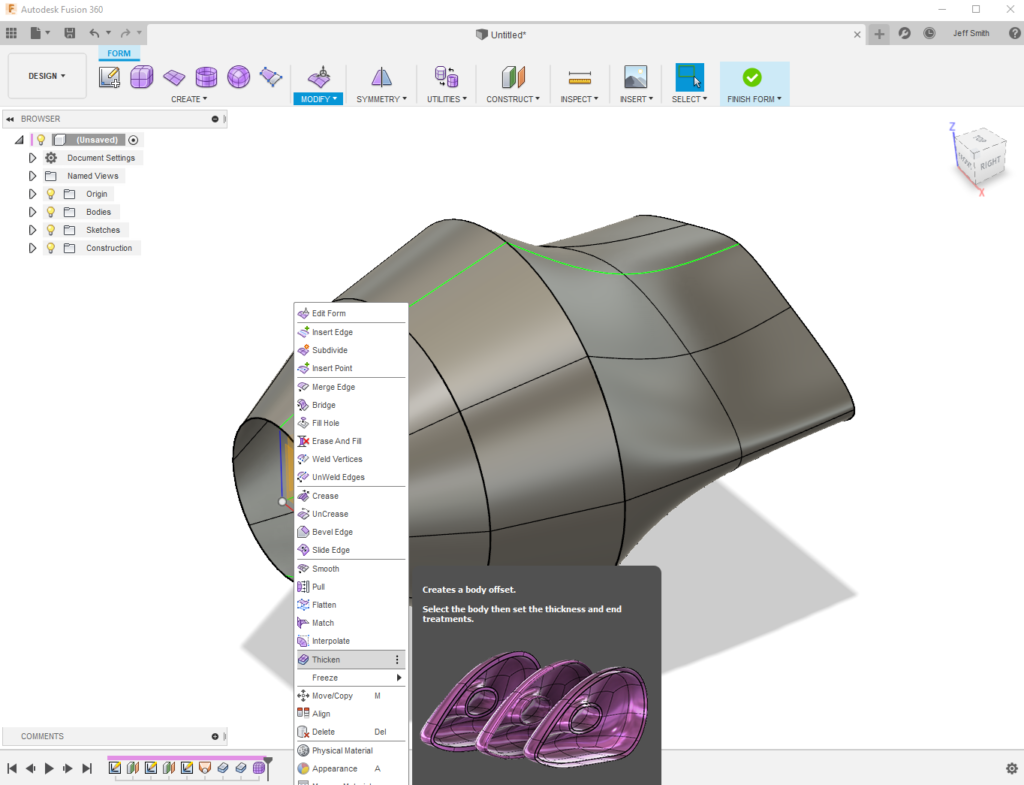
Similar to the Surface tools, it allows you to select the direction and distance. In addition, you can choose the Thicken type.
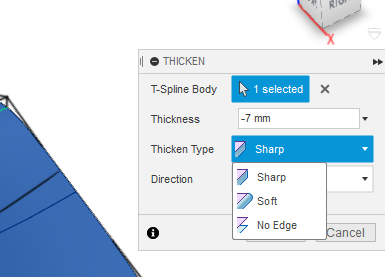
This allow you to create hared edges, smooth or open bodies (like “offset” in Surface tools). Play with the Direction options as well.
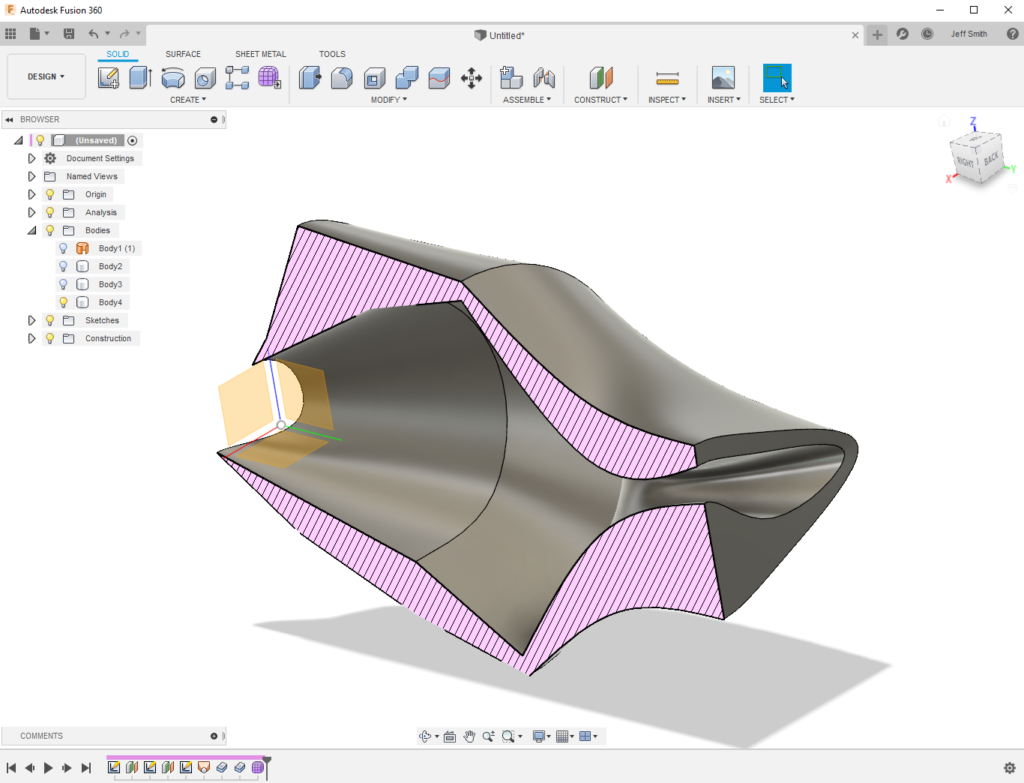
This allows you to modify the outcome of the thicken right in Sculpt. Look how quickly I adjusted the form. This is now an air tight body and not nominal thickness.
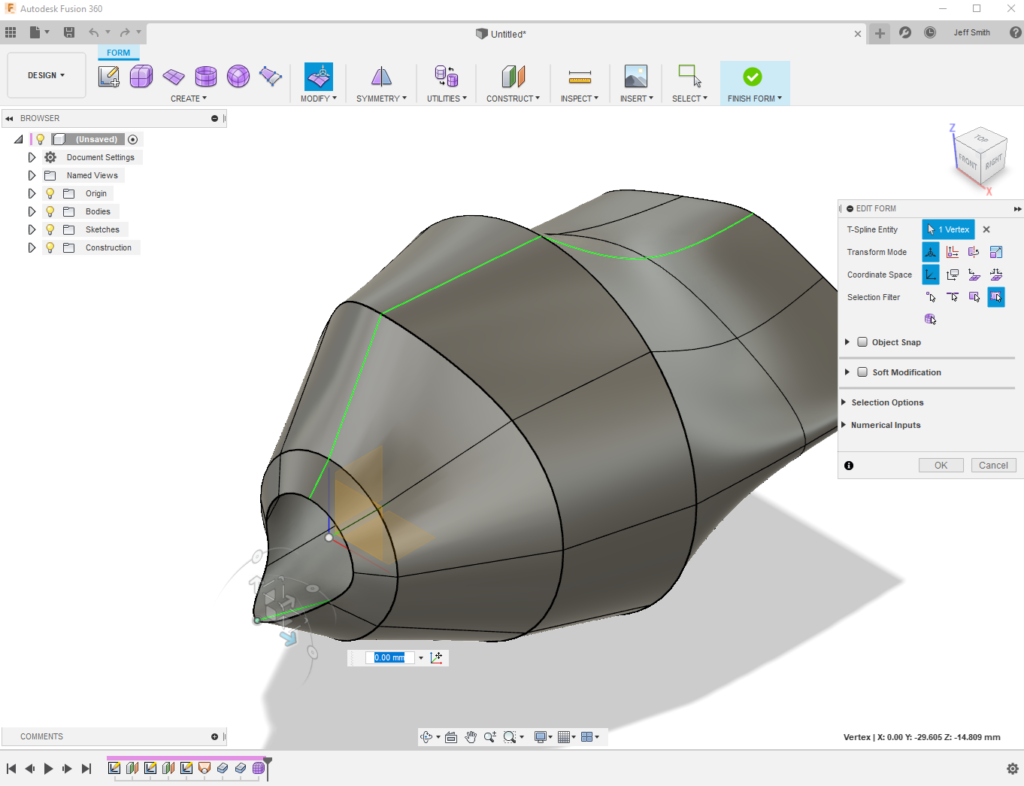
After finishing form, Fusion gives me a Solid body based on the Sculpt. I did a section view to show you how I modified the form in sculpt more clearly post thicken.
I hope you enjoyed our quick exploration of the Thicken tool in two environments. Want even more learning? Check out these lessons: Thicken Surfaces: Part 1 and Thicken Surfaces: Part 2. Follow me on Instagram @blaster701 and keep a look out for my next post on the boundary fill tool!
By clicking subscribe, I agree to receive the Fusion newsletter and acknowledge the Autodesk Privacy Statement.
Success!
May we collect and use your data?
Learn more about the Third Party Services we use and our Privacy Statement.May we collect and use your data to tailor your experience?
Explore the benefits of a customized experience by managing your privacy settings for this site or visit our Privacy Statement to learn more about your options.