& Construction

Integrated BIM tools, including Revit, AutoCAD, and Civil 3D
& Manufacturing

Professional CAD/CAM tools built on Inventor and AutoCAD
1 min read
Do you require threaded parts in your Fusion 360 design? It’s very easy to specify a thread using the Thread command under the Create menu.

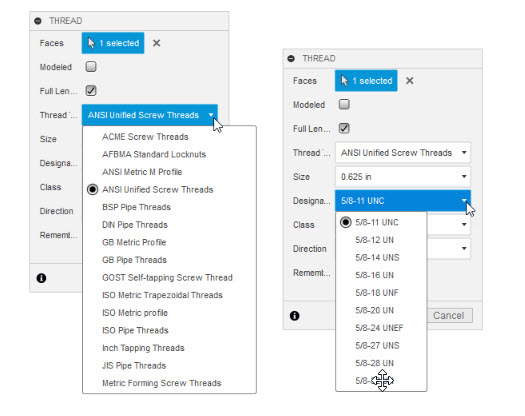
Once in the command, you can specify which circular face, whether internal or external, that you want to create the thread on.

Fusion 360 will find the closest “standard” thread in relation to the size of the circular face you selected. You have the option to specify the Thread Type, such as Pipe Threads, ACME Threads, Inch or Metric Threads, etc. You can also change the size of the thread, if necessary.
By un-checking the Full Length option, you can specify the length of the thread on the face.
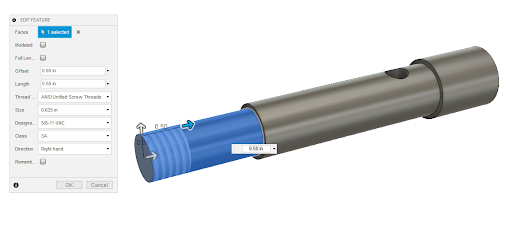
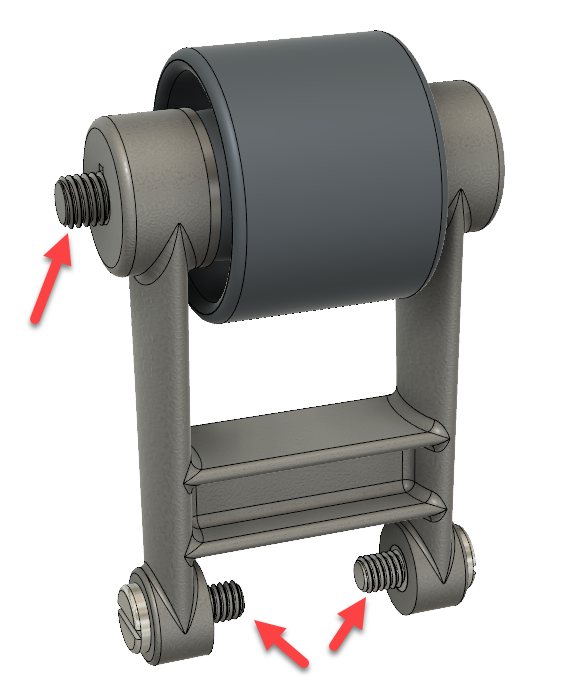
You will notice that the threads show up as a “decal” instead of modeled threads. This is to help create a visual reference without adding all the extra faces and edges that modeled threads would create. The threads will be represented correctly on a drawing.
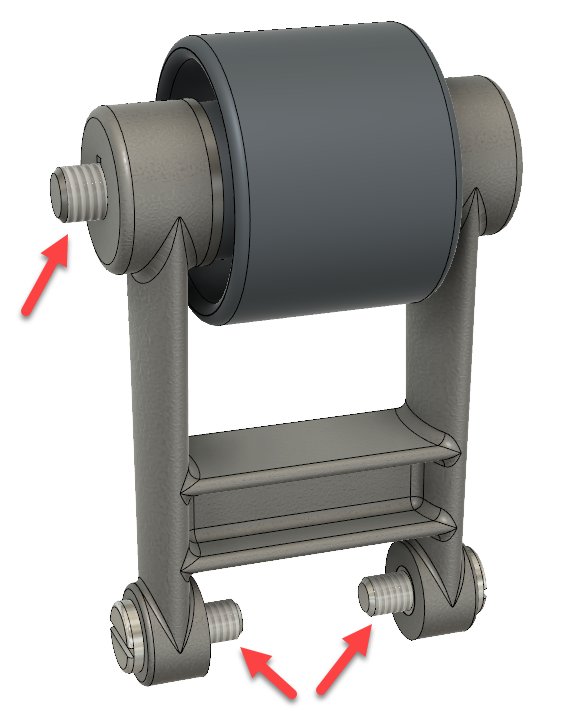
However, if you need to show the modeled threads, such as for 3D printing, you can quickly convert the decal threads to modeled threads using the following tip:
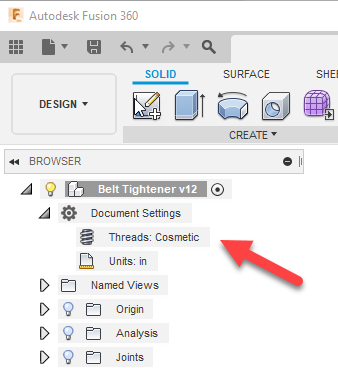
In the Document Settings pull-down in the Browser, you can change the Threads option from Cosmetic to Modeled. They will all switch to the Modeled format!
Check out the 360 Live playlist for lots of recorded Fusion 360 content.
By clicking subscribe, I agree to receive the Fusion newsletter and acknowledge the Autodesk Privacy Statement.
Success!
May we collect and use your data?
Learn more about the Third Party Services we use and our Privacy Statement.May we collect and use your data to tailor your experience?
Explore the benefits of a customized experience by managing your privacy settings for this site or visit our Privacy Statement to learn more about your options.