Elevate your design and manufacturing processes with Autodesk Fusion
Remember the old saying ‘Sometimes we need to take a step back, to take a two steps forward’? Refreshing ourselves on basic commands in Fusion 360 never hurts, and can always add more ‘tools to our toolbox’. We take a deeper look at using different capabilities underneath the Sculpt Command, visiting functionality such as leveraging ‘Primitives’, Flattening Vertices, Bridging, and the traditional ‘Edit Form’ Command. Enjoy!
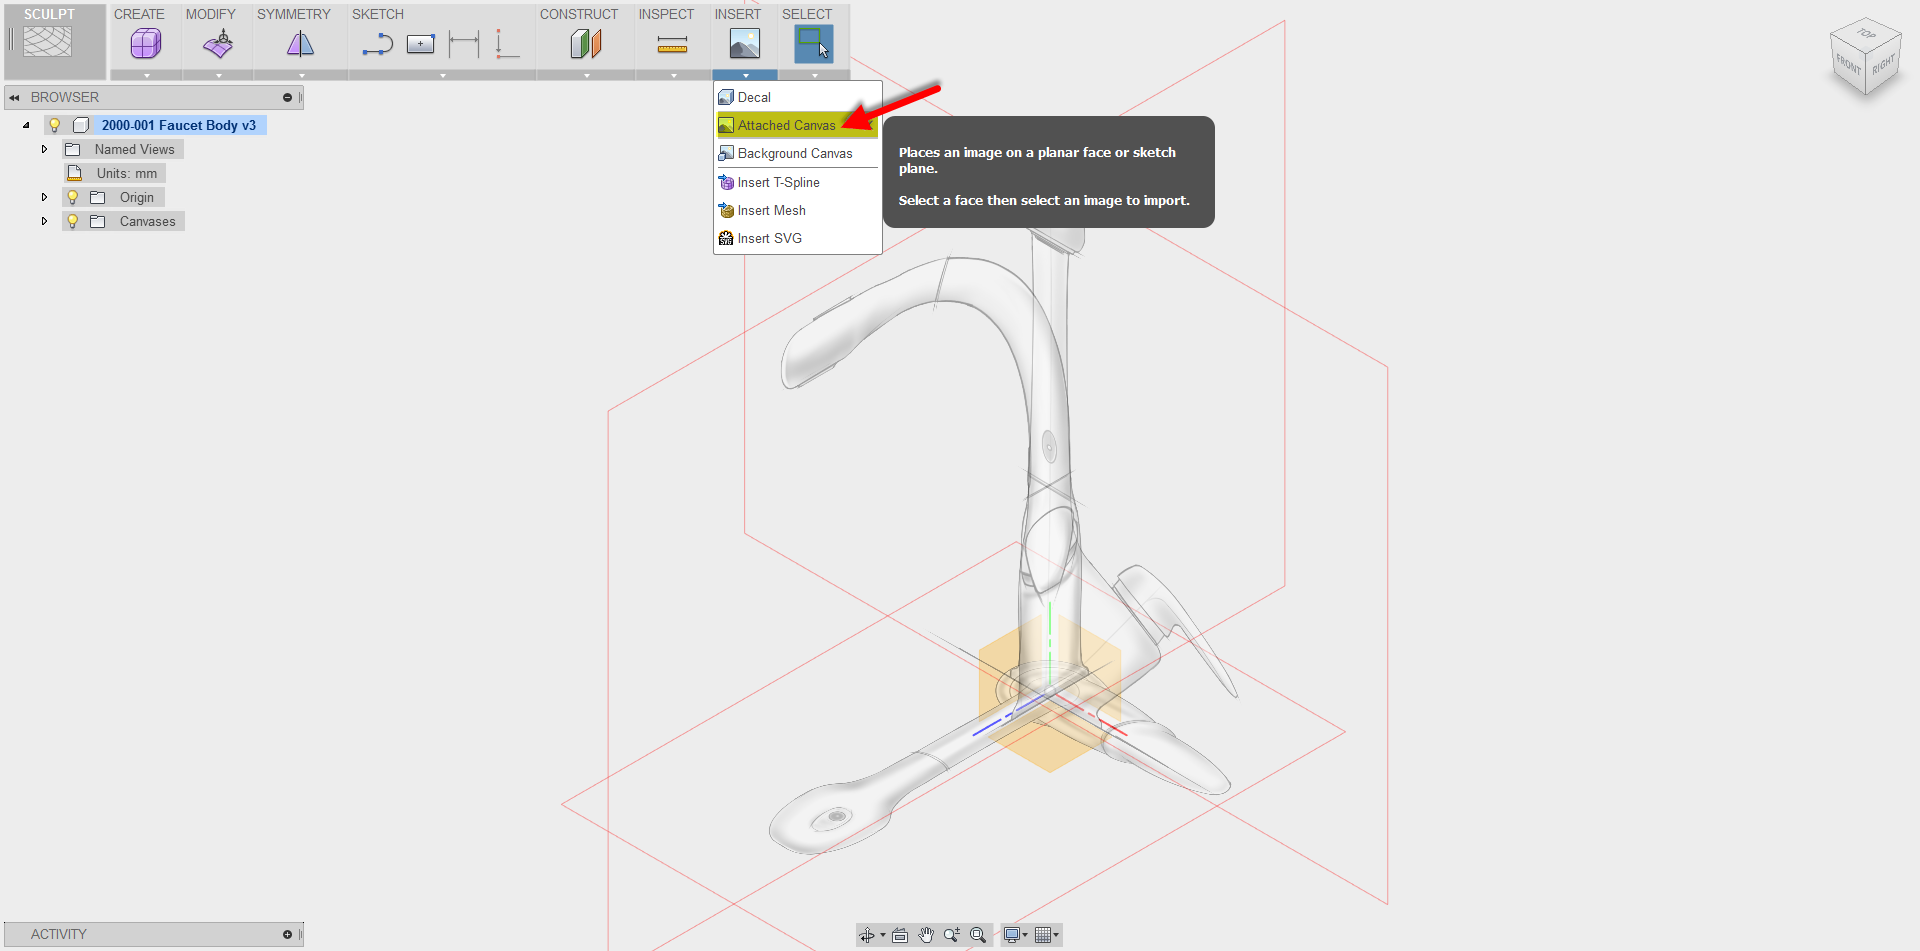
Attached Canvas inserts an image onto a selected plane or planar face. Use ‘Attached Canvas’ to add images as references to a model, or as inspiration when creating a design. This is seen with the Industrial Design Sketches of a Kitchen Faucet.
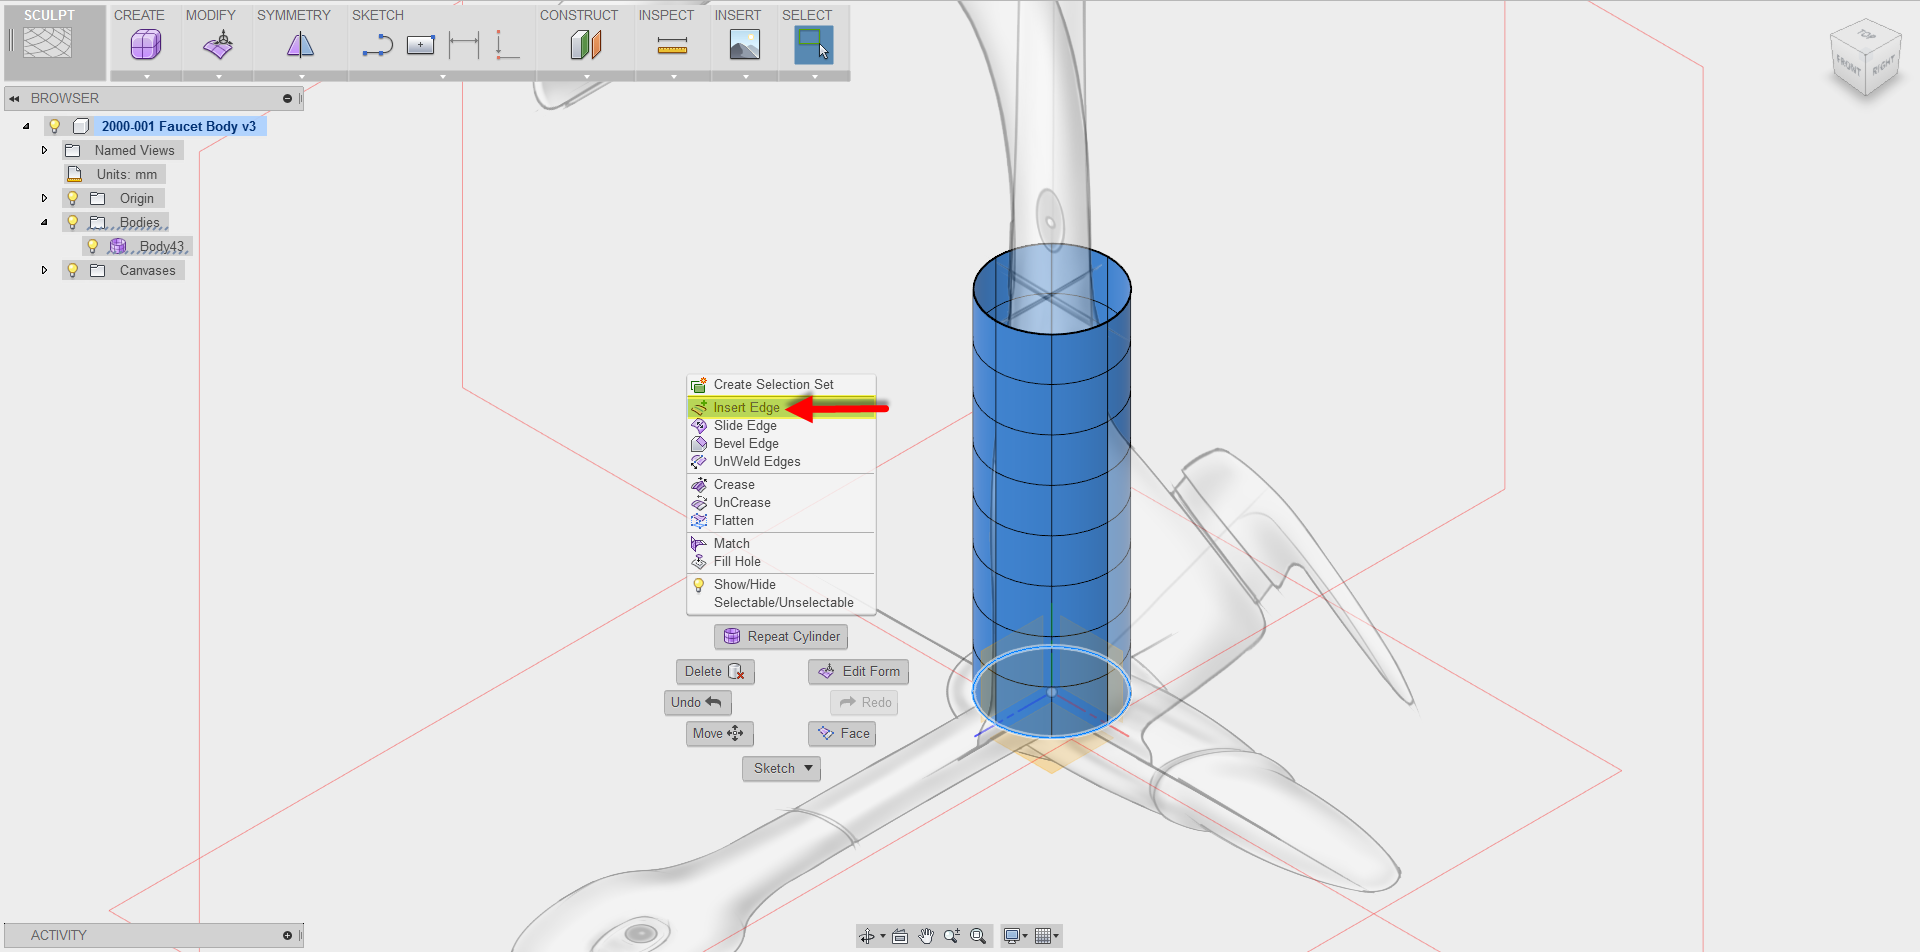
Insert Edge adds edges to a T-Spline body by offsetting existing edges.
Edges can be inserted on a T-Spline body using Insert Edge. To use this command, highlight an edge or loop and edit a value for the location of the new edge.
There are two options on the command:
- Simple: Will not move the location of any points or edges, however the surface shape will likely change.
- Exact: Maintains the shape of the surface by adding control points.
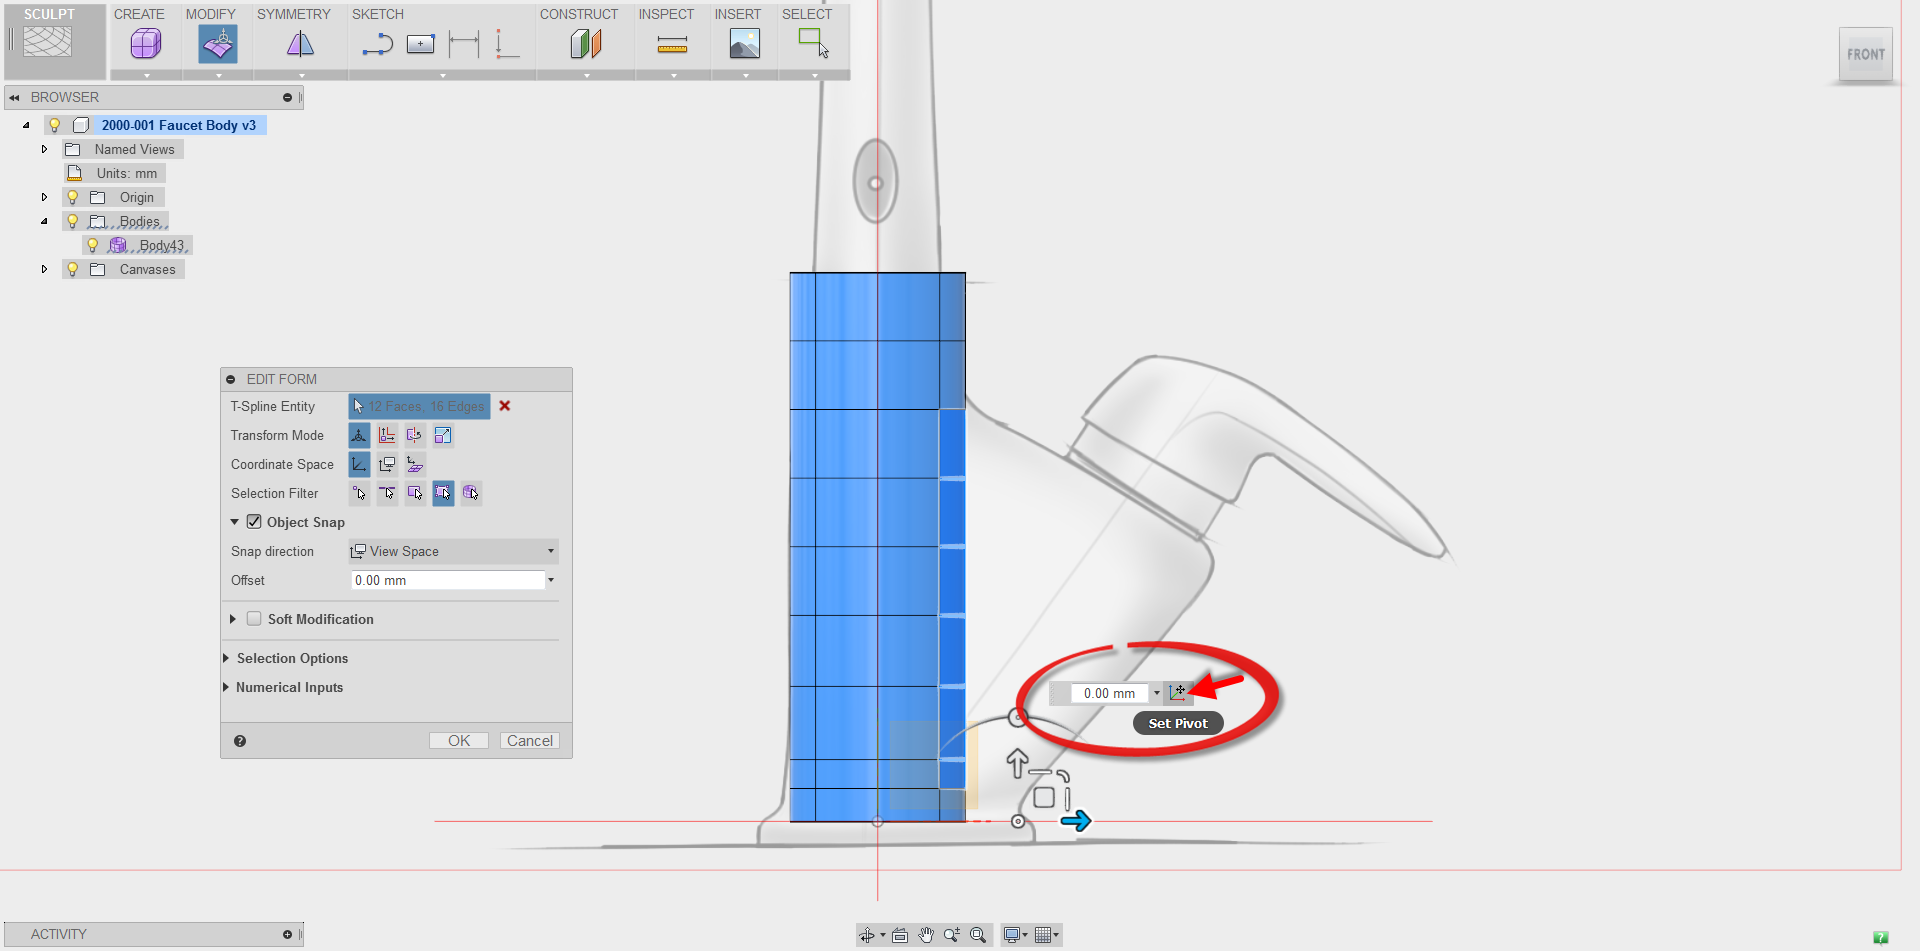
Set Pivot allows you to manipulate the location of the triad under ‘Edit Form’ to change the location of rotation for a t-spline section.
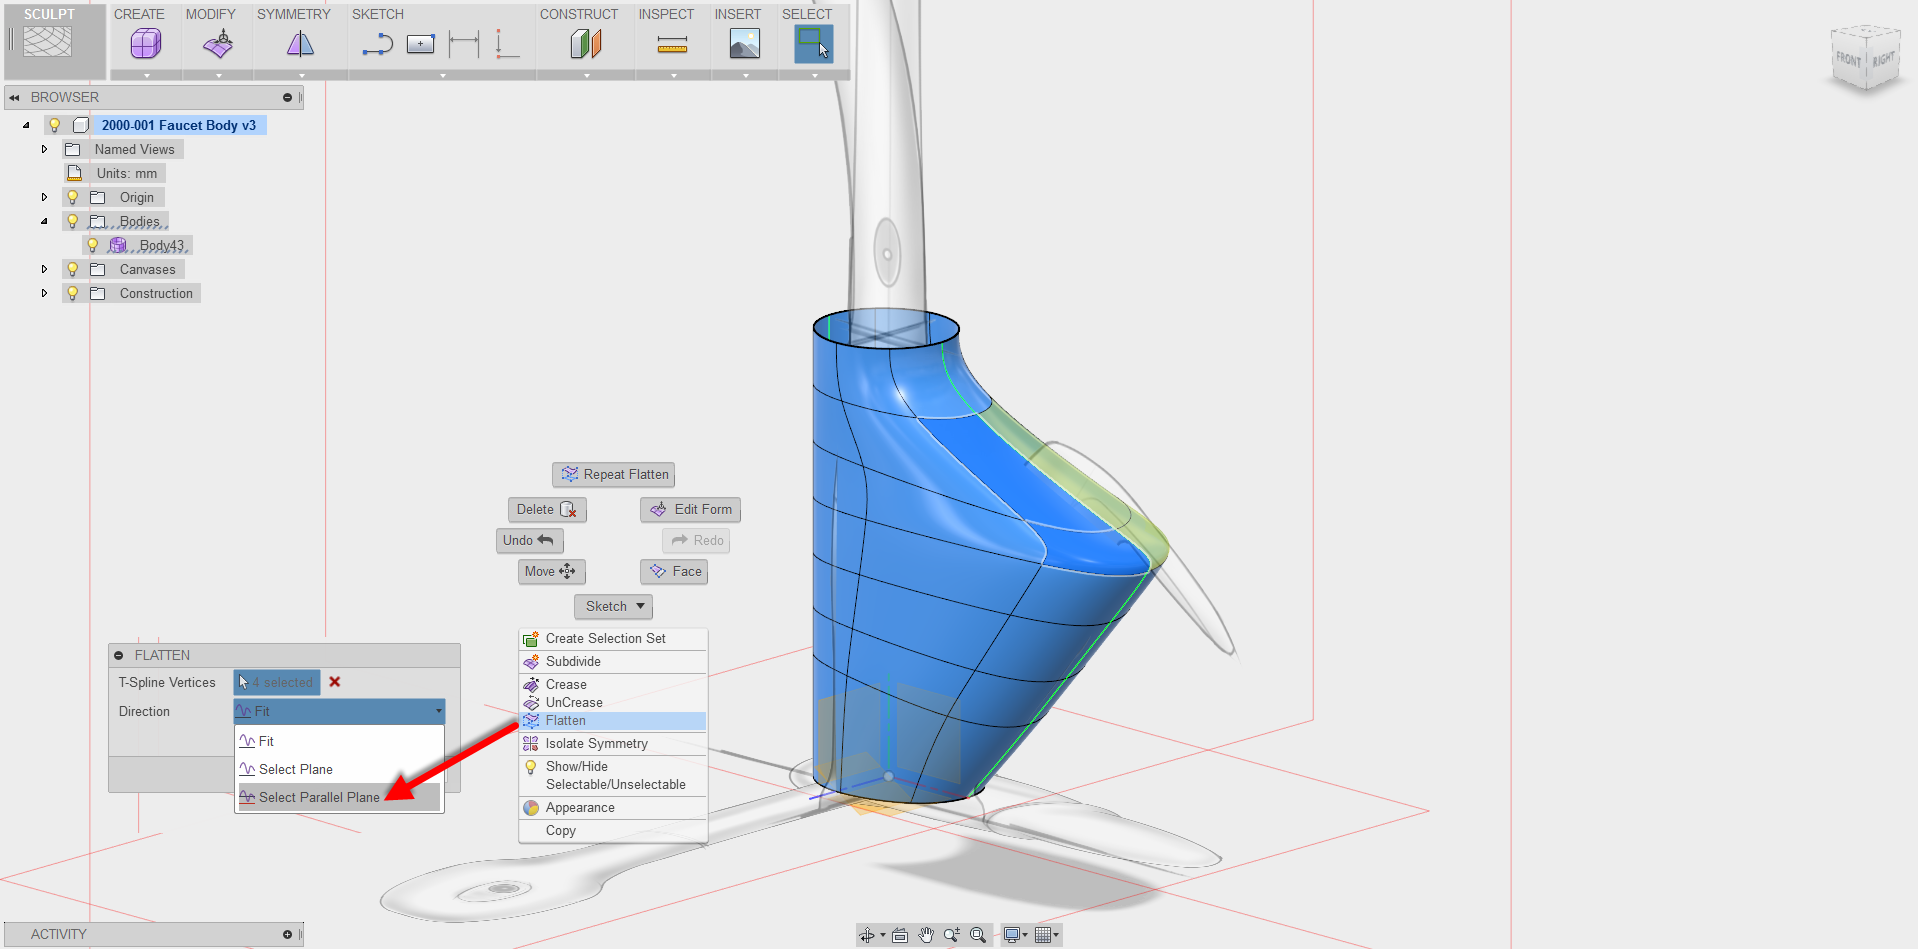
Flatten moves the selected control points to a single plane passing through the control point group. Selected Parallel Plane allows you to take any t-spline surface and make it parallel to a given plane.
The Bridge Command allows you to connect two T-spline bodies (or two parts of the same T-spline body) by adding intermediate faces.


