& Construction

Integrated BIM tools, including Revit, AutoCAD, and Civil 3D
& Manufacturing

Professional CAD/CAM tools built on Inventor and AutoCAD
7 min read
Does this sound familiar? You just want to share a design with someone on your team, but you end up spending more time teaching them how to download and install a viewer instead. All of that work, when you just needed to review your design to make sure it meets the latest requirements. If this sounds like your day-to-day, then you know that not everyone on your team has EAGLE, or Fusion 360. If they don’t, then good luck getting them quick access to your design, it could take hours! Fortunately, these problems are a thing of the past with the new Fusion Team Collaboration.
For those of you not in the know, Autodesk EAGLE 8.3 is now live and includes the impressive and commonly requested integration with Fusion 360. So these days, whether you’re an electrical or mechanical engineer, it’s easier than ever to share your design data between both engineering domains. But while this integration is helpful, it does leave out one significant piece of the puzzle – not everyone in the world is going to have a copy of Fusion 360 or EAGLE, so what do you do for them?
You could send them off on a chase to find a free design viewer, but wouldn’t it just be simpler if they could view your design right from their browser? This is the beauty of Fusion Team Collaboration.
In a nutshell, this feature makes it easy to share your design data for reviews, manufacturing, and more without having to install Fusion 360 or EAGLE on a local machine. Just pop open a browser with your design in it, and you’ll be able to:
The best part about Fusion Team Collaboration is twofold. First, it is free and included as part of the Fusion 360 integration. Secondly, you can share your design with anyone, on any device. Whether that’s a phone, tablet, or desktop, Fusion Team Collaboration works anywhere, at any time. So how do you get started with it? Let’s find out.
The first step of the process is to get your electronics design into Fusion. We won’t be covering that process in depth here, and you can read our Fusion-to-EAGLE blog for the details. Once you do have your design in Fusion, it’s time to share it with the rest of your team, here’s how:
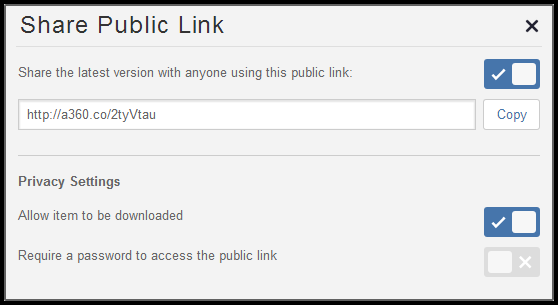
That’s all it takes to share your design! Now hand off that link to someone in need, have them open it in a browser, and you’ll see your design just as it looks in Fusion 360, on any device!
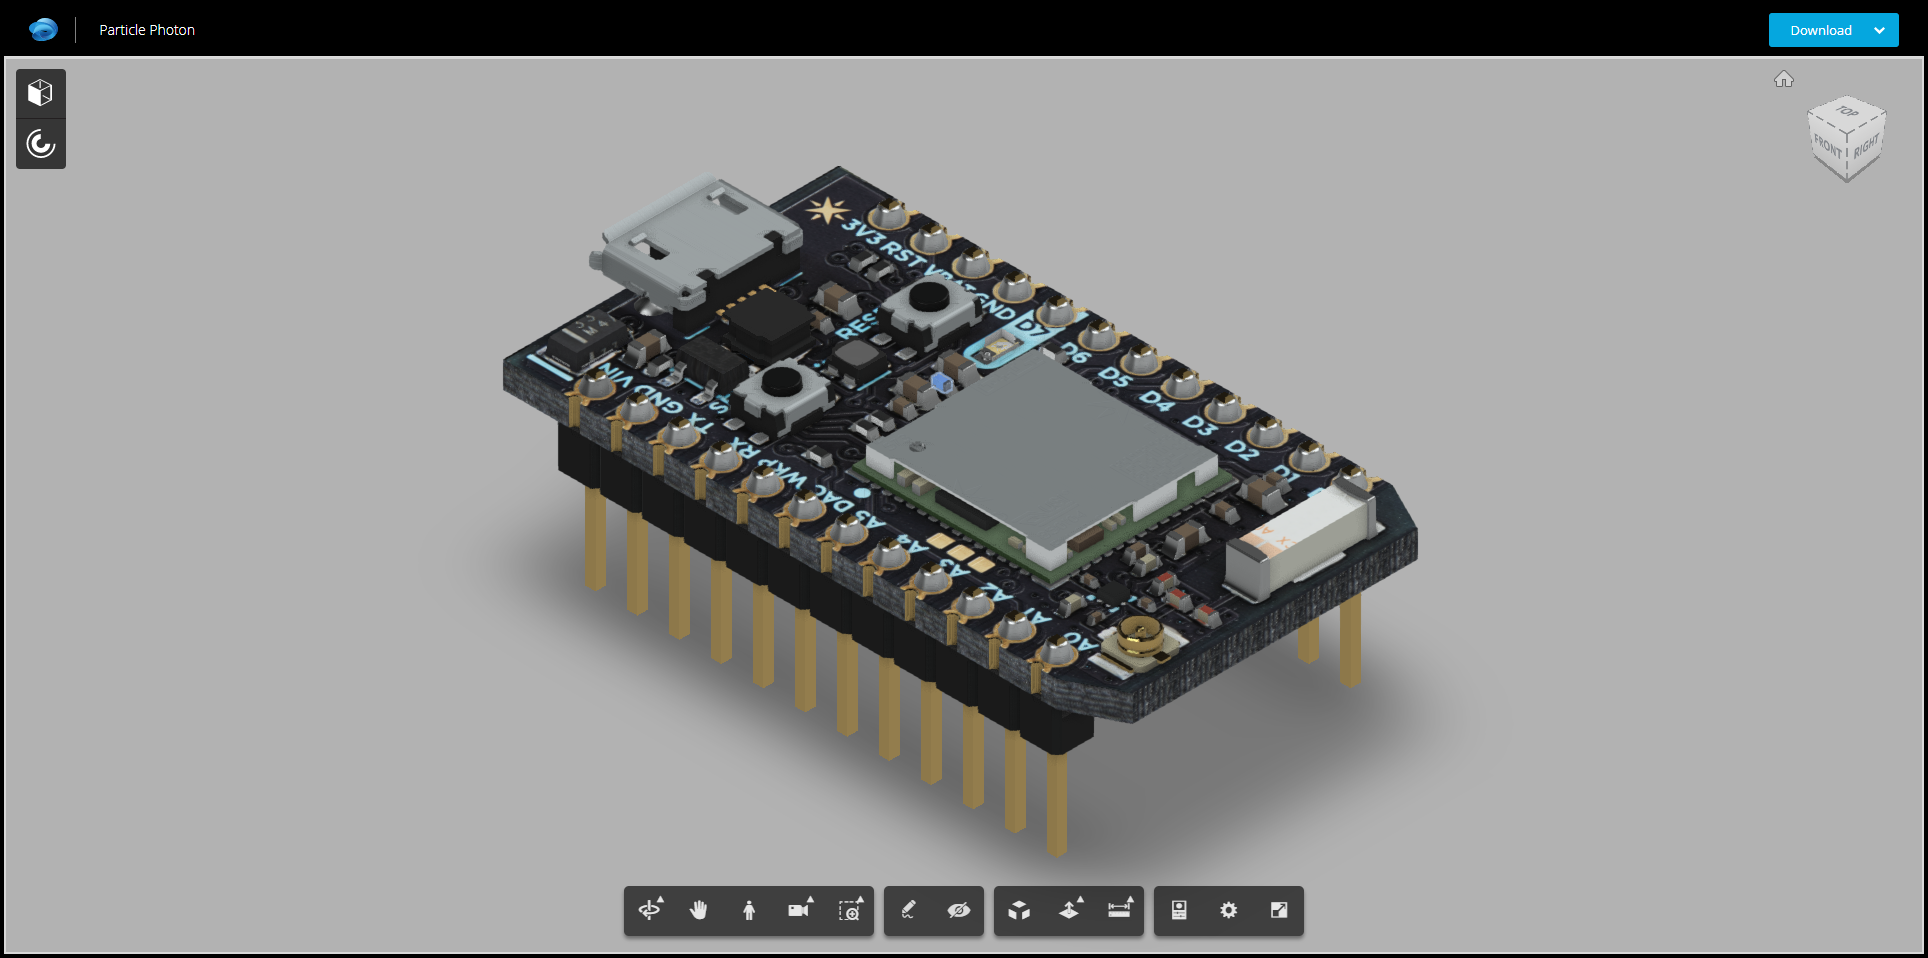
From here we can start to dive into the powerful features available in Fusion Team Collaboration, including navigating in 3D, marking up a design, exploding a design, navigating the assembly tree, and downloading file types. You’ll find most of these tools in the set of icons at the bottom of your Fusion Team Collaboration interface as shown below:

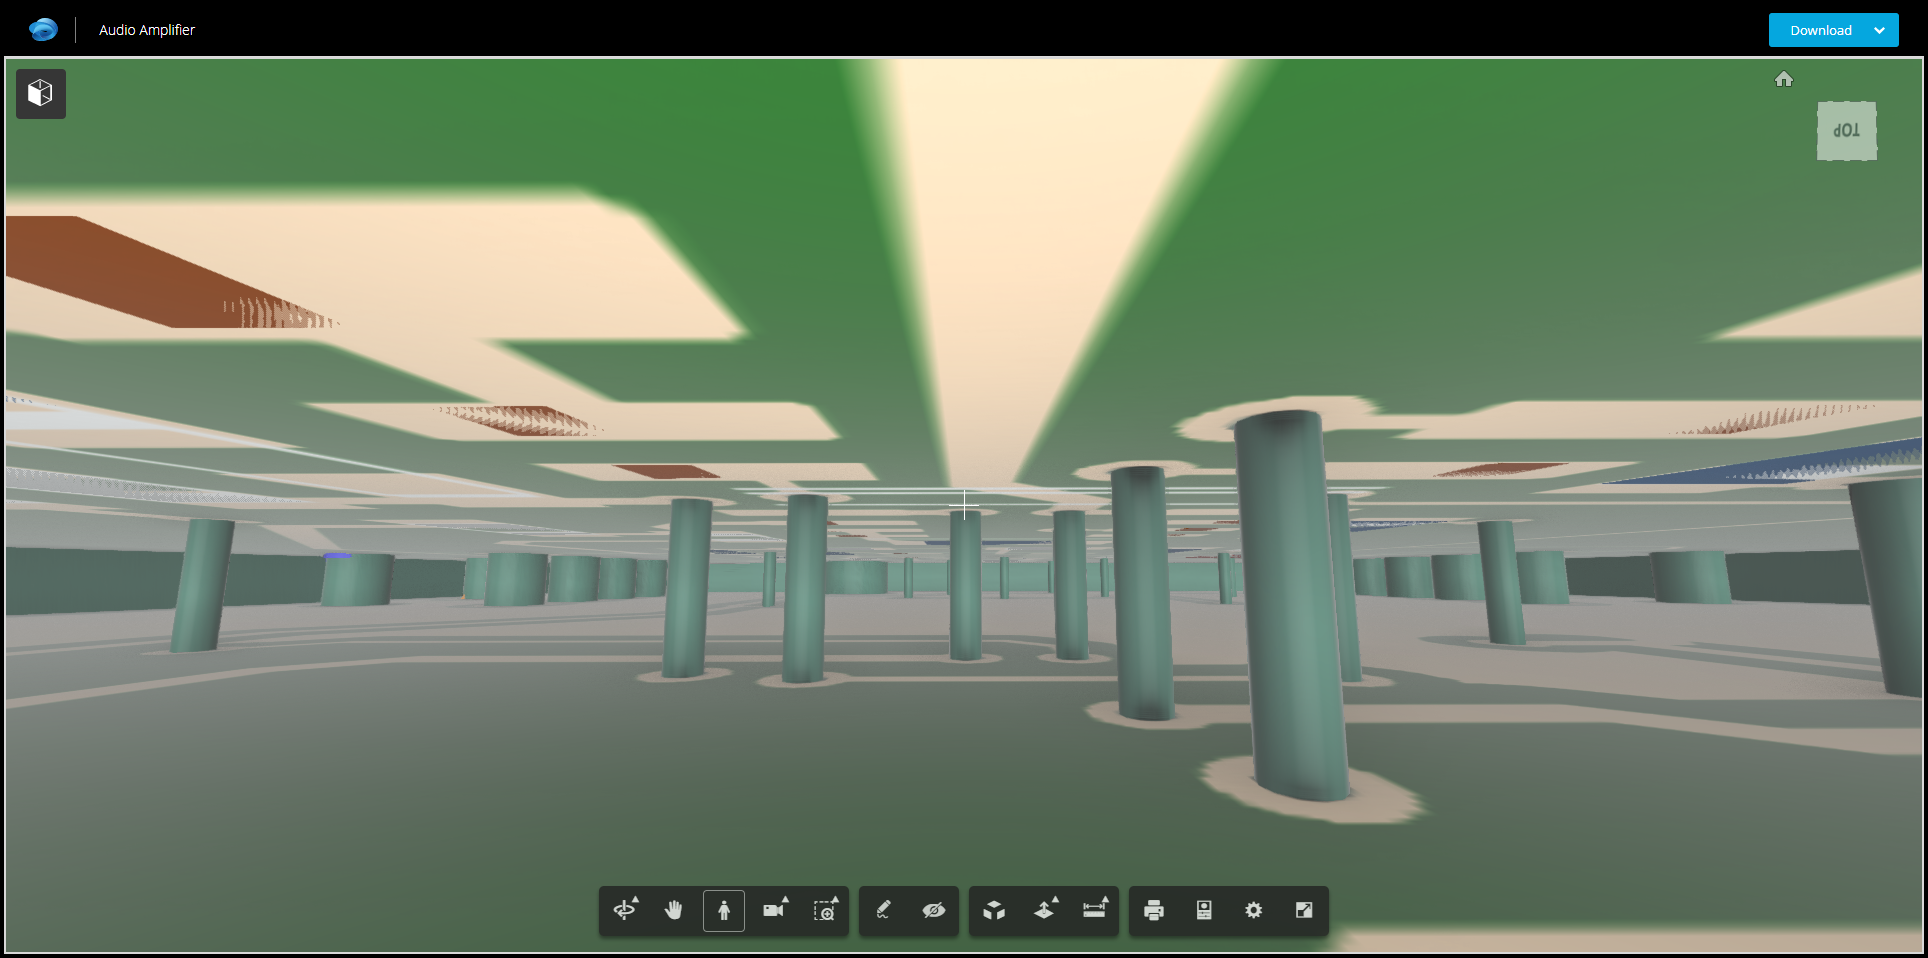
Navigating around your design in 3D works just like you’d expect in Fusion 360 with both the Orbit and Pan tools. You can also get up close and personal with your design by using the First Person tool.

With the First Person tool, use the WASD keys to move around and your mouse to navigate your perspective, just like a video game! If you dive into the copper surface of your design, you’ll even be able to see the middle layers and vias.
Next up we have all of the markup tools available at your disposal. These come in handy during a design review when someone needs to add a comment or point out specific objects on your board that needs to be adjusted. After selecting the Markup tool, you’ll get a ribbon of available options including creating Lines, Area Selections, Callouts, and Text.

After selecting your preferred markup tool simply left click to place it, add text if needed, and you’re done! You can then select the Save Snapshot button to save all of your documentation in a convenient PNG file.
Want to make your manufacturer’s life a little bit easier? By sending them a link to your design in Fusion Team Collaboration, they’ll have access to some helpful gadgets like the Explode Model and Measure tool.
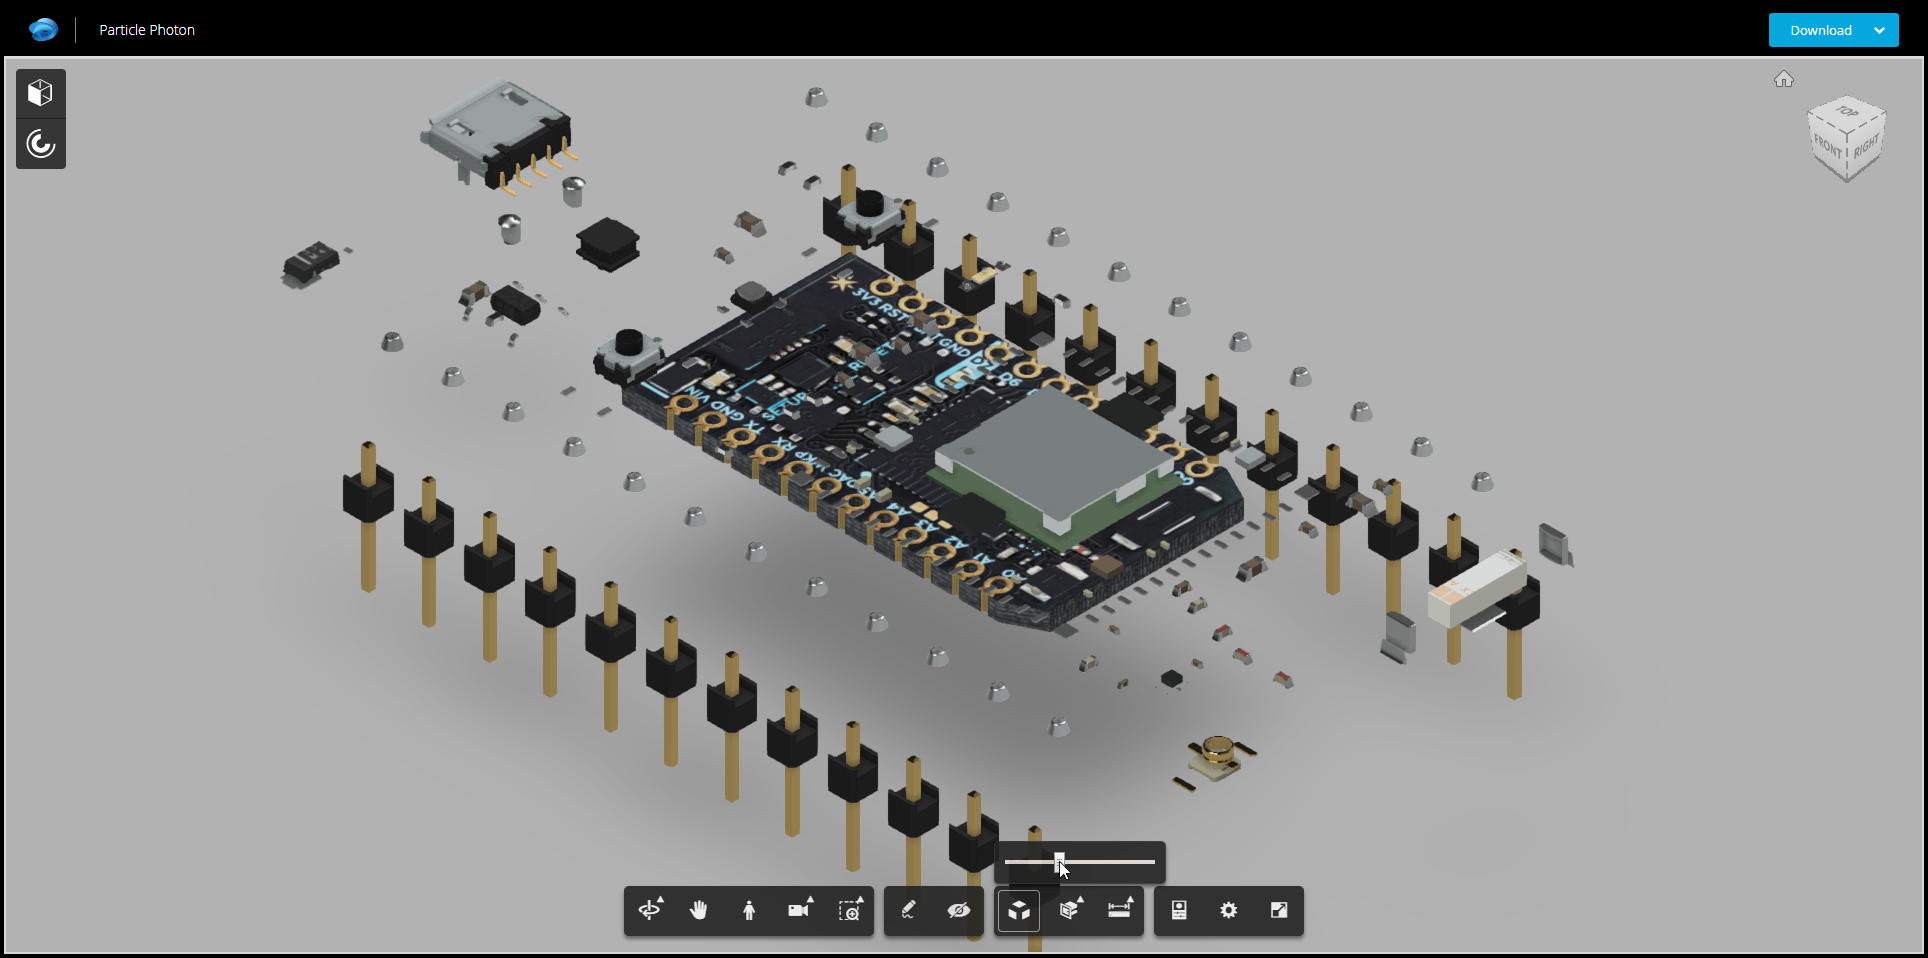
The Explode Model tool lets you “explode” components off of your PCB as shown in the image below. This can help your manufacturer when they need to know exactly how parts are attached to your bare board.
Your manufacturer can also use the Measure tool to get precise measurements between any object on your 3D PCB. To use this tool:

One last thing, there’s also a Sectional tool that you can utilize. This makes it easy to slice your design based on the X, Y, or Z plane from an isolated perspective.
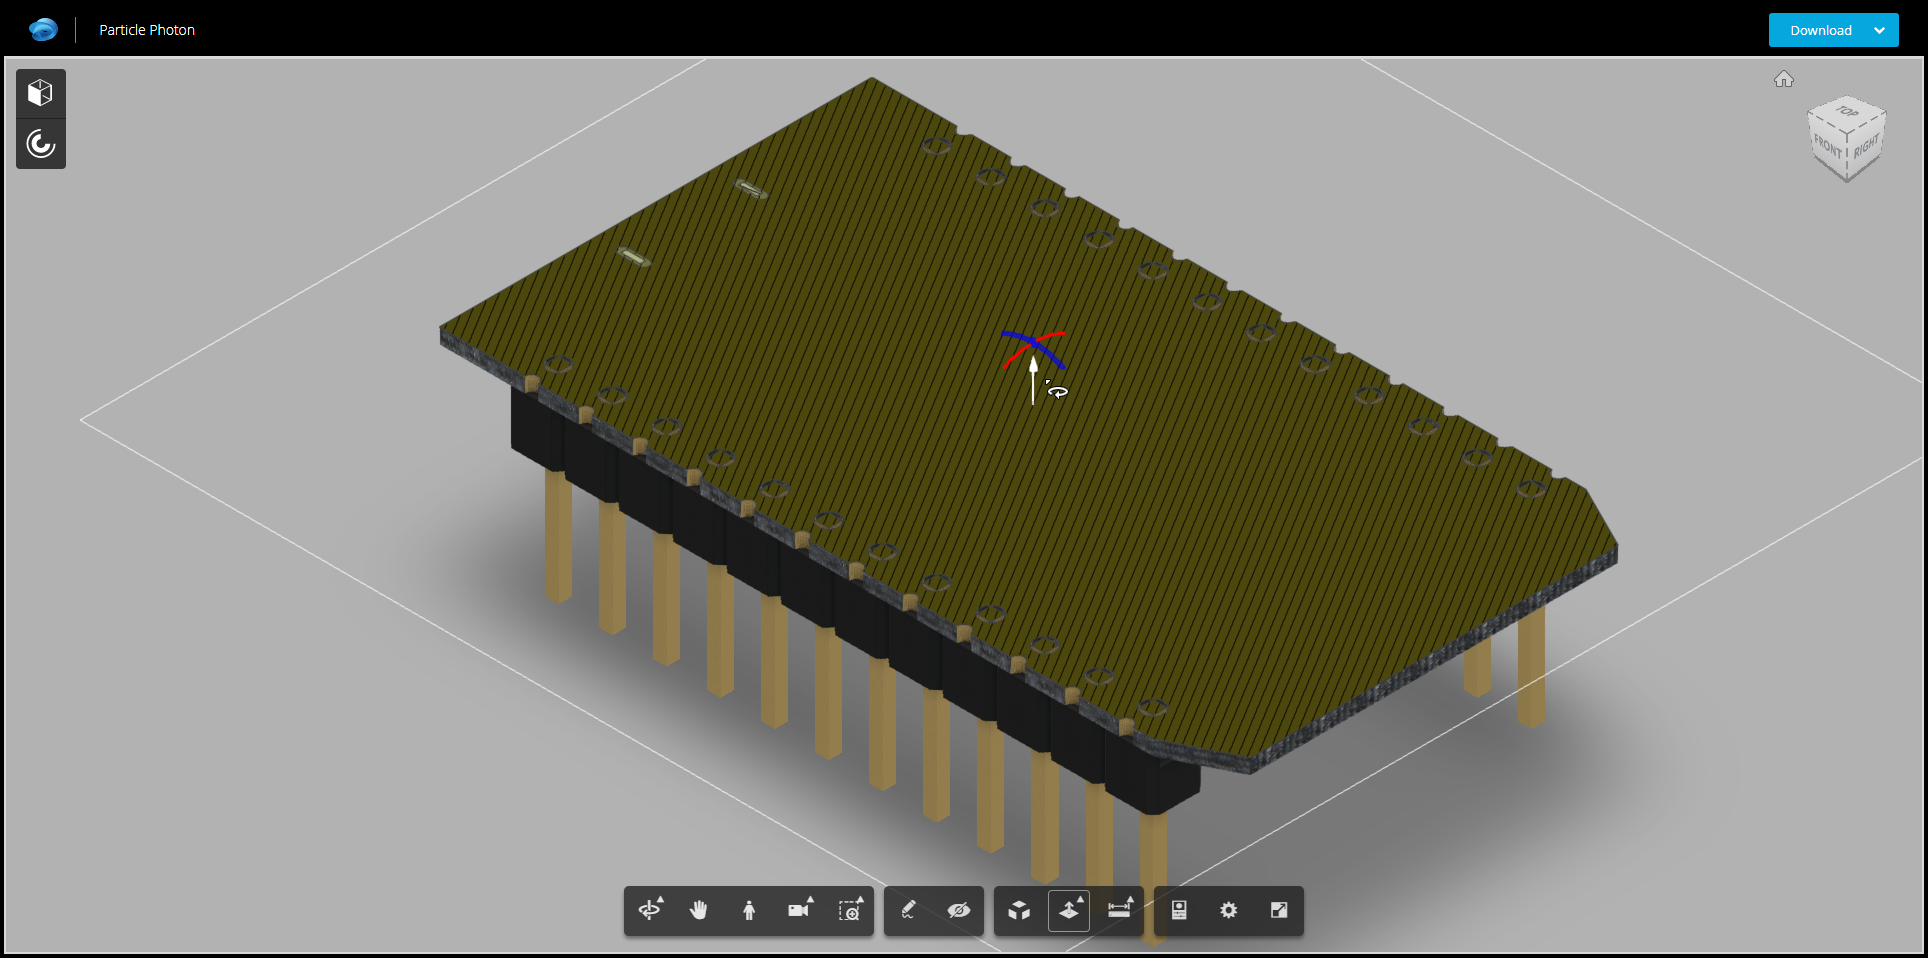
In Fusion Team Collaboration, you’re not just viewing a “dumb” 3D model of your PCB. Every model and board surface is a unique object and can be seen in your Assembly Tree. To open this, select the Cube icon at the top-left corner of your interface.
From this menu, you’ll see a breakdown of each component being used on your design. The typical naming convention is [Component Type][Package Type]:[Reference Designator]. For example, R0805:R1 will highlight the first 0805 surface mount resistor on our design below.
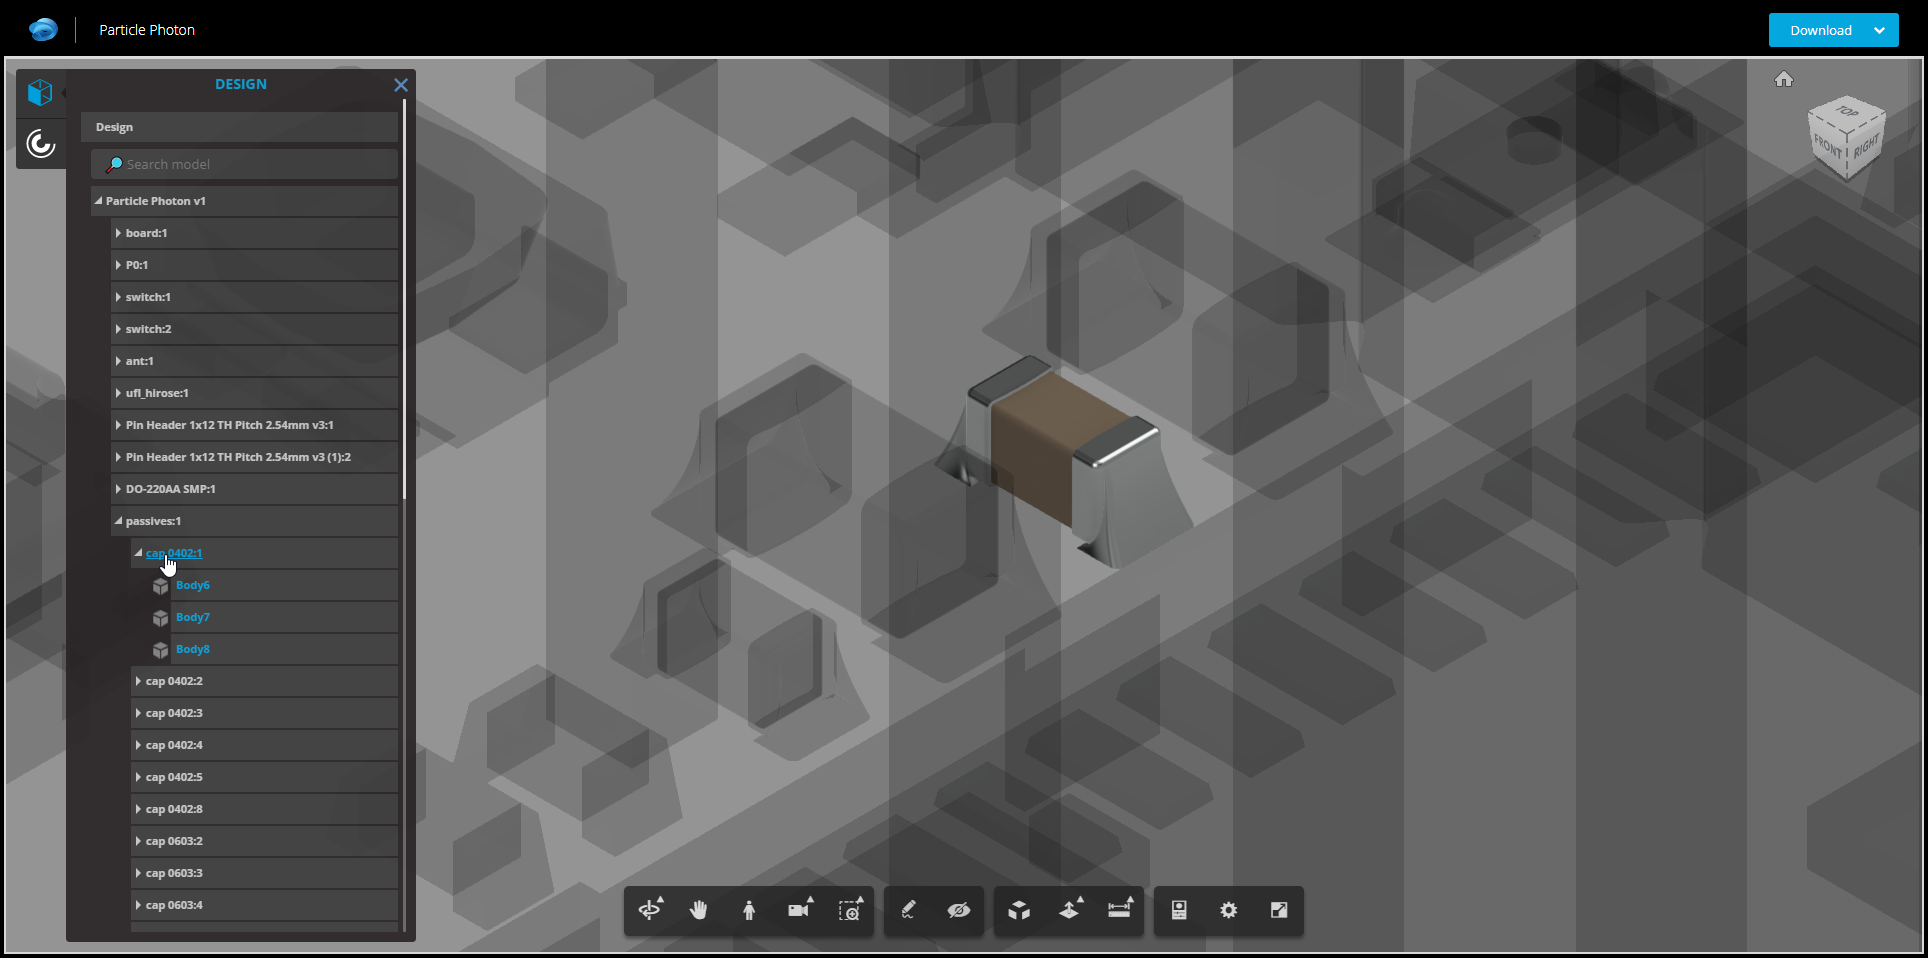
Notice as you select each part in your Assembly Tree the rest of your design grayed out, making it easy to see exactly what you’re looking at. If you want to select more than one part at a time, Shift + left-click each part you want to have highlighted.
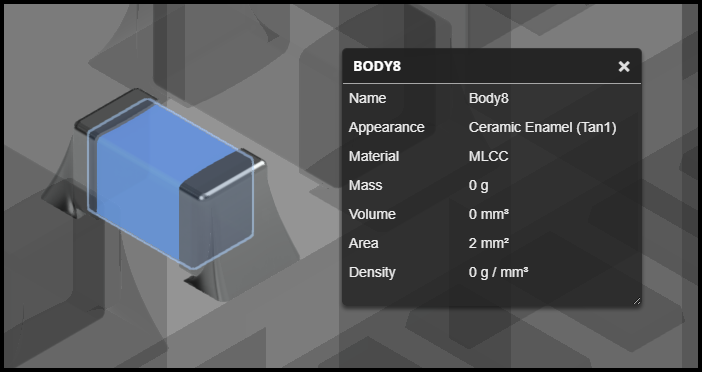
If you need more details about a particular part, you can also left-click a specific 3D model on your design and choose the Properties option. This will open a dialog similar to the one below that gives an overview of basic properties like material, mass, volume, etc.
Last but not least, we all know there are times when your manufacturer asks for one type of file and ends up needing another. Instead of having to email zip files back and forth, your manufacturer can download their preferred file format for your design data right in Fusion Team Collaboration.
To do this, they can select the Download button in the top-right corner of their interface, and then select their desired file type. After that, they’ll just need to enter an email, select the Send button, and the files they need are on the way, without you having to send another email!

Man, who could have predicted that we’d see a day of viewing our ECAD designs in full 3D, right in our browsers! It’s pretty amazing to have all of this great technology available on any device, for your entire design team to access. Ready to say farewell to downloading yet another viewer, or setting someone up with EAGLE or Fusion 360 that doesn’t really need it? When you need to share your design data for reviews, manufacturing, and more, you can do it all with Fusion Team Collaboration and Autodesk EAGLE 8.3. Enjoy!
Ready to take the new Fusion Team Collaboration for a spin? Try Autodesk EAGLE for free today.
By clicking subscribe, I agree to receive the Fusion newsletter and acknowledge the Autodesk Privacy Statement.
Success!
May we collect and use your data?
Learn more about the Third Party Services we use and our Privacy Statement.May we collect and use your data to tailor your experience?
Explore the benefits of a customized experience by managing your privacy settings for this site or visit our Privacy Statement to learn more about your options.